1、安裝nginx略
#2、使用openssl實作憑證中心
由於是使用openssl架設私有憑證中心,因此要確保以下欄位在憑證中心的憑證、服務端憑證、客戶端憑證中都相同
country name
state or province name
locality name
organization name
organizational unit name
編輯憑證中心設定檔
vim /etc/pki/tls/openssl.cnf
[ ca_default ]
dir = /etc/pki/ca
certs = $dir/certs # where the issued certs are kept
crl_dir an = $dir/cept
crl_dir 問題 = $dir/crl>p. base = $dir/index.txt # database index file.
# unique_subject = no # set to 'no' to allow creation of
with same subject.
new_certs_dir = $dir/newcerts # default place for new certs.
certificate = $dir/cacert.pem # the ca certificate
serial = $dir/serial # the current serial number
crlnumber = $dir/crlnlnumber # must be commented out to leave a v1 crl
crl crl.pem # the current crl
private_key = $dir/private/cakey.pem# the private key
randfile = $$ir/private .##randfile _name ]
countryname_default = 2
stateorprovincename = state or province name (full name)
stateorprovincename_default state or province name (full name)
stateorprovincename_default ##localityname = locality name (eg, city)
localityname_default = fz name_default name name any)
0.organizationname_default = zdz
organizationalunitname = organizational unit name (eg, section)
organizationalunitname_default = zdz
建立憑證私鑰
cd /etc/pki/ca/private
(umask 077;openssl genrsa -out cakey.pem 2048)
產生自簽證書
openssl req -new -x509 -key private/cakey.pem -out cacert.pem -days=3655
#3、建立伺服器憑證
mkdir /usr/local/nginx/ssl
(umask 077;openssl genrsa -out nginx.key 1024)openssl req -new -key nginx.key -out nginx.csr
openssl ca -in nginx.csr -out nginx.crt -days=3650
#4、建立用戶端瀏覽器憑證
(umask 077;openssl genrsa -out client.key 1024)
openssl ca -in client.csr -out client.crt -days=3650將文字格式的憑證轉換成可以匯入瀏覽器的憑證
openssl pkcs12 -export -clcerts -in client.crt -inkey client.key -out client.p12
5、設定nginx伺服器驗證
vim /usr/local/nginx/conf/nginx.conf
ssl on;
ssl_certificate /usr/local/nginx/ssl/ nginx.crt;
ssl_certificate_key /usr/local/nginx/ssl/nginx.key;
ssl_client_certificate /usr/local/nginx/ssl/cacert.pemm;#ssl_ ) on ; 伺服器為使用者端時不開啟,並於沒有憑證的客戶」
點選「新增例外」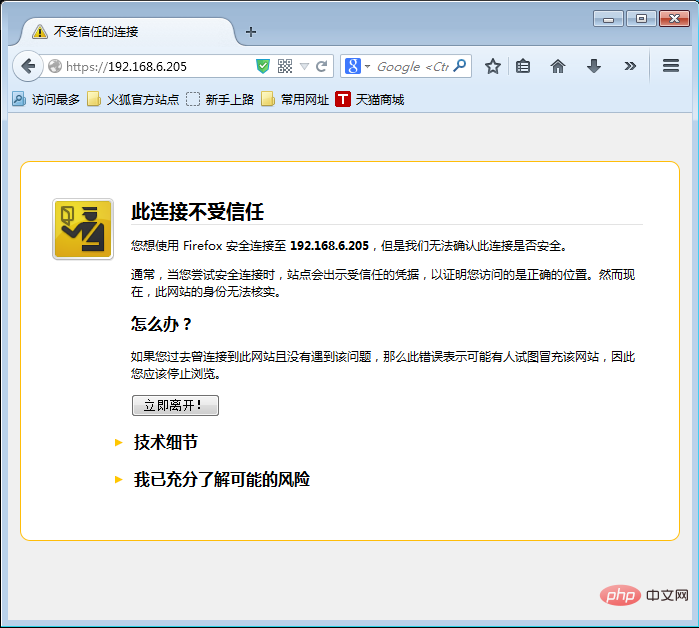
點選「確認安全例外」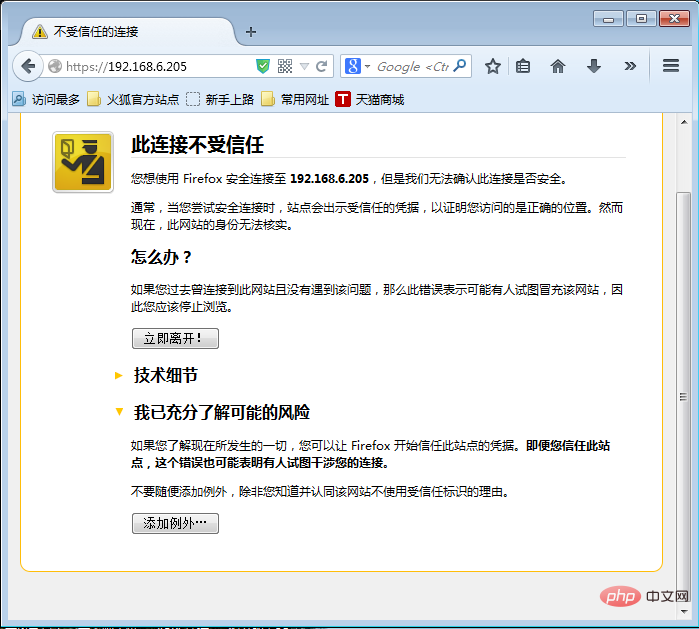
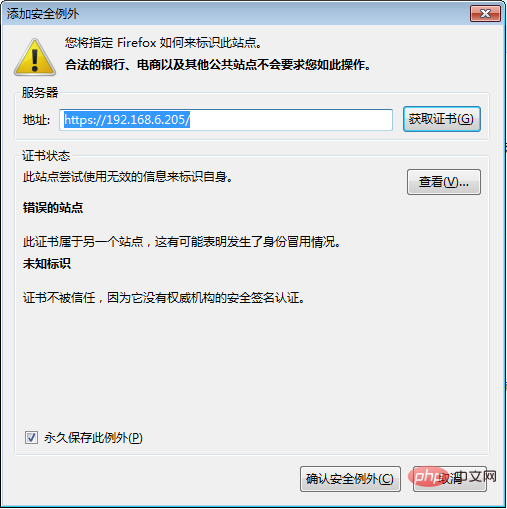 6、設定雙向驗證
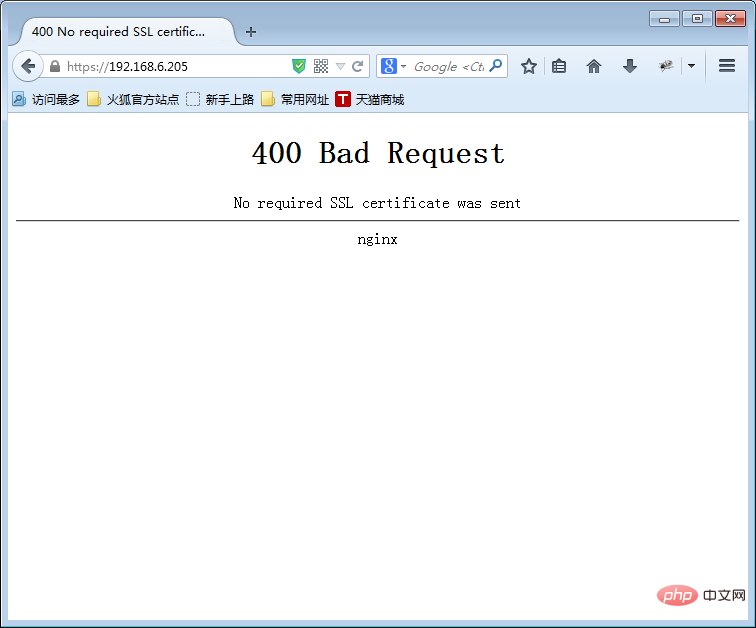
nginx設定開啟ssl_verify_client on; 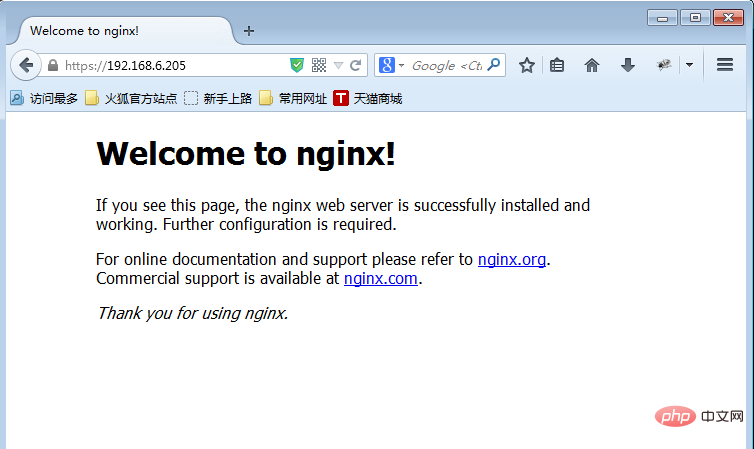 在用戶端瀏覽器沒有安裝憑證的情況下存取
在用戶端瀏覽器匯入憑證
開啟火狐瀏覽器的進階標籤
在憑證管理員中的您的憑證中點選匯入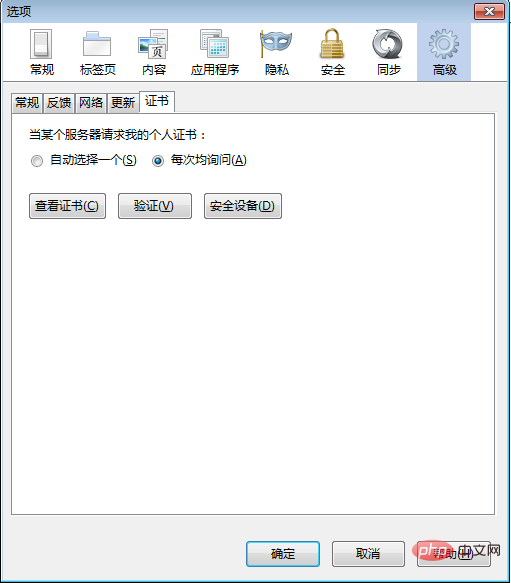
選擇憑證並匯入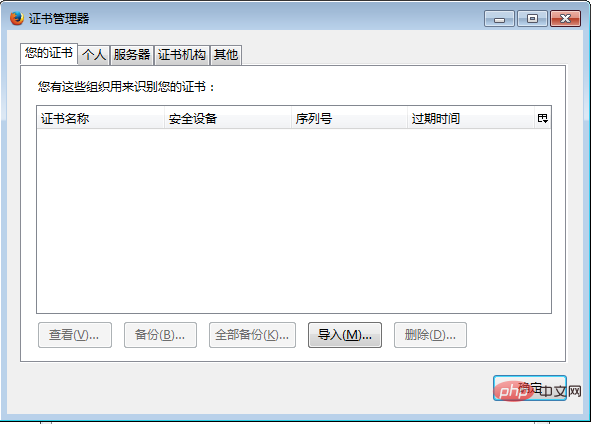
再次刷新網頁,彈出「使用確認」點擊確定,就實現了雙向驗證
以上是nginx如何設定ssl雙向驗證的詳細內容。更多資訊請關注PHP中文網其他相關文章!


