

CentOS7.3怎麼設定Nginx虛擬主機

實驗環境
一台最小化安裝的centos 7.3虛擬機
設定基本環境
1.安裝nginx
yum install -y epel-*
yum isntall -y nginx vim
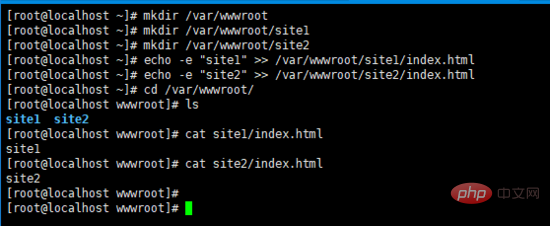
2. 建立虛擬機主機的網站根目錄
mkdir /var/wwwroot
mkdir /var/wwwroot/site1
mkdir /var/wwwroot/site2
echo -e "site1" >> /var/wwwroot/site1/index.html
echo -e "site2" >> /var/wwwroot/site2/index.html
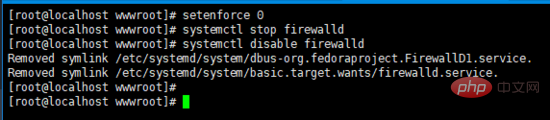
3. 關閉centos的防火牆
setenforce 0
systemctl stop firewalld
systemctl disable firewalld
設定基於連接埠的虛擬主機
1. 編輯nginx設定檔
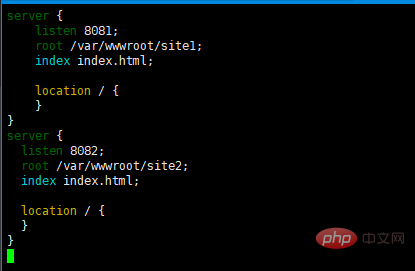
<div class="code" style="position:relative; padding:0px; margin:0px;"><div class="code" style="position:relative; padding:0px; margin:0px;"><div class="code" style="position:relative; padding:0px; margin:0px;"><pre class='brush:php;toolbar:false;'>vim /etc/nginx/conf.d/vhosts.conf</pre><div class="contentsignin">登入後複製</div></div><div class="contentsignin">登入後複製</div></div><div class="contentsignin">登入後複製</div></div>2. 新增以下內容
server {
  listen 8081;
  root /var/wwwroot/site1;
  index index.html;

  location / {
  }
}
server {
 listen 8082;
 root /var/wwwroot/site2;
 index index.html;

 location / {
 }
}
#3. 啟動 nginx 服務
systemctl start nginx
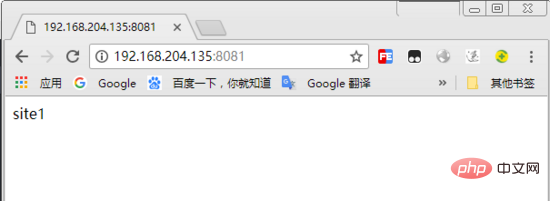
4. 在宿主機器存取兩個網站
http://192.168 .204.135:8081/#http://192.168.204.135:8082/

#
 #設定基於網域的虛擬主機
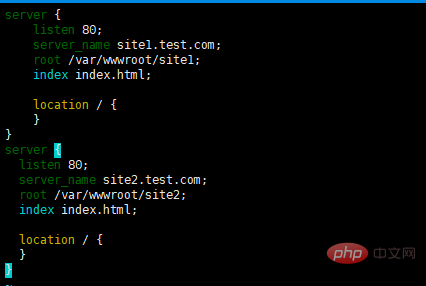
1. 重新編輯nginx設定檔<div class="code" style="position:relative; padding:0px; margin:0px;"><div class="code" style="position:relative; padding:0px; margin:0px;"><div class="code" style="position:relative; padding:0px; margin:0px;"><pre class='brush:php;toolbar:false;'>vim /etc/nginx/conf.d/vhosts.conf</pre><div class="contentsignin">登入後複製</div></div><div class="contentsignin">登入後複製</div></div><div class="contentsignin">登入後複製</div></div>
server {
  listen 80;
  server_name site1.test.com;
  root /var/wwwroot/site1;
  index index.html;

  location / {
  }
}
server {
 listen 80;
 server_name site2.test.com;
 root /var/wwwroot/site2;
 index index.html;

 location / {
 }
}3. 重啟 nginx 服務
systemctl restart nginx
4. 在windows上修改
hosts 檔案#編輯
文件,新增以下內容(依實際情況自行修改)
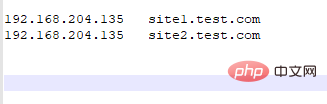 #192.168.204.135 site1 .test.com
192.168.204.135 site2.test.com##5. 在宿主機上訪問兩個網站
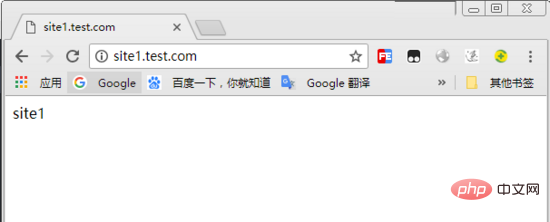 http://site1.test.com/
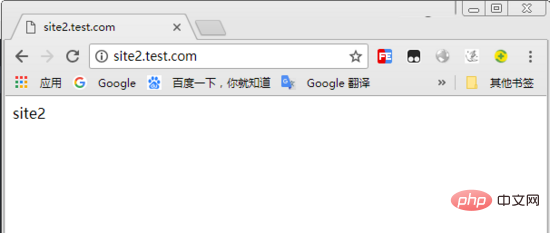 http://site2.test.com/
配置基於ip的虛擬主機
 1. 在虛擬機器增加兩個ip位址
ifconfig ens33:1 192.168.204.151
ifconfig ens33:2 192.168.204.152
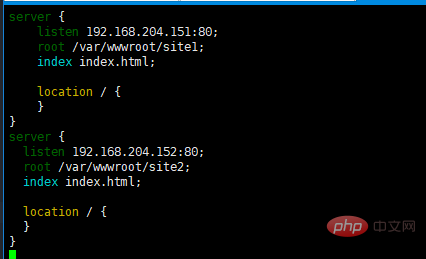
2. 重新編輯nginx設定檔<div class="code" style="position:relative; padding:0px; margin:0px;"><div class="code" style="position:relative; padding:0px; margin:0px;"><div class="code" style="position:relative; padding:0px; margin:0px;"><pre class='brush:php;toolbar:false;'>vim /etc/nginx/conf.d/vhosts.conf</pre><div class="contentsignin">登入後複製</div></div><div class="contentsignin">登入後複製</div></div><div class="contentsignin">登入後複製</div></div>3. 刪除原始內容,重新新增下列內容
server {
listen 192.168.204.151:80;
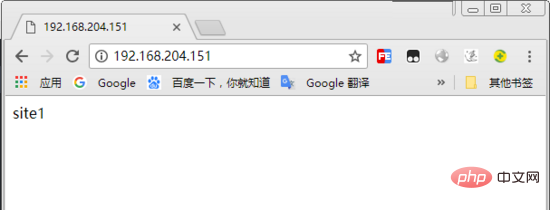
root /var/wwwroot/site1;
index index.html;
location / {
}
}
server {
listen 192.168.204.152:80;
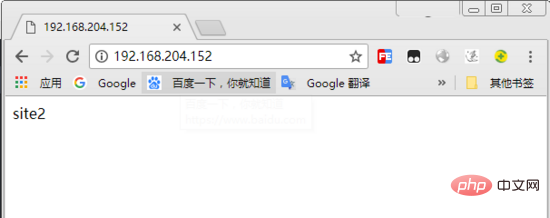
root /var/wwwroot/site2;
index index.html;
location / {
}
}http://192.168.204.151/ #http://192.168. 204.152/ 以上是CentOS7.3怎麼設定Nginx虛擬主機的詳細內容。更多資訊請關注PHP中文網其他相關文章!4. 重新啟動 nginx
服務systemctl restart nginx

熱AI工具

Undresser.AI Undress
人工智慧驅動的應用程序,用於創建逼真的裸體照片

AI Clothes Remover
用於從照片中去除衣服的線上人工智慧工具。

Undress AI Tool
免費脫衣圖片

Clothoff.io
AI脫衣器

AI Hentai Generator
免費產生 AI 無盡。

熱門文章
熱工具

記事本++7.3.1
好用且免費的程式碼編輯器

SublimeText3漢化版
中文版,非常好用

禪工作室 13.0.1
強大的PHP整合開發環境

Dreamweaver CS6
視覺化網頁開發工具

SublimeText3 Mac版
神級程式碼編輯軟體(SublimeText3)
熱門話題


 如何實施 PHP 安全最佳實踐
May 05, 2024 am 10:51 AM
如何實施 PHP 安全最佳實踐
May 05, 2024 am 10:51 AM
如何實施PHP安全最佳實踐PHP是最受歡迎的後端Web程式語言之一,用於建立動態和互動式網站。然而,PHP程式碼可能容易受到各種安全漏洞的攻擊。實施安全最佳實務對於保護您的網路應用程式免受這些威脅至關重要。輸入驗證輸入驗證是驗證使用者輸入並防止惡意輸入(如SQL注入)的關鍵第一步。 PHP提供了多種輸入驗證函數,例如filter_var()和preg_match()。範例:$username=filter_var($_POST['username'],FILTER_SANIT
 WordPress站點文件訪問受限:為什麼我的.txt文件無法通過域名訪問?
Apr 01, 2025 pm 03:00 PM
WordPress站點文件訪問受限:為什麼我的.txt文件無法通過域名訪問?
Apr 01, 2025 pm 03:00 PM
Wordpress站點文件訪問受限:排查.txt文件無法訪問的原因最近有用戶在配置小程序業務域名時,遇到一個問題:�...
 如何在同一台服務器上通過Nginx配置讓PHP5.6和PHP7共存?
Apr 01, 2025 pm 03:15 PM
如何在同一台服務器上通過Nginx配置讓PHP5.6和PHP7共存?
Apr 01, 2025 pm 03:15 PM
在同一系統中同時運行多個PHP版本是一個常見的需求,特別是當不同項目依賴於不同版本的PHP時。如何在同一台...
 h5項目怎麼運行
Apr 06, 2025 pm 12:21 PM
h5項目怎麼運行
Apr 06, 2025 pm 12:21 PM
運行 H5 項目需要以下步驟:安裝 Web 服務器、Node.js、開發工具等必要工具。搭建開發環境,創建項目文件夾、初始化項目、編寫代碼。啟動開發服務器,使用命令行運行命令。在瀏覽器中預覽項目,輸入開發服務器 URL。發布項目,優化代碼、部署項目、設置 Web 服務器配置。
 gnetlink支援哪些車型
May 08, 2024 pm 09:39 PM
gnetlink支援哪些車型
May 08, 2024 pm 09:39 PM
所有運行 Linux 作業系統且具有必要硬體和驅動程式的裝置都支援 gnetlink。支援它的主流 Linux 發行版包括 Ubuntu、Debian、RHEL、CentOS 和 Fedora。
 如何在LAMP架構下高效整合Node.js或Python服務?
Apr 01, 2025 pm 02:48 PM
如何在LAMP架構下高效整合Node.js或Python服務?
Apr 01, 2025 pm 02:48 PM
在LAMP架構下整合Node.js或Python服務許多網站開發者都面臨這樣的問題:已有的LAMP(Linux Apache MySQL PHP)架構網站需要...

 Gitee Pages靜態網站部署失敗:單個文件404錯誤如何排查和解決?
Apr 04, 2025 pm 11:54 PM
Gitee Pages靜態網站部署失敗:單個文件404錯誤如何排查和解決?
Apr 04, 2025 pm 11:54 PM
GiteePages靜態網站部署失敗:404錯誤排查與解決在使用Gitee...
