

vue3怎麼實現6位支付密碼輸入框

具體的需求: 在客戶資訊表格的操作列中,點選修改付款密碼按鈕,會跳到6位付款密碼輸入框元件頁面。同時,要求輸入框密文顯示、不可編輯、不可回退、即時顯示;到達6位數,自動進入確認支付密碼;確認支付密碼到達6位數,自動檢驗兩次輸入密碼的一致性,顯示確定按鈕。此功能是為了用於在銀行中,客戶用設備輸入密碼,櫃員不可見密碼,但櫃員可以進行提示操作。
具體的問題: 1、如何實現密文顯示,且每個框只能輸入1位數字;2、如何實現輸入框不可編輯、不可回退;3、如何檢驗兩次輸入密碼的一致性;4、如果自己的業務需要對鍵盤按鍵做限制,該怎麼處理。
一、程式碼總覽
實作6位付款密碼輸入框元件的程式碼如下,複製即可直接使用!
<template>
<div >
<!-- 密码输入框 -->
<div class="input-box" >
<!-- 输入密码 -->
<div >{{ "输入密码" }}</div>
<div class="input-content" @keyup="keyup" @input="inputEvent">
<input max="9" min="0" maxlength="1" data-index="0" v-model.number="state.input[0]" type="password"
ref="firstinput" :disabled="state.disabledInput[0]" />
<input max="9" min="0" maxlength="1" data-index="1" v-model.number="state.input[1]" type="password"
:disabled="state.disabledInput[1]" />
<input max="9" min="0" maxlength="1" data-index="2" v-model.number="state.input[2]" type="password"
:disabled="state.disabledInput[2]" />
<input max="9" min="0" maxlength="1" data-index="3" v-model.number="state.input[3]" type="password"
:disabled="state.disabledInput[3]" />
<input max="9" min="0" maxlength="1" data-index="4" v-model.number="state.input[4]" type="password"
:disabled="state.disabledInput[4]" />
<input max="9" min="0" maxlength="1" data-index="5" v-model.number="state.input[5]" type="password"
:disabled="state.disabledInput[5]" />
</div>
<!-- 确认密码 -->
<div >{{ "确认密码" }}</div>
<div class="input-content" @keyup="confirmKeyUp" @input="confirmInputEvent">
<input max="9" min="0" maxlength="1" data-index="0" v-model.number="state.confirmInput[0]" type="password"
ref="confirmfirstinput" :disabled="state.disabledConfirmInput[0]" />
<input max="9" min="0" maxlength="1" data-index="1" v-model.number="state.confirmInput[1]" type="password"
:disabled="state.disabledConfirmInput[1]" />
<input max="9" min="0" maxlength="1" data-index="2" v-model.number="state.confirmInput[2]" type="password"
:disabled="state.disabledConfirmInput[2]" />
<input max="9" min="0" maxlength="1" data-index="3" v-model.number="state.confirmInput[3]" type="password"
:disabled="state.disabledConfirmInput[3]" />
<input max="9" min="0" maxlength="1" data-index="4" v-model.number="state.confirmInput[4]" type="password"
:disabled="state.disabledConfirmInput[4]" />
<input max="9" min="0" maxlength="1" data-index="5" v-model.number="state.confirmInput[5]" type="password"
:disabled="state.disabledConfirmInput[5]" />
</div>
</div>
<!-- 按钮 -->
<div >
<el-button type="info" :disabled="state.disabledConfirm" @click="reConfirm"
:class="[state.disabledConfirm ? 'noActive' : 'active']">{{ "确定" }}</el-button>
<el-button type="warning" @click="reset">{{ "重新输入" }}</el-button>
</div>
<!-- 提示区 -->
<div
>
<p>{{ state.tipContent }}</p>
</div>
</div>
</template>
<script lang="ts" setup>
import { nextTick, reactive, ref, onMounted } from "vue";
import { ElMessage, ElMessageBox } from 'element-plus'
const state = reactive({
// 输入数组
input: ["", "", "", "", "", ""],
// 确认输入数组
confirmInput: ["", "", "", "", "", ""],
// 存放粘贴进来的数字
pasteResult: [],
confirmPasteResult: [],
// 一上来禁用确定按钮
disabledConfirm: true,
// 输入框是否禁用
disabledInput: [false, false, false, false, false, false],
disabledConfirmInput: [false, false, false, false, false, false],
// 提示内容
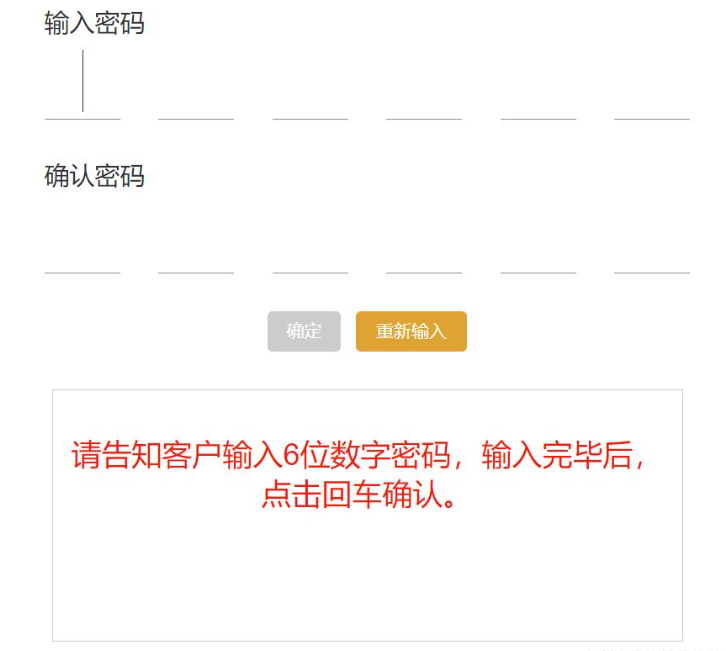
tipContent: "请告知客户输入6位数字密码,输入完毕后,点击回车确认。"
})
// 获取第一个元素的ref
const firstinput = ref()
const confirmfirstinput = ref()
// 页面一加载就使第一个框聚焦
onMounted(() => {
// 等待dom渲染完成,在执行focus,否则无法获取到焦点
nextTick(() => {
firstinput.value.focus();
});
})
// @input的处理方法
// 解决一个输入框输入多个字符
const inputEvent = (e) => {
var index = e.target.dataset.index * 1;
var el = e.target;
// 限制只能输入数字
el.value = el.value.replace(/[^\d]/g, "");
if (el.value.length >= 1) {
// 密文显示、不可编辑、不可回退、即时显示
state.disabledInput[index] = true;
if (el.nextElementSibling) {
el.nextElementSibling.focus();
}
}
// 到达6位数,自动进入确认支付密码
if (!el.nextElementSibling) {
confirmfirstinput.value.focus();
state.tipContent = "请告知客户再次输入6位数字密码,输入完毕后,点击回车确认。";
}
}
// @keydown的处理方法,根据业务需要添加
// 此示例没有使用
const keydown = (e) => {
var index = e.target.dataset.index * 1;
var el = e.target;
// 回退键
if (e.key === 'Backspace') {
if (state.input[index].length > 0) {
state.input[index] = ''
} else {
if (el.previousElementSibling) {
el.previousElementSibling.focus()
state.input[index - 1] = ''
}
}
}
// 删除键
else if (e.key === 'Delete') {
if (state.input[index].length > 0) {
state.input[index] = ''
} else {
if (el.nextElementSibling) {
state.input[1] = ''
}
}
if (el.nextElementSibling) {
el.nextElementSibling.focus()
}
}
// 左键
else if (e.key === 'ArrowLeft') {
if (el.previousElementSibling) {
el.previousElementSibling.focus()
}
}
// 右键
else if (e.key === 'ArrowRight') {
if (el.nextElementSibling) {
el.nextElementSibling.focus()
}
}
// 上键
else if (e.key === 'ArrowUp') {
if (Number(state.input[index]) * 1 < 9) {
state.input[index] = (Number(state.input[index]) * 1 + 1).toString()
}
}
// 下键
else if (e.key === 'ArrowDown') {
if (Number(state.input[index]) * 1 > 0) {
state.input[index] = (Number(state.input[index]) * 1 - 1).toString()
}
}
}
// @keyup的处理方法
const keyup = (e) => {
var index = e.target.dataset.index * 1;
// 如果为最后一个框,则输入框全部失焦
if (index === 5) {
if (state.input.join("").length === 6) {
document.activeElement.blur();
}
}
}
// @input的处理方法
// 解决一个输入框输入多个字符
const confirmInputEvent = (e) => {
var index = e.target.dataset.index * 1;
var el = e.target;
if (el.value.length >= 1) {
// 密文显示、不可编辑、不可回退、即时显示
state.disabledConfirmInput[index] = true;
if (el.nextElementSibling) {
el.nextElementSibling.focus();
}
}
// 到达6位数,自动检验两次输入密码的一致性
if (!el.nextElementSibling) {
// 一一比较元素值,有一个不相等就不等
for (let i = 0; i < state.input.length; i++) {
if (state.input[i] !== state.confirmInput[i]) {
state.tipContent = "请告知客户两次密码输入不一致,柜员点击重新输入,清空密码后请告知客户重新输入。";
return;
}
}
state.tipContent = "密码合规,点击确定按钮进行修改。";
// 确定按钮变为可用
state.disabledConfirm = false;
}
}
// @keydown的处理方法,根据业务需要添加
// 此示例没有使用
const confirmKeydown = (e) => {
var index = e.target.dataset.index * 1;
var el = e.target;
// 回退键
if (e.key === 'Backspace') {
if (state.confirmInput[index].length > 0) {
state.confirmInput[index] = ''
} else {
if (el.previousElementSibling) {
el.previousElementSibling.focus()
state.confirmInput[index - 1] = ''
}
}
}
// 删除键
else if (e.key === 'Delete') {
if (state.confirmInput[index].length > 0) {
state.confirmInput[index] = ''
} else {
if (el.nextElementSibling) {
state.confirmInput[1] = ''
}
}
if (el.nextElementSibling) {
el.nextElementSibling.focus()
}
}
// 左键
else if (e.key === 'ArrowLeft') {
if (el.previousElementSibling) {
el.previousElementSibling.focus()
}
}
// 右键
else if (e.key === 'ArrowRight') {
if (el.nextElementSibling) {
el.nextElementSibling.focus()
}
}
// 上键
else if (e.key === 'ArrowUp') {
if (Number(state.confirmInput[index]) * 1 < 9) {
state.confirmInput[index] = (Number(state.confirmInput[index]) * 1 + 1).toString()
}
}
// 下键
else if (e.key === 'ArrowDown') {
if (Number(state.confirmInput[index]) * 1 > 0) {
state.confirmInput[index] = (Number(state.confirmInput[index]) * 1 - 1).toString()
}
}
}
// @keyup的处理方法
const confirmKeyUp = (e) => {
var index = e.target.dataset.index * 1;
// 如果为最后一个框,则输入框全部失焦
if (index === 5) {
if (state.confirmInput.join("").length === 6) {
document.activeElement.blur();
}
}
}
// 重新输入
const reset = () => {
state.disabledConfirm = true;
state.tipContent = "请告知客户输入6位数字密码,输入完毕后,点击回车确认。";
state.input = ["", "", "", "", "", ""];
state.confirmInput = ["", "", "", "", "", ""];
state.disabledInput = [false, false, false, false, false, false];
state.disabledConfirmInput = [false, false, false, false, false, false];
// 等待dom渲染完成,在执行focus,否则无法获取到焦点
nextTick(() => {
firstinput.value.focus();
});
}
// 确认修改
const reConfirm = () => {
ElMessageBox.confirm(
'是否确定修改?',
'温馨提示',
{
confirmButtonText: '确定',
cancelButtonText: '取消',
type: 'warning',
}
)
.then(() => {
// 此处调修改支付密码接口
ElMessage({
type: 'success',
message: '修改成功!',
})
})
.catch(() => {
ElMessage({
type: 'info',
message: '已取消修改!',
})
})
}
</script>
<style lang="scss" scoped>
.input-box {
.input-content {
width: 512px;
height: 60px;
display: flex;
align-items: center;
justify-content: space-between;
input {
color: inherit;
font-family: inherit;
border: 0;
outline: 0;
border-bottom: 1px solid #919191;
height: 60px;
width: 60px;
font-size: 44px;
text-align: center;
}
}
input::-webkit-outer-spin-button,
input::-webkit-inner-spin-button {
appearance: none;
margin: 0;
}
}
.noActive {
color: #fff !important;
border-width: 0px !important;
background-color: #ccc !important;
}
.active {
color: #fff !important;
border-width: 0px !important;
background-color: #67c23a !important;
}
</style>二、問題解析
1、問:如何實作密文顯示,且每個框只能輸入1位數字?
如果想要進行密文輸入,只需要將輸入框的類型設為"password"即可。對於實現每個框只能輸入1位數字,這裡只使用輸入框的maxlength屬性效果並不完美,可能會出現限制不住的情況,需要在@input事件中,判斷當前元素值的長度,如果大於等於1,則透過nextElementSibling.focus(),讓遊標聚焦到下一個兄弟元素上去。
2、問:如何實現輸入框不可編輯、不可回退?
答案:使用了輸入框的disabled屬性,透過在@input事件中,將目前輸入元素的disabled屬性變成true即可。為了方便後續的取得和修改,我們將輸入框的disabled屬性值分別儲存在一個陣列中。
3、問:如何檢驗兩次輸入密碼的一致性?
答案:使用了最簡單的for循環,遍歷輸入密碼數組和確認密碼數組,一一比較它們的元素值,有一個不相等就不等,透過return;結束整個函數的執行。
4、問:如果自己的業務需要對鍵盤按鍵做限制,該怎麼處理?
答案:可以為輸入框新增@keydown或@keyup事件,在回呼內部透過對key做判斷,來對不同的按鍵做一些業務的處理。
以上是vue3怎麼實現6位支付密碼輸入框的詳細內容。更多資訊請關注PHP中文網其他相關文章!

熱AI工具

Undresser.AI Undress
人工智慧驅動的應用程序,用於創建逼真的裸體照片

AI Clothes Remover
用於從照片中去除衣服的線上人工智慧工具。

Undress AI Tool
免費脫衣圖片

Clothoff.io
AI脫衣器

AI Hentai Generator
免費產生 AI 無盡。

熱門文章
熱工具

記事本++7.3.1
好用且免費的程式碼編輯器

SublimeText3漢化版
中文版,非常好用

禪工作室 13.0.1
強大的PHP整合開發環境

Dreamweaver CS6
視覺化網頁開發工具

SublimeText3 Mac版
神級程式碼編輯軟體(SublimeText3)
熱門話題


 vue3+vite:src使用require動態匯入圖片報錯怎麼解決
May 21, 2023 pm 03:16 PM
vue3+vite:src使用require動態匯入圖片報錯怎麼解決
May 21, 2023 pm 03:16 PM
vue3+vite:src使用require動態導入圖片報錯和解決方法vue3+vite動態的導入多張圖片vue3如果使用的是typescript開發,就會出現require引入圖片報錯,requireisnotdefined不能像使用vue2這樣imgUrl:require(' …/assets/test.png')導入,是因為typescript不支援require所以用import導入,下面介紹如何解決:使用awaitimport
 vue3專案中怎麼使用tinymce
May 19, 2023 pm 08:40 PM
vue3專案中怎麼使用tinymce
May 19, 2023 pm 08:40 PM
tinymce是一個功能齊全的富文本編輯器插件,但在vue中引入tinymce並不像別的Vue富文本插件一樣那麼順利,tinymce本身並不適配Vue,還需要引入@tinymce/tinymce-vue,並且它是國外的富文本插件,沒有透過中文版本,需要在其官網下載翻譯包(可能需要翻牆)。 1.安裝相關依賴npminstalltinymce-Snpminstall@tinymce/tinymce-vue-S2、下載中文包3.引入皮膚和漢化包在項目public資料夾下新建tinymce資料夾,將下載的
 Vue3如何實作刷新頁面局部內容
May 26, 2023 pm 05:31 PM
Vue3如何實作刷新頁面局部內容
May 26, 2023 pm 05:31 PM
想要實現頁面的局部刷新,我們只需要實現局部元件(dom)的重新渲染。在Vue中,想要實現這效果最簡單的方式方法就是使用v-if指令。在Vue2中我們除了使用v-if指令讓局部dom的重新渲染,也可以新建一個空白元件,需要刷新局部頁面時跳轉至這個空白元件頁面,然後在空白元件內的beforeRouteEnter守衛中又跳轉回原來的頁面。如下圖所示,如何在Vue3.X中實現點擊刷新按鈕實現紅框範圍內的dom重新加載,並展示對應的加載狀態。由於Vue3.X中scriptsetup語法中組件內守衛只有o
 Vue3怎麼解析markdown並實現程式碼高亮顯示
May 20, 2023 pm 04:16 PM
Vue3怎麼解析markdown並實現程式碼高亮顯示
May 20, 2023 pm 04:16 PM
Vue實作部落格前端,需要實作markdown的解析,如果有程式碼則需要實作程式碼的高亮。 Vue的markdown解析函式庫很多,如markdown-it、vue-markdown-loader、marked、vue-markdown等。這些庫都大同小異。這裡選用的是marked,程式碼高亮的函式庫選用的是highlight.js。具體實現步驟如下:一、安裝依賴庫在vue專案下開啟命令窗口,並輸入以下命令npminstallmarked-save//marked用於將markdown轉換成htmlnpmins
 vue3項目打包發佈到伺服器後訪問頁面顯示空白怎麼解決
May 17, 2023 am 08:19 AM
vue3項目打包發佈到伺服器後訪問頁面顯示空白怎麼解決
May 17, 2023 am 08:19 AM
vue3專案打包發佈到伺服器後存取頁面顯示空白1、處理vue.config.js檔案中的publicPath處理如下:const{defineConfig}=require('@vue/cli-service')module.exports=defineConfig({publicPath :process.env.NODE_ENV==='production'?'./':'/&
 Vue3中怎麼實現選取頭像並裁剪
May 29, 2023 am 10:22 AM
Vue3中怎麼實現選取頭像並裁剪
May 29, 2023 am 10:22 AM
最終效果安裝VueCropper組件yarnaddvue-cropper@next上面的安裝值針對Vue3的,如果時Vue2或想使用其他的方式引用,請訪問它的npm官方地址:官方教程。在元件中引用使用時也很簡單,只需要引入對應的元件和它的樣式文件,我這裡沒有在全域引用,只在我的元件檔案中引入import{userInfoByRequest}from'../js/api' import{VueCropper}from'vue-cropper&
 怎麼使用vue3+ts+axios+pinia實現無感刷新
May 25, 2023 pm 03:37 PM
怎麼使用vue3+ts+axios+pinia實現無感刷新
May 25, 2023 pm 03:37 PM
vue3+ts+axios+pinia實作無感刷新1.先在專案中下載aiXos和pinianpmipinia--savenpminstallaxios--save2.封裝axios請求-----下載js-cookienpmiJS-cookie-s//引入aixosimporttype{AxiosRequestConfigig ,AxiosResponse}from"axios";importaxiosfrom'axios';import{ElMess
 Vue3復用元件怎麼使用
May 20, 2023 pm 07:25 PM
Vue3復用元件怎麼使用
May 20, 2023 pm 07:25 PM
前言無論是vue還是react,當我們遇到多處重複程式碼的時候,我們都會想著如何重複使用這些程式碼,而不是一個檔案裡充斥著一堆冗餘程式碼。實際上,vue和react都可以透過抽組件的方式來達到復用,但如果遇到一些很小的程式碼片段,你又不想抽到另外一個檔案的情況下,相比而言,react可以在相同文件裡面宣告對應的小元件,或透過renderfunction來實現,如:constDemo:FC=({msg})=>{returndemomsgis{msg}}constApp:FC=()=>{return(
