

vue3和ts封裝axios及使用mock.js的方法是什麼

前言
我們要注意區分Axios 和Ajax :
Ajax 是一種技術統稱,技術內容包括:HTML 或XHTML , CSS, JavaScript, DOM, XML, XSLT, 以及最重要的XMLHttpRequest,用於瀏覽器與伺服器之間使用非同步資料傳輸(HTTP 請求),做到局部請求以實現局部刷新,使用是基於 XMLHttpRequest 進行使用;
Axios 是一個基於promise 的HTTP 函式庫,是第三方函式庫
主要技術堆疊:vue3,ts,axios,mock.js,elementPlus
一、axios 的依賴安裝與處理
1. 依賴安裝
使用非同步網路請求肯定離不開loading、message 等提示,今天我們配合elementPlus 一起使用;
// 安装axios
npm install axios --save

// 安装 elementPlus
npm install element-plus --save
2. 全域axios 封裝
3.實際使用src 目錄下utils 目錄下,新建request.ts,因為使用的是TS,需要事先定義資料格式:
##
定義請求資料回傳的格式,需要事先確認好
定義axios 基礎設定資訊
請求攔截器:所有請求最先到達的地方,我們可以在此自訂請求頭資訊(例如:token、多語言等等)
回應攔截器:傳回資料最先到達的地方,我們可以在此處理異常訊息(例如:code為401重定向至登入、code為500提示錯誤訊息)
import axios, { AxiosInstance, AxiosError, AxiosRequestConfig, AxiosResponse } from "axios"; import { ElMessage, ElLoading, ElMessageBox } from "element-plus"; // response interface { code, msg, success } // 不含 data interface Result { code: number, success: boolean, msg: string } // request interface,包含 data interface ResultData<T = any> extends Result { data?: T } enum RequestEnums { TIMEOUT = 10000, // 请求超时 request timeout FAIL = 500, // 服务器异常 server error LOGINTIMEOUT = 401, // 登录超时 login timeout SUCCESS = 200, // 请求成功 request successfully } // axios 基础配置 const config = { // 默认地址,可以使用 process Node内置的,项目根目录下新建 .env.development baseURL: process.env.VUE_APP_BASE_API as string, timeout: RequestEnums.TIMEOUT as number, // 请求超时时间 withCredentials: true, // 跨越的时候允许携带凭证 } class Request { service: AxiosInstance; constructor(config: AxiosRequestConfig) { // 实例化 serice this.service = axios.create(config); /** * 请求拦截器 * request -> { 请求拦截器 } -> server */ this.service.interceptors.request.use( (config: AxiosRequestConfig) => { const token = localStorage.getItem('token') ?? ''; return { ...config, headers: { 'customToken': "customBearer " + token } } }, (error: AxiosError) => { // 请求报错 Promise.reject(error) } ); /** * 响应拦截器 * response -> { 响应拦截器 } -> client */ this.service.interceptors.response.use( (response: AxiosResponse) => { const { data, config } = response; if (data.code === RequestEnums.LOGINTIMEOUT) { // 表示登录过期,需要重定向至登录页面 ElMessageBox.alert("Session expired", "System info", { confirmButtonText: 'Relogin', type: 'warning' }).then(() => { // 或者调用 logout 方法去处理 localStorage.setItem('token', ''); location.href = '/' }) } if (data.code && data.code !== RequestEnums.SUCCESS) { ElMessage.error(data); return Promise.reject(data); } return data }, (error: AxiosError) => { const { response } = error; if (response) { this.handleCode(response.status); } if (!window.navigator.onLine) { ElMessage.error("网络连接失败,请检查网络"); // 可以重定向至404页面 } } ) } public handleCode = (code: number): void => { switch (code) { case 401: ElMessage.error("登陆失败,请重新登录"); break; case 500: ElMessage.error("请求异常,请联系管理员"); break; default: ElMessage.error('请求失败'); break; } } // 通用方法封装 get<T>(url: string, params?: object): Promise<ResultData<T>> { return this.service.get(url, { params }); } post<T>(url: string, params?: object): Promise<ResultData<T>> { return this.service.post(url, params); } put<T>(url: string, params?: object): Promise<ResultData<T>> { return this.service.put(url, params); } delete<T>(url: string, params?: object): Promise<ResultData<T>> { return this.service.delete(url, { params }); } } export default new Request(config)登入後複製
src 目錄下新增api/index.tsVue 檔案中呼叫
- 定義請求的參數類型
- 定義回應想具體參數類型
這裡我們使用到ts 中的namespace ,實際開發中我們很多api 可能會出現相同名字不同意義,所以我們使用namespace 進行定義
#import request from "@/utils/request"; namespace User { // login export interface LoginForm { userName: string, password: string } } export namespace System { export interface Info { path: string, routeName: string } export interface ResponseItem { code: number, items: Array<Sidebar>, success: boolean } export interface Sidebar { id: number, hashId: string | number, title: string, routeName: string, children: Array<SidebarItem>, } export interface SidebarItem { id: number, parentId: number, hashId: string | number, title: string, } } export const info = (params: System.Info) => { // response if (!params || !params.path) throw new Error('Params and params in path can not empty!') // 这里因为是全局的一个info,根据路由地址去请求侧边栏,所需不用把地址写死 return request.post<System.Sidebar>(params.path, { routeName: params.routeName }) }登入後複製
<script lang="ts" setup name="Sidebar">
import { ref, reactive, onBeforeMount } from "vue"
import { info } from "@/api"
import { useRoute } from "vue-router"
const route = useRoute();
let loading = ref<boolean>(false);
let sidebar = ref<any>({});
const _fetch = async (): Promise<void> => {
const routeName = route.name as string;
const path = '/' + routeName.replace(routeName[0], routeName[0].toLocaleLowerCase()) + 'Info'
try {
loading.value = true;
const res = await info({ path, routeName });
if (!res || !res.data) return;
sidebar.value = res.data;
} finally {
loading.value = false
}
}
onBeforeMount(() => {
_fetch();
})
</script># 安装
npm install mockjs --save
登入後複製
在ts 中使用時,我們需要現在 shims-vue.d.ts 檔案中去拋出模組,不然會出現引入錯誤的問題# 安装 npm install mockjs --save
/* eslint-disable */
declare module '*.vue' {
import type { DefineComponent } from 'vue'
const component: DefineComponent<{}, {}, any>
export default component
}
declare module 'mockjs';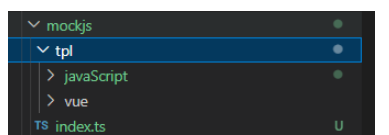
##1. 新mockjs /javaScript/index.ts(具體的資料檔)
因為我這裡的資料主要是側邊欄的數據,都是固定好的,所以並沒有用到mockjs 的規則產生數據import { GlobalSidebar, Sidebar } from "../../sidebar";
namespace InfoSidebar {
export type InfoSidebarParams = {
body: string,
type: string,
url: string
}
}
const dataSource: Array<GlobalSidebar> = [
{
mainTitle: 'JavaScript基础问题梳理',
mainSidebar: [
{
id: 0,
hashId: 'This',
title: 'this指向',
routeName: 'JsBasic',
children: [
{
id: 1,
parentId: 0,
hashId: 'GlobalFunction',
title: '全局函数'
},
{
id: 2,
parentId: 0,
hashId: 'ObjectMethod',
title: '对象方法'
},
{
id: 3,
parentId: 0,
hashId: 'Constructor',
title: '构造函数'
},
{
id: 4,
parentId: 0,
hashId: 'SetTimeout',
title: '定时器、回调函数'
},
{
id: 5,
parentId: 0,
hashId: 'EventFunction',
title: '事件函数'
},
{
id: 6,
parentId: 0,
hashId: 'ArrowFunction',
title: '箭头函数'
},
{
id: 7,
parentId: 0,
hashId: 'CallApplyBind',
title: 'call、apply、bind'
},
]
},
{
id: 2,
hashId: 'DeepClone',
title: '深拷贝和浅拷贝',
routeName: 'JsBasic',
children: []
}
]
},
];
export default {
name: 'jsBasicInfo',
jsBasicInfo(params: InfoSidebar.InfoSidebarParams) {
const param = JSON.parse(params.body)
if (!param) throw new Error("Params can not empty!");
const data = dataSource.find((t: GlobalSidebar) => {
return t.mainSidebar.filter((x: Sidebar) => {
return x.routeName === param.routeName
})
})
return {
data,
success: true,
code: 200
}
}
}
/**
 * @param { number } id Unique value
 * @param { string } hashId href Unique value
 * @param { string } title show current title
 * @param { string } routeName page find data
 */

interface GlobalSidebar {
    mainTitle: string,
    mainSidebar: Array<Sidebar>
}

interface Sidebar {
    id: number,
    hashId: string | number,
    title: string,
    routeName: string,
    children: Array<SidebarItem>,
}

interface SidebarItem {
    id: number,
    parentId: number,
    hashId: string | number,
    title: string,
}

export {
    GlobalSidebar,
    Sidebar,
    SidebarItem
}2. 新建mockjs/index.ts
import Mock from "mockjs";
import jsBasicInfo from "./tpl/javaScript/index";
const requestMethod = 'post';
const BASE_URL = process.env.VUE_APP_BASE_API;
const mocks = [jsBasicInfo];

for (let i of mocks) {
    Mock.mock(BASE_URL + '/' + i.name, requestMethod, i.jsBasicInfo);
}

export default Mock3. main.ts 引入
import { createApp } from 'vue'
import App from './App.vue'

if(process.env.NODE_ENV == 'development'){
    require('./mockjs/index')
}

const app = createApp(App);
app.mount('#app');三、結合使用
#其實就是剛剛呼叫axios 的那一段程式碼
<script lang="ts" setup name="Sidebar">
import { ref, reactive, onBeforeMount } from "vue"
import { info } from "@/api"
import { useRoute } from "vue-router"
const route = useRoute();
let loading = ref<boolean>(false);
let sidebar = ref<any>({});
const _fetch = async (): Promise<void> => {
const routeName = route.name as string;
const path = '/' + routeName.replace(routeName[0], routeName[0].toLocaleLowerCase()) + 'Info'
try {
loading.value = true;
const res = await info({ path, routeName });
if (!res || !res.data) return;
sidebar.value = res.data;
} finally {
loading.value = false
}
}
onBeforeMount(() => {
_fetch();
})
</script>以上是vue3和ts封裝axios及使用mock.js的方法是什麼的詳細內容。更多資訊請關注PHP中文網其他相關文章!

熱AI工具

Undresser.AI Undress
人工智慧驅動的應用程序,用於創建逼真的裸體照片

AI Clothes Remover
用於從照片中去除衣服的線上人工智慧工具。

Undress AI Tool
免費脫衣圖片

Clothoff.io
AI脫衣器

Video Face Swap
使用我們完全免費的人工智慧換臉工具,輕鬆在任何影片中換臉!

熱門文章
熱工具

記事本++7.3.1
好用且免費的程式碼編輯器

SublimeText3漢化版
中文版,非常好用

禪工作室 13.0.1
強大的PHP整合開發環境

Dreamweaver CS6
視覺化網頁開發工具

SublimeText3 Mac版
神級程式碼編輯軟體(SublimeText3)


 在Vue應用程式中使用axios時出現「Uncaught (in promise) Error: Request failed with status code 500」怎麼辦?
Jun 24, 2023 pm 05:33 PM
在Vue應用程式中使用axios時出現「Uncaught (in promise) Error: Request failed with status code 500」怎麼辦?
Jun 24, 2023 pm 05:33 PM
在Vue應用程式中使用axios是十分常見的,axios是一種基於Promise的HTTP客戶端,可以用於瀏覽器和Node.js。在開發過程中,有時會出現「Uncaught(inpromise)Error:Requestfailedwithstatuscode500」的錯誤提示,對於開發者來說,這個錯誤提示可能有些難以理解和解決。本文將會探討這
 Vue中資料請求的選擇:Axios or Fetch?
Jul 17, 2023 pm 06:30 PM
Vue中資料請求的選擇:Axios or Fetch?
Jul 17, 2023 pm 06:30 PM
Vue中資料請求的選擇:AxiosorFetch?在Vue開發中,處理資料請求是一個非常常見的任務。而選擇使用哪種工具來進行資料請求,則是需要考慮的問題。在Vue中,最常見的兩種工具是Axios和Fetch。本文將會比較這兩種工具的優缺點,並給出一些範例程式碼來幫助你做出選擇。 Axios是一個基於Promise的HTTP客戶端,可以在瀏覽器和Node.
 在Vue應用程式中使用axios時出現「TypeError: Failed to fetch」怎麼辦?
Jun 24, 2023 pm 11:03 PM
在Vue應用程式中使用axios時出現「TypeError: Failed to fetch」怎麼辦?
Jun 24, 2023 pm 11:03 PM
最近,在使用Vue應用程式開發過程中,我遇到了一個常見的問題:「TypeError:Failedtofetch」錯誤提示。這個問題出現在使用axios進行HTTP請求時,後端伺服器沒有正確回應請求時發生。這種錯誤提示通常表示請求無法到達伺服器,可能是由於網路原因或伺服器未回應造成的。出現這個錯誤提示後,我們該怎麼辦呢?以下是一些解決方法:檢查網路連接由於
 在Vue應用程式中使用axios時出現「Error: Network Error」怎麼解決?
Jun 25, 2023 am 08:27 AM
在Vue應用程式中使用axios時出現「Error: Network Error」怎麼解決?
Jun 25, 2023 am 08:27 AM
在Vue應用程式中使用axios時出現「Error:NetworkError」怎麼解決?在Vue應用程式的開發中,我們常常會使用到axios進行API的請求或資料的獲取,但是有時我們會遇到axios請求出現「Error:NetworkError」的情況,這時我們該怎麼辦呢?首先,需要了解「Error:NetworkError」是什麼意思,它通常表示網路連
 高效利用Vue和Axios實現前端資料的批次處理
Jul 17, 2023 pm 10:43 PM
高效利用Vue和Axios實現前端資料的批次處理
Jul 17, 2023 pm 10:43 PM
高效利用Vue和Axios實現前端資料的批次處理在前端開發中,資料的處理是一個常見的任務。當我們需要處理大量資料時,如果沒有有效的方法,處理資料將會變得十分繁瑣和低效。 Vue是一種優秀的前端框架,而Axios是一個流行的網路請求庫,它們可以協同工作來實現前端資料的批次處理。本文將詳細介紹如何有效利用Vue和Axios來進行資料的批次處理,並提供相關的程式碼範例
 Vue3中怎麼實現選取頭像並裁剪
May 29, 2023 am 10:22 AM
Vue3中怎麼實現選取頭像並裁剪
May 29, 2023 am 10:22 AM
最終效果安裝VueCropper組件yarnaddvue-cropper@next上面的安裝值針對Vue3的,如果時Vue2或想使用其他的方式引用,請訪問它的npm官方地址:官方教程。在元件中引用使用時也很簡單,只需要引入對應的元件和它的樣式文件,我這裡沒有在全域引用,只在我的元件檔案中引入import{userInfoByRequest}from'../js/api' import{VueCropper}from'vue-cropper&
 在Vue應用程式中使用axios時出現「Error: timeout of xxxms exceeded」怎麼辦?
Jun 24, 2023 pm 03:27 PM
在Vue應用程式中使用axios時出現「Error: timeout of xxxms exceeded」怎麼辦?
Jun 24, 2023 pm 03:27 PM
在Vue應用程式中使用axios時出現「Error:timeoutofxxxmsexceeded」怎麼辦?隨著網路的快速發展,前端技術也不斷地更新迭代,Vue作為優秀的前端框架,近年來受到大家的歡迎。在Vue應用程式中,我們常常需要使用axios來進行網路請求,但是有時候會出現「Error:timeoutofxxxmsexceeded」的錯誤
 Vue實作檔案上傳的完整指南(axios、element-ui)
Jun 09, 2023 pm 04:12 PM
Vue實作檔案上傳的完整指南(axios、element-ui)
Jun 09, 2023 pm 04:12 PM
Vue實作檔案上傳的完整指南(axios、element-ui)在現代Web應用程式中,檔案上傳已成為一項基本的功能。無論是上傳頭像、圖片、文件或視頻,我們都需要一個可靠的方法來將文件從用戶的電腦上傳到伺服器中。本文將為您提供一份詳細的指南,介紹如何使用Vue、axios和element-ui來實現檔案上傳。什麼是axiosaxios是一個基於prom
