說明:nginx版本需求是1.9以上,編譯nginx的時候需要加上--with-stream
如:
##
./configure --prefix=/data/apps/nginx --with-http_stub_status_module --with-http_ssl_module --with-http_realip_module --with-http_image_filter_module --with-stream
1.因為mysql預設使用了3306端口所以配置nginx tcp反向代理mysql的時候注意端口不要與mysql監聽的端口一樣比如我使用的是3307
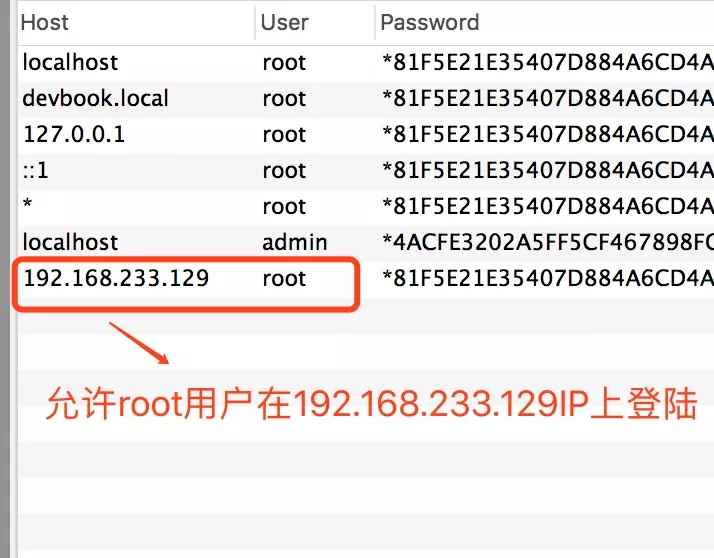
2.確保能root使用者能遠端連線mysql
如資料庫mysql 表user

此段程式碼追加在nginx.conf檔案結尾,注意不能加在http{}內
stream{
include /data/apps/nginx/conf/stream/*.conf;
}server {
listen 3307; #注意端口不能跟mysql监听的一样
proxy_pass db;
}
upstream db {
server 127.0.0.1:3306;
server 192.168.233.1:3306;
}
 然後php程式碼是這樣子
#
#其实就是new mysqli的时候只需改端口号与nginx反向代理设置的端口号一样就可以了
$mysqli = new mysqli('127.0.0.1','root','root','test',3307);
<?php
class mysqlclass
{
private static $obj = null; //mysqlclass对象
public $host;
public $database;
public $user;
public $pwd;
public $port;
public $mysqli = null;
//禁止对象被克隆
private function __clone(){}
//禁止外部实例化
private function __construct($host="127.0.0.1",$database="test",$user="root",$pwd="root",$port="3307")
{
$this->host = $host;
$this->database = $database;
$this->user = $user;
$this->pwd = $pwd;
$this->port = $port;
$this->mysqli = $this->db_connect();
}
//获取mysqli连接
private function db_connect()
{
$mysqli = new mysqli($this->host,$this->user,$this->pwd,$this->database,$this->port);
if($mysqli->connect_errno)
{
printf("connect failed: %s\n", $mysqli->connect_errno);
exit();
}
$mysqli->query("set names utf8 ");
return $mysqli;
}
//获取db实例
public static function get_db()
{
if(self::$obj === null)
{
self::$obj = new self();
}
return self::$obj;
}
public function db_query($sql)
{
$result = $this->mysqli->query($sql);
$arr = [];
while ($row = $result->fetch_assoc()) {
$arr[] = $row;
}
$result->close();
$this->mysqli->close();
return $arr;
}
public function db_insert()
{
}
public function db_update()
{
}
public function __destruct() {
$this->mysqli->close();
}
}
$db = mysqlclass::get_db();
$r = $db->db_query("show tables");
var_dump($r);

以上是怎麼使用nginx充當mysql的負載平衡器的詳細內容。更多資訊請關注PHP中文網其他相關文章!


