

MySQL安裝常見報錯怎麼處理


1.無法啟動處理,錯誤1053
Windows 無法啟動Mysql服務錯誤1053:服務沒有及時回應啟動或控制要求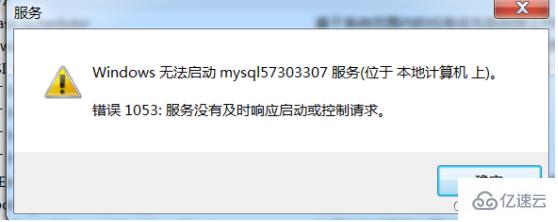
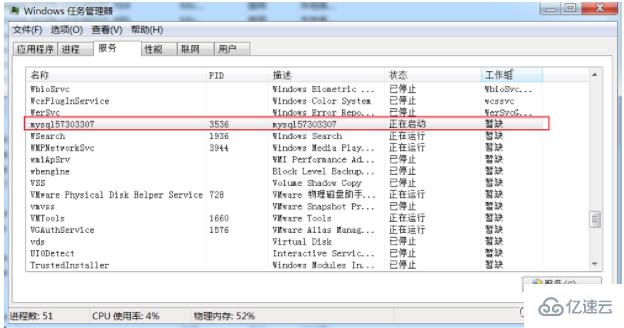
#1.1 結束進程
處理方法:
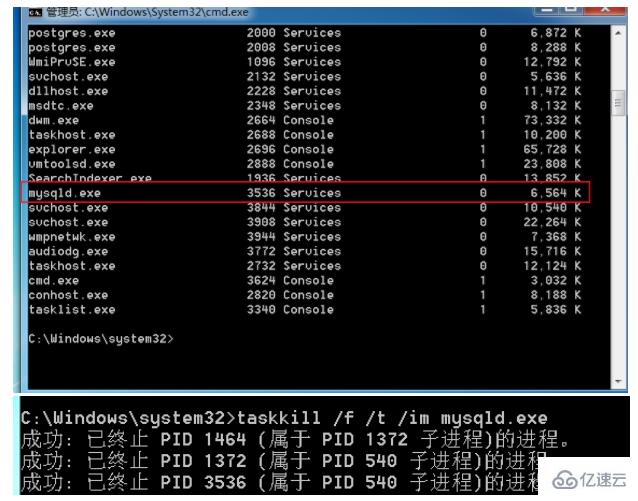
1、在命令列中敲入tasklist查看進程
2、根據進程名稱殺死進程
taskkill /f /t /im 行程名稱
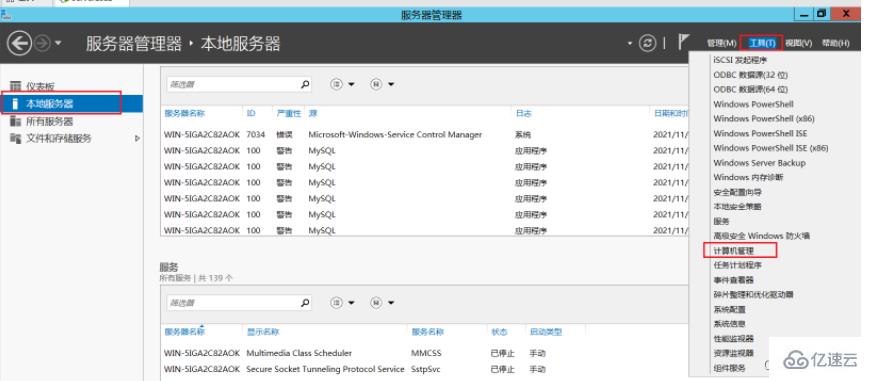
#1.2 變更網路服務
Server2012位置
# 其他win7及win10作業系統
1)、電腦->管理->本機使用者及群組->群組雙擊,效果圖如下:
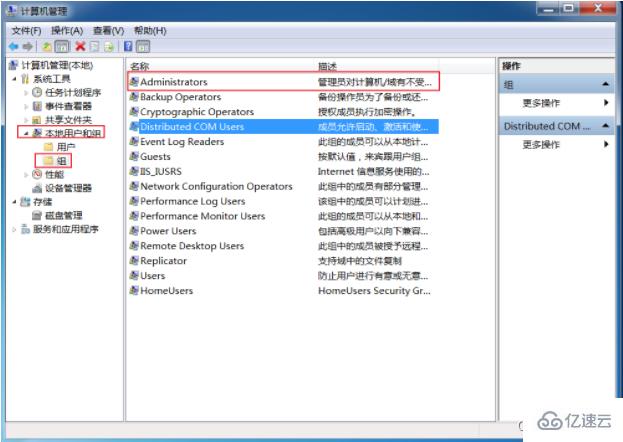
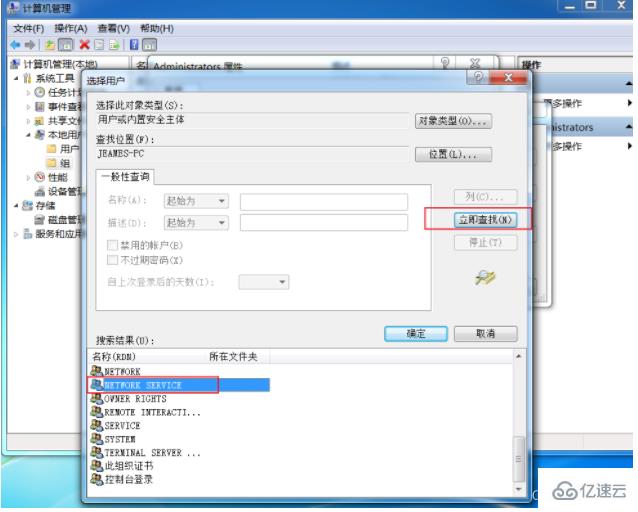
(2)、雙擊Administrators,並點選新增,再點選進階
(3)、把NETWORK SERVICE加入Administrators群組
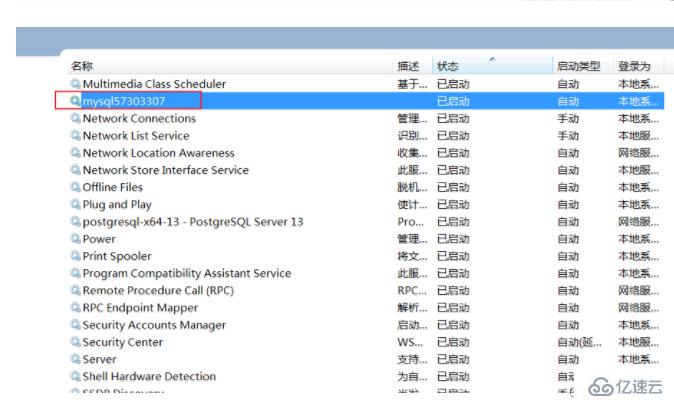
1.3刪除服務
sc delete mysql57303307
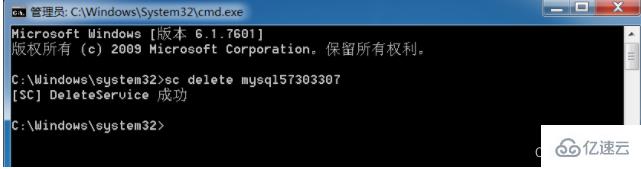
這裡記住,重新安裝Mysql就可以,2步驟操作重新執行(刪除原有Mysql文件,全部重新安裝即可)
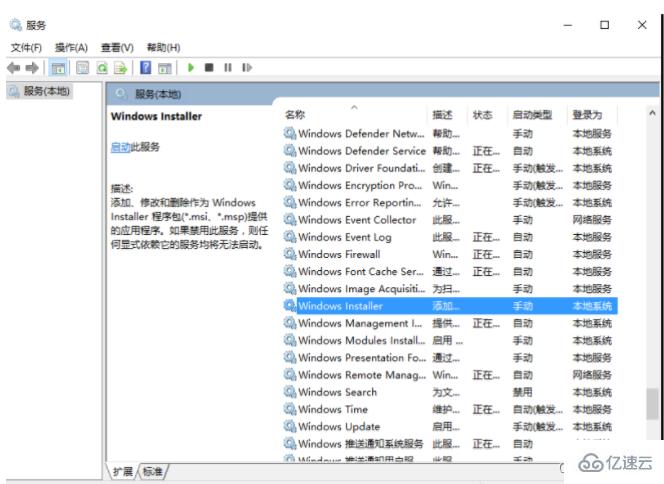
還有個坑就是,如果還是啟動不了, 記得要開啟這個服務Windows Installer
Windows Installer是一種通用的軟體發布方式,用於安裝軟體。
預設情況下,該服務是手動啟動,需要進入服務管理中開啟。
右鍵開始-執行-輸入「services.msc」-Windows Installer-啟動
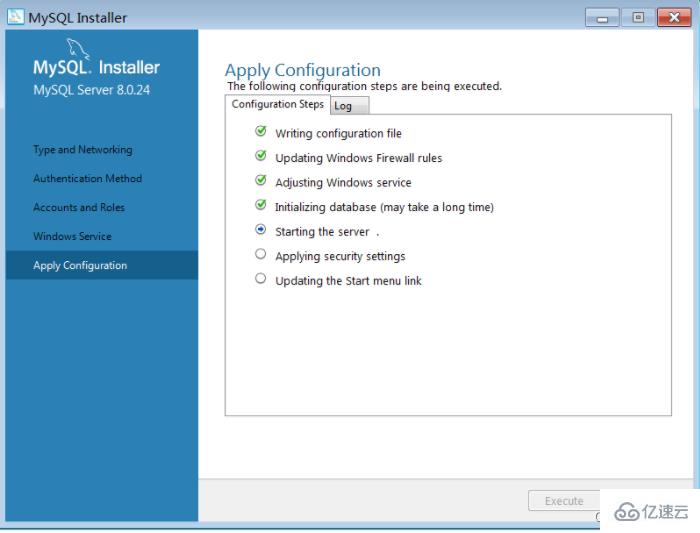
#2. Winwods安裝初始化報錯誤
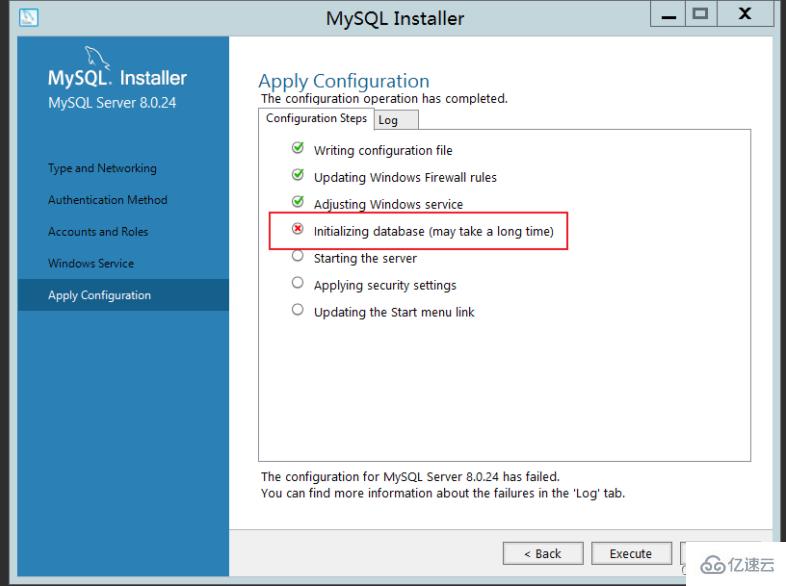
Beginning configuration step: Writing configuration fileSaving my.ini configuration file...
Saved my.ini configuration file.
Ended configuration step: Writing configuration fileBeginning configuration step: Updating Windows Firewall rules

Adding a Windows Firewall rule for MySQL80 on port 3306.
Attempting to add a Windows Firewall rule with command: netsh.exe advfirewall firewall add rule name="Port 3306" protocol=TCP localport=3306 dir=in action=allow
确定。

Successfully added the Windows Firewall rule.
Adding a Windows Firewall rule for MySQL80 on port 33060.
Attempting to add a Windows Firewall rule with command: netsh.exe advfirewall firewall add rule name="Port 33060" protocol=TCP localport=33060 dir=in action=allow
确定。

Successfully added the Windows Firewall rule.
Ended configuration step: Updating Windows Firewall rules

Beginning configuration step: Adjusting Windows serviceAttempting to grant Network Service require filesystem permissions.
Granted permissions.
Adding new serviceNew service added
Ended configuration step: Adjusting Windows serviceBeginning configuration step: Initializing database (may take a long time)Attempting to run MySQL Server with --initialize-insecure option...
Starting process for MySQL Server 8.0.24...
Starting process with command: C:\Program Files\MySQL\MySQL Server 8.0\bin\mysqld.exe --defaults-file="C:\ProgramData\MySQL\MySQL Server 8.0\my.ini" --console --initialize-insecure=on --lower-case-table-names=1...
Process for mysqld, with ID 2572, was run successfully and exited with code -1073741515.
Failed to start process for MySQL Server 8.0.24.
Database initialization failed.
Ended configuration step: Initializing database (may take a long time)

安裝VC_redist.x86即可執行既OK
輸入gpedit. msc,開啟策略管理
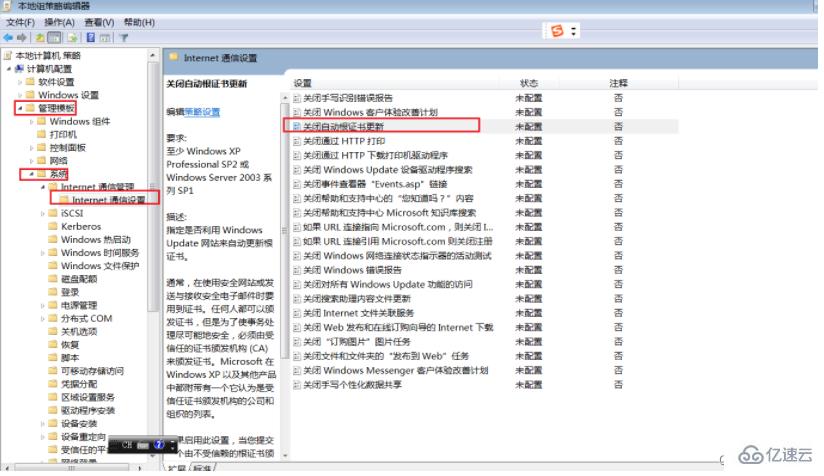
啟用憑證更新後正常
由於部分系統映像建置較早,且無法進行系統更新,需要安裝系統修補程式包才能完成vc安裝
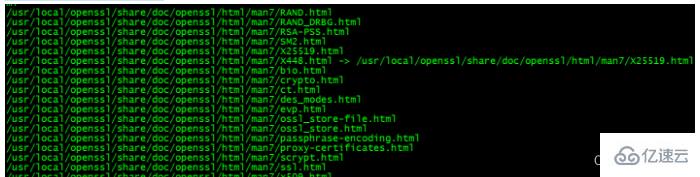
4.Centos環境rpm初始化MySQL報錯
Centos7 預設提供的openssl 版本是1.0.2 的,某些php 擴充或其他軟體依賴1.1 以上版本,如果過低的話就會報錯
libssl.so.1.1: cannot open shared object file: No such file or directory
也有執行openssl version 時報錯和上面一致,這是由於openssl 庫的位置不正確或未安裝1.1 以上版本的問題
想要升級openssl 版本則需要手動進行編譯,報錯解決方式很簡單,安裝正確即可,
下面說一下我以Centos7 為例,說一下具體的編譯安裝步驟
–openssl版本確認
[root@jeames ~]# openssl version
OpenSSL 1.0.1e-fips 11 Feb 2013
–編譯openssl
tar - xvf openssl-1.1.1g.tar.gz
cd openssl-1.1.1g
./config shared --openssldir=/usr/local/openssl --prefix=/usr/local/openssl
make && make install
–設定
編譯完成後,使用 openssl version,來檢視一下目前 openssl 版本號時,
你會發現還是 1.0.2,所以這裡需要做一些額外的設定工作。
[root@jeames openssl-1.1.1g]# more /etc/ld.so.conf
include ld.so.conf.d/*.conf
[root@jeames openssl-1.1.1g ]# echo “/usr/local/lib64/” >> /etc/ld.so.conf
[root@jeames openssl-1.1.1g]# ldconfig
再次使用openssl version 驗證版本就可以了,
如果不行,可以嘗試下面的方式,
依序執行(先備份舊版本,再從新版本安裝位置建立軟連線)
mv /usr/bin/openssl /usr/bin/openssl .old
ln -s /usr/local/openssl/bin/openssl /usr/bin/openssl
ln -s /usr/local/openssl/include/openssl /usr/include/openssl
echoopen “/usr/local/openssl/lib” >> /etc/ld.so.conf
ldconfig -v
4.MySQL8安裝後無法登陸
第一辦法:
1.用指令編輯/etc/my.cnf設定文件,即:vim /etc/my.cnf 或vi /etc/my.cnf
2.在[mysqld]下新增skip-grant-tables,然後儲存並退出
3.重啟mysql服務:service mysqld restart
4.更改root用戶名
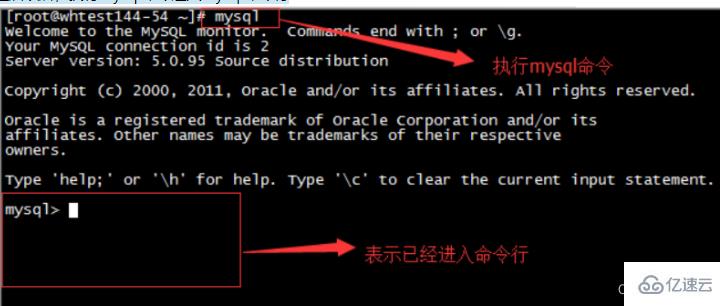
重啟以後,執行mysql指令進入mysql指令列
5.修改root使用者密碼,此處注意,有時候會報不允許修改,先flush privileges再執行即可
update mysql.user set authentication_string=password('root') where user='root' ; --5.7版本
flush privileges;
6.把/etc/my.cnf中的skip-grant-tables註解掉,然後重啟mysql,即:service mysqld restart
好了,下面就可以用root新的密碼登入了!
第二個方法:
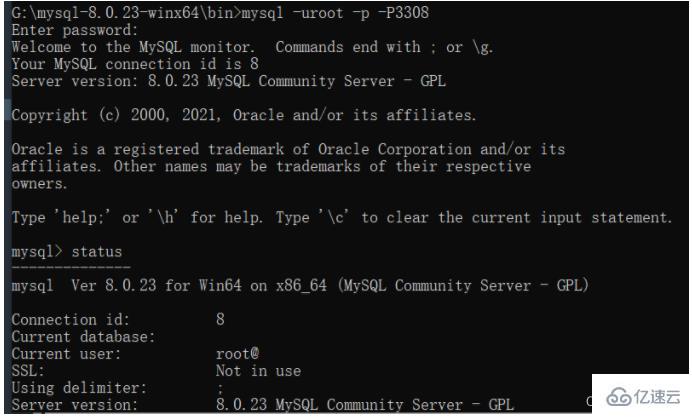
在mysql8系統下,適用下列方法(全路徑)
G:\mysql-8.0 .23-winx64\bin\mysqld --datadir=G:\mysql-8.0.23-winx64\data80323308 --console --skip-grant-tables --shared-memory

############################### ##########然後再開一個窗口,執行下面指令### cd G:\mysql-8.0.23-winx64\bin############### ######mysql> select user,host,authentication_string from mysql.user;### mysql> delete from mysql.user where user='root' ;### mysql> flush privileges; --記得刷新哈,如果提示無法建立### mysql> create user root@'%' identified with mysql_native_password by 'root';### mysql> grant all on ###.### to root@'%' with grant option;# ## mysql>; ### mysql> grant all on ###.### to root@'localhost' with grant option;### mysql> flush privileges;######
以上是MySQL安裝常見報錯怎麼處理的詳細內容。更多資訊請關注PHP中文網其他相關文章!

熱AI工具

Undresser.AI Undress
人工智慧驅動的應用程序,用於創建逼真的裸體照片

AI Clothes Remover
用於從照片中去除衣服的線上人工智慧工具。

Undress AI Tool
免費脫衣圖片

Clothoff.io
AI脫衣器

Video Face Swap
使用我們完全免費的人工智慧換臉工具,輕鬆在任何影片中換臉!

熱門文章
熱工具

記事本++7.3.1
好用且免費的程式碼編輯器

SublimeText3漢化版
中文版,非常好用

禪工作室 13.0.1
強大的PHP整合開發環境

Dreamweaver CS6
視覺化網頁開發工具

SublimeText3 Mac版
神級程式碼編輯軟體(SublimeText3)


 laravel入門實例
Apr 18, 2025 pm 12:45 PM
laravel入門實例
Apr 18, 2025 pm 12:45 PM
Laravel 是一款 PHP 框架,用於輕鬆構建 Web 應用程序。它提供一系列強大的功能,包括:安裝: 使用 Composer 全局安裝 Laravel CLI,並在項目目錄中創建應用程序。路由: 在 routes/web.php 中定義 URL 和處理函數之間的關係。視圖: 在 resources/views 中創建視圖以呈現應用程序的界面。數據庫集成: 提供與 MySQL 等數據庫的開箱即用集成,並使用遷移來創建和修改表。模型和控制器: 模型表示數據庫實體,控制器處理 HTTP 請求。
 MySQL和PhpMyAdmin:核心功能和功能
Apr 22, 2025 am 12:12 AM
MySQL和PhpMyAdmin:核心功能和功能
Apr 22, 2025 am 12:12 AM
MySQL和phpMyAdmin是強大的數據庫管理工具。 1)MySQL用於創建數據庫和表、執行DML和SQL查詢。 2)phpMyAdmin提供直觀界面進行數據庫管理、表結構管理、數據操作和用戶權限管理。
 MySQL與其他編程語言:一種比較
Apr 19, 2025 am 12:22 AM
MySQL與其他編程語言:一種比較
Apr 19, 2025 am 12:22 AM
MySQL与其他编程语言相比,主要用于存储和管理数据,而其他语言如Python、Java、C 则用于逻辑处理和应用开发。MySQL以其高性能、可扩展性和跨平台支持著称,适合数据管理需求,而其他语言在各自领域如数据分析、企业应用和系统编程中各有优势。
 laravel框架安裝方法
Apr 18, 2025 pm 12:54 PM
laravel框架安裝方法
Apr 18, 2025 pm 12:54 PM
文章摘要:本文提供了詳細分步說明,指導讀者如何輕鬆安裝 Laravel 框架。 Laravel 是一個功能強大的 PHP 框架,它 упростил 和加快了 web 應用程序的開發過程。本教程涵蓋了從系統要求到配置數據庫和設置路由等各個方面的安裝過程。通過遵循這些步驟,讀者可以快速高效地為他們的 Laravel 項目打下堅實的基礎。
 在MySQL中解釋外鍵的目的。
Apr 25, 2025 am 12:17 AM
在MySQL中解釋外鍵的目的。
Apr 25, 2025 am 12:17 AM
在MySQL中,外鍵的作用是建立表與表之間的關係,確保數據的一致性和完整性。外鍵通過引用完整性檢查和級聯操作維護數據的有效性,使用時需注意性能優化和避免常見錯誤。
 比較和對比Mysql和Mariadb。
Apr 26, 2025 am 12:08 AM
比較和對比Mysql和Mariadb。
Apr 26, 2025 am 12:08 AM
MySQL和MariaDB的主要區別在於性能、功能和許可證:1.MySQL由Oracle開發,MariaDB是其分支。 2.MariaDB在高負載環境中性能可能更好。 3.MariaDB提供了更多的存儲引擎和功能。 4.MySQL採用雙重許可證,MariaDB完全開源。選擇時應考慮現有基礎設施、性能需求、功能需求和許可證成本。
 SQL與MySQL:澄清兩者之間的關係
Apr 24, 2025 am 12:02 AM
SQL與MySQL:澄清兩者之間的關係
Apr 24, 2025 am 12:02 AM
SQL是一種用於管理關係數據庫的標準語言,而MySQL是一個使用SQL的數據庫管理系統。 SQL定義了與數據庫交互的方式,包括CRUD操作,而MySQL實現了SQL標準並提供了額外的功能,如存儲過程和触發器。
 yi框架用什麼軟件比較好 yi框架使用軟件推薦
Apr 18, 2025 pm 11:03 PM
yi框架用什麼軟件比較好 yi框架使用軟件推薦
Apr 18, 2025 pm 11:03 PM
文章首段摘要:在選擇開發 Yi 框架應用程序的軟件時,需要考慮多個因素。雖然原生移動應用程序開發工具(如 XCode 和 Android Studio)可以提供強大的控制和靈活性,但跨平台框架(如 React Native 和 Flutter)憑藉其編寫一次,即可部署到多個平台的優點而越來越受歡迎。對於剛接觸移動開發的開發者,低代碼或無代碼平台(如 AppSheet 和 Glide)可以快速輕鬆地構建應用程序。另外,雲服務提供商(如 AWS Amplify 和 Firebase)提供了全面的工具
