

SpringBoot整合Redis快取實作的方法

SpringBoot支援的快取元件
在SpringBoot中,資料的快取管理儲存依賴於Spring框架中cache相關的org.springframework.cache.Cache和org.springframework.cache.CacheManager快取管理器介面。
如果程式中沒有定義類型為CacheManager的Bean元件或是名為cacheResolver的CacheResolver快取解析器,SpringBoot會嘗試選擇啟用下列快取元件(依照指定的順序):
( 1)Generic
(2)JCache (JSR-107) (EhCache 3、Hazelcast、Infinispan等)
(3)EhCache 2.x
#(4)Hazelcast
(5)Infinispan
(6)Couchbase
(7)Redis
(8)Caffeine
(9)Simple
上面依照SpringBoot快取元件的載入順序,列舉了SpringBoot支援的9種快取元件,在專案中加入某個快取管理元件(例如Redis)後,SpringBoot專案會選擇並啟用對應的快取管理器。如果在專案中同時新增了多個快取元件,且沒有指定快取管理器或快取解析器(CacheManager或cacheResolver),那麼SpringBoot會依照上述順序在新增的多個快取元件中優先啟用排在前面的某個快取元件進行快取管理(例如,同時新增了Couchbase和Redis這兩個快取元件,那麼優先啟用Couchbase元件)。
在上一篇文章 SpringBoot快取管理(一) 預設快取管理 介紹的預設快取管理中,我們搭建的專案沒有新增任何快取管理元件,但是依舊實作了快取管理。這是因為開啟快取管理後,SpringBoot會按照上述快取元件順序查找有效的快取元件進行快取管理,如果沒有任何快取元件,就會預設使用最後一個Simple快取元件進行管理。 Simple快取組件是SpringBoot預設的快取管理元件,它預設使用記憶體中的ConcurrentMap進行快取存儲,所以在沒有添加任何第三方快取元件的情況下,依舊可以實現記憶體中的快取管理,但不推薦這種快取管理方式。
基於註解的Redis快取實作
在 SpringBoot快取管理(一) 預設快取管理 搭建的專案基礎上引入Redis快取元件,使用基於註解的方式講解SpringBoot整合Redis快取的具體實現。
(1)新增Spring Data Redis依賴啟動器
在pom.xml檔案中加入Spring Data Redis依賴啟動器:
<dependency>
  <groupId>org.springframework.boot</groupId>
  <artifactId>spring-boot-starter-data-redis</artifactId>
</dependency>
當我們新增Redis相關的依賴啟動器後,SpringBoot會使用RedisCacheConfigratioin作為自動配置類別進行快取相關的自動組裝類別(之前為預設的SimpleCacheConfiguration),容器中使用的快取管理器變成了RedisCacheManager(之前為預設為cacheManager),這個快取管理器創建的Cache為RedisCache,進而操控Redis進行資料的快取。
(2)Redis伺服器連線配置
在專案的全域設定檔application.properties中新增Redis資料庫的連線配置,範例程式碼如下:
# Redis服务器地址
spring.redis.host=127.0.0.1
# Redis服务器连接端口
spring.redis.port=6379
# Redis服务器连接密码(默认为空)
spring.redis.password=
(3)將CommentService類別中的方法進行修改
使用@Cacheable、@CachePut、@CacheEvict三個註解進行快取管理,分別進行快取儲存、快取更新及快取刪除等操作:
package com.hardy.springbootdatacache.service;

import com.hardy.springbootdatacache.entity.Comment;
import com.hardy.springbootdatacache.repository.CommentRepository;
import org.springframework.beans.factory.annotation.Autowired;
import org.springframework.cache.annotation.CacheEvict;
import org.springframework.cache.annotation.CachePut;
import org.springframework.cache.annotation.Cacheable;
import org.springframework.stereotype.Service;

import java.util.Optional;

/**
 * @Author: HardyYao
 * @Date: 2021/6/19
 */
@Service
public class CommentService {

    @Autowired
    private CommentRepository commentRepository;

    /**
     * 根据评论id查询评论
     * @Cacheable:将该方法的查询结果comment存放在SpringBoot默认缓存中
     * cacheNames:起一个缓存命名空间,对应缓存唯一标识
     * @param id
     * @return
     */
    @Cacheable(cacheNames = "comment", unless = "#result==null")
    public Comment findCommentById(Integer id){
        Optional<Comment> comment = commentRepository.findById(id);
        if(comment.isPresent()){
            Comment comment1 = comment.get();
            return comment1;
        }
        return null;
    }

    /**
     * 更新评论
     * @param comment
     * @return
     */
    @CachePut(cacheNames = "comment",key = "#result.id")
    public Comment updateComment(Comment comment) {
        commentRepository.updateComment(comment.getAuthor(), comment.getaId());
        return comment;
    }

    /**
     * 删除评论
     * @param comment_id
     */
    @CacheEvict(cacheNames = "comment")
    public void deleteComment(int comment_id) {
        commentRepository.deleteById(comment_id);
    }

}在上述程式碼中,使用了@Cacheable、@CachePut、@CacheEvict註解在資料查詢、資料更新及資料刪除方法上進行了快取管理。
其中,查詢快取@Cacheable註解中沒有標記key值,將會使用預設參數值comment_id作為key進行資料保存,在進行快取更新時必須使用相同的key;同樣,在使用查詢快取@Cacheable註解中,定義了 unless= "#result==null" 表示查詢結果為空則不進行快取。
(4)在CommentController類別中新增兩個介面
新增更新和刪除的介面:
package com.hardy.springbootdatacache.controller;

import com.hardy.springbootdatacache.entity.Comment;
import com.hardy.springbootdatacache.service.CommentService;
import org.springframework.beans.factory.annotation.Autowired;
import org.springframework.web.bind.annotation.RequestMapping;
import org.springframework.web.bind.annotation.RestController;

/**
 * @Author: HardyYao
 * @Date: 2021/6/19
 */
@RestController
public class CommentController {

    @Autowired
    private CommentService commentService;

    @RequestMapping(value = "/findCommentById")
    public Comment findCommentById(Integer id){
        Comment comment = commentService.findCommentById(id);
        return comment;
    }

    @RequestMapping(value = "/updateComment")
    public Comment updateComment(Comment comment){
        Comment oldComment = commentService.findCommentById(comment.getId());
        oldComment.setAuthor(comment.getAuthor());
        Comment comment1 = commentService.updateComment(oldComment);
        return comment1;
    }

    @RequestMapping(value = "/deleteComment")
    public void deleteComment(Integer id){
        commentService.deleteComment(id);
    }

}(5)基於註解的Redis查詢快取測試
在瀏覽器中輸入:http://localhost:8080/findCommentById?id=1 進行訪問:
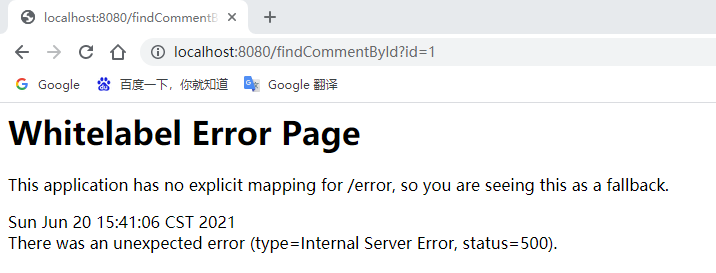
頁面報錯了,查看控制台信息:

根據報錯資訊可知:查詢使用者評論資訊Comment時執行了對應的SQL語句,但是在進行快取儲存時出現了IllegalArgumentException非法參數異常,提示訊息要求對應的Comment實體類別必須實作序列化(DefaultSerializer requires a Serializable payload but received an object of type [com.hardy.springbootdatacache.entity.Comment])。
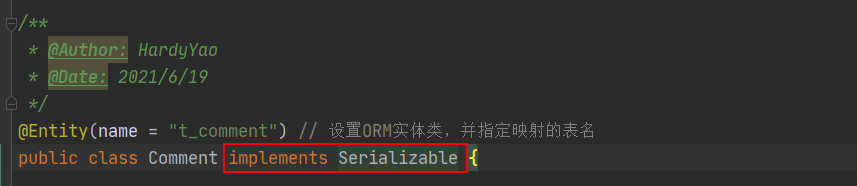
(6)將快取物件實作序列化
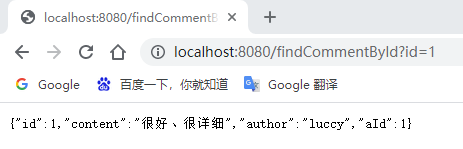
(7)重啟項目測試查詢快取
在浏览器中输入:http://localhost:8080/findCommentById?id=1 进行访问(连续访问三次):
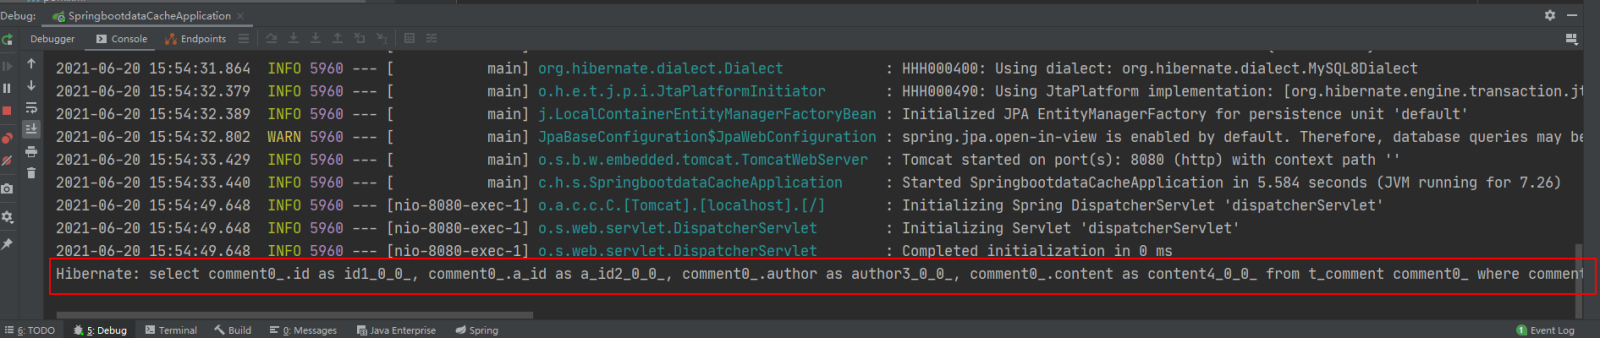
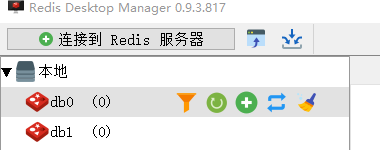
打开Redis客户端可视化工具Redis Desktop Manager,连接本地启用的Redis服务,查看具体的数据缓存效果:

执行findById()方法查询出的用户评论信息Comment正确存储到了Redis缓存库中名为comment的名称空间下。
其中缓存数据的唯一标识key值是以“名称空间comment::+参数值(comment::1)”的字符串形式体现的,而value值则是经过JDK默认序列格式化后的HEX格式存储。这种JDK默认序列格式化后的数据显然不方便缓存数据的可视化查看和管理,所以在实际开发中,通常会自定义数据的序列化格式,这方面的内容在后面会介绍。
(8)基于注解的Redis缓存更新测试
先通过浏览器访问:http://localhost:8080/updateComment?id=1&author=hardy;
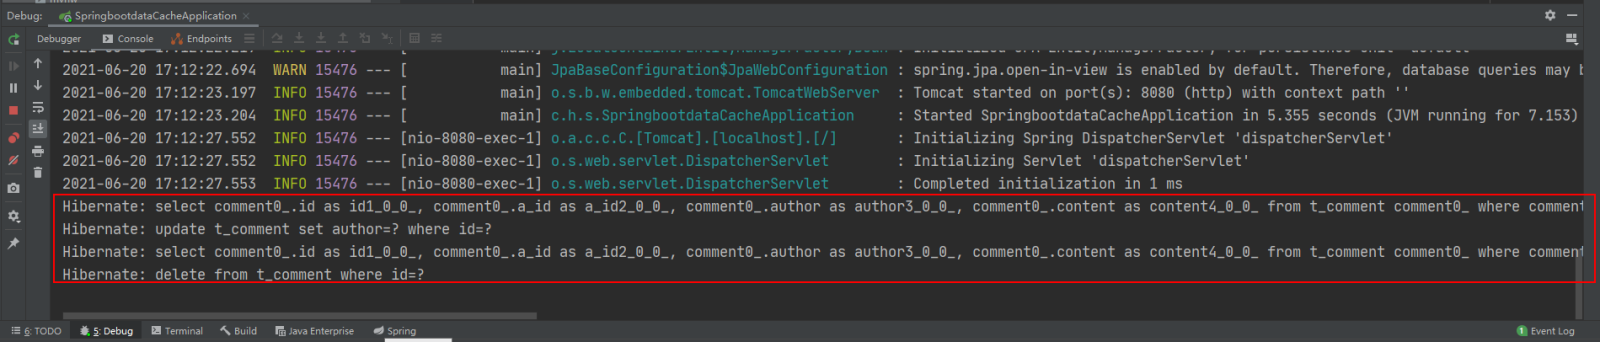
接着在访问:http://localhost:8080/findCommentById?id=1,查看浏览器返回信息及控制台打印信息:
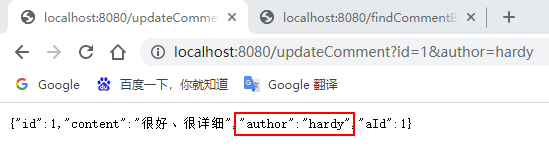


可以看到,执行updateComment()更新id为1的数据时执行了一条更新的SQL语句,后续调用findById()方法查询id为1的用户评论信息时没有再次执行查询的SQL语句,且浏览器返回了更新后的正确结果,这说明@CachePut缓存更新配置成功。
(9)基于注解的Redis缓存删除测试
通过浏览器访问:http://localhost:8080/deleteComment?id=1 和 http://localhost:8080/findCommentById?id=1
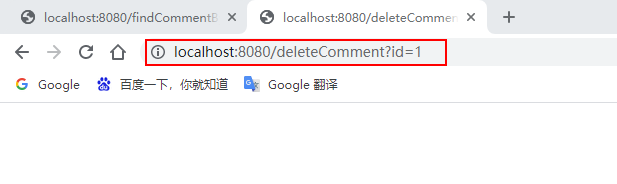
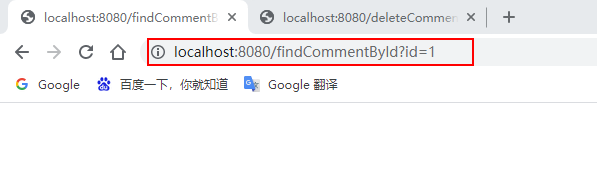
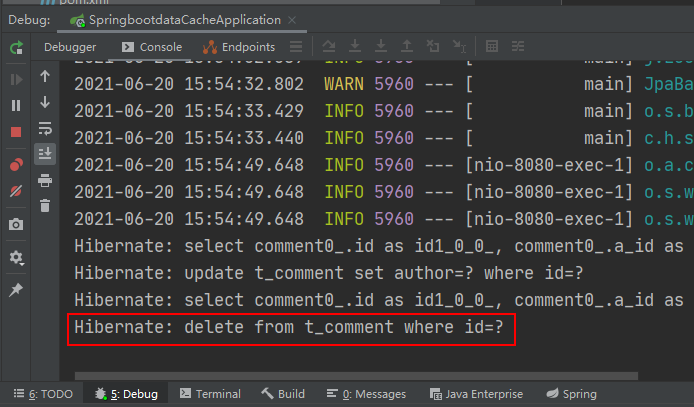
执行deleteComment()方法删除id为1的数据后查询结果为空,查看Redis缓存数据库:
可以看到之前存储的comment相关数据被删除掉了,这表明@CacheEvict注解缓存删除成功实现。
通过上面的案例可以看出:使用基于注解的Redis缓存实现只需要添加Redis依赖、并使用几个注解在对应的方法上,就可以实现对数据的缓存管理。
另外,还可以在SpringBoot全局配置文件中配置Redis有效期,示例代码如下:
# 对基于注解的Redis缓存数据统一设置有效期为1分钟,单位毫秒
spring.cache.redis.time-to-live=60000
上述代码中,在SpringBoot全局配置文件中添加了“spring.cache.redis.time-to-live”属性统一设置Redis数据的有效期(单位为毫秒),但这种方式不够灵活,因此一般不用。
基于API的Redis缓存实现
在SpringBoot整合Redis缓存实现中,除了基于注解形式的Redis缓存形式外,还有一种开发中更常用的方式——基于API的Redis缓存实现。这种基于API的Redis缓存实现,需要在某种业务需求下通过Redis提供的API调用相关方法实现数据缓存管理。同时,这种方法还可以手动管理缓存的有效期。
下面,通过Redis API的方式讲解SpringBoot整合Redis缓存的具体实现。
(1)使用Redis API进行业务数据缓存管理
在 com.hardy.springbootdatacache.service 包下新建一个 ApiCommentService:
package com.hardy.springbootdatacache.service;

import com.hardy.springbootdatacache.entity.Comment;
import com.hardy.springbootdatacache.repository.CommentRepository;
import org.springframework.beans.factory.annotation.Autowired;
import org.springframework.cache.annotation.CacheEvict;
import org.springframework.cache.annotation.CachePut;
import org.springframework.cache.annotation.Cacheable;
import org.springframework.data.redis.core.RedisTemplate;
import org.springframework.stereotype.Service;

import java.util.Optional;
import java.util.concurrent.TimeUnit;

/**
 * @Author: HardyYao
 * @Date: 2021/6/19
 */
@Service
public class ApiCommentService {

    @Autowired
    private CommentRepository commentRepository;

    @Autowired
    private RedisTemplate redisTemplate;

    /**
     * 根据评论id查询评论
     * @param id
     * @return
     */
    public Comment findCommentById(Integer id){
        // 先查Redis缓存
        Object o = redisTemplate.opsForValue().get("comment_" + id);
        if (o != null) {
            return (Comment) o;
        } else {
            // 如果缓存中没有,则从数据库查询
            Optional<Comment> dbComment = commentRepository.findById(id);
            if (dbComment.isPresent()) {
                Comment redisComment = dbComment.get();
                // 将查询结果存储到缓存中,并设置有效期为1天
                redisTemplate.opsForValue().set("comment_"+id, redisComment,1, TimeUnit.DAYS);
                return redisComment;
            } else {
                return null;
            }
        }

    }

    /**
     * 更新评论
     * @param comment
     * @return
     */
    public Comment updateComment(Comment comment) {
        commentRepository.updateComment(comment.getAuthor(), comment.getId());
        // 更新数据库数据后进行缓存更新
        redisTemplate.opsForValue().set("comment_" + comment.getId(), comment);
        return comment;
    }

    /**
     * 删除评论
     * @param comment_id
     */
    public void deleteComment(int comment_id) {
        commentRepository.deleteById(comment_id);
        // 删除数据库数据后进行缓存删除
        redisTemplate.delete("comment_" + comment_id);
    }

}(2)编写Web访问层ApiCommentController
package com.hardy.springbootdatacache.controller;

import com.hardy.springbootdatacache.entity.Comment;
import com.hardy.springbootdatacache.service.ApiCommentService;
import org.springframework.beans.factory.annotation.Autowired;
import org.springframework.web.bind.annotation.RequestMapping;
import org.springframework.web.bind.annotation.RestController;

/**
 * @Author: HardyYao
 * @Date: 2021/6/19
 */
@RestController
@RequestMapping("api")  // 改变请求路径
public class ApiCommentController {

    @Autowired
    private ApiCommentService apiCommentService;

    @RequestMapping(value = "/findCommentById")
    public Comment findCommentById(Integer id){
        Comment comment = apiCommentService.findCommentById(id);
        return comment;
    }

    @RequestMapping(value = "/updateComment")
    public Comment updateComment(Comment comment){
        Comment oldComment = apiCommentService.findCommentById(comment.getId());
        oldComment.setAuthor(comment.getAuthor());
        Comment comment1 = apiCommentService.updateComment(oldComment);
        return comment1;
    }

    @RequestMapping(value = "/deleteComment")
    public void deleteComment(Integer id){
        apiCommentService.deleteComment(id);
    }

}(3)测试基于API的Redis缓存实现
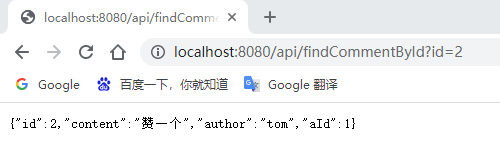
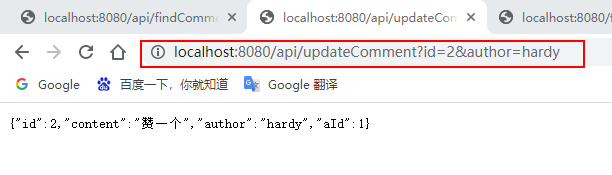
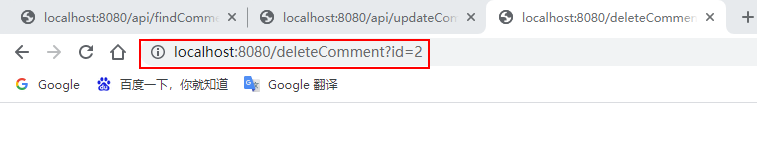
输入:http://localhost:8080/api/findCommentById?id=2(连续输入三次)、http://localhost:8080/api/updateComment?id=2&author=hardy、http://localhost:8080/deleteComment?id=2进行访问:
查看控制台訊息及Redis資料庫:

基於API的Redis快取實現的相關配置:基於API的Redis快取實作不需要@EnableCaching註解開啟基於註解的快取支持,所以這裡可以選擇將新增在專案啟動類別上的@EnableCaching註解進行刪除或註解,不會影響項目的功能實現。
以上是SpringBoot整合Redis快取實作的方法的詳細內容。更多資訊請關注PHP中文網其他相關文章!

熱AI工具

Undresser.AI Undress
人工智慧驅動的應用程序,用於創建逼真的裸體照片

AI Clothes Remover
用於從照片中去除衣服的線上人工智慧工具。

Undress AI Tool
免費脫衣圖片

Clothoff.io
AI脫衣器

Video Face Swap
使用我們完全免費的人工智慧換臉工具,輕鬆在任何影片中換臉!

熱門文章
熱工具

記事本++7.3.1
好用且免費的程式碼編輯器

SublimeText3漢化版
中文版,非常好用

禪工作室 13.0.1
強大的PHP整合開發環境

Dreamweaver CS6
視覺化網頁開發工具

SublimeText3 Mac版
神級程式碼編輯軟體(SublimeText3)


 redis集群模式怎麼搭建
Apr 10, 2025 pm 10:15 PM
redis集群模式怎麼搭建
Apr 10, 2025 pm 10:15 PM
Redis集群模式通過分片將Redis實例部署到多個服務器,提高可擴展性和可用性。搭建步驟如下:創建奇數個Redis實例,端口不同;創建3個sentinel實例,監控Redis實例並進行故障轉移;配置sentinel配置文件,添加監控Redis實例信息和故障轉移設置;配置Redis實例配置文件,啟用集群模式並指定集群信息文件路徑;創建nodes.conf文件,包含各Redis實例的信息;啟動集群,執行create命令創建集群並指定副本數量;登錄集群執行CLUSTER INFO命令驗證集群狀態;使
 redis數據怎麼清空
Apr 10, 2025 pm 10:06 PM
redis數據怎麼清空
Apr 10, 2025 pm 10:06 PM
如何清空 Redis 數據:使用 FLUSHALL 命令清除所有鍵值。使用 FLUSHDB 命令清除當前選定數據庫的鍵值。使用 SELECT 切換數據庫,再使用 FLUSHDB 清除多個數據庫。使用 DEL 命令刪除特定鍵。使用 redis-cli 工具清空數據。
 redis怎麼讀取隊列
Apr 10, 2025 pm 10:12 PM
redis怎麼讀取隊列
Apr 10, 2025 pm 10:12 PM
要從 Redis 讀取隊列,需要獲取隊列名稱、使用 LPOP 命令讀取元素,並處理空隊列。具體步驟如下:獲取隊列名稱:以 "queue:" 前綴命名,如 "queue:my-queue"。使用 LPOP 命令:從隊列頭部彈出元素並返回其值,如 LPOP queue:my-queue。處理空隊列:如果隊列為空,LPOP 返回 nil,可先檢查隊列是否存在再讀取元素。
 centos redis如何配置Lua腳本執行時間
Apr 14, 2025 pm 02:12 PM
centos redis如何配置Lua腳本執行時間
Apr 14, 2025 pm 02:12 PM
在CentOS系統上,您可以通過修改Redis配置文件或使用Redis命令來限制Lua腳本的執行時間,從而防止惡意腳本佔用過多資源。方法一:修改Redis配置文件定位Redis配置文件:Redis配置文件通常位於/etc/redis/redis.conf。編輯配置文件:使用文本編輯器(例如vi或nano)打開配置文件:sudovi/etc/redis/redis.conf設置Lua腳本執行時間限制:在配置文件中添加或修改以下行,設置Lua腳本的最大執行時間(單位:毫秒)
 redis過期策略怎麼設置
Apr 10, 2025 pm 10:03 PM
redis過期策略怎麼設置
Apr 10, 2025 pm 10:03 PM
Redis數據過期策略有兩種:定期刪除:定期掃描刪除過期鍵,可通過 expired-time-cap-remove-count、expired-time-cap-remove-delay 參數設置。惰性刪除:僅在讀取或寫入鍵時檢查刪除過期鍵,可通過 lazyfree-lazy-eviction、lazyfree-lazy-expire、lazyfree-lazy-user-del 參數設置。
 redis命令行怎麼用
Apr 10, 2025 pm 10:18 PM
redis命令行怎麼用
Apr 10, 2025 pm 10:18 PM
使用 Redis 命令行工具 (redis-cli) 可通過以下步驟管理和操作 Redis:連接到服務器,指定地址和端口。使用命令名稱和參數向服務器發送命令。使用 HELP 命令查看特定命令的幫助信息。使用 QUIT 命令退出命令行工具。
 redis計數器怎麼實現
Apr 10, 2025 pm 10:21 PM
redis計數器怎麼實現
Apr 10, 2025 pm 10:21 PM
Redis計數器是一種使用Redis鍵值對存儲來實現計數操作的機制,包含以下步驟:創建計數器鍵、增加計數、減少計數、重置計數和獲取計數。 Redis計數器的優勢包括速度快、高並發、持久性和簡單易用。它可用於用戶訪問計數、實時指標跟踪、遊戲分數和排名以及訂單處理計數等場景。
 如何優化debian readdir的性能
Apr 13, 2025 am 08:48 AM
如何優化debian readdir的性能
Apr 13, 2025 am 08:48 AM
在Debian系統中,readdir系統調用用於讀取目錄內容。如果其性能表現不佳,可嘗試以下優化策略:精簡目錄文件數量:盡可能將大型目錄拆分成多個小型目錄,降低每次readdir調用處理的項目數量。啟用目錄內容緩存:構建緩存機制,定期或在目錄內容變更時更新緩存,減少對readdir的頻繁調用。內存緩存(如Memcached或Redis)或本地緩存(如文件或數據庫)均可考慮。採用高效數據結構:如果自行實現目錄遍歷,選擇更高效的數據結構(例如哈希表而非線性搜索)存儲和訪問目錄信
