SpringBoot整合Redis操作API的方法
SpringDataRedis呼叫Redis底層解讀
在SpringBoot2.X之前還是直接使用的官方推薦的Jedis連接的Redis
#在2 .X之後換為了lettuce

Jedis:採用直接連接,多線程操作不安全,如果想要避免不安全,使用Jedis pool連接池;BIO
lettuce:底層採用Netty,實例可以在多個線程之間共享,不存在線程不安全的情況,可以減少執行緒數量;NIO
SpringBoot整合Redis(原始碼分析)
SpringBoot所有的設定類,都有一個自動配置類別
自動配置類別都會綁定一個properties檔案
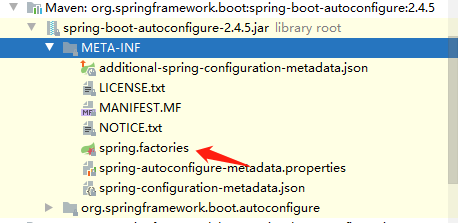
在原始碼中找到Spring.factories

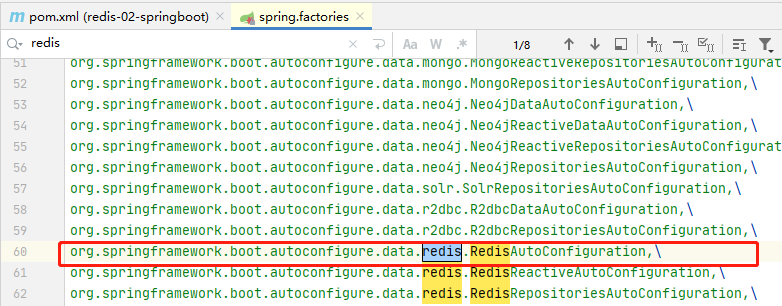
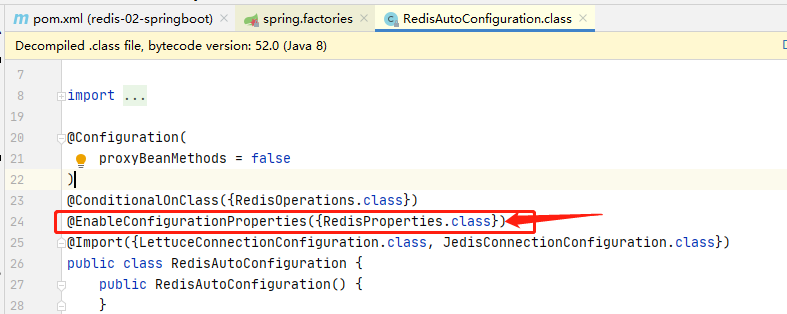
#在裡面搜尋redis,找到AutoConfiguration


- #按ctrl 點選進入類別

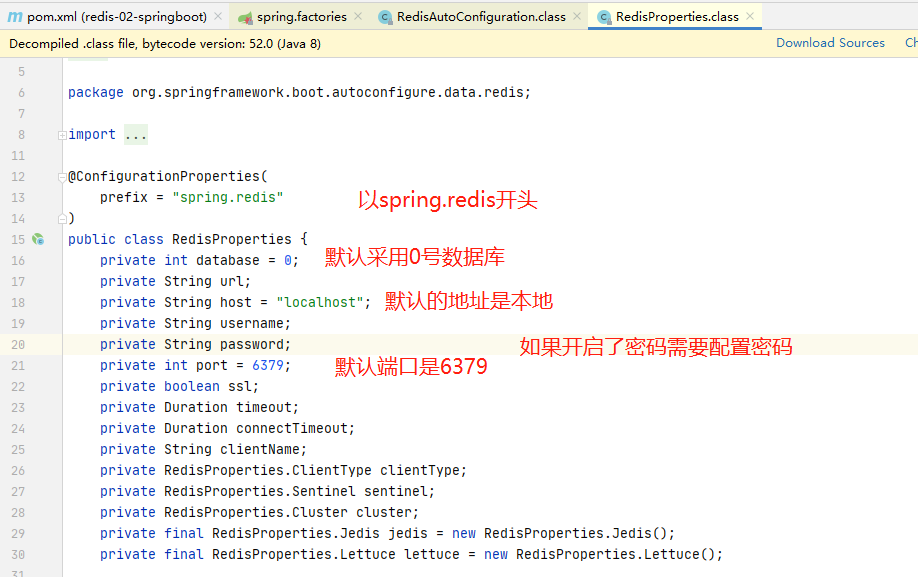
- #找到redisproperties.class

- ctrl 點選進入

- 裡面就是全部的redis相關配置了,先簡單看一下,其他的後面再說
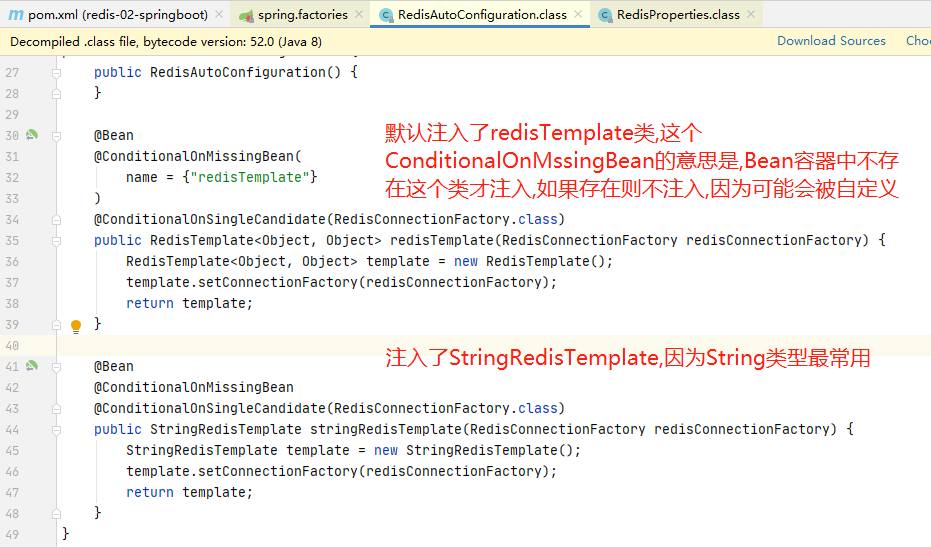
- 預設注入的Bean

- 但是預設的redisTemplate是存在一些問題的,他的key是Object類型的,但是我們期望的一般key都是String類型的這就需要強制類型轉換了,所以上面提出了,可以自己定義RedisTemplate
-
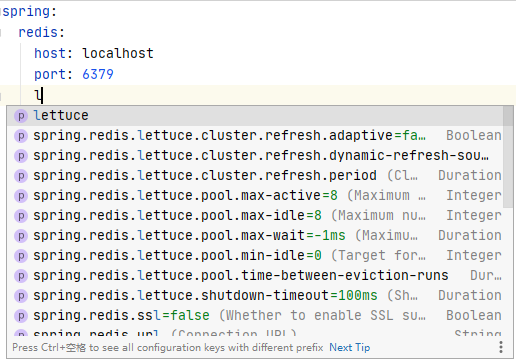
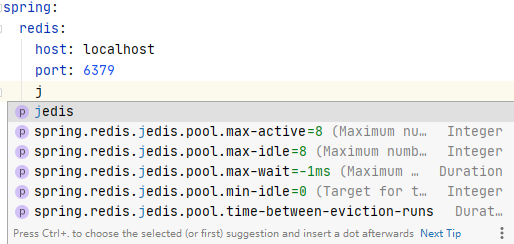
#在配置配置文件時,如果需要配置連接池,就採用lettuce的,不要直接配置Redis的,配置了也不生效
- 查看注入時的RedisConnectionFactory

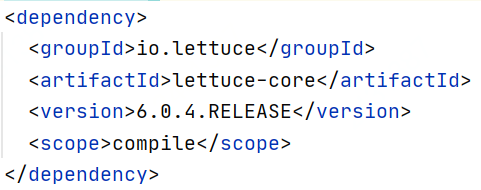
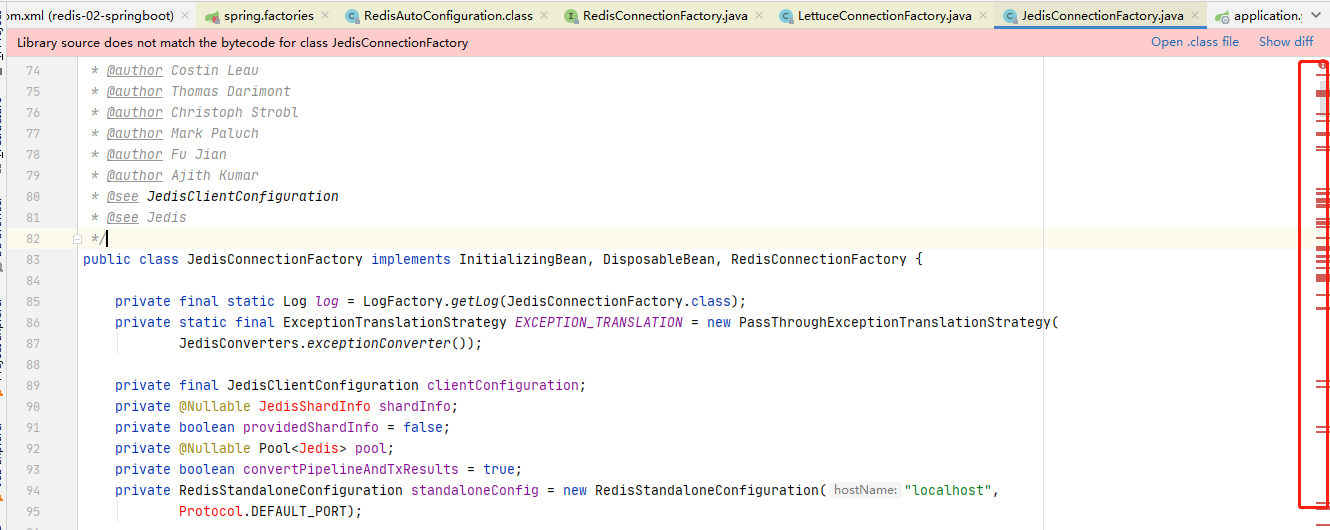
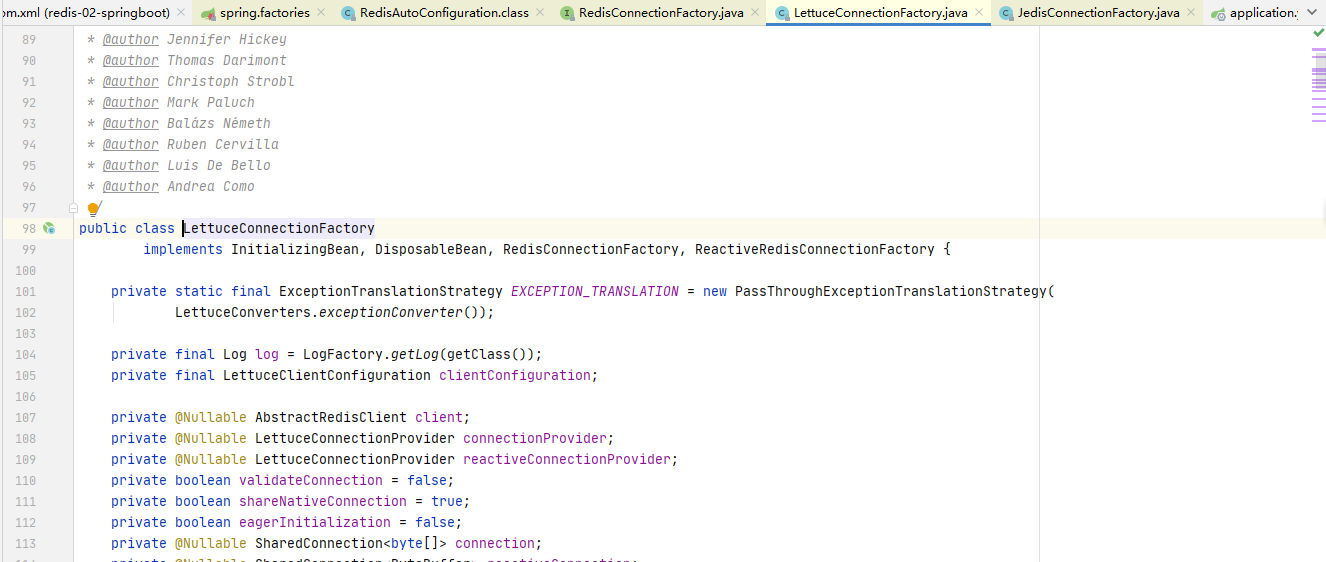
##他是存在兩個子類別的,分別是JedisConnectionFactory和LettuceConnectionFactory

因為JedisConnectionFactory類別所依賴的很多類別都不存在,所以不能直接使用它

#全都是爆紅線的,而lettuceConnectionFactory中的依賴就是全部存在的

所以所以配置時,採用lettuce的
- 不要直接設定jedis的

- yml
- 拷貝properties建立一個yml格式的設定檔, 我還是很喜歡yml的

- Maven
在项目创建的时候选择,如果没有选择就添加
登入後複製<dependency> <groupId>org.springframework.boot</groupId> <artifactId>spring-boot-starter-data-redis</artifactId> </dependency>登入後複製 #編寫測試
#編寫測試 開啟SpringBoot預設建立的測試類別
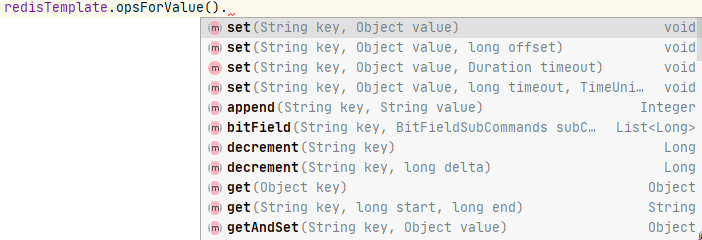
- ############redisTemp操作資料類型的方法都是以opsFor開頭,後面是類型############ ###############例如opsForValue就是操作字串的#############然後後面的應用程式就跟前面寫的API一樣了###

常用的操作可以直接点就可以了
关于事物的
spring:
  redis:
    host: localhost
port: 6379redisTemplate.unwatch();
redisTemplate.watch("key");
redisTemplate.multi();
redisTemplate.discard();
redisTemplate.exec();关于数据库的操作需要获取链接后使用连接对象操作
RedisConnection connection = redisTemplate.getConnectionFactory().getConnection();connection.flushAll();connection.flushDb();connection.close();
测试代码及其执行结果
package co.flower.redis02springboot;import org.junit.jupiter.api.Test;import org.springframework.beans.factory.annotation.Autowired;import org.springframework.boot.test.context.SpringBootTest;import org.springframework.data.redis.connection.RedisConnection;import org.springframework.data.redis.core.RedisTemplate;

@SpringBootTestclass Redis02SpringbootApplicationTests {/** * 我居然直接就指定了泛型 RedisTemplate<String,Object>结果就直接报错了,删除泛型后成功     */@Autowiredprivate RedisTemplate redisTemplate;

    @Testvoid contextLoads() {// 英文测试redisTemplate.opsForValue().set("name","xiaojiejie");
        System.out.println(redisTemplate.opsForValue().get("name"));// 中文测试redisTemplate.opsForValue().set("name","小姐姐");
        System.out.println(redisTemplate.opsForValue().get("name"));
    }

}

执行结果,SpringBoot的启动加载和结束销毁没有粘贴/***SpringBootStart****/xiaojiejie
小姐姐/***SpringBootStop*****/以上是SpringBoot整合Redis操作API的方法的詳細內容。更多資訊請關注PHP中文網其他相關文章!

熱AI工具

Undresser.AI Undress
人工智慧驅動的應用程序,用於創建逼真的裸體照片

AI Clothes Remover
用於從照片中去除衣服的線上人工智慧工具。

Undress AI Tool
免費脫衣圖片

Clothoff.io
AI脫衣器

Video Face Swap
使用我們完全免費的人工智慧換臉工具,輕鬆在任何影片中換臉!

熱門文章

熱工具

記事本++7.3.1
好用且免費的程式碼編輯器

SublimeText3漢化版
中文版,非常好用

禪工作室 13.0.1
強大的PHP整合開發環境

Dreamweaver CS6
視覺化網頁開發工具

SublimeText3 Mac版
神級程式碼編輯軟體(SublimeText3)
 redis集群模式怎麼搭建
Apr 10, 2025 pm 10:15 PM
Redis集群模式通過分片將Redis實例部署到多個服務器,提高可擴展性和可用性。搭建步驟如下:創建奇數個Redis實例,端口不同;創建3個sentinel實例,監控Redis實例並進行故障轉移;配置sentinel配置文件,添加監控Redis實例信息和故障轉移設置;配置Redis實例配置文件,啟用集群模式並指定集群信息文件路徑;創建nodes.conf文件,包含各Redis實例的信息;啟動集群,執行create命令創建集群並指定副本數量;登錄集群執行CLUSTER INFO命令驗證集群狀態;使
 redis數據怎麼清空
Apr 10, 2025 pm 10:06 PM
如何清空 Redis 數據:使用 FLUSHALL 命令清除所有鍵值。使用 FLUSHDB 命令清除當前選定數據庫的鍵值。使用 SELECT 切換數據庫,再使用 FLUSHDB 清除多個數據庫。使用 DEL 命令刪除特定鍵。使用 redis-cli 工具清空數據。
 redis怎麼讀取隊列
Apr 10, 2025 pm 10:12 PM
要從 Redis 讀取隊列,需要獲取隊列名稱、使用 LPOP 命令讀取元素,並處理空隊列。具體步驟如下:獲取隊列名稱:以 "queue:" 前綴命名,如 "queue:my-queue"。使用 LPOP 命令:從隊列頭部彈出元素並返回其值,如 LPOP queue:my-queue。處理空隊列:如果隊列為空,LPOP 返回 nil,可先檢查隊列是否存在再讀取元素。
 centos redis如何配置Lua腳本執行時間
Apr 14, 2025 pm 02:12 PM
在CentOS系統上,您可以通過修改Redis配置文件或使用Redis命令來限制Lua腳本的執行時間,從而防止惡意腳本佔用過多資源。方法一:修改Redis配置文件定位Redis配置文件:Redis配置文件通常位於/etc/redis/redis.conf。編輯配置文件:使用文本編輯器(例如vi或nano)打開配置文件:sudovi/etc/redis/redis.conf設置Lua腳本執行時間限制:在配置文件中添加或修改以下行,設置Lua腳本的最大執行時間(單位:毫秒)
 redis命令行怎麼用
Apr 10, 2025 pm 10:18 PM
使用 Redis 命令行工具 (redis-cli) 可通過以下步驟管理和操作 Redis:連接到服務器,指定地址和端口。使用命令名稱和參數向服務器發送命令。使用 HELP 命令查看特定命令的幫助信息。使用 QUIT 命令退出命令行工具。
 redis計數器怎麼實現
Apr 10, 2025 pm 10:21 PM
Redis計數器是一種使用Redis鍵值對存儲來實現計數操作的機制,包含以下步驟:創建計數器鍵、增加計數、減少計數、重置計數和獲取計數。 Redis計數器的優勢包括速度快、高並發、持久性和簡單易用。它可用於用戶訪問計數、實時指標跟踪、遊戲分數和排名以及訂單處理計數等場景。
 redis過期策略怎麼設置
Apr 10, 2025 pm 10:03 PM
Redis數據過期策略有兩種:定期刪除:定期掃描刪除過期鍵,可通過 expired-time-cap-remove-count、expired-time-cap-remove-delay 參數設置。惰性刪除:僅在讀取或寫入鍵時檢查刪除過期鍵,可通過 lazyfree-lazy-eviction、lazyfree-lazy-expire、lazyfree-lazy-user-del 參數設置。
 如何優化debian readdir的性能
Apr 13, 2025 am 08:48 AM
在Debian系統中,readdir系統調用用於讀取目錄內容。如果其性能表現不佳,可嘗試以下優化策略:精簡目錄文件數量:盡可能將大型目錄拆分成多個小型目錄,降低每次readdir調用處理的項目數量。啟用目錄內容緩存:構建緩存機制,定期或在目錄內容變更時更新緩存,減少對readdir的頻繁調用。內存緩存(如Memcached或Redis)或本地緩存(如文件或數據庫)均可考慮。採用高效數據結構:如果自行實現目錄遍歷,選擇更高效的數據結構(例如哈希表而非線性搜索)存儲和訪問目錄信








 #編寫測試
#編寫測試