1、概述
redis 叢集可以在一組 redis 節點之間實現高可用性和 sharding。在叢集中會有 1 個 master 和多個 slave 節點。當 master 節點失效時,應選出一個 slave 節點作為新的 master。然而 redis 本身(包括它的很多客戶端)沒有實現自動故障發現並進行主備切換的能力,需要外部的監控方案來實現自動故障恢復。
redis sentinel 是官方推薦的高可用性解決方案。它是 redis 叢集的監控管理工具,可提供節點監控、通知、自動故障復原和用戶端設定發現服務。
2、遇到的問題
1、docker host網路
docker使用host網路時對於windows 、mac不生效(沒找到解決方案),最後放棄了windows 使用centos部署叢集。
2、不使用host網路的情況下sentinel 連線問題
不使用host網路的情況下連接sentinel叢集時可以指定主節點連接埠故可以正常聯通, 但在主節點故障時sentinel 從主節點取得的ip 是容器內的虛擬ip 導致叢集無法正常連線。

3、建造流程
#1、目錄結構


2、sentinel 設定檔
1、sentinel1.conf
#端口号
port 26379
dir /tmp
# mymaster:自定义集群名,2:投票数量必须2个sentinel才能判断主节点是否失败
sentinel monitor mymaster <ip> <port> 2
# 指的是超过5000秒,且没有回复,则判定主节点不可达
sentinel down-after-milliseconds mymaster 5000
# 表示在故障转移的时候最多有numslaves在同步更新新的master
sentinel parallel-syncs mymaster 1
# 故障转移超时时间
sentinel failover-timeout mymaster 5000
2、sentinel2.conf
#端口号
port 26380
dir /tmp
# mymaster:自定义集群名,2:投票数量必须2个sentinel才能判断主节点是否失败
sentinel monitor mymaster <ip> <port> 2
# 指的是超过5000秒,且没有回复,则判定主节点不可达
sentinel down-after-milliseconds mymaster 5000
# 表示在故障转移的时候最多有numslaves在同步更新新的master
sentinel parallel-syncs mymaster 1
# 故障转移超时时间
sentinel failover-timeout mymaster 5000
3、sentinel3.conf
#端口号
port 26381
dir /tmp
# mymaster:自定义集群名,2:投票数量必须2个sentinel才能判断主节点是否失败
sentinel monitor mymaster <ip> <port> 2
# 指的是超过5000秒,且没有回复,则判定主节点不可达
sentinel down-after-milliseconds mymaster 5000
# 表示在故障转移的时候最多有numslaves在同步更新新的master
sentinel parallel-syncs mymaster 1
# 故障转移超时时间
sentinel failover-timeout mymaster 5000
3、docker-compose.yml
version: '2'
services:
 master:
 image: redis:4.0
 restart: always
 container_name: redis-master
 #使用主机网络
 network_mode: "host"
 command: redis-server --port 16379

 slave1:
 image: redis:4.0
 restart: always
 container_name: redis-slave-1
 network_mode: "host"
 # 指定端口并指定master ip 端口
 command: redis-server --port 16380 --slaveof <master ip> 16379

 slave2:
 image: redis:4.0
 restart: always
 container_name: redis-slave-2
 network_mode: "host"
 command: redis-server --port 16381 --slaveof <master ip> 16379

 sentinel1:
 image: redis:4.0
 restart: always
 container_name: redis-sentinel-1
 network_mode: "host"
 # 指定sentinel文件位置
 command: redis-sentinel /usr/local/etc/redis/sentinel.conf
 # 使用数据卷映射文件到指定sentinel位置
 volumes:
  - ./sentinel/sentinel1.conf:/usr/local/etc/redis/sentinel.conf

 sentinel2:
 image: redis:4.0
 restart: always
 container_name: redis-sentinel-2
 network_mode: "host"
 command: redis-sentinel /usr/local/etc/redis/sentinel.conf
 volumes:
  - ./sentinel/sentinel2.conf:/usr/local/etc/redis/sentinel.conf

 sentinel3:
 image: redis:4.0
 restart: always
 container_name: redis-sentinel-3
 network_mode: "host"
 command: redis-sentinel /usr/local/etc/redis/sentinel.conf
 volumes:
  - ./sentinel/sentinel3.conf:/usr/local/etc/redis/sentinel.conf
4、使用centos 部署叢集測試效果
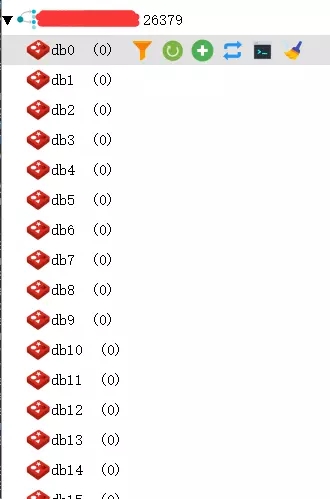
1、測試透過sentinel1連接叢集

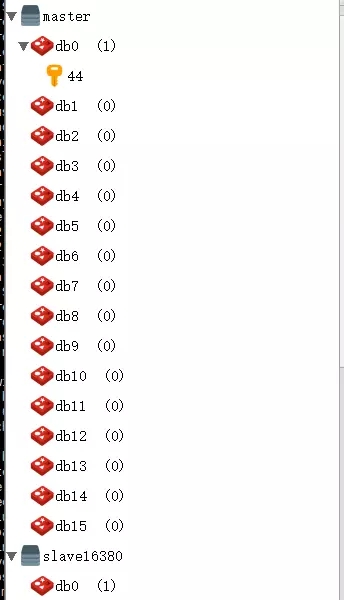
2、測試主節點子節點資料同步


#3、關閉master查看主備切換

sentinel 正常聯通

#主節點從16379 切換到16381

以上是基於docker如何建構redis-sentinel集群的詳細內容。更多資訊請關注PHP中文網其他相關文章!


