lufylegend是一個HTML5開源引擎,它實現了利用仿ActionScript3.0的語法進行HTML5的開發,包含了LSprite,LBitmapData,LBitmap,LLoader,LURLLoader,LTextField,LEvent等多個AS開發人員熟悉的類,支援Google Chrome ,Firefox,Opera,IE9,IOS,Android等多種熱門環境。 利用lufylegend可以輕鬆的使用物件導向編程,並且可以配合Box2dWeb製作實體遊戲, 另外它還內建了LTweenLite緩動類別等非常實用的功能, 現在開始使用它吧,它可以讓你更快的進入HTML5的世界!
什麼是捲軸
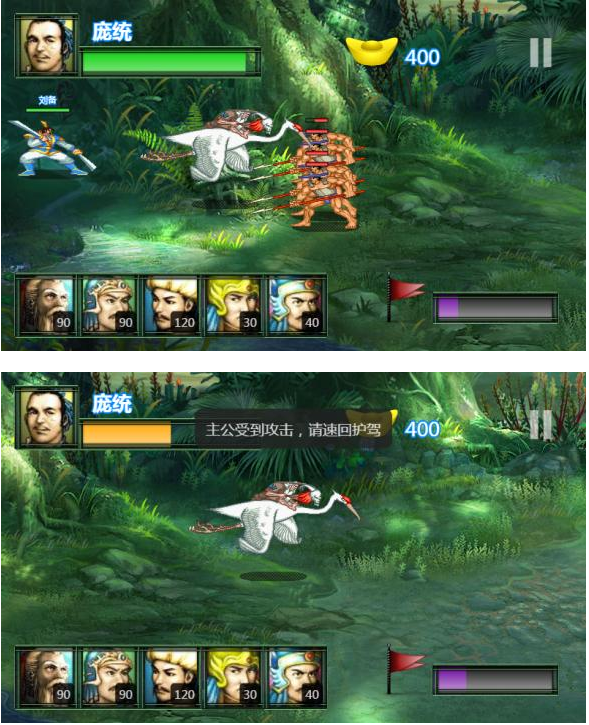
玩過RPG或橫版格鬥的同學應該知道,人物走到螢幕中央後,由於地圖過大,地圖會進行移動,人物則相對靜止不動。這個就是傳說中的捲軸。例如下圖是我的遊戲「三國戰線」裡的捲軸:

有了以上的簡介,大家應該明白了什麼是捲軸。說穿了就是鏡頭跟隨主角的效果。接下來,我們就利用lufylegend.js遊戲引擎來實現這個效果。
原理介紹
其實實現這個效果的關鍵在於如何使人物靜止,何時移動地圖,以及如何移動地圖。在探究這個兩個問題之前,我們先創造一個結構良好的舞台圖層(及一個LSprite物件),以便以後的操作。舞台結構如下:
- 舞台層
|
- 地圖圖層
|
- 人物層
可見舞台層就是地圖層和人物層的父元素,而人物層在地圖圖層上方,畢竟人物是站在地圖上的。我們知道,子對象的座標是相對於父對象的,所以移動父對象,子對象會跟著移動。這點要先弄明白。
如何使人物靜止呢?何時移動地圖呢?如何移動地圖呢?也許你會想,先用if(xxx){...}來判斷人物的座標是否達到螢幕中央,如果是,則移動地圖對象,如果不是則移動人物對象。這麼做的話就麻煩了。其實有更簡單的方法:
捲軸/不捲軸時,我們的人物都是在移動,但是如果人物達到屏幕中央時,要開始捲軸了,我們的舞台層就進行與人物速度方向相反、大小相同的移動,那麼人物的相對於canvas畫布的位移就抵消了,看上去就是靜止的,而地圖就跟著父類向反方向移動。這類似於拍古裝電影,拍兩個人一邊騎馬一邊談話。如果人和馬在前進,攝影機以相同的速度跟拍,那麼得到的畫面就是人物並沒有移動,而人物背後風景是在移動的。
接下來看實現程式碼。
實作程式碼
以下是含有詳細註解的程式碼:
XML/HTML Code複製內容到剪貼簿
- LInit(30, 'mydemo', 700, 480, main);
- // 移動方向,null代表沒動
-
var direction = null;
// 小鳥,舞臺層,背景物件 -
var bird, stageLayer, bg; -
// 每次移動的長度 -
var -
step = 5; 5;
- function main () {
- // 資源清單
- var loadList = [
- {name : 'bird', path : './bird.png'},
- {name : 'bg', path : './bg.jpg'}
- ];
- // 載入資源
- LLoadManage.load(loadList, null, demoInit);
- }
- function demoInit (result) {
- // 初始化舞臺層
-
stageLayer = new LSprite();
addChild(stageLayer);
-
// 加入背景
-
- bg = new LBitmap(new LBitmapData(result['b'b]);
bg.y-
= -100;
stageLayer.addChild(bg);
- // 加入小鳥
-
= new LBitmap(new LBitmapData(result['bird]));
bird.x
- = 100; ; >
-
bird.y = 150; ; >
-
stageLayer.addChild(bird);
-
// 新增滑鼠按下事件
-
stageLayer.addEventListener(LMouseEvent.MOUSE_DOWN, onDown);
-
// 新增滑鼠彈起事件
-
stageLayer.addEventListener(LMouseEvent.MOUSE_UP, onUp);
-
// 增加時間軸事件
-
stageLayer.addEventListener(LEvent.ENTER_FRAME, onFrame);
-
}
-
function onDown (e) {
-
/** 根據點選位置設定移動方向 */
-
if (e.offsetX > LGlobal.width / 2) {
-
direction = 'right'
; >
- } else {
-
direction = 'left';
;
- }
- }
- function onUp () {
- // Set the direction to no direction, which means no movement
-
direction = null;
- }
- function onFrame () {
- var _step, minX, maxX;
- /**moving bird*/
-
if (direction == 'right') {
-
_step = step;
-
} else if (direction == 'left') {
-
_step = -step;
- } else {
- return;
- }
- bird.x = _step;
- /**Control the bird’s movement range*/
-
minX = 0,
-
maxX = bg.getWidth() - bird.getWidth();
-
if (bird.x < minX) {
- bird.x = minX;
- }else if (bird.x > maxX) {
-
bird.x = maxX;
- }
- /**mobile stage*/
-
stageLayer.x = LGlobal.width / 2 - bird.x;
- /**Control the stage movement range*/
-
minX = LGlobal.width - stageLayer.getWidth(),
-
maxX = 0;
-
if (stageLayer.x < minX) {
- stageLayer.x = minX;
- }else if (stageLayer.x > maxX) {
-
stageLayer.x = maxX;
- }
- }
Running results:

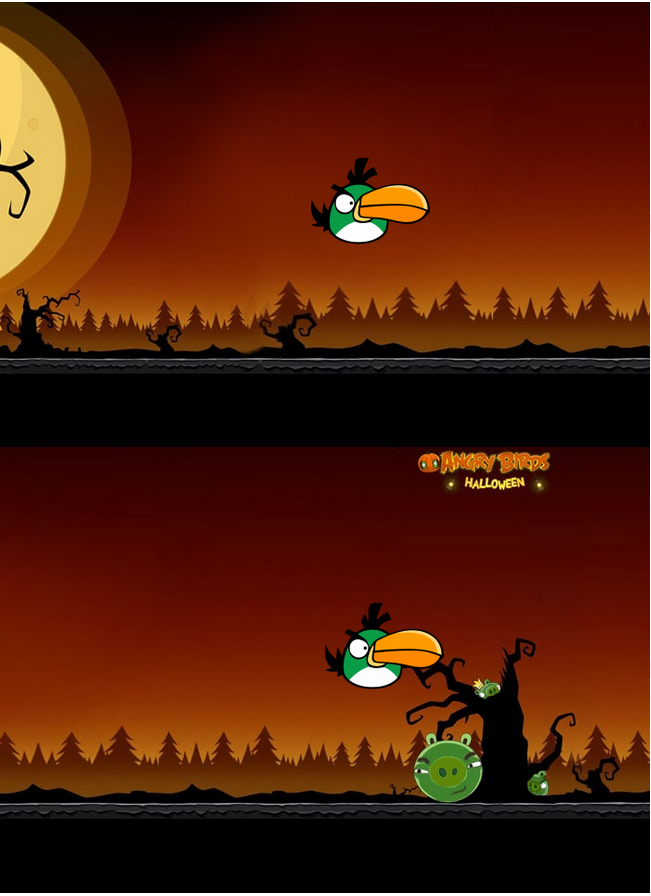
You can go here to view the online demo. Click on the left half of the screen to control the bird to move to the left, click on the right half of the screen to control the bird to move to the right. Once the bird reaches the center of the screen, start the reel.


