

Nginx超簡單教程,入門看這篇就夠了
一Nginx簡介
#1.1 什麼是Nginx
Nginx是一個高效能的http和反向代理伺服器,其特點是佔用記憶體小,並發能力強。 Nginx專為效能最佳化而開發,效能是其最重要的考量,能經受高負載的考驗,有報告指出能支援高達50000個並發連線數。
1.2 反向代理
正向代理程式:在瀏覽器中設定代理伺服器,透過代理伺服器進行網際網路存取。
反向代理:將請求傳送到反向代理伺服器,由反向代理伺服器去選擇目標伺服器取得資料後,再傳回給客戶端,此時反向代理伺服器和目標伺服器對外就是一個伺服器,暴漏的是代理伺服器位址。
1.3 負載平衡
如果請求數過大,單一伺服器解決不了,我們增加伺服器的數量,然後將請求分發到各個伺服器上,將原先請求集中到單一伺服器的情況改為請求分發到多個伺服器上,就是負載平衡。
1.4 動靜分離
為了加快伺服器的解析速度,可以把動態頁面和靜態頁面交給不同的伺服器來解析,加快解析速度,降低原來單一伺服器的壓力。
二Nginx的安裝
Nginx需要幾個依賴套件,分別是pcre,openssl,zlib,在安裝nginx之前需要先安裝這幾個相依性。
2.1 安裝pcre依賴
#使用指令下載
pcre壓縮包
1wget http://downloads.sourceforge.net/project/pcre/pcre/8.37/pcre-8.37.tar.gz
解壓縮壓縮檔案
1tar -xvf pcre-8.37.tar.gz
##進入解壓縮後的名錄,執行以下指令
1./configure
#使用以下指令進行編譯安裝
##1make && make install
登入後複製
- 查看安裝的
- pcre
版本號
</li></ol><div class="code" style="position:relative; padding:0px; margin:0px;"><pre class='brush:php;toolbar:false;'>1pcre-config --version</pre><div class="contentsignin">登入後複製</div></div><h3 id="span-style-font-size-inherit-line-height-inherit-display-inline-block-font-weight-normal-background-rgb-color-rgb-padding-px-px-px-border-top-right-radius-px-border-top-left-radius-px-margin-right-px-安装openssl-zlib等依赖-span-span-style-display-inline-block-vertical-align-bottom-border-bottom-px-solid-rgb-border-right-px-solid-transparent-span"><span style="font-size: inherit;line-height: inherit;display: inline-block;font-weight: normal;background: rgb(239, 112, 96);color: rgb(255, 255, 255);padding: 3px 10px 1px;border-top-right-radius: 3px;border-top-left-radius: 3px;margin-right: 3px;">2.2 安装openssl,zlib等依赖</span><span style="display: inline-block;vertical-align: bottom;border-bottom: 36px solid rgb(239, 235, 233);border-right: 20px solid transparent;"> </span></h3><div class="code" style="position:relative; padding:0px; margin:0px;"><pre class='brush:php;toolbar:false;'>1yum -y install make zlib zlib-devel gcc-c++ libtool openssl openssl-devel</pre><div class="contentsignin">登入後複製</div></div><h3 id="span-style-font-size-inherit-line-height-inherit-display-inline-block-font-weight-normal-background-rgb-color-rgb-padding-px-px-px-border-top-right-radius-px-border-top-left-radius-px-margin-right-px-安装nginx-span-span-style-display-inline-block-vertical-align-bottom-border-bottom-px-solid-rgb-border-right-px-solid-transparent-span"><span style="font-size: inherit;line-height: inherit;display: inline-block;font-weight: normal;background: rgb(239, 112, 96);color: rgb(255, 255, 255);padding: 3px 10px 1px;border-top-right-radius: 3px;border-top-left-radius: 3px;margin-right: 3px;">2.3 安装nginx</span><span style="display: inline-block;vertical-align: bottom;border-bottom: 36px solid rgb(239, 235, 233);border-right: 20px solid transparent;"> </span></h3><ol class="list-paddingleft-2" style="font-size: inherit;color: inherit;line-height: inherit;padding-left: 32px;"><li style="font-size: inherit;color: inherit;line-height: inherit;margin-bottom: 0.5em;"><p><code style="font-size: inherit;line-height: inherit;overflow-wrap: break-word;padding: 2px 4px;border-radius: 4px;margin-right: 2px;margin-left: 2px;color: rgb(248, 35, 117);background: rgb(248, 248, 248);">nginx官网下载nginx,官网地址:https://nginx.org/download/; 将压缩包拖到服务器上;
使用命令
tar -xvf nginx-1.12.2.tar.gz解压压缩包;使用命令
./configure检查;使用命令
make && make isntall编译安装;
安装成功后,在usr会多出来一个文件夹,local/nginx,在nginx的sbin文件夹下有启动脚本。
2.4 启动nginx
在/usr/local/nginx/sbin文件夹下,使用以下命令启动
1./nginx
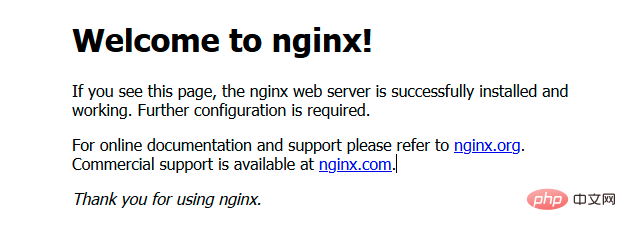
然后浏览器访问服务器ip,nginx默认端口是80,出现以下页面则证明nginx安装成功;
2.5 Nginx常用的命令
使用这些命令时需要进入/usr/local/nginx/sbin文件夹
查看
nginx的版本号
1./nginx -v
启动
nginx
1./nginx
关闭
nginx
1./nginx -s stop
重新加载
nginx
1./nginx -s reload
2.6 Nginx的配置文件
nginx的配置文件在/usr/local/nginx/conf中的nginx.conf。我们将nginx.conf中注释的内容删除一下。
 1#user  nobody;
 2worker_processes  1;
 3
 4#pid        logs/nginx.pid;
 5
 6events {
 7    worker_connections  1024;
 8}
 9
10http {
11    include       mime.types;
12    default_type  application/octet-stream;
13
14    sendfile        on;
15    #tcp_nopush     on;
16
17    #keepalive_timeout  0;
18    keepalive_timeout  65;
19
20    #gzip  on;
21
22    server {
23        listen       80;
24        server_name  localhost;
25
26        location / {
27            root   html;
28            index  index.html index.htm;
29        }
30    }
31}nginx的配置文件包含三部门。
1.全局块
从配置文件开始到events块之间的内容,主要会设置一些nginx服务器整体运行的配置指令。
1worker_processes 1;
这个代表nginx处理并发的关键配置,值越大,处理并发能力越强。但是会受到硬件、软件等约束。
2.events块
events块涉及的指令主要影响nginx服务器与用户网络的连接。
1worker_connections 1024;
这个代表nginx支持的最大连接数。
3.http全局块
nginx伺服器配置最頻繁的部分。 http全域區塊包含http區塊和server區塊。
三Nginx設定反向代理
3.1 ngix代理程式流程
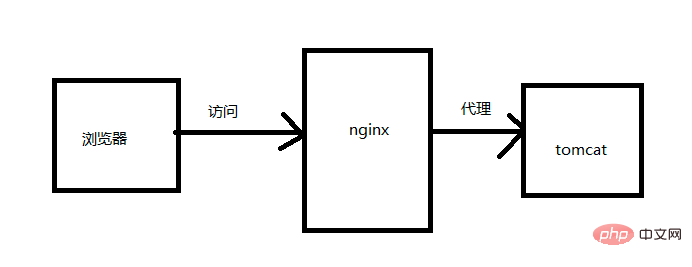
本機瀏覽器存取nginx伺服器,nginx伺服器反向代理程式tomcat伺服器,當我們要求nginx的時候直接存取到tomcat。 tomcat的安裝這裡就不在講了,我將tomcat和nginx安裝在了同一台伺服器上。
3.2 配置ip和域名的绑定关系
由于我们的nginx没有域名,为了演示,因此我们在本地host文件中配置nginx服务器ip和域名进行绑定。这个host文件的具体位置在C:\Windows\System32\drivers\etc。在host文件中增加一句配置:
147.104.xxx.xxx www.javatrip.com
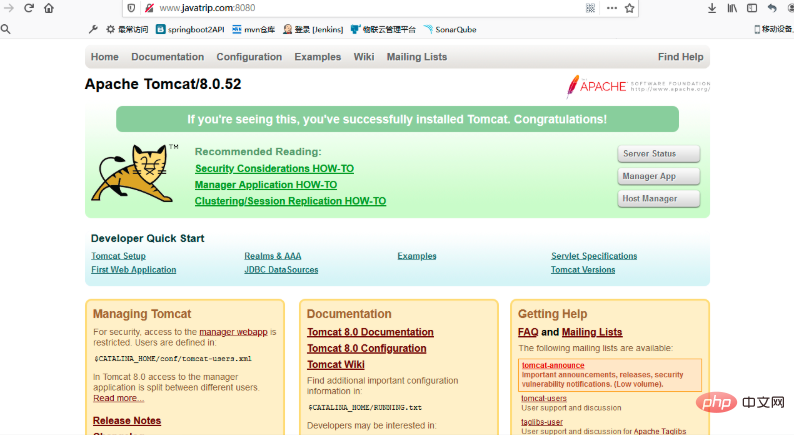
前面的ip是服务器的ip地址,后面的域名是我随便起的用于绑定这个ip的一个域名。配置好之后,我们使用域名访问一下tomcat,如果能请求到tomcat默认页面,则配置成功。
3.3 在nginx配置请求转发
1  server {
2        listen       80;
3        server_name  localhost;
4
5        location / {
6            root   html;
7            index  index.html index.htm;
8        }
9 }我们将以上默认的配置文件做个修改:
 1server {
 2    listen       80;
 3    server_name  47.104.xxx.xxx;
 4
 5    location / {
 6        root   html;
 7        proxy_pass http://127.0.0.1:8080;
 8        index  index.html index.htm;
 9    }
10}以上这段配置的意思就是请求是47.104.xxx.xxx:80,都会转发至47.104.xxx.xxx:8080。
现在浏览器访问www.javatrip.com,发现直接转发到了tomcat上了,这样简单的反向代理就完成了。
3.4 根据请求后缀分发
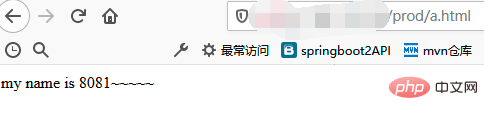
我们再解压一个tomcat,端口号设置为8081,分别在两个tomcat下webapps目录下面新建dev和prod目录,然后在该目录下写一个文件。
将请求www.javatrip.com:7001/dev转发到tomcat8080,将请求www.javatrip.com:7001/prod转发到tomcat8081。现在我们的nginx监听的端口号是7001。打开nginx的配置文件,新建一个server如下:
1server {
2 listen 7001;
3 server_name 47.104.xxx.xxx;
4
5 location ~ /dev/ {
6 proxy_pass http://127.0.0.1:8080;
7 }
8
9 location ~ /prod/ {
10 proxy_pass http://127.0.0.1:8081;
11 }
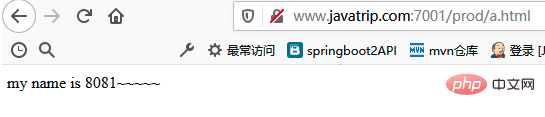
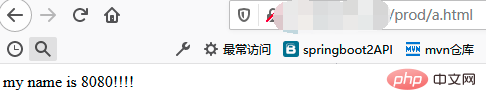
12}然后试试效果,分别访问www.javatrip.com:7001/dev/a.html和www.javatrip.com:7001/prod/a.html,效果如下:

其中,配置转发的时候用到了~,其含义内容如下:
= 严格匹配。如果这个查询匹配,那么将停止搜索并立即处理此请求。
~ 為區分大小寫匹配(可用正規表示式)
#!~為區分大小寫不匹配
~* 為不區分大小寫符合(可用正規表示式)
!~*為不區分大小寫不匹配
^~ 如果把這個前綴用於一個常規字串,那麼告訴
nginx如果路徑匹配那就不測試正規表示式。
四Nginx設定負載平衡
#4.1 什麼是負載平衡
負載平衡(Load Balance),意思是將負載(工作任務,存取請求)進行平衡、分攤到多個操作單元(伺服器,元件)上進行執行。是解決高效能,單點故障(高可用),擴展性(水平伸縮)的終極解決方案。
現在我們想實現的效果是透過存取www.javatrip.com:7001/prod/a.html,將請求分別分發到兩個tomcat上面去,首先我們在tomcat8080 上新建一個prod的資料夾,裡面放一個a.html的檔案。這樣tomcat8081和tomcat8080兩個上就都有了一個prod的檔案加且裡面有一個a.html的檔案。
4.2 配置nginx.conf
首先,在http块中配置两个tomcat的服务列表
1upstream myserver{
2    server 127.0.0.1:8080;
3    server 127.0.0.1:8081;
4}其次,在server块中配置规则:
 1server {
 2    listen       80;
 3    server_name  47.104.xxx.xxx;
 4
 5    location / {
 6        root   html;
 7        proxy_pass http://myserver;
 8        index  index.html index.htm;
 9    }
10}4.3 测试效果
访问地址:www.javatrip.com:7001/prod/a.html,多刷新几次。发现有的请求到tomcat8080上,有的请求到tomcat8081上。
4.4 nginx支持的几种负载策略
轮询(默认):每个请求按时间顺序逐一分配到不同的服务器,如果服务器down了,会自动剔除。
1upstream myserver{
2    server 127.0.0.1:8080;
3    server 127.0.0.1:8081;
4}weight(权重):默认为1,权重越高,分配的请求越多。
1upstream myserver{
2    server 127.0.0.1:8080 weight=1;
3    server 127.0.0.1:8081 weight=2;
4}ip hash:每个请求按访问ip的hash结果分配,这样每个访客固定访问一个后台服务器,可以解决
session的问题。
1upstream myserver{
2    ip_hash;
3    server 127.0.0.1:8080;
4    server 127.0.0.1:8081;
5}fair(第三方):按后端响应时间进行分配,响应时间越短分配的请求越多。
1upstream myserver{
2    server 127.0.0.1:8080;
3    server 127.0.0.1:8081;
4    fair;
5}由于动静分离在实际开发中也不常用,就不再写了。本篇文章做为一个nginx入门,到这里就基本完结了。最后留给大家一个问题思考一下:如何保证nginx的高可用?
以上是Nginx超簡單教程,入門看這篇就夠了的詳細內容。更多資訊請關注PHP中文網其他相關文章!

熱AI工具

Undresser.AI Undress
人工智慧驅動的應用程序,用於創建逼真的裸體照片

AI Clothes Remover
用於從照片中去除衣服的線上人工智慧工具。

Undress AI Tool
免費脫衣圖片

Clothoff.io
AI脫衣器

AI Hentai Generator
免費產生 AI 無盡。

熱門文章
熱工具

記事本++7.3.1
好用且免費的程式碼編輯器

SublimeText3漢化版
中文版,非常好用

禪工作室 13.0.1
強大的PHP整合開發環境

Dreamweaver CS6
視覺化網頁開發工具

SublimeText3 Mac版
神級程式碼編輯軟體(SublimeText3)
熱門話題


 怎麼查看nginx是否啟動
Apr 14, 2025 pm 01:03 PM
怎麼查看nginx是否啟動
Apr 14, 2025 pm 01:03 PM
確認 Nginx 是否啟動的方法:1. 使用命令行:systemctl status nginx(Linux/Unix)、netstat -ano | findstr 80(Windows);2. 檢查端口 80 是否開放;3. 查看系統日誌中 Nginx 啟動消息;4. 使用第三方工具,如 Nagios、Zabbix、Icinga。
 linux怎麼查看nginx是否啟動
Apr 14, 2025 pm 12:48 PM
linux怎麼查看nginx是否啟動
Apr 14, 2025 pm 12:48 PM
在 Linux 中,使用以下命令檢查 Nginx 是否已啟動:systemctl status nginx根據命令輸出進行判斷:如果顯示 "Active: active (running)",則 Nginx 已啟動。如果顯示 "Active: inactive (dead)",則 Nginx 已停止。
 linux怎麼啟動nginx
Apr 14, 2025 pm 12:51 PM
linux怎麼啟動nginx
Apr 14, 2025 pm 12:51 PM
在 Linux 中啟動 Nginx 的步驟:檢查 Nginx 是否已安裝。使用 systemctl start nginx 啟動 Nginx 服務。使用 systemctl enable nginx 啟用在系統啟動時自動啟動 Nginx。使用 systemctl status nginx 驗證啟動是否成功。在 Web 瀏覽器中訪問 http://localhost 查看默認歡迎頁面。
 nginx在windows中怎麼配置
Apr 14, 2025 pm 12:57 PM
nginx在windows中怎麼配置
Apr 14, 2025 pm 12:57 PM
如何在 Windows 中配置 Nginx?安裝 Nginx 並創建虛擬主機配置。修改主配置文件並包含虛擬主機配置。啟動或重新加載 Nginx。測試配置並查看網站。選擇性啟用 SSL 並配置 SSL 證書。選擇性設置防火牆允許 80 和 443 端口流量。
 怎麼解決nginx跨域問題
Apr 14, 2025 am 10:15 AM
怎麼解決nginx跨域問題
Apr 14, 2025 am 10:15 AM
解決 Nginx 跨域問題有兩種方法:修改跨域響應頭:添加指令以允許跨域請求,指定允許的方法和頭,以及設置緩存時間。使用 CORS 模塊:啟用模塊並配置 CORS 規則,允許跨域請求、方法、頭和設置緩存時間。
 nginx403怎麼解決
Apr 14, 2025 am 10:33 AM
nginx403怎麼解決
Apr 14, 2025 am 10:33 AM
如何解決 Nginx 403 Forbidden 錯誤?檢查文件或目錄權限;2. 檢查 .htaccess 文件;3. 檢查 Nginx 配置文件;4. 重啟 Nginx。其他可能原因還包括防火牆規則、SELinux 設置或應用程序問題。
 怎麼把nginx訪問地址設置成服務器ip
Apr 14, 2025 am 11:36 AM
怎麼把nginx訪問地址設置成服務器ip
Apr 14, 2025 am 11:36 AM
要在 Nginx 中將訪問地址設置為服務器 IP,請:配置服務器塊,設置監聽地址(如:listen 192.168.1.10:80)設置服務器名稱(如:server_name example.com www.example.com),或將其留空以訪問服務器 IP保存並重新加載 Nginx 以應用更改
 nginx怎麼查看運行狀態
Apr 14, 2025 am 11:48 AM
nginx怎麼查看運行狀態
Apr 14, 2025 am 11:48 AM
查看 Nginx 運行狀態的方法有:使用 ps 命令查看進程狀態;查看 Nginx 配置文件 /etc/nginx/nginx.conf;使用 Nginx 狀態模塊啟用狀態端點;使用 Prometheus、Zabbix 或 Nagios 等監控工具。
