

Vue中如何實現圖片的標記和註解功能?


Vue中如何實作圖片的標記和註解功能?
在開發網頁或應用程式時,我們常常需要在圖片上標記和註釋,以便更好地展示和解釋圖片內容。而Vue作為一個流行的前端框架,提供了豐富的工具和組件,可以非常方便地實現圖片的標記和註釋功能。本文將介紹如何利用Vue實作圖片的標記和註解功能,並提供相關程式碼範例。
- 準備工作
在開始之前,需要做好一些準備。首先,我們需要建立一個Vue項目,並安裝相關依賴。可以使用如下的命令來建立一個新的Vue專案:
vue create image-annotation
然後按照提示選擇相應的配置和依賴項進行安裝。
- 新增圖片元件
在Vue專案中,我們可以使用<img src="/static/imghw/default1.png" data-src="imageSrc" class="lazy" alt="Vue中如何實現圖片的標記和註解功能?" >標籤來展示圖片。為了方便後續的操作,我們可以封裝一個圖片元件ImageAnnotation,程式碼如下所示:
<template>
  <div class="image-annotation">
    <img  src="/static/imghw/default1.png"  data-src="imageSrc"  class="lazy"  : @click="handleClick" / alt="Vue中如何實現圖片的標記和註解功能?" >
    <div class="annotations">
      <div v-for="(annotation, index) in annotations" :key="index" :style="{ top: annotation.y + 'px', left: annotation.x + 'px' }" class="annotation" @click="handleAnnotationClick(annotation)">
        <div class="label">{{ annotation.label }}</div>
        <div class="content">{{ annotation.content }}</div>
      </div>
    </div>
  </div>
</template>

<script>
export default {
  props: {
    imageSrc: {
      type: String,
      required: true
    },
    annotations: {
      type: Array,
      default: () => []
    }
  },
  methods: {
    handleClick(event) {
      const { offsetX, offsetY } = event
      this.$emit('addAnnotation', { x: offsetX, y: offsetY })
    },
    handleAnnotationClick(annotation) {
      this.$emit('editAnnotation', annotation)
    }
  }
}
</script>

<style scoped>
.image-annotation {
  position: relative;
}

.annotations {
  position: absolute;
  top: 0;
  left: 0;
}

.annotation {
  position: absolute;
  background-color: #f6f6f6;
  border: 1px solid #ccc;
  border-radius: 4px;
  padding: 8px;
  cursor: pointer;
  font-size: 12px;
}

.label {
  font-weight: bold;
  margin-bottom: 4px;
}

.content {
  color: #666;
}
</style>上述程式碼中,我們使用<img src="/static/imghw/default1.png" data-src="imageSrc" class="lazy" alt="Vue中如何實現圖片的標記和註解功能?" >標籤展示圖片,點擊圖片時會觸發handleClick方法。在handleClick方法中,我們透過event.offsetX和event.offsetY取得目前點擊的座標,並透過$emit方法將坐標資訊傳遞給父組件。
同時,我們使用v-for指令將註解渲染出來,並透過@click事件監聽註解的點擊操作。點擊註解時,會觸發handleAnnotationClick方法,該方法將註解的資訊傳遞給父元件。
- 使用圖片元件
在應用程式中使用圖片元件ImageAnnotation,並透過props傳遞圖片位址和註解訊息。
<template>
  <div class="app">
    <image-annotation :image- :annotations="annotations" @add-annotation="handleAddAnnotation" @edit-annotation="handleEditAnnotation"/>
  </div>
</template>

<script>
import ImageAnnotation from '@/components/ImageAnnotation.vue'

export default {
  components: {
    ImageAnnotation
  },
  data() {
    return {
      imageSrc: 'path/to/image.jpg',
      annotations: [
        { x: 100, y: 100, label: '标注1', content: '这是标注1的内容' },
        { x: 200, y: 200, label: '标注2', content: '这是标注2的内容' }
      ]
    }
  },
  methods: {
    handleAddAnnotation(annotation) {
      this.annotations.push(annotation)
    },
    handleEditAnnotation(annotation) {
      // 处理编辑注释的逻辑
    }
  }
}
</script>

<style>
.app {
  padding: 20px;
}
</style>以上程式碼中,我們建立了一個名為app的Vue實例,並在模板中使用了ImageAnnotation元件。透過props將圖片位址和註解陣列傳遞給元件,同時監聽add-annotation和edit-annotation事件,在對應的事件處理方法中更新註釋數據。
至此,我們已經完成了Vue中圖片的標記和註解功能的實作。你可以根據實際需求自訂樣式和互動邏輯,進一步擴展該功能。
總結
本文介紹如何在Vue中實作圖片的標記和註解功能。我們透過封裝一個圖片元件,在元件內部處理點擊事件和註解的展示,同時透過props和$emit來傳遞和更新資料。此方法簡單易懂,同時也可依實際需求進行擴充和客製化。希望本文對你理解和實踐Vue的圖片標記和註釋功能有所幫助。
以上是Vue中如何實現圖片的標記和註解功能?的詳細內容。更多資訊請關注PHP中文網其他相關文章!

熱AI工具

Undresser.AI Undress
人工智慧驅動的應用程序,用於創建逼真的裸體照片

AI Clothes Remover
用於從照片中去除衣服的線上人工智慧工具。

Undress AI Tool
免費脫衣圖片

Clothoff.io
AI脫衣器

Video Face Swap
使用我們完全免費的人工智慧換臉工具,輕鬆在任何影片中換臉!

熱門文章
熱工具

記事本++7.3.1
好用且免費的程式碼編輯器

SublimeText3漢化版
中文版,非常好用

禪工作室 13.0.1
強大的PHP整合開發環境

Dreamweaver CS6
視覺化網頁開發工具

SublimeText3 Mac版
神級程式碼編輯軟體(SublimeText3)


 小紅書發布自動儲存圖片怎麼解決?發布自動保存圖片在哪裡?
Mar 22, 2024 am 08:06 AM
小紅書發布自動儲存圖片怎麼解決?發布自動保存圖片在哪裡?
Mar 22, 2024 am 08:06 AM
隨著社群媒體的不斷發展,小紅書已經成為越來越多年輕人分享生活、發現美好事物的平台。許多用戶在發布圖片時遇到了自動儲存的問題,這讓他們感到十分困擾。那麼,如何解決這個問題呢?一、小紅書發布自動儲存圖片怎麼解決? 1.清除快取首先,我們可以嘗試清除小紅書的快取資料。步驟如下:(1)開啟小紅書,點選右下角的「我的」按鈕;(2)在個人中心頁面,找到「設定」並點選;(3)向下捲動,找到「清除快取」選項,點擊確認。清除快取後,重新進入小紅書,嘗試發布圖片看是否解決了自動儲存的問題。 2.更新小紅書版本確保你的小
 抖音評論裡怎麼發圖片?評論區圖片入口在哪裡?
Mar 21, 2024 pm 09:12 PM
抖音評論裡怎麼發圖片?評論區圖片入口在哪裡?
Mar 21, 2024 pm 09:12 PM
隨著抖音短影片的火爆,用戶們在留言區互動變得更加豐富多彩。有些用戶希望在評論中分享圖片,以便更好地表達自己的觀點或情感。那麼,抖音評論裡怎麼發圖片呢?本文將為你詳細解答這個問題,並為你提供一些相關的技巧和注意事項。一、抖音評論裡怎麼發圖片? 1.開啟抖音:首先,你需要開啟抖音APP,並登入你的帳號。 2.找到評論區:瀏覽或發布短影片時,找到想要評論的地方,點擊「評論」按鈕。 3.輸入評論內容:在留言區輸入你的評論內容。 4.選擇傳送圖片:在輸入評論內容的介面,你會看到一個「圖片」按鈕或「+」號按鈕,點
 在 iPhone 上讓圖片更清晰的 6 種方法
Mar 04, 2024 pm 06:25 PM
在 iPhone 上讓圖片更清晰的 6 種方法
Mar 04, 2024 pm 06:25 PM
Apple最近的iPhone可以透過清晰的細節、飽和度和亮度來捕捉回憶。但有時,您可能會遇到一些問題,這些問題可能會導致影像看起來不那麼清晰。儘管iPhone相機上的自動對焦已經取得了長足的進步,可以讓您快速拍照,但相機在某些情況下可能會錯誤地對焦錯誤的拍攝對象,從而使照片在不需要的區域更加模糊。如果iPhone上的照片看起來失焦或整體缺乏清晰度,以下貼文應該可以幫助您使它們更清晰。如何在iPhone上讓圖片更清晰[6種方法]您可以嘗試使用本機的「照片」應用程式來清理照片。如果您需要更多功能和選項
 掃雷怎麼標記? -掃雷怎麼更改難度?
Mar 18, 2024 pm 06:34 PM
掃雷怎麼標記? -掃雷怎麼更改難度?
Mar 18, 2024 pm 06:34 PM
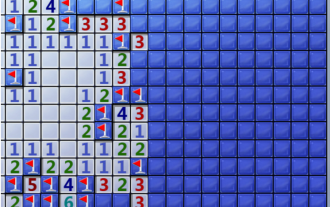
掃雷怎麼標記?首先,我們需要熟悉掃雷遊戲中的標記方式。通常情況下,掃雷遊戲中有兩種常見的標記方式:旗子標記和問號標記。旗子標記用來表示該方塊中有地雷,是一種確定性的標記;而問號標記則表示該方塊可能存在地雷,但並非確定性。這兩種標記方式在遊戲中起著重要的作用,幫助玩家推斷哪些方塊可能存在地雷,從而有效地進行下一步操作。熟練運用這些標記方式可以提高玩家在掃雷遊戲中的成功率,並降低踩雷的風險。因此,在玩掃雷遊戲時,掌握好旗子標記和問號標記的當玩家不能確定某一個方格是否有地雷時,可以使用問號標記來進行標記
 ppt怎麼讓圖片一張一張出來
Mar 25, 2024 pm 04:00 PM
ppt怎麼讓圖片一張一張出來
Mar 25, 2024 pm 04:00 PM
在PowerPoint中,讓圖片逐一顯示是常用的技巧,可以透過設定動畫效果來實現。本指南詳細介紹了實現此技巧的步驟,包括基本設定、圖片插入、新增動畫、調整動畫順序和時間。此外,還提供了進階設定和調整,例如使用觸發器、調整動畫速度和順序,以及預覽動畫效果。透過遵循這些步驟和技巧,使用者可以輕鬆地在PowerPoint中設定圖片逐一出現,從而提升簡報的視覺效果並吸引觀眾的注意力。
 百度地圖怎麼標記多個地點 標記多個地點方法
Mar 15, 2024 pm 04:28 PM
百度地圖怎麼標記多個地點 標記多個地點方法
Mar 15, 2024 pm 04:28 PM
上面的功能非常的多,尤其是對於在地圖方面可以標記到多個地方的一些為止,我們在知道一些地方的時候,肯定是採用標點的一些功能,這樣就可以為你們帶來多種不同方面的一些功能,你們所標點都會產生距離的差異,也就是可以知道距離究竟有多遠,當然也會顯示出上面地點的的一些名稱和詳細的信息都可以,但是很多網友們可能對於上面的一些內容資訊都不是非常的清楚,所以為了能夠讓大家們更好的進行多方面的一些選擇,所以今日小編就來給你們帶來多種不同方面的一些選擇,所以有興趣想法的朋友們,你也有興趣的話,就來試試看。 標
 網頁圖片載入不出來怎麼辦? 6種解決辦法
Mar 15, 2024 am 10:30 AM
網頁圖片載入不出來怎麼辦? 6種解決辦法
Mar 15, 2024 am 10:30 AM
有網友發現打開瀏覽器網頁,網頁上的圖片遲遲加載不出來,是怎麼回事?檢查過網路是正常的,那是哪裡出現了問題呢?下面小編就來跟大家介紹一下網頁圖片載入不出來的六種解決方法。網頁圖片載入不出來: 1、網速問題網頁顯示不出圖片有可能是因為電腦的網路速度比較慢,電腦中開啟的軟體比較多, 而我們造訪的圖片比較大,這就可能因為載入逾時,導致圖片顯示不出來, 可以將比較佔網速的軟體將關掉,可以去任務管理器查看一下。 2、造訪人數過多 網頁顯示不出圖片還有可能是因為我們造訪的網頁,在同時段造訪的
 便捷使用PyCharm快捷鍵實現多行註釋
Jan 27, 2024 am 08:02 AM
便捷使用PyCharm快捷鍵實現多行註釋
Jan 27, 2024 am 08:02 AM
PyCharm多行註解快速鍵:讓程式碼註解更便捷,需要具體程式碼範例在日常的程式設計工作中,程式碼註解是非常重要的一部分。它不僅可以提高程式碼的可讀性和可維護性,還能幫助其他開發人員理解程式碼的意圖和設計思路。然而,手動添加程式碼註解往往是一項耗時而繁瑣的工作。為了讓我們的程式碼註解更加高效,PyCharm提供了多行註解的快捷鍵。在PyCharm中,我們可以使用Ctrl+/
