

超级好用的一个php上传图片类(随机名,缩略图,加水印)_PHP

Upimages.class.php php上传类
复制代码 代码如下:
class UpImages {
var $annexFolder = "upload";//附件存放点,默认为:annex
var $smallFolder = "small";//缩略图存放路径,注:必须是放在 $annexFolder下的子目录,默认为:smallimg
var $markFolder = "mark";//水印图片存放处
var $upFileType = "jpg gif png";//上传的类型,默认为:jpg gif png rar zip
var $upFileMax = 1024;//上传大小限制,单位是“KB”,默认为:1024KB
var $fontType;//字体
var $maxWidth = 500; //图片最大宽度
var $maxHeight = 600; //图片最大高度
function UpImages($annexFolder,$smallFolder,$includeFolder) {
$this->annexFolder = $annexFolder;
$this->smallFolder = $smallFolder;
$this->fontType = $includeFolder."/04B_08__.TTF";
}
function upLoad($inputName) {
$imageName = time();//设定当前时间为图片名称
if(@empty($_FILES[$inputName]["name"])) die("没有上传图片信息,请确认");
$name = explode(".",$_FILES[$inputName]["name"]);//将上传前的文件以“.”分开取得文件类型
$imgCount = count($name);//获得截取的数量
$imgType = $name[$imgCount-1];//取得文件的类型
if(strpos($this->upFileType,$imgType) === false) die(error("上传文件类型仅支持 ".$this->upFileType." 不支持 ".$imgType));
$photo = $imageName.".".$imgType;//写入数据库的文件名
$uploadFile = $this->annexFolder."/".$photo;//上传后的文件名称
$upFileok = move_uploaded_file($_FILES[$inputName]["tmp_name"],$uploadFile);
if($upFileok) {
$imgSize = $_FILES[$inputName]["size"];
$kSize = round($imgSize/1024);
if($kSize > ($this->upFileMax*1024)) {
@unlink($uploadFile);
die(error("上传文件超过 ".$this->upFileMax."KB"));
}
} else {
die(error("上传图片失败,请确认你的上传文件不超过 $upFileMax KB 或上传时间超时"));
}
return $photo;
}
function getInfo($photo) {
$photo = $this->annexFolder."/".$photo;
$imageInfo = getimagesize($photo);
$imgInfo["width"] = $imageInfo[0];
$imgInfo["height"] = $imageInfo[1];
$imgInfo["type"] = $imageInfo[2];
$imgInfo["name"] = basename($photo);
return $imgInfo;
}
function smallImg($photo,$width=128,$height=128) {
$imgInfo = $this->getInfo($photo);
$photo = $this->annexFolder."/".$photo;//获得图片源
$newName = substr($imgInfo["name"],0,strrpos($imgInfo["name"], "."))."_thumb.jpg";//新图片名称
if($imgInfo["type"] == 1) {
$img = imagecreatefromgif($photo);
} elseif($imgInfo["type"] == 2) {
$img = imagecreatefromjpeg($photo);
} elseif($imgInfo["type"] == 3) {
$img = imagecreatefrompng($photo);
} else {
$img = "";
}
if(empty($img)) return False;
$width = ($width > $imgInfo["width"]) ? $imgInfo["width"] : $width;
$height = ($height > $imgInfo["height"]) ? $imgInfo["height"] : $height;
$srcW = $imgInfo["width"];
$srcH = $imgInfo["height"];
if ($srcW * $width > $srcH * $height) {
$height = round($srcH * $width / $srcW);
} else {
$width = round($srcW * $height / $srcH);
}
if (function_exists("imagecreatetruecolor")) {
$newImg = imagecreatetruecolor($width, $height);
ImageCopyResampled($newImg, $img, 0, 0, 0, 0, $width, $height, $imgInfo["width"], $imgInfo["height"]);
} else {
$newImg = imagecreate($width, $height);
ImageCopyResized($newImg, $img, 0, 0, 0, 0, $width, $height, $imgInfo["width"], $imgInfo["height"]);
}
if ($this->toFile) {
if (file_exists($this->annexFolder."/".$this->smallFolder."/".$newName)) @unlink($this->annexFolder."/".$this->smallFolder."/".$newName);
ImageJPEG($newImg,$this->annexFolder."/".$this->smallFolder."/".$newName);
return $this->annexFolder."/".$this->smallFolder."/".$newName;
} else {
ImageJPEG($newImg);
}
ImageDestroy($newImg);
ImageDestroy($img);
return $newName;
}
function waterMark($photo,$text) {
$imgInfo = $this->getInfo($photo);
$photo = $this->annexFolder."/".$photo;
$newName = substr($imgInfo["name"], 0, strrpos($imgInfo["name"], ".")) . "_mark.jpg";
switch ($imgInfo["type"]) {
case 1:
$img = imagecreatefromgif($photo);
break;
case 2:
$img = imagecreatefromjpeg($photo);
break;
case 3:
$img = imagecreatefrompng($photo);
break;
default:
return False;
}
if (empty($img)) return False;
$width = ($this->maxWidth > $imgInfo["width"]) ? $imgInfo["width"] : $this->maxWidth;
$height = ($this->maxHeight > $imgInfo["height"]) ? $imgInfo["height"] : $this->maxHeight;
$srcW = $imgInfo["width"];
$srcH = $imgInfo["height"];
if ($srcW * $width > $srcH * $height) {
$height = round($srcH * $width / $srcW);
} else {
$width = round($srcW * $height / $srcH);
}
if (function_exists("imagecreatetruecolor")) {
$newImg = imagecreatetruecolor($width, $height);
ImageCopyResampled($newImg, $img, 0, 0, 0, 0, $width, $height, $imgInfo["width"], $imgInfo["height"]);
} else {
$newImg = imagecreate($width, $height);
ImageCopyResized($newImg, $img, 0, 0, 0, 0, $width, $height, $imgInfo["width"], $imgInfo["height"]);
}
$white = imageColorAllocate($newImg, 255, 255, 255);
$black = imageColorAllocate($newImg, 0, 0, 0);
$alpha = imageColorAllocateAlpha($newImg, 230, 230, 230, 40);
ImageFilledRectangle($newImg, 0, $height-26, $width, $height, $alpha);
ImageFilledRectangle($newImg, 13, $height-20, 15, $height-7, $black);
ImageTTFText($newImg, 4.9, 0, 20, $height-14, $black, $this->fontType, $text[0]);
ImageTTFText($newImg, 4.9, 0, 20, $height-6, $black, $this->fontType, $text[1]);
if($this->toFile) {
if (file_exists($this->annexFolder."/".$this->markFolder."/".$newName)) @unlink($this->annexFolder."/".$this->markFolder."/".$newName);
ImageJPEG($newImg,$this->annexFolder."/".$this->markFolder."/".$newName);
return $this->annexFolder."/".$this->markFolder."/".$newName;
} else {
ImageJPEG($newImg);
}
ImageDestroy($newImg);
ImageDestroy($img);
return $newName;
}
}
?>
使用方法
复制代码 代码如下:
include 'Upimages.class.php';
$max="upload"; //文件上传路径
$mix="small"; //缩略图路径(必须在upload下建立)
$mark="mark"; //加水引的图片存放路径
$text = array("oktang","2012"); //水印内容
$img= new UpImages($max,$mix,$max); //实例化类文件
$photo = $img->upLoad("file"); //上传的文件域
$img->maxWidth = $img->maxHeight = 600; //设置高,和宽
$img->toFile = true;
$newSmallImg = $img->smallImg($photo);
$newMark = $img->waterMark($photo,$text);
echo $newSmallImg;
echo $newMark;
echo "
";
echo "
";
注意里面有个字体文件,大家可以从网上下载。

熱AI工具

Undresser.AI Undress
人工智慧驅動的應用程序,用於創建逼真的裸體照片

AI Clothes Remover
用於從照片中去除衣服的線上人工智慧工具。

Undress AI Tool
免費脫衣圖片

Clothoff.io
AI脫衣器

AI Hentai Generator
免費產生 AI 無盡。

熱門文章
熱工具

記事本++7.3.1
好用且免費的程式碼編輯器

SublimeText3漢化版
中文版,非常好用

禪工作室 13.0.1
強大的PHP整合開發環境

Dreamweaver CS6
視覺化網頁開發工具

SublimeText3 Mac版
神級程式碼編輯軟體(SublimeText3)
熱門話題


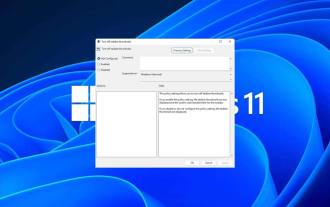 Win11怎麼停用工作列縮圖預覽? 關閉滑鼠移動工作列圖示顯示縮圖技巧
Feb 29, 2024 pm 03:20 PM
Win11怎麼停用工作列縮圖預覽? 關閉滑鼠移動工作列圖示顯示縮圖技巧
Feb 29, 2024 pm 03:20 PM
本文將介紹如何在Win11系統中關閉滑鼠移動工作列圖示時顯示的縮圖功能。這項功能在預設情況下是開啟的,當使用者將滑鼠指標懸停在工作列上的應用程式圖示上時,會顯示該應用程式的目前視窗縮圖。然而,有些用戶可能覺得這個功能不太實用或會幹擾到他們的使用體驗,因此想要關閉它。工作列縮圖可能很有趣,但它們也可能分散注意力或煩人。考慮到您將滑鼠懸停在該區域的頻率,您可能無意中關閉了重要視窗幾次。另一個缺點是它使用更多的系統資源,因此,如果您一直在尋找一種提高資源效率的方法,我們將向您展示如何停用它。不過
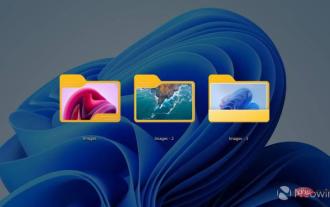 如何在 Windows 11 22H2 中自訂資料夾縮圖
Apr 30, 2023 pm 04:52 PM
如何在 Windows 11 22H2 中自訂資料夾縮圖
Apr 30, 2023 pm 04:52 PM
Windows1122H2是Windows11的第一個功能更新,應該會帶來大量新功能和急需的改進。其中一項改進是允許預覽資料夾內文件的資料夾縮圖。如果您不喜歡Windows11中資料夾縮圖的外觀,可以透過以下方式變更它。 Windows11中資料夾縮圖的一組自訂圖示(由Reddit的LEXX911提供)可讓您放大預覽並變更資料夾圖示樣式。您仍然需要處理單一檔案預覽(例如,在Windows7中,資料夾縮圖可以同時顯示多個影像),但您可以將其做得更大更方便。重要提示:
 Vscode怎麼顯示縮圖_Vscode顯示縮圖方法
Apr 02, 2024 pm 02:43 PM
Vscode怎麼顯示縮圖_Vscode顯示縮圖方法
Apr 02, 2024 pm 02:43 PM
1.先進入VisualStudioCode後,點選左上角【檔案】。 2、然後點選【首選項】。 3.點選【設定】項。 4.接著點選【文字編輯器-縮圖】。 5.最後在縮圖項,開啟【控制是否顯示縮圖】。
 PHP產生縮圖的步驟詳解
Sep 13, 2023 am 08:40 AM
PHP產生縮圖的步驟詳解
Sep 13, 2023 am 08:40 AM
PHP產生縮圖的步驟詳解,需要具體程式碼範例在現今互聯網高速發展的時代,圖片是網頁中不可或缺的一部分,但是高解析度的圖片不僅會佔用大量的頻寬,還會影響使用者的網頁加載速度。因此,我們常常需要將原始圖片產生縮圖,以縮小圖片尺寸和檔案大小。 PHP作為一種流行的伺服器端腳本語言,它提供了豐富的影像處理功能,可以用來產生縮圖。以下將詳細介紹PHP產生縮圖的步驟,
 使用JavaScript實現自動縮圖生成
Jun 16, 2023 pm 12:51 PM
使用JavaScript實現自動縮圖生成
Jun 16, 2023 pm 12:51 PM
隨著網路的發展,圖片已成為網頁中不可或缺的一部分。但是隨著圖片數量的增多,圖片的載入速度成為了一個很重要的問題。為了解決這個問題,許多網站都採用了縮圖的方式來展示圖片,但是為了產生縮圖,我們需要使用專業的圖片處理工具,對於一些非專業人士來說,這是一個很麻煩的事情。那麼,使用JavaScript實現自動縮圖產生就成為了一個不錯的選擇。如何使用JavaS
 美圖秀秀怎麼加浮水印
Apr 08, 2024 pm 03:52 PM
美圖秀秀怎麼加浮水印
Apr 08, 2024 pm 03:52 PM
1.在美圖秀的【圖片美化】功能中,上傳或選擇要新增浮水印的圖片。 2.在底部工具列點選【文字】選項,輸入浮水印內容並調整其顏色、大小和透明度。 3.調整浮水印的尺寸和位置,確認滿意後點選【完成】確認編輯。 4.最後點選右上角的【儲存】按鈕,即可儲存有浮水印的圖片。
 在u盤裡怎樣顯示縮圖
Feb 12, 2024 pm 08:36 PM
在u盤裡怎樣顯示縮圖
Feb 12, 2024 pm 08:36 PM
常常遇到客戶說的,幾個電腦的小問題,關鍵時候非常麻煩。總結下有以下幾種。檔案無法複製到USB可能是因為USB隨身碟的分割格式是FAT32而不是NTFS。你可以嘗試將U盤的分割區格式改為NTFS,這樣就可以複製大檔案了。第二種,圖片顯示不是縮圖,找圖非得一張張點開看。第三種,頁面突然變大變小。這三種情況不知道,簡單的幾個操作就可以解決。一、把U盤分區改成NTFS新購買的U盤預設分區格式一般是FAT32,一般情況下使用是沒有問題的。但是當需要複製大於4G的檔案時,會出現無法複製的提示,這給使用帶來了一些麻煩。為
 PowerToys 0.53.1 為檔案總管中的縮圖和預覽窗格新增了 G 程式碼支持
Apr 13, 2023 pm 11:19 PM
PowerToys 0.53.1 為檔案總管中的縮圖和預覽窗格新增了 G 程式碼支持
Apr 13, 2023 pm 11:19 PM
距離上一個 0.51.1 版本僅一個多月的時間,Microsoft已經繼續並在今天發布了 0.53.1。微軟注意到v0.53 發布週期是為維護衝刺而設計的,但是有了一些“驚人的社區支持”,它最終獲得了巨大的成功!微軟表示他們仍在努力改進安裝程序,但此版本應該會大大改進。檢查出的三個主要事情是在文件瀏覽器預覽窗格和縮圖G代碼的支持,新的網絡,從運行的PowerToys通過搜索插件
