
在本系列文章中,我們將回顧一些可用於建立更易於維護的 WordPress 外掛程式的技巧和策略,並且我們將透過利用選項卡式元框的外掛程式的上下文來實現這一切.
在上一篇文章中,我們專門為我們的選項卡實現了功能,並且還實現了第一個 textarea ,它將用於捕獲一些用戶輸入。對於那些一直在關注的人來說,您知道我們只做到了:
我們尚未完成清理、驗證和保存資料的實際流程,也沒有費心介紹其餘選項卡的內容。在接下來的兩篇文章中,我們將正是這樣做的。
具體來說,在本文中,我們將繼續介紹使用者介面的其餘部分,然後我們將繼續實際編寫負責驗證使用者輸入並將其與給定帖子關聯的程式碼。
這些都擺在我們面前,讓我們開始吧。
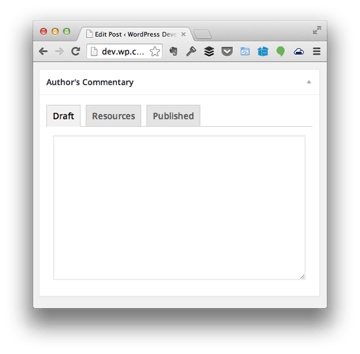
如前所述,在上一篇文章中,我們在草稿標籤中引入了 textarea。如果您一直在遵循教學課程和/或使用可用儲存庫中的程式碼,那麼您應該會看到以下內容:
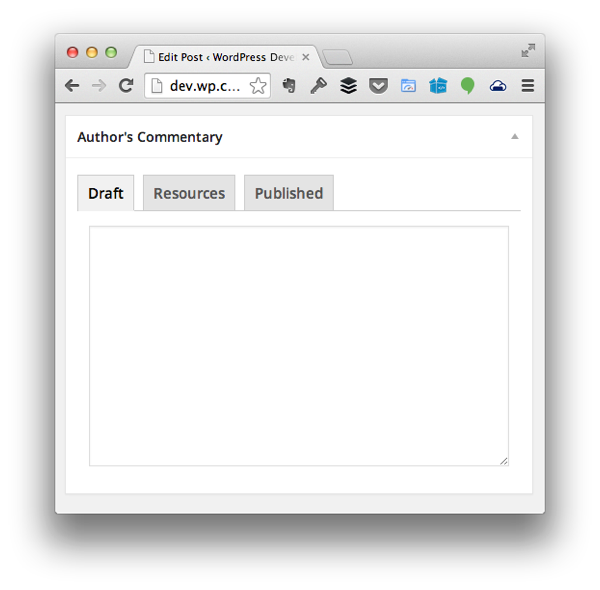

草稿標籤背後的想法很簡單:用戶可以在此處記下筆記、收集想法,基本上有一個記事本可以幫助他們收集想法在寫帖子之前。
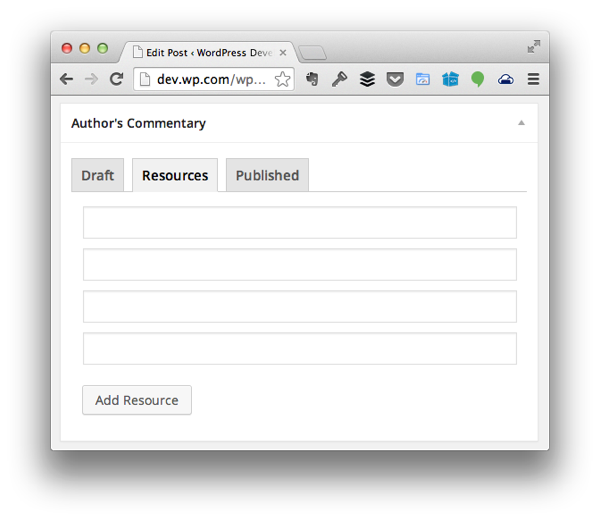
資源s標籤怎麼樣?此選項卡背後的想法是,用戶將能夠收集與他們想要編寫的內容相關的頁面、推文、圖像和其他資訊的各種URL,以便他們可以在帖子中嵌入、連結和/或引用它們.
其工作原理如下:
就最後兩項而言,我們將在下一篇文章中解決。現在,讓我們來動態新增輸入欄位。
找到 admin/views/partials/resources.php 並將程式碼更新為如下所示:
<?php

/**
 * Provides the 'Resources' view for the corresponding tab in the Post Meta Box.
 *
 * @link       https://code.tutsplus.com/tutorials/creating-maintainable-wordpress-meta-boxes-the-front-end--cms-22383
 * @since      0.3.0
 *
 * @package    Authors_Commentary
 * @subpackage Authors_Commentary/admin/partials
 */
?>

<div class="inside hidden">
    <div id="authors-commentary-resources"></div><!-- #authors-commentary-resources -->
	<p><input type="submit" id="authors-commentary-add-resource" value="Add Resource" />
</div>
接下來,我們在 admin/assets/js 中建立一個文件,並將其命名為 resources.js。刪除該文件,使其如下所示:
(function( $ ) {
    'use strict';

	$(function() {

	});

})( jQuery );
接下來,我們需要設定一個事件處理程序,以便當使用者點擊新增資源按鈕時,它會執行以下操作:
以下是完整註解的程式碼,說明如何實現此目的,並提供以下更多資訊:
/**
 * Creates a new input element to be appended to the DOM that's used to represent a single
 * resource (be it an address, tweet, image URL, etc.) to be referenced in the post.
 *
 * @since    0.4.0
 * @param    object    $    A reference to the jQuery object
 * @return   object         An input element to be appended to the DOM.
 */
function createInputElement( $ ) {

    var $inputElement, iInputCount;

	/* First, count the number of input fields that already exist. This is how we're going to
	 * implement the name and ID attributes of the element.
	 */
	iInputCount = $( '#authors-commentary-resources' ).children().length;
	iInputCount++;

	// Next, create the actual input element and then return it to the caller
	$inputElement =
		$( '<input />' )
			.attr( 'type', 'text' )
			.attr( 'name', 'authors-commentary-resource-' + iInputCount )
			.attr( 'id', 'authors-commentary-resource-' + iInputCount )
			.attr( 'value', '' );


	return $inputElement;


}

(function( $ ) {
	'use strict';

	$(function() {

		var $inputElement;

		$( '#authors-commentary-add-resource' ).on( 'click', function( evt ) {

			evt.preventDefault();

			/* Create a new input element that will be used to capture the users input
			 * and append it to the container just above this button.
			 */
			$( '#authors-commentary-resources' ).append ( createInputElement( $ ) );


		});

	});

})( jQuery );
在上面的程式碼中,有一個函數專門用於建立輸入元素並使用預先存在的元素的數量來幫助為其提供唯一的名稱和 ID。
還有一個 DOM 就緒處理程序,它設定一個函數,以便在使用者點擊新增資源按鈕時觸發。當您按一下按鈕時,將呼叫上述函數,然後將輸入元素附加到父容器。
為了確保它看起來最好,我們需要寫一些樣式。就像我們對 JavaScript 原始程式碼所做的那樣,找到 admin/assets/css/admin.css ,然後將以下程式碼新增至檔案底部:
#authors-commentary-resources input[type="text"] {
    width:         100%;
    margin-bottom: 10px;
}
這將確保每個輸入元素的寬度為 100%,以便它們各自位於自己的行上。
最後,我們需要將用 WordPress 編寫的 JavaScript 排入佇列,以便它正確地回應我們在部分中顯示的元素。為此,請在 admin/class-authors-commentary.php 中找到 enqueue_admin_scripts 函數,並更新函數,使其如下所示:
<?php

/**
 * Includes the JavaScript necessary to control the toggling of the tabs in the
 * meta box that's represented by this class.
 *
 * @since    0.2.0
 */
public function enqueue_admin_scripts() {

    if ( 'post' === get_current_screen()->id ) {

		wp_enqueue_script(
			$this->name . '-tabs',
			plugin_dir_url( __FILE__ ) . 'authors-commentary/admin/assets/js/tabs.js',
			array( 'jquery' ),
			$this->version
		);

		wp_enqueue_script(
			$this->name . '-resources',
			plugin_dir_url( __FILE__ ) . 'authors-commentary/admin/assets/js/resources.js',
			array( 'jquery' ),
			$this->version
		);

	}

}
此時,您應該能夠在瀏覽器中載入貼文編輯器,點擊資源標籤,然後開始在頁面動態新增多個輸入欄位。
请记住,我们实际上还没有在服务器端执行任何操作,因此我们还没有进行清理、验证,或保存此信息。我们将在下一篇文章中执行此操作。
现在我们已经可以收集要在整个帖子中使用的各种注释和资源,那么已发布标签将包含哪些元素?
这三个内容都是完全可以接受的,可以引入到已发布标签中;但是,为了不重新发明轮子并继续引入新功能以及使用 WordPress API 的其他方式,我们将采用最终选项。
具体来说,我们将加载帖子中存在的所有评论的列表。每条评论旁边都会有一个复选框。如果评论已收到回复,则会进行查看;否则,它将被取消选中。
我们不会为此添加 pingback,因为作者通常不会回复 pingback。
话虽如此,加载 admin/views/partials/published.php 并添加以下代码:
<?php

/**
 * Provides the 'Published' view for the corresponding tab in the Post Meta Box.
 *
 * @link       http://code.tutsplus.com/tutorials/creating-maintainable-wordpress-meta-boxes-the-front-end--cms-22383
 * @since      0.3.0
 *
 * @package    Authors_Commentary
 * @subpackage Authors_Commentary/admin/partials
 */
?>

<div class="inside hidden">
    <?php $comments = $this->load_post_comments(); ?>
	<ul id="author-commentary-comments">
		<?php foreach ( $comments as $comment ) { ?>
			<li>
				<label for="authors-commentary-comment-<?php echo $comment->comment_ID ?>">
					<input type="checkbox" id="authors-commentary-comment-<?php echo $comment->comment_ID ?>" name="authors-commentary-comment-<?php echo $comment->comment_ID ?>" />
					This comment has received a reply.
				</label>
				<p>
					<em><?php echo $comment->comment_author; ?></em>:
					<?php echo $comment->comment_content; ?>
				</p>
				<hr />
			</li>
		<?php } ?>
	</ul>
</div>
请注意,我们正在调用一个名为 load_post_comments 的函数。由于我们还没有定义它,所以让我们跳到 admin/class-authors-commentary-meta-box.php 并添加以下代码:
<?php

/**
 * Loads all of the comments for the given post along with checkboxes used to
 * indicate whether or not they've received a reply or not.
 *
 * @since    0.4.0
 * @access   private
 */
private function load_post_comments() {

    $args = array(
	    'post_id' => get_the_ID(),
	    'status'  => 'approve'
    );
    $comments = get_comments( $args );

    return $comments;

}
此函数将检索给定帖子的所有已批准评论的集合。上面列出的部分将遍历评论,然后创建一个标签和一个复选框,允许用户选择评论是否收到回复。
在标签下方,您会注意到评论作者和评论。这主要是为了轻松识别留下的评论。
最后,我们需要在样式表中添加一件事:
#author-commentary-comments label {
    font-weight: bold;
}
我们就完成了。
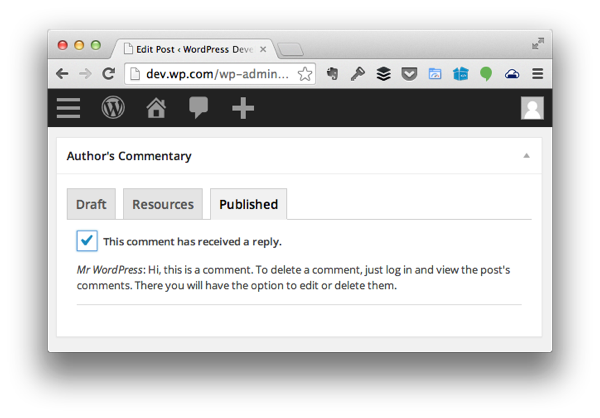
最终,您应该看到一个与上面看到的非常相似的屏幕。
在下一篇文章中,我们将回到服务器端并开始编写代码,用于验证、清理、序列化和检索与我们刚刚创建的用户界面相关的所有代码。
同时,请记得查看 GitHub 上的代码(可在本文右侧找到),并随时在下面的提要中留下任何及所有问题和评论。
以上是確保可維護的WordPress元框:完成前端部分的詳細內容。更多資訊請關注PHP中文網其他相關文章!


