

使用 WordPress 媒體上傳器來儲存圖片

在本系列中,我們將了解如何在實際外掛程式中實作 WordPress 媒體上傳器。本系列及其相關程式碼背後的想法是讓我們清楚地了解它是如何運作的,我們將來如何使用它,以及如何將它融入我們的工作中。
到目前為止,我們已經介紹了:
- WordPress 媒體上傳器入門
- 使用 WordPress 媒體上傳器新增和刪除圖片
在這些文章中,我們逐步了解了建立一個外掛程式的過程,該外掛程式使用 WordPress 媒體上傳器將特色圖像引入我們部落格文章(和頁面)的頁腳。
但有一個問題:圖像未儲存,也未顯示在其關聯部落格文章(或頁面)的內容中。
在本文中,我們將繼續我們上次停下的地方,並完成該插件其餘部分的實現。請注意,我假設您已閱讀前兩篇文章並了解我們迄今為止介紹的源代碼。
話雖如此,讓我們繼續。
儲存特色圖片
確保圖片能夠在 WordPress 前端顯示的關鍵是保存 WordPress 提供的圖片資訊。
在上一篇文章中,我們使用其中一些資訊在我們建立的元框中顯示圖像,但實際上沒有保存這些資訊。因此,該圖像無法顯示在儀表板或網站前端,因為 WordPress 實際上並不記住它。
我們會解決這個問題。具體來說,我們將保存以下欄位:
- 圖像 URL,以便我們可以設定圖像的
src屬性 - 圖像標題,以便我們可以將其設定為圖像的
alt屬性和title屬性
介紹元資料
我們需要做的第一件事是在插件的 admin.php 視圖中新增另一個包含三個輸入欄位的容器。這些欄位中的每一個都將對應到上面的值。
看一下下面的程式碼,然後我會詳細說明:
<p id="featured-footer-image-meta">
    <input type="text" id="footer-thumbnail-src" name="footer-thumbnail-src" value="" />
	<input type="text" id="footer-thumbnail-title" name="footer-thumbnail-title" value="" />
	<input type="text" id="footer-thumbnail-alt" name="footer-thumbnail-alt" value="" />
</p><!-- #featured-footer-image-meta -->
從一開始,它就應該夠容易理解:
- 我們引入了一個由
featured-footer-image-meta標識的容器 - 包含三個輸入文字元素,每個元素對應到我們將要保存的圖像元素屬性
此時,我們需要跳回 JavaScript 文件,以便我們可以獲取透過媒體上傳器傳回給我們的訊息,並使用此資訊填入輸入欄位。
開啟 admin.js,然後將以下三行加入到插入 event 的處理函數底部(對於 file_frame) :
// Store the image's information into the meta data fields
$( '#footer-thumbnail-src' ).val( json.url );
$( '#footer-thumbnail-title' ).val( json.title );
$( '#footer-thumbnail-alt' ).val( json.title );
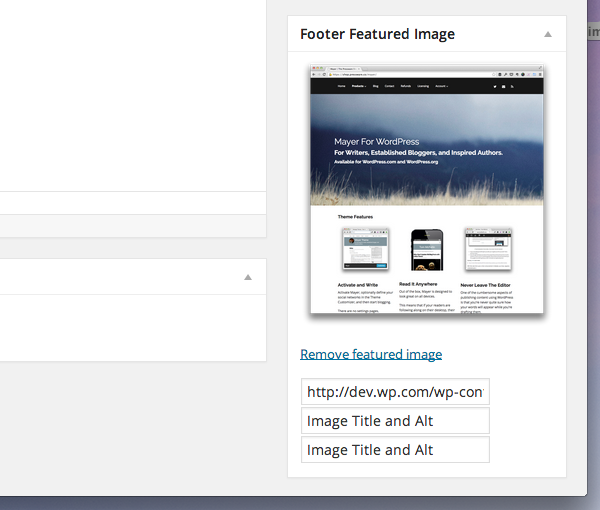
從這裡導航到您的 WordPress 儀表板,添加新帖子或編輯現有帖子,您應該會看到如下圖所示的內容:
假設您已直接編寫了所有 JavaScript,則根據您在中提供的數據,您應該會看到類似的內容選擇圖像時的媒體上傳器。
但請注意,當您按一下「刪除特色圖像」時,文字將保留。在我們實際保存此資訊之前,讓我們完成 JavaScript,以便每當用戶刪除圖像時它都會清除輸入欄位。
雖然有多種方法可以做到這一點,但我選擇使用以下程式碼:
// Finally, we reset the meta data input fields
$( '#featured-footer-image-info' )
    .children()
    .val( '' );
請記住,這需要位於「刪除特色圖像」錨點的事件處理程序中。在上一篇文章中,我們將此函數命名為 resetUploadForm。
此時,您應該能夠點擊“刪除精選圖像”並看到圖像和輸入欄位已重置。如果您遇到問題,請查看與本文相關的 GitHub 儲存庫中的原始程式碼(它將位於 master 分支中,並且還將標記為 1.0.0)。
保存元資料
現在我們需要在插件中引入一些程式碼,這些程式碼將清理輸入欄位的值,將它們與帖子相關聯,並將其保存到資料庫中,以便我們可以在每個帖子的頁腳處顯示訊息。 < /p>
在 Acme_Footer_Image 的 run 函數中,加入以下程式碼行:
add_action( 'save_post', array( $this, 'save_post' ) );
然後我們需要定義一個函數,負責將輸入欄位的值實際儲存到資料庫中。對於以下程式碼,有兩件事需要了解:
- 我們會在儲存資料之前對其進行清理
- 我們將欄位與用於在前端顯示影像的鍵相關聯。
/**
 * Sanitized and saves the post featured footer image meta data specific with this post.
 *
 * @param    int    $post_id    The ID of the post with which we're currently working.
 * @since 0.2.0
 */
public function save_post( $post_id ) {

    if ( isset( $_REQUEST['footer-thumbnail-src'] ) ) {
		update_post_meta( $post_id, 'footer-thumbnail-src', sanitize_text_field( $_REQUEST['footer-thumbnail-src'] ) );
	}

	if ( isset( $_REQUEST['footer-thumbnail-title'] ) ) {
		update_post_meta( $post_id, 'footer-thumbnail-title', sanitize_text_field( $_REQUEST['footer-thumbnail-title'] ) );
	}

	if ( isset( $_REQUEST['footer-thumbnail-alt'] ) ) {
		update_post_meta( $post_id, 'footer-thumbnail-alt', sanitize_text_field( $_REQUEST['footer-thumbnail-alt'] ) );
	}

}
在準備測試之前,我們需要在前端顯示影像之前先對儀表板視圖再進行兩項變更。
首先,我們需要確保將元資料回顯到輸入欄位。跳轉到 admin.php 並再次更新它以包含以下內容:
<p id="featured-footer-image-info">
    <input type="text" id="footer-thumbnail-src" name="footer-thumbnail-src" value="<?php echo get_post_meta( $post->ID, 'footer-thumbnail-src', true ); ?>" />
	<input type="text" id="footer-thumbnail-title" name="footer-thumbnail-title" value="<?php echo get_post_meta( $post->ID, 'footer-thumbnail-title', true ); ?>" />
	<input type="text" id="footer-thumbnail-alt" name="footer-thumbnail-alt" value="<?php echo get_post_meta( $post->ID, 'footer-thumbnail-alt', true ); ?>" />
</p><!-- #featured-footer-image-meta -->
在這裡,我們呼叫 get_post_meta 函數來檢索使用我們上面宣告的函數所儲存的值。
接下来,我们需要确保使用相同的值填充本系列前面创建的图像元素:
<div id="featured-footer-image-container" class="hidden">
    <img src="<?php echo get_post_meta( $post->ID, 'footer-thumbnail-src', true ); ?>" alt="<?php echo get_post_meta( $post->ID, 'footer-thumbnail-alt', true ); ?>" title="<?php echo get_post_meta( $post->ID, 'footer-thumbnail-title', true ); ?>" />
</div><!-- #featured-footer-image-container -->
当然,如果元数据为空,则不会填充任何内容,并且图像将不会显示。
假设一切顺利,您应该在保存帖子时看到图像及其关联数据显示在输入字段中。同样,当您删除特色图像时,字段应该清除并且不再显示。
清理
在我们继续在前端显示图像之前,我们需要做一些小事情来清理元框的显示。
首先,我们需要确保之前类型为 text 的所有输入字段均为 hidden 类型。
<p id="featured-footer-image-info">
    <input type="hidden" id="footer-thumbnail-src" name="footer-thumbnail-src" value="<?php echo get_post_meta( $post->ID, 'footer-thumbnail-src', true ); ?>" />
	<input type="hidden" id="footer-thumbnail-title" name="footer-thumbnail-title" value="<?php echo get_post_meta( $post->ID, 'footer-thumbnail-title', true ); ?>" />
	<input type="hidden" id="footer-thumbnail-alt" name="footer-thumbnail-alt" value="<?php echo get_post_meta( $post->ID, 'footer-thumbnail-alt', true ); ?>" />
</p><!-- #featured-footer-image-meta -->
接下来,我们需要编写一个小的 JavaScript 函数,该函数将显示图像(假设图像已保存)。该函数将检查图像 URL 的输入字段是否不是空字符串。
如果不是,那么它将显示图像。因此,我们将此函数添加到 JavaScript 文件中:
/**
 * Checks to see if the input field for the thumbnail source has a value.
 * If so, then the image and the 'Remove featured image' anchor are displayed.
 *
 * Otherwise, the standard anchor is rendered.
 *
 * @param    object    $    A reference to the jQuery object
 * @since    1.0.0
 */
function renderFeaturedImage( $ ) {

    /* If a thumbnail URL has been associated with this image
     * Then we need to display the image and the reset link.
     */
	if ( '' !== $.trim ( $( '#footer-thumbnail-src' ).val() ) ) {

		$( '#featured-footer-image-container' ).removeClass( 'hidden' );

		$( '#set-footer-thumbnail' )
			.parent()
			.hide();

		$( '#remove-footer-thumbnail' )
			.parent()
			.removeClass( 'hidden' );

	}

}
然后,在 DOM 就绪函数的上下文中调用 JavaScript 函数:
renderFeaturedImage( $ );
简而言之,当页面加载时,它会检查输入字段中是否存在 URL。如果是这样,它会渲染图像并为我们提供删除它的选项。否则,它只显示空的特色图像框。
再次强调,如果您在执行此代码时遇到问题,请务必使用本页侧边栏中的链接查看关联的 GitHub 存储库。
显示特色图像
至此,我们已经在仪表板中完成了需要做的所有事情,现在是时候在博客的前端显示图像了。为此,我们需要设置一个连接到 the_content 操作的挂钩,检查图像是否存在,如果存在,则将其附加到帖子内容中。
为此,首先将以下行添加到 Acme_Footer_Image 类的 run 方法中:
add_action( 'the_content', array( $this, 'the_content' ) );
接下来,我们需要编写一个与此操作挂钩的函数。该函数将负责检查我们是否只是一个页面(因为如果用户有 more 标签,我们不想将图像附加到帖子的页脚其内容的一部分)。
我们使用以下代码来完成此操作:
/**
 * If the current post is a single post, check to see if there is a featured image.
 * If so, append is to the post content prior to rendering the post.
 *
 * @param   string    $content    The content of the post.
 * @since   1.0.0
 */
public function the_content( $content ) {

    // We only care about appending the image to single pages
	if ( is_single() ) {

		// In order to append an image, there has to be at least a source attribute
		if ( '' !== ( $src = get_post_meta( get_the_ID(), 'footer-thumbnail-src', true ) ) ) {

			// read the remaining attributes even if they are empty strings
			$alt = get_post_meta( get_the_ID(), 'footer-thumbnail-alt', true );
			$title = get_post_meta( get_the_ID(), 'footer-thumbnail-title', true );

			// create the image element within its own container
			$img_html = '<p id="footer-thumbnail">';
				$img_html .= "<img src='$src' alt='$alt' title='$title' />";
			$img_html .= '</p><!-- #footer-thumbnail -->';

			// append it to the content
			$content .= $img_html;

		}

	}

	return $content;

}
这样,我们就应该有一个功能齐全的插件,将特色页脚图像附加到在单个帖子页面上呈现的帖子中。
结论
在本系列中,我们介绍了很多材料,其中最少涉及使用媒体上传器。尽管这篇文章花了更多时间向我们展示如何将数据从元框连接到前端,但它仍然演示了如何在插件上下文中应用媒体上传器的实际应用。
话虽如此,关于媒体上传器还有很多东西需要了解,我们可以在以后的主题中介绍这些内容。如果您有兴趣,请在下面的评论中告诉我。此外,如果您对所读内容或本系列有任何疑问,也请随时留下。
不要忘记查看该项目的 GitHub 存储库 - 我希望它能在您将来使用媒体上传器时为您提供良好的服务!
以上是使用 WordPress 媒體上傳器來儲存圖片的詳細內容。更多資訊請關注PHP中文網其他相關文章!

熱AI工具

Undresser.AI Undress
人工智慧驅動的應用程序,用於創建逼真的裸體照片

AI Clothes Remover
用於從照片中去除衣服的線上人工智慧工具。

Undress AI Tool
免費脫衣圖片

Clothoff.io
AI脫衣器

Video Face Swap
使用我們完全免費的人工智慧換臉工具,輕鬆在任何影片中換臉!

熱門文章
熱工具

記事本++7.3.1
好用且免費的程式碼編輯器

SublimeText3漢化版
中文版,非常好用

禪工作室 13.0.1
強大的PHP整合開發環境

Dreamweaver CS6
視覺化網頁開發工具

SublimeText3 Mac版
神級程式碼編輯軟體(SublimeText3)


 HTML:結構,CSS:樣式,JavaScript:行為
Apr 18, 2025 am 12:09 AM
HTML:結構,CSS:樣式,JavaScript:行為
Apr 18, 2025 am 12:09 AM
HTML、CSS和JavaScript在Web開發中的作用分別是:1.HTML定義網頁結構,2.CSS控製網頁樣式,3.JavaScript添加動態行為。它們共同構建了現代網站的框架、美觀和交互性。
 HTML,CSS和JavaScript的未來:網絡開發趨勢
Apr 19, 2025 am 12:02 AM
HTML,CSS和JavaScript的未來:網絡開發趨勢
Apr 19, 2025 am 12:02 AM
HTML的未來趨勢是語義化和Web組件,CSS的未來趨勢是CSS-in-JS和CSSHoudini,JavaScript的未來趨勢是WebAssembly和Serverless。 1.HTML的語義化提高可訪問性和SEO效果,Web組件提升開發效率但需注意瀏覽器兼容性。 2.CSS-in-JS增強樣式管理靈活性但可能增大文件體積,CSSHoudini允許直接操作CSS渲染。 3.WebAssembly優化瀏覽器應用性能但學習曲線陡,Serverless簡化開發但需優化冷啟動問題。
 HTML的未來:網絡設計的發展和趨勢
Apr 17, 2025 am 12:12 AM
HTML的未來:網絡設計的發展和趨勢
Apr 17, 2025 am 12:12 AM
HTML的未來充滿了無限可能。 1)新功能和標準將包括更多的語義化標籤和WebComponents的普及。 2)網頁設計趨勢將繼續向響應式和無障礙設計發展。 3)性能優化將通過響應式圖片加載和延遲加載技術提升用戶體驗。
 HTML與CSS vs. JavaScript:比較概述
Apr 16, 2025 am 12:04 AM
HTML與CSS vs. JavaScript:比較概述
Apr 16, 2025 am 12:04 AM
HTML、CSS和JavaScript在網頁開發中的角色分別是:HTML負責內容結構,CSS負責樣式,JavaScript負責動態行為。 1.HTML通過標籤定義網頁結構和內容,確保語義化。 2.CSS通過選擇器和屬性控製網頁樣式,使其美觀易讀。 3.JavaScript通過腳本控製網頁行為,實現動態和交互功能。
 HTML與CSS和JavaScript:比較Web技術
Apr 23, 2025 am 12:05 AM
HTML與CSS和JavaScript:比較Web技術
Apr 23, 2025 am 12:05 AM
HTML、CSS和JavaScript是構建現代網頁的核心技術:1.HTML定義網頁結構,2.CSS負責網頁外觀,3.JavaScript提供網頁動態和交互性,它們共同作用,打造出用戶體驗良好的網站。
 HTML:是編程語言還是其他?
Apr 15, 2025 am 12:13 AM
HTML:是編程語言還是其他?
Apr 15, 2025 am 12:13 AM
HTMLISNOTAPROGRAMMENGUAGE; ITISAMARKUMARKUPLAGUAGE.1)htmlStructures andFormatSwebContentusingtags.2)itworkswithcsssforstylingandjavascript for Interactivity,增強WebevebDevelopment。
 超越HTML:網絡開發的基本技術
Apr 26, 2025 am 12:04 AM
超越HTML:網絡開發的基本技術
Apr 26, 2025 am 12:04 AM
要構建一個功能強大且用戶體驗良好的網站,僅靠HTML是不夠的,還需要以下技術:JavaScript賦予網頁動態和交互性,通過操作DOM實現實時變化。 CSS負責網頁的樣式和佈局,提升美觀度和用戶體驗。現代框架和庫如React、Vue.js和Angular,提高開發效率和代碼組織結構。
 &lt; strong&gt;,lt; b&gt;有什麼區別標籤和lt; em&gt;,&lt; i&gt;標籤?
Apr 28, 2025 pm 05:42 PM
&lt; strong&gt;,lt; b&gt;有什麼區別標籤和lt; em&gt;,&lt; i&gt;標籤?
Apr 28, 2025 pm 05:42 PM
本文討論了HTML標籤,和和關注其語義與表現用途及其對SEO和可訪問性的影響之間的差異。
