Firebase 與 Web 集成
Firebase 由 Google 於 2014 年推出,為其用戶提供後端服務。它提供了不同類型的高品質服務,我們可以使用這些服務來開發行動和網路應用程式。例如,它提供即時資料庫、用戶身份驗證、雲端儲存等。此外,它還提供分析功能來分析應用程式的流量。由於其快速設置而更受歡迎。
在本教學中,我們將學習如何將 Firebase 驗證整合到單頁 Web 應用程式中。
使用者應按照以下步驟設定 Firebase 帳戶並將其與單頁 Web 應用程式整合。
第 1 步 - 首先,造訪 Firebase 網站並建立帳戶。
第 2 步 - 現在,前往 https://console.firebase.google.com/u/0/ 開啟 Firebase 控制台。
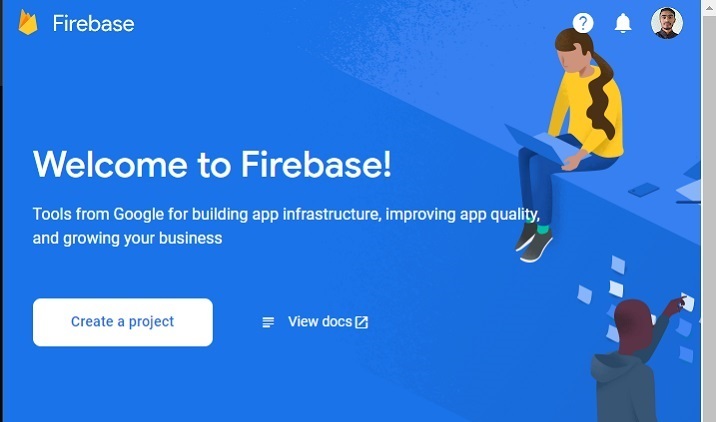
第 3 步 - 現在,點擊「建立專案」按鈕開始建立新專案。
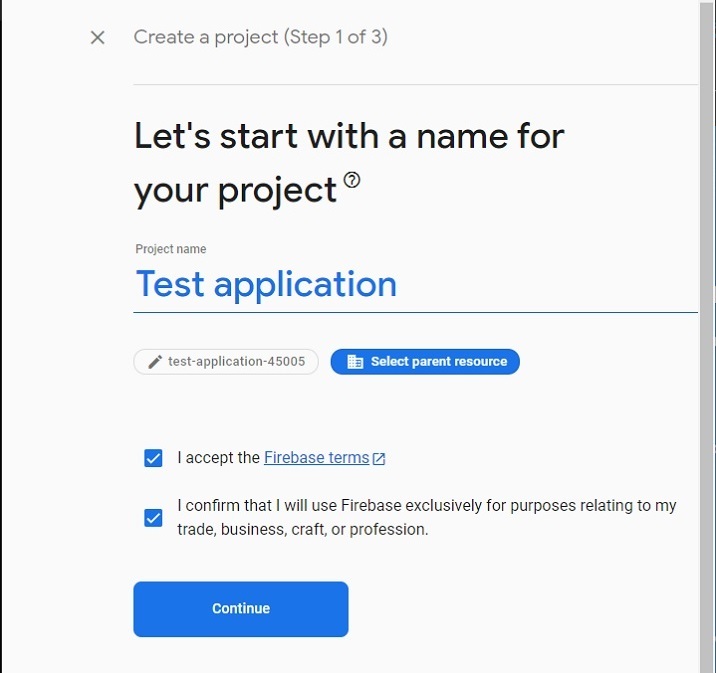
第 4 步 - 在此填寫所需的詳細信息,然後按一下「繼續」按鈕。我們正在此處創建一個“測試”應用程式。
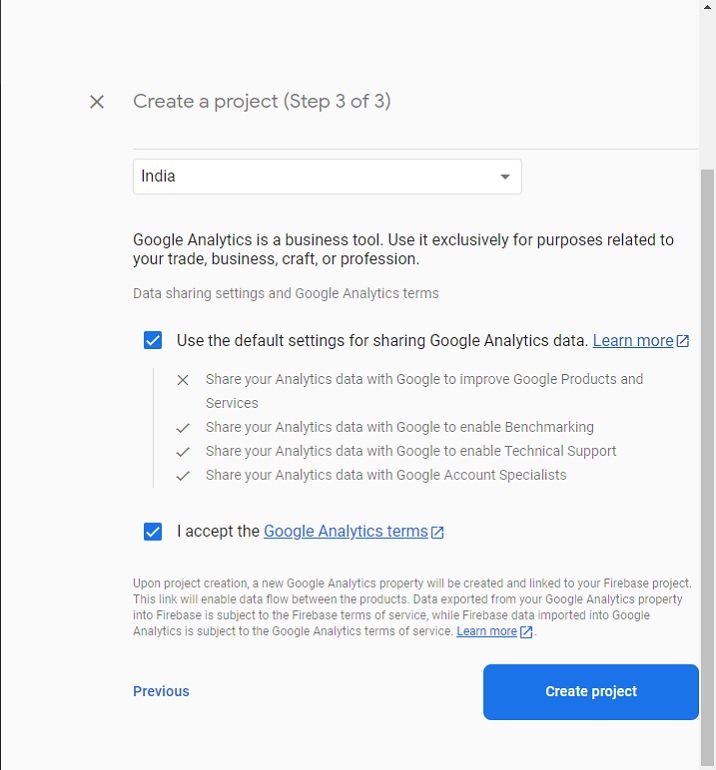
第 5 步 - 選擇首選位置,接受條款和條件,然後按一下「建立項目」按鈕。之後,請等待它為您建立一個專案。
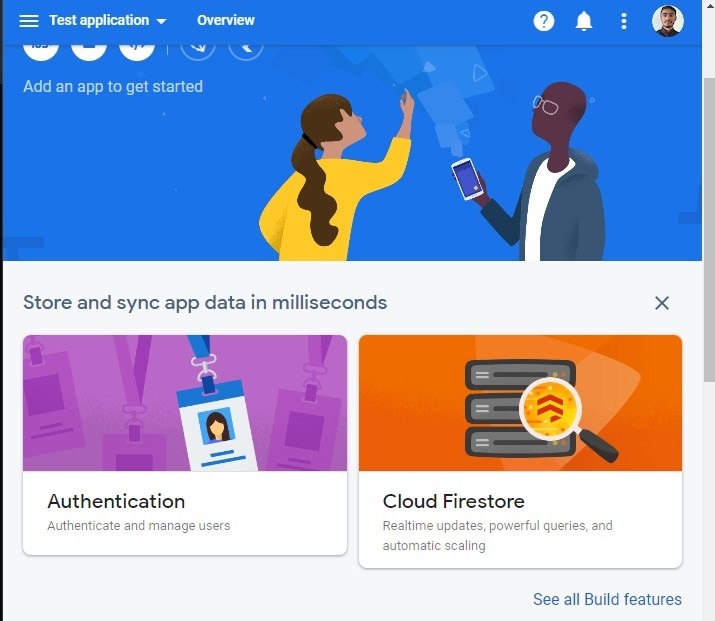
第 6 步 - 它會將您重定向到以下頁面。在這裡,按一下“身份驗證”卡元素。之後,按一下“開始”按鈕。
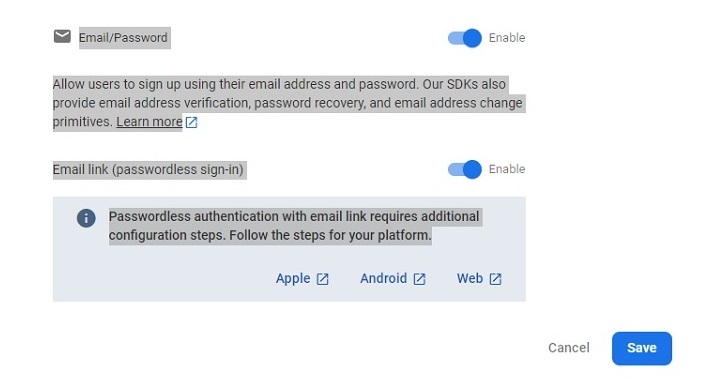
第 7 步 - 前往「登入方法」選項卡,然後按一下「電子郵件/密碼」欄位。之後,啟用“電子郵件/密碼”方法,然後按一下“儲存”按鈕。使用者也可以從此處啟用其他方式來驗證您的 Web 應用程式。
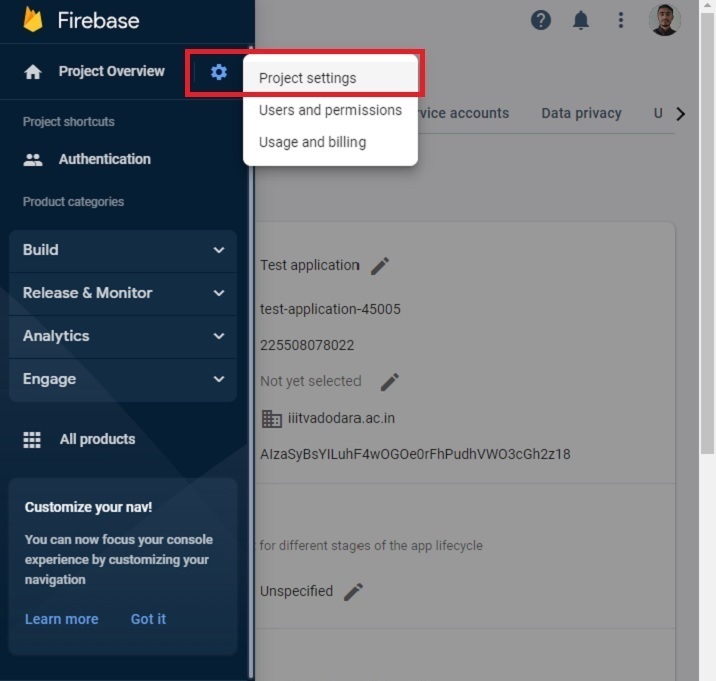
第 8 步 - 現在,點擊「專案設定」並從那裡取得 API 和專案 ID。將其存放在某處。我們將在下面的範例中使用它。
建立單頁靜態應用程式
現在,Firebase 專案的設定已經完成。接下來,我們將建立一個單頁靜態應用程式。
步驟
第 1 步 - 以任一方式將 Firebase 新增到您的專案中。這裡,我們添加了使用CDN。開發者也可以根據自己目前從事的專案使用該SDK。
步驟 2 - 現在,建立一個簡單的 HTML 範本來輸入電子郵件和密碼。另外,新增註冊、登入和登出按鈕。
第 3 步 - 在 JavaScript 中,使用 API 金鑰和專案 ID 初始化 Firebase 配置。
步驟 4 - 使用 onAuthStateChanged() 方法在驗證狀態變更時列印訊息。
第 5 步 - 使用 Firebase 的 auth() 方法初始化驗證。
第 6 步 - 現在,建立一個 addUsers() 函數以將使用者新增至 Firebase。在函數中存取電子郵件和密碼,並使用 createUserWithEmailAndPassword() 方法將使用者新增至 Firebase。
-
第7步 - 現在,建立一個logIn()函數,並使用signInWithEmailAndPassword()方法使用電子郵件和密碼登入應用程式。
李> 第 8 步驟 - 另外,建立一個 logout() 函數,它使用 signOut() 方法來結束目前會話。
範例
在下面的範例中,我們建立了一個帶有兩個輸入欄位的簡單表單。每當使用者點擊註冊按鈕時,它都會呼叫 addUsers() 函數,該函數將使用者新增至 Firebase。如果使用者輸入弱密碼或錯誤的電子郵件地址,Firebase 將傳回錯誤。
此外,當使用者點擊登入按鈕時,它會呼叫「login()」函數,該函數允許使用者登入應用程式。如果使用者輸入錯誤的密碼或電子郵件,Firebase 會回傳錯誤。當使用者點擊signOut按鈕時,它會執行signOut()函數,結束目前會話。
注意 - 這裡,開發者需要根據他們的專案更改API金鑰、專案ID和專案域。產生以下憑證僅用於測試目的。
<html>
<head>
   <script src = "https://www.gstatic.com/firebasejs/8.2.7/firebase-app.js">
   </script>
   <script src = "https://www.gstatic.com/firebasejs/8.2.7/firebase-auth.js">
   </script>
   <style>
      button {
         width: 100px;
         height: auto;
         padding: 5px 10px;
         background-color: aqua;
         border: 2px solid green;
         border-radius: 12px;
      }
   </style>
</head>
<body>
   <h2>
      Using the <i> Firebase auth </i> to add authentication in a single page static website.
   </h2>
   <div class = "container">
      <h2>Enter the email and password below.</h2>
      <input type = "email" placeholder = "abcd@gamil.com" id = "email" />
      <br /> <br />
      <input type = "password" placeholder = "Add password" id = "password" />
      <br /> <br />
      <button onclick = "addUsers()" id = "signUp">
         SignUp
      </button>
      <button onclick = "login()" id = "logIp">
         SignIn
      </button>
      <button onclick = "logout()" id = "logOut">
         SignOut
      </button>
      <br> <br>
      <div id = "output"> </div>
   </div>
   <script>
      let output = document.getElementById('output');
      // Your web app's Firebase configuration
      var initialConfig = {
         apiKey: "AIzaSyBsYILuhF4wOGOe0rFhPudhVWO3cGh2z18", // change API keu
         authDomain: "localhost", // change domain
         projectId: "test-application-45005", // change project Id
      };

      // Initialize Firebase
      firebase.initializeApp(initialConfig);
      const authenticate = firebase.auth();

      // Check if there are any active users
      firebase.auth().onAuthStateChanged((user) => {
         if (user) {
            var email = user.email;
            output.innerHTML = "Active user is " + email + "<br>";
         } else {
            output.innerHTML = "No active users" + "<br>";
         }
      });

      // add users
      function addUsers() {
         var email = document.getElementById("email").value;
         var password = document.getElementById("password").value;

         // adding users via the promise
         authenticate.createUserWithEmailAndPassword(
            email,
            password
         ).then((userCredential) => {
            output.innerHTML = "User added successfully and user id is " + userCredential.user.uid + "<br>";
         }).catch((e) => {
            output.innerHTML = "Some error occurred - " + e.message + "<br>";
         });
      }

      // login function
      function login() {
         var email = document.getElementById("email").value;
         var password = document.getElementById("password").value;
         authenticate.signInWithEmailAndPassword(
         email, password).then((userCredential) => {
            output.innerHTML = "User login successfully and user id is " + userCredential.user.uid + "<br>";
         }).catch((e) => {
            output.innerHTML = "Some error occurred - " + e.message + "<br>";
         });
      }

      // logout currently logged-in user
      function logout() {
         authenticate.signOut();
         output.innerHTML = "User logout successfully";
      }

   </script>
</body>
</html>
使用者學會如何將 Firebase 與 Web 應用程式整合。對於經驗豐富的開發人員來說,將 Firebase 與任何 Web 應用程式整合幾乎不需要 15 分鐘。此外,如果使用者在登入應用程式時輸入弱密碼,它會給出錯誤,並且它會管理開發人員無需擔心的所有其他內容。
此外,開發者還可以將 Firebase 資料庫與任何 Web 或行動應用程式一起使用。
以上是Firebase 與 Web 集成的詳細內容。更多資訊請關注PHP中文網其他相關文章!

熱AI工具

Undresser.AI Undress
人工智慧驅動的應用程序,用於創建逼真的裸體照片

AI Clothes Remover
用於從照片中去除衣服的線上人工智慧工具。

Undress AI Tool
免費脫衣圖片

Clothoff.io
AI脫衣器

Video Face Swap
使用我們完全免費的人工智慧換臉工具,輕鬆在任何影片中換臉!

熱門文章

熱工具

記事本++7.3.1
好用且免費的程式碼編輯器

SublimeText3漢化版
中文版,非常好用

禪工作室 13.0.1
強大的PHP整合開發環境

Dreamweaver CS6
視覺化網頁開發工具

SublimeText3 Mac版
神級程式碼編輯軟體(SublimeText3)
 JavaScript引擎:比較實施
Apr 13, 2025 am 12:05 AM
不同JavaScript引擎在解析和執行JavaScript代碼時,效果會有所不同,因為每個引擎的實現原理和優化策略各有差異。 1.詞法分析:將源碼轉換為詞法單元。 2.語法分析:生成抽象語法樹。 3.優化和編譯:通過JIT編譯器生成機器碼。 4.執行:運行機器碼。 V8引擎通過即時編譯和隱藏類優化,SpiderMonkey使用類型推斷系統,導致在相同代碼上的性能表現不同。
 Python vs. JavaScript:學習曲線和易用性
Apr 16, 2025 am 12:12 AM
Python更適合初學者,學習曲線平緩,語法簡潔;JavaScript適合前端開發,學習曲線較陡,語法靈活。 1.Python語法直觀,適用於數據科學和後端開發。 2.JavaScript靈活,廣泛用於前端和服務器端編程。
 JavaScript:探索網絡語言的多功能性
Apr 11, 2025 am 12:01 AM
JavaScript是現代Web開發的核心語言,因其多樣性和靈活性而廣泛應用。 1)前端開發:通過DOM操作和現代框架(如React、Vue.js、Angular)構建動態網頁和單頁面應用。 2)服務器端開發:Node.js利用非阻塞I/O模型處理高並發和實時應用。 3)移動和桌面應用開發:通過ReactNative和Electron實現跨平台開發,提高開發效率。
 如何使用Next.js(前端集成)構建多租戶SaaS應用程序
Apr 11, 2025 am 08:22 AM
本文展示了與許可證確保的後端的前端集成,並使用Next.js構建功能性Edtech SaaS應用程序。 前端獲取用戶權限以控制UI的可見性並確保API要求遵守角色庫
 使用Next.js(後端集成)構建多租戶SaaS應用程序
Apr 11, 2025 am 08:23 AM
我使用您的日常技術工具構建了功能性的多租戶SaaS應用程序(一個Edtech應用程序),您可以做同樣的事情。 首先,什麼是多租戶SaaS應用程序? 多租戶SaaS應用程序可讓您從唱歌中為多個客戶提供服務
 從C/C到JavaScript:所有工作方式
Apr 14, 2025 am 12:05 AM
從C/C 轉向JavaScript需要適應動態類型、垃圾回收和異步編程等特點。 1)C/C 是靜態類型語言,需手動管理內存,而JavaScript是動態類型,垃圾回收自動處理。 2)C/C 需編譯成機器碼,JavaScript則為解釋型語言。 3)JavaScript引入閉包、原型鍊和Promise等概念,增強了靈活性和異步編程能力。
 JavaScript和Web:核心功能和用例
Apr 18, 2025 am 12:19 AM
JavaScript在Web開發中的主要用途包括客戶端交互、表單驗證和異步通信。 1)通過DOM操作實現動態內容更新和用戶交互;2)在用戶提交數據前進行客戶端驗證,提高用戶體驗;3)通過AJAX技術實現與服務器的無刷新通信。
 JavaScript在行動中:現實世界中的示例和項目
Apr 19, 2025 am 12:13 AM
JavaScript在現實世界中的應用包括前端和後端開發。 1)通過構建TODO列表應用展示前端應用,涉及DOM操作和事件處理。 2)通過Node.js和Express構建RESTfulAPI展示後端應用。


