

MySql常用命令--优化参数以及日常管理_MySQL

显示插入查询的优化参数:
<code class="hljs asciidoc">show variables like "concurrent_insert";
+-------------------+-------+
| Variable_name     | Value |
+-------------------+-------+
| concurrent_insert | AUTO  |
+-------------------+-------+

set GLOBAL concurrent_insert=2;</code>
插入数据时MySQL会对插入的记录进行唯一性校验<br />
这种校验也会降低插入记录的速度。可以在插入记录之前禁用唯一性检查。等到记录插入完毕后再开启。禁用唯一性检查的语句如下:
<code class="hljs asciidoc"><code class="hljs sql">SET UNIQUE_CHECKS=0;</code></code>
<code class="hljs sql">重新开启唯一性检查的语句如下:
<code class="hljs asciidoc"><code class="hljs sql"><code class="hljs sql">SET UNIQUE_CHECKS=1;</code></code></code>
<code class="hljs asciidoc"><code class="hljs sql"><code class="hljs sql"><code class="hljs asciidoc">mysql> show variables like "UNIQUE_CHECKS";
+---------------+-------+
| Variable_name | Value |
+---------------+-------+
| unique_checks | ON    |
+---------------+-------+</code></code></code></code>
<code class="hljs sql"><code class="hljs sql"><code class="hljs asciidoc">mysql设置最大连接数量
<code class="hljs asciidoc"><code class="hljs sql"><code class="hljs sql"><code class="hljs asciidoc"><code class="hljs lasso">mysql> set GLOBAL max_connections = 1000;
Query OK, 0 rows affected (0.00 sec)</code></code></code></code></code>
<code class="hljs sql"><code class="hljs sql"><code class="hljs asciidoc"><code class="hljs lasso">之前配置了mysql的主从备份<br />
结果发现日志很多,占据了很多的磁盘空间,需要进行额外的磁盘管理<br />
进入mysql的存储区域,查看一下数据部分的空间大小
<code class="hljs asciidoc"><code class="hljs sql"><code class="hljs sql"><code class="hljs asciidoc"><code class="hljs lasso"><code class="hljs lasso">/mnt/ssd/data$ ls
auto.cnf          mysql-bin.000139  mysql-bin.000149  mysql-bin.000159  mysql-bin.000169  mysql-bin.000179  mysql-bin.000189  mysql-bin.000199  mysql-bin.000209  mysql-bin.index
db_user_msg       mysql-bin.000140  mysql-bin.000150  mysql-bin.000160  mysql-bin.000170  mysql-bin.000180  mysql-bin.000190  mysql-bin.000200  mysql-bin.000210  performance_schema
ibdata1           mysql-bin.000141  mysql-bin.000151  mysql-bin.000161  mysql-bin.000171  mysql-bin.000181  mysql-bin.000191  mysql-bin.000201  mysql-bin.000211  StockData
ib_logfile0       mysql-bin.000142  mysql-bin.000152  mysql-bin.000162  mysql-bin.000172  mysql-bin.000182  mysql-bin.000192  mysql-bin.000202  mysql-bin.000212
ib_logfile1       mysql-bin.000143  mysql-bin.000153  mysql-bin.000163  mysql-bin.000173  mysql-bin.000183  mysql-bin.000193  mysql-bin.000203  mysql-bin.000213
mysql             mysql-bin.000144  mysql-bin.000154  mysql-bin.000164  mysql-bin.000174  mysql-bin.000184  mysql-bin.000194  mysql-bin.000204  mysql-bin.000214
mysql-bin.000135  mysql-bin.000145  mysql-bin.000155  mysql-bin.000165  mysql-bin.000175  mysql-bin.000185  mysql-bin.000195  mysql-bin.000205  mysql-bin.000215
mysql-bin.000136  mysql-bin.000146  mysql-bin.000156  mysql-bin.000166  mysql-bin.000176  mysql-bin.000186  mysql-bin.000196  mysql-bin.000206  mysql-bin.000216
mysql-bin.000137  mysql-bin.000147  mysql-bin.000157  mysql-bin.000167  mysql-bin.000177  mysql-bin.000187  mysql-bin.000197  mysql-bin.000207  mysql-bin.000217
mysql-bin.000138  mysql-bin.000148  mysql-bin.000158  mysql-bin.000168  mysql-bin.000178  mysql-bin.000188  mysql-bin.000198  mysql-bin.000208  mysql-bin.000218</code></code></code></code></code></code>
<code class="hljs sql"><code class="hljs sql"><code class="hljs asciidoc"><code class="hljs lasso"><code class="hljs lasso">显示mysql中数据部分和基本的配置部分所占用的磁盘空间
<code class="hljs asciidoc"><code class="hljs sql"><code class="hljs sql"><code class="hljs asciidoc"><code class="hljs lasso"><code class="hljs lasso"><code class="hljs lasso">/mnt/ssd/data$ sudo du -h -d 1
163G    ./StockData
636K    ./performance_schema
1.7M    ./mysql
56K     ./db_user_msg
242G    .</code></code></code></code></code></code></code>
<code class="hljs sql"><code class="hljs sql"><code class="hljs asciidoc"><code class="hljs lasso"><code class="hljs lasso"><code class="hljs lasso">结果发现这其中很多的空间都被mysql-bin*文件所占用了
<code class="hljs asciidoc"><code class="hljs sql"><code class="hljs sql"><code class="hljs asciidoc"><code class="hljs lasso"><code class="hljs lasso"><code class="hljs lasso"><code class="hljs lasso">/mnt/ssd/data$ sudo du -c -h mysql-bin*
1.1G    mysql-bin.000135
......
491M    mysql-bin.000218
4.0K    mysql-bin.index
80G     total
结果显示mysql-bin占用了大约80G的磁盘空间</code></code></code></code></code></code></code></code>
<code class="hljs sql"><code class="hljs sql"><code class="hljs asciidoc"><code class="hljs lasso"><code class="hljs lasso"><code class="hljs lasso"><code class="hljs lasso">现在我们要将这些日志清理掉
<code class="hljs asciidoc"><code class="hljs sql"><code class="hljs sql"><code class="hljs asciidoc"><code class="hljs lasso"><code class="hljs lasso"><code class="hljs lasso"><code class="hljs lasso"><code class="hljs asciidoc">mysql> show master logs;
+------------------+------------+
| Log_name         | File_size  |
+------------------+------------+
| mysql-bin.000135 | 1073742116 |
| mysql-bin.000136 | 1073742153 |
......
| mysql-bin.000216 | 1073747783 |
| mysql-bin.000217 | 1073742128 |
| mysql-bin.000218 |  514734902 |
+------------------+------------+
84 rows in set (0.01 sec)
这应该是主从备份一周以内的日志文件

查看一下目前正在起作用的日志文件是哪一个
mysql> show master status;
+------------------+-----------+--------------+------------------+-------------------+
| File             | Position  | Binlog_Do_DB | Binlog_Ignore_DB | Executed_Gtid_Set |
+------------------+-----------+--------------+------------------+-------------------+
| mysql-bin.000218 | 514734902 |              |                  |                   |
+------------------+-----------+--------------+------------------+-------------------+
1 row in set (0.00 sec)</code></code></code></code></code></code></code></code></code>
<code class="hljs sql"><code class="hljs sql"><code class="hljs asciidoc"><code class="hljs lasso"><code class="hljs lasso"><code class="hljs lasso"><code class="hljs lasso"><code class="hljs asciidoc">如何删除多余的日志<br />
日志的删除<br />
对于比较繁忙的OLTP系统,由于每天生产日志量大,这些日志如果长时间不清理,将会对磁盘空间带来很大的浪费,因此,定期删除日志是DBA维护Mysql数据库的一个重要工作内容,下面将介绍几种删除日志的常见方法:
<code class="hljs sql"><code class="hljs sql"><code class="hljs asciidoc"><code class="hljs lasso"><code class="hljs lasso"><code class="hljs lasso"><code class="hljs lasso"><code class="hljs asciidoc">先去获得mysql中数据存储的位置:
<code class="hljs asciidoc"><code class="hljs sql"><code class="hljs sql"><code class="hljs asciidoc"><code class="hljs lasso"><code class="hljs lasso"><code class="hljs lasso"><code class="hljs lasso"><code class="hljs asciidoc"><code class="hljs asciidoc">mysql> show variables like "datadir";
+---------------+-----------------+
| Variable_name | Value           |
+---------------+-----------------+
| datadir       | /var/lib/mysql/ |
+---------------+-----------------+
1 row in set (0.00 sec)
这是mysql中的默认存储位置</code></code></code></code></code></code></code></code></code></code>
<code class="hljs sql"><code class="hljs sql"><code class="hljs asciidoc"><code class="hljs lasso"><code class="hljs lasso"><code class="hljs lasso"><code class="hljs lasso"><code class="hljs asciidoc"><code class="hljs asciidoc">再去查看master中日志的存储位置:
<code class="hljs asciidoc"><code class="hljs sql"><code class="hljs sql"><code class="hljs asciidoc"><code class="hljs lasso"><code class="hljs lasso"><code class="hljs lasso"><code class="hljs lasso"><code class="hljs asciidoc"><code class="hljs asciidoc"><code class="hljs smalltalk">mysql> show variables like "log%";
+----------------------------------------+-------------------------------+
| Variable_name                          | Value                         |
+----------------------------------------+-------------------------------+
| log_bin                                | ON                            |
| log_bin_basename                       | /mnt/ssd/data/mysql-bin       |
| log_bin_index                          | /mnt/ssd/data/mysql-bin.index |
| log_bin_trust_function_creators        | OFF                           |
| log_bin_use_v1_row_events              | OFF                           |
| log_error                              | /var/log/mysql/error.log      |
| log_output                             | FILE                          |
| log_queries_not_using_indexes          | OFF                           |
| log_slave_updates                      | OFF                           |
| log_slow_admin_statements              | OFF                           |
| log_slow_slave_statements              | OFF                           |
| log_throttle_queries_not_using_indexes | 0                             |
| log_warnings                           | 1                             |
+----------------------------------------+-------------------------------+
13 rows in set (0.00 sec)</code></code></code></code></code></code></code></code></code></code></code>
<code class="hljs sql"><code class="hljs sql"><code class="hljs asciidoc"><code class="hljs lasso"><code class="hljs lasso"><code class="hljs lasso"><code class="hljs lasso"><code class="hljs asciidoc"><code class="hljs asciidoc"><code class="hljs smalltalk">查询slave节点的更新状态:
<code class="hljs asciidoc"><code class="hljs sql"><code class="hljs sql"><code class="hljs asciidoc"><code class="hljs lasso"><code class="hljs lasso"><code class="hljs lasso"><code class="hljs lasso"><code class="hljs asciidoc"><code class="hljs asciidoc"><code class="hljs smalltalk"><code class="hljs lasso">mysql> show slave status \G
*************************** 1. row ***************************
               Slave_IO_State: Waiting for master to send event
                  Master_Host: 25.25.2.6
                  Master_User: gpx_sync
                  Master_Port: 3306
                Connect_Retry: 10
              Master_Log_File: mysql-bin.000218
          Read_Master_Log_Pos: 514734902
               Relay_Log_File: mysqld-relay-bin.000669
                Relay_Log_Pos: 236
        Relay_Master_Log_File: mysql-bin.000218
             Slave_IO_Running: Yes
            Slave_SQL_Running: Yes
              Replicate_Do_DB:
          Replicate_Ignore_DB:
           Replicate_Do_Table: StockData.t_day_stock
       Replicate_Ignore_Table:
      Replicate_Wild_Do_Table:
  Replicate_Wild_Ignore_Table:
                   Last_Errno: 0
                   Last_Error:
                 Skip_Counter: 0
          Exec_Master_Log_Pos: 514734902
              Relay_Log_Space: 132818854
              Until_Condition: None
               Until_Log_File:
                Until_Log_Pos: 0
           Master_SSL_Allowed: No
           Master_SSL_CA_File:
           Master_SSL_CA_Path:
              Master_SSL_Cert:
            Master_SSL_Cipher:
               Master_SSL_Key:
        Seconds_Behind_Master: 0
Master_SSL_Verify_Server_Cert: No
                Last_IO_Errno: 0
                Last_IO_Error:
               Last_SQL_Errno: 0
               Last_SQL_Error:
  Replicate_Ignore_Server_Ids:
             Master_Server_Id: 1
                  Master_UUID: e61e54d8-1e08-11e5-9160-44a842112d25
             Master_Info_File: /var/lib/mysql/master.info
                    SQL_Delay: 0
          SQL_Remaining_Delay: NULL
      Slave_SQL_Running_State: Slave has read all relay log; waiting for the slave I/O thread to update it
           Master_Retry_Count: 86400
                  Master_Bind:
      Last_IO_Error_Timestamp:
     Last_SQL_Error_Timestamp:
               Master_SSL_Crl:
           Master_SSL_Crlpath:
           Retrieved_Gtid_Set:
            Executed_Gtid_Set:
                Auto_Position: 0
1 row in set (0.00 sec)

这里面我们获得的有用的信息是:
              Master_Log_File: mysql-bin.000218
          Read_Master_Log_Pos: 514734902
               Relay_Log_File: mysqld-relay-bin.000669
                Relay_Log_Pos: 236
        Relay_Master_Log_File: mysql-bin.000218
             Slave_IO_Running: Yes
            Slave_SQL_Running: Yes
Slave_SQL_Running_State: Slave has read all relay log; waiting for the slave I/O thread to update it</code></code></code></code></code></code></code></code></code></code></code></code><code class="hljs sql"><code class="hljs sql"><code class="hljs asciidoc"><code class="hljs lasso"><code class="hljs lasso"><code class="hljs lasso"><code class="hljs lasso"><code class="hljs asciidoc"><code class="hljs asciidoc"><code class="hljs smalltalk"><code class="hljs lasso">执行“reset master;”命令,该命令将删除所有二进制日志,新日志的编号从“000001” 开始;
<code class="hljs asciidoc"><code class="hljs sql"><code class="hljs sql"><code class="hljs asciidoc"><code class="hljs lasso"><code class="hljs lasso"><code class="hljs lasso"><code class="hljs lasso"><code class="hljs asciidoc"><code class="hljs asciidoc"><code class="hljs smalltalk"><code class="hljs lasso"><code class="hljs perl">Mysql>reset master;</code></code></code></code></code></code></code></code></code></code></code></code></code>
<code class="hljs sql"><code class="hljs sql"><code class="hljs asciidoc"><code class="hljs lasso"><code class="hljs lasso"><code class="hljs lasso"><code class="hljs lasso"><code class="hljs asciidoc"><code class="hljs asciidoc"><code class="hljs smalltalk"><code class="hljs lasso"><code class="hljs perl">执行“Purge master logs to ‘mysql-bin.’” 命令,该命令将删除“” 编号之前的所有日志,下列中删除了“mysql-bin.000001”之前编号的所有日志;
<code class="hljs asciidoc"><code class="hljs sql"><code class="hljs sql"><code class="hljs asciidoc"><code class="hljs lasso"><code class="hljs lasso"><code class="hljs lasso"><code class="hljs lasso"><code class="hljs asciidoc"><code class="hljs asciidoc"><code class="hljs smalltalk"><code class="hljs lasso"><code class="hljs perl"><code class="hljs vbnet">Mysql>purge master logs to 'mysql-bin.000215';</code></code></code></code></code></code></code></code></code></code></code></code></code></code>
<code class="hljs sql"><code class="hljs sql"><code class="hljs asciidoc"><code class="hljs lasso"><code class="hljs lasso"><code class="hljs lasso"><code class="hljs lasso"><code class="hljs asciidoc"><code class="hljs asciidoc"><code class="hljs smalltalk"><code class="hljs lasso"><code class="hljs perl"><code class="hljs vbnet">执行“purge master logs before ‘yyyy-mm-dd hh24:min:ss’”命令,该命令将删除日期为“yyyy-mm-dd hh24:mi:ss”之前产生的所有日志,下列中删除了日期在“2010-05-22 01:00:00”之前的所有日志
<code class="hljs asciidoc"><code class="hljs sql"><code class="hljs sql"><code class="hljs asciidoc"><code class="hljs lasso"><code class="hljs lasso"><code class="hljs lasso"><code class="hljs lasso"><code class="hljs asciidoc"><code class="hljs asciidoc"><code class="hljs smalltalk"><code class="hljs lasso"><code class="hljs perl"><code class="hljs vbnet"><code class="hljs css">Mysql>purge master logs before ‘2010-05-22 01:00:00’;</code></code></code></code></code></code></code></code></code></code></code></code></code></code></code>
<code class="hljs sql"><code class="hljs sql"><code class="hljs asciidoc"><code class="hljs lasso"><code class="hljs lasso"><code class="hljs lasso"><code class="hljs lasso"><code class="hljs asciidoc"><code class="hljs asciidoc"><code class="hljs smalltalk"><code class="hljs lasso"><code class="hljs perl"><code class="hljs vbnet"><code class="hljs css">设置参数 –expire_logs_days=#(days),此参数的含义是设置日志的过期天数,过来指定的天数后日志将会被自动删除,这样将有利于减少DBA管理日志的工作量。
<code class="hljs asciidoc"><code class="hljs sql"><code class="hljs sql"><code class="hljs asciidoc"><code class="hljs lasso"><code class="hljs lasso"><code class="hljs lasso"><code class="hljs lasso"><code class="hljs asciidoc"><code class="hljs asciidoc"><code class="hljs smalltalk"><code class="hljs lasso"><code class="hljs perl"><code class="hljs vbnet"><code class="hljs css"><code class="hljs asciidoc">gpx@dell:~$ sudo vim /etc/mysql/my.cnf
[mysqld]
expire_logs_days = 3
这样,3天前的日志都会被删除,系统自动删除

查看系统中对于二进制日志自动删除的过期时间
mysql> show variables like "expire%";
+------------------+-------+
| Variable_name    | Value |
+------------------+-------+
| expire_logs_days | 3     |
+------------------+-------+
1 row in set (0.00 sec)</code></code></code></code></code></code></code></code></code></code></code></code></code></code></code></code>

熱AI工具

Undresser.AI Undress
人工智慧驅動的應用程序,用於創建逼真的裸體照片

AI Clothes Remover
用於從照片中去除衣服的線上人工智慧工具。

Undress AI Tool
免費脫衣圖片

Clothoff.io
AI脫衣器

Video Face Swap
使用我們完全免費的人工智慧換臉工具,輕鬆在任何影片中換臉!

熱門文章
熱工具

記事本++7.3.1
好用且免費的程式碼編輯器

SublimeText3漢化版
中文版,非常好用

禪工作室 13.0.1
強大的PHP整合開發環境

Dreamweaver CS6
視覺化網頁開發工具

SublimeText3 Mac版
神級程式碼編輯軟體(SublimeText3)


 如何在Windows 11/10中執行SUDO命令
Mar 09, 2024 am 09:50 AM
如何在Windows 11/10中執行SUDO命令
Mar 09, 2024 am 09:50 AM
透過sudo指令,使用者可以在提升權限模式下執行指令,而無需切換到超級使用者模式。本文將介紹如何在Windows系統中模擬類似sudo指令的功能。什麼是數道司令部? Sudo(「超級使用者do」的縮寫)是一種命令列工具,允許基於Unix的作業系統(如Linux和MacOS)的使用者以提升的權限執行命令,這些權限通常是管理員所擁有的。在Windows11/10中執行SUDO命令然而,隨著最新發布的Windows11Insider預覽版推出,Windows用戶現在也可以體驗到這項功能。這項新功能使用戶能夠
 win11網卡mac位址怎麼查? Win11使用指令取得網路卡MAC位址方法
Feb 29, 2024 pm 04:34 PM
win11網卡mac位址怎麼查? Win11使用指令取得網路卡MAC位址方法
Feb 29, 2024 pm 04:34 PM
本文將向讀者介紹在Win11系統中如何使用命令提示字元(CommandPrompt)來尋找網路介面卡的實體位址(MAC位址)。 MAC位址是網路介面卡(NIC)的唯一標識符,它在網路通訊中扮演著重要角色。透過命令提示符,使用者可以輕鬆地獲取到當前電腦上所有網路適配器的MAC位址信息,這對於網路故障排查、配置網路設定等任務非常有幫助。方法一:使用「命令提示字元」1、按【Win+X】組合鍵,或【右鍵】點選工作列上的【Windows標誌】,在開啟的選單項目中,選擇【執行】;2、執行窗口,輸入【cmd】指令,然
 超實用!讓你成為Linux大神的Sar命令
Mar 01, 2024 am 08:01 AM
超實用!讓你成為Linux大神的Sar命令
Mar 01, 2024 am 08:01 AM
一、概述sar命令透過從系統活動中收集的資料來展示系統的使用報告。這些報告由不同部分組成,每個部分都包含資料類型和收集資料的時間。 sar指令的預設模式顯示存取CPU的各種資源(如使用者、系統、I/O調度等)在不同時間增量下的CPU使用率。此外,它還顯示給定時間段內空閒CPU的百分比。報告底部列出了每個數據點的平均值。 sar預設每10分鐘報告一次收集的數據,但您可以使用各種選項來篩選和調整這些報告。與uptime指令類似,sar指令也可協助您監控CPU的負載狀況。透過sar,您可以了解過度負載發
 hyperv增強會話模式在哪? Win11用指令啟用或停用Hyper-V增強會話模式技巧
Feb 29, 2024 pm 05:52 PM
hyperv增強會話模式在哪? Win11用指令啟用或停用Hyper-V增強會話模式技巧
Feb 29, 2024 pm 05:52 PM
Win11系統中,可以透過指令來啟用或停用Hyper-V增強會話模式。本文將介紹如何使用指令來進行操作,幫助使用者更好地管理和控制系統中的Hyper-V功能。 Hyper-V是Microsoft提供的一種虛擬化技術,它內建在WindowsServer和Windows10、11(家用版除外)中,允許使用者在Windows系統中執行虛擬作業系統。雖然虛擬機器與宿主機作業系統隔離,但透過設置,它們仍然能夠使用宿主機的資源,如音效卡和儲存設備等。其中一個關鍵設定就是啟用「增強會話模式」。增強會話模式是Hyper
 win11小元件怎麼刪除? 一條指令卸載 Windows11小元件功能技巧
Apr 11, 2024 pm 05:19 PM
win11小元件怎麼刪除? 一條指令卸載 Windows11小元件功能技巧
Apr 11, 2024 pm 05:19 PM
小組件是Win11系統的新增功能,預設是開啟狀態,但是難免會出現有部分用戶不太使用到小組件,看著佔位置,因此想要禁用小組件的情況,那麼應該如何操作呢?下面小編就教大家操作方法,大家可以去試試看。什麼是小組件?小元件是小卡片,用於在Windows桌面上顯示你最喜愛的應用程式和服務中的動態內容。它們顯示在小組件板上,你可以在其中發現、固定、取消固定、排列、調整大小和自訂小組件以反映你的興趣。小組件板經過最佳化,可根據使用情況顯示相關小組件和個人化內容。從工作列的左角開啟小組件板,可在其中看到即時天氣
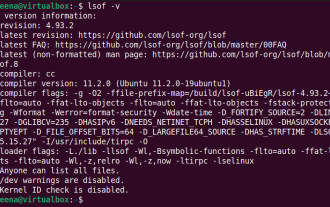 如何使用LSOF即時監控端口
Mar 20, 2024 pm 02:07 PM
如何使用LSOF即時監控端口
Mar 20, 2024 pm 02:07 PM
LSOF(ListOpenFiles)是一個命令列工具,主要用於監控類似Linux/Unix作業系統的系統資源。透過LSOF命令,使用者可以獲得有關係統中活動檔案以及正在存取這些檔案的進程的詳細資訊。 LSOF能夠幫助使用者識別目前佔用檔案資源的進程,從而更好地管理系統資源和排除可能的問題。 LSOF的功能強大且靈活,可以幫助系統管理員快速定位檔案相關的問題,例如檔案洩漏、未關閉的檔案描述符等。透過LSOF命令LSOF命令列工具允許系統管理員和開發人員:確定目前正在使用特定檔案或連接埠的進程,在連接埠衝突的情
 Linux ldconfig指令詳解
Mar 14, 2024 pm 12:18 PM
Linux ldconfig指令詳解
Mar 14, 2024 pm 12:18 PM
Linuxldconfig指令詳解一、概述在Linux系統中,ldconfig是一個用來設定共享函式庫的指令。它用於更新共享庫的連結和快取,並使系統能夠正確載入動態連結共享庫。 ldconfig的主要作用是尋找動態連結庫並建立符號連結以供程式使用。本文將深入探討ldconfig指令的用法和工作原理,以及透過具體的程式碼範例來幫助讀者更好地理解ldconfig的功能
 Linux 重啟服務的正確方式是什麼?
Mar 15, 2024 am 09:09 AM
Linux 重啟服務的正確方式是什麼?
Mar 15, 2024 am 09:09 AM
Linux重啟服務的正確方式是什麼?在使用Linux系統時,經常會遇到需要重新啟動某個服務的情況,但是有時我們可能會在重新啟動服務時遇到一些問題,例如服務沒有真正停止或啟動等情況。因此,掌握正確的重啟服務的方式是非常重要的。在Linux中,通常可以使用systemctl指令來管理系統服務。 systemctl指令是systemd系統管理員的一部分
