

TensorFlow深度學習架構模型推理Pipeline進行人像摳圖推理

概述
為了讓ModelScope的使用者能夠快速、方便的使用平台提供的各類模型,提供了一套功能完備的Python library,其中包含了ModelScope官方模型的實現,以及使用這些模型進行推理,finetune等任務所需的資料預處理,後處理,效果評估等功能相關的程式碼,同時也提供了簡單易用的API,以及豐富的使用範例。透過呼叫library,使用者可以只寫短短的幾行程式碼,就可以完成模型的推理、訓練和評估等任務,也可以在此基礎上快速進行二次開發,實現自己的創新想法。
目前library提供的演算法模型,涵蓋了圖像,自然語言處理,語音,多模態,科學5個主要的AI領域,數十個應用場景任務,具體任務可參考文檔:任務的介紹。
深度學習框架
ModelScope Library目前已支援Pytorch和Tensorflow等深度學習框架,未來將不斷更新並擴展更多框架,敬請期待!所有官方模型均可透過ModelScope Library進行模型推理,有些模型也能夠使用該函式庫進行訓練和評估。如需完整的使用信息,請查看相應模型的模型卡片。
模型推理Pipeline
模型的推理
在深度學習中,推理是指模型對資料進行預測的過程。 ModelScope執行推理時會利用pipeline來依序執行必要的操作。一個典型的pipeline通常包括資料預處理、模型前向推理和資料後處理三個步驟。
Pipeline介紹
pipeline()方法是ModelScope框架中最基礎的使用者方法之一,可用來快速進行各種領域的模型推理。借助pipeline()方法,使用者只需一行程式碼即可輕鬆完成對特定任務的模型推理。
pipeline()方法是ModelScope框架中最基礎的使用者方法之一,可用來快速進行各種領域的模型推理。借助pipeline()方法,使用者只需一行程式碼即可輕鬆完成對特定任務的模型推理。
Pipeline的使用
本文將簡單介紹如何使用pipeline方法載入模型進行推理。透過pipeline方法,使用者可以輕鬆地從模型倉庫中根據任務類型和模型名稱拉取所需模型進行推理。此方法的主要優點在於簡單易用,能夠快速且有效率地進行模型推論。 pipeline方法的便利之處在於它提供了一種直接的方式來獲取和應用模型,無需用戶深入了解模型的具體細節,從而降低了使用模型的門檻。透過pipeline方法,使用者可以更專注於解決問題和
- 環境準備
- 重要參數
- Pipeline基本用法
- #指定預處理、模型進行推理
- 不同場景任務推理pipeline使用範例
Pipeline基本用法
中文分詞
pipeline函數支援指定特定任務名稱,載入任務預設模型,建立對應pipeline物件。
Python程式碼
from modelscope.pipelines import pipelineword_segmentation = pipeline('word-segmentation')input_str = '开源技术小栈作者是Tinywan,你知道不?'print(word_segmentation(input_str))PHP 程式碼
<?php $operator = PyCore::import("operator");$builtins = PyCore::import("builtins");$pipeline = PyCore::import('modelscope.pipelines')->pipeline;$word_segmentation = $pipeline("word-segmentation");$input_str = "开源技术小栈作者是Tinywan,你知道不?";PyCore::print($word_segmentation($input_str));線上轉換工具:https://www.swoole.com/ py2php/
輸出結果
/usr/local/php-8.2.14/bin/php demo.php 2024-03-25 21:41:42,434 - modelscope - INFO - PyTorch version 2.2.1 Found.2024-03-25 21:41:42,434 - modelscope - INFO - Loading ast index from /home/www/.cache/modelscope/ast_indexer2024-03-25 21:41:42,577 - modelscope - INFO - Loading done! Current index file version is 1.13.0, with md5 f54e9d2dceb89a6c989540d66db83a65 and a total number of 972 components indexed2024-03-25 21:41:44,661 - modelscope - WARNING - Model revision not specified, use revision: v1.0.32024-03-25 21:41:44,879 - modelscope - INFO - initiate model from /home/www/.cache/modelscope/hub/damo/nlp_structbert_word-segmentation_chinese-base2024-03-25 21:41:44,879 - modelscope - INFO - initiate model from location /home/www/.cache/modelscope/hub/damo/nlp_structbert_word-segmentation_chinese-base.2024-03-25 21:41:44,880 - modelscope - INFO - initialize model from /home/www/.cache/modelscope/hub/damo/nlp_structbert_word-segmentation_chinese-baseYou are using a model of type bert to instantiate a model of type structbert. This is not supported for all configurations of models and can yield errors.2024-03-25 21:41:48,633 - modelscope - WARNING - No preprocessor field found in cfg.2024-03-25 21:41:48,633 - modelscope - WARNING - No val key and type key found in preprocessor domain of configuration.json file.2024-03-25 21:41:48,633 - modelscope - WARNING - Cannot find available config to build preprocessor at mode inference, current config: {'model_dir': '/home/www/.cache/modelscope/hub/damo/nlp_structbert_word-segmentation_chinese-base'}. trying to build by task and model information.2024-03-25 21:41:48,639 - modelscope - INFO - cuda is not available, using cpu instead.2024-03-25 21:41:48,640 - modelscope - WARNING - No preprocessor field found in cfg.2024-03-25 21:41:48,640 - modelscope - WARNING - No val key and type key found in preprocessor domain of configuration.json file.2024-03-25 21:41:48,640 - modelscope - WARNING - Cannot find available config to build preprocessor at mode inference, current config: {'model_dir': '/home/www/.cache/modelscope/hub/damo/nlp_structbert_word-segmentation_chinese-base', 'sequence_length': 512}. trying to build by task and model information./home/www/anaconda3/envs/tinywan-modelscope/lib/python3.10/site-packages/transformers/modeling_utils.py:962: FutureWarning: The `device` argument is deprecated and will be removed in v5 of Transformers.warnings.warn({'output': ['开源', '技术', '小', '栈', '作者', '是', 'Tinywan', ',', '你', '知道', '不', '?']}輸入多條樣本
pipeline物件也支援傳入多個樣本列表輸入,傳回對應輸出列表,每個元素對應輸入樣本的回傳結果。多條文字的推理方式是輸入data在pipeline內部用迭代器單條處理後append到同一個返回List。
Python程式碼
from modelscope.pipelines import pipelineword_segmentation = pipeline('word-segmentation')inputs =['开源技术小栈作者是Tinywan,你知道不?','webman这个框架不错,建议你看看']print(word_segmentation(inputs))PHP 程式碼
<?php $operator = PyCore::import("operator");$builtins = PyCore::import("builtins");$pipeline = PyCore::import('modelscope.pipelines')->pipeline;$word_segmentation = $pipeline("word-segmentation");$inputs = new PyList(["开源技术小栈作者是Tinywan,你知道不?", "webman这个框架不错,建议你看看"]);PyCore::print($word_segmentation($inputs));輸出
[{'output': ['开源', '技术', '小', '栈', '作者', '是', 'Tinywan', ',', '你', '知道', '不', '?']},{'output': ['webman', '这个', '框架', '不错', ',', '建议', '你', '看看']}]#批次推理
pipeline對於批次推理的支援類似於上面的“輸入多條文字”,差異在於會在使用者指定的batch_size尺度上,在模型forward過程實現批次前向推理。
inputs =['今天天气不错,适合出去游玩','这本书很好,建议你看看']# 指定batch_size参数来支持批量推理print(word_segmentation(inputs, batch_size=2))# 输出[{'output': ['今天', '天气', '不错', ',', '适合', '出去', '游玩']}, {'output': ['这', '本', '书', '很', '好', ',', '建议', '你', '看看']}]輸入一個資料集
from modelscope.msdatasets import MsDatasetfrom modelscope.pipelines import pipelineinputs = ['今天天气不错,适合出去游玩', '这本书很好,建议你看看']dataset = MsDataset.load(inputs, target='sentence')word_segmentation = pipeline('word-segmentation')outputs = word_segmentation(dataset)for o in outputs:print(o)# 输出{'output': ['今天', '天气', '不错', ',', '适合', '出去', '游玩']}{'output': ['这', '本', '书', '很', '好', ',', '建议', '你', '看看']}#指定預處理、模型進行推理
pipeline函數支援傳入實例化的預處理對象、模型對象,從而支援使用者在推理過程中客製化預處理、模型。
建立模型物件進行推理
Python程式碼
from modelscope.models import Modelfrom modelscope.pipelines import pipelinemodel = Model.from_pretrained('damo/nlp_structbert_word-segmentation_chinese-base')word_segmentation = pipeline('word-segmentation', model=model)inputs =['开源技术小栈作者是Tinywan,你知道不?','webman这个框架不错,建议你看看']print(word_segmentation(inputs))PHP 程式碼
<?php $operator = PyCore::import("operator");$builtins = PyCore::import("builtins");$Model = PyCore::import('modelscope.models')->Model;$pipeline = PyCore::import('modelscope.pipelines')->pipeline;$model = $Model->from_pretrained("damo/nlp_structbert_word-segmentation_chinese-base");$word_segmentation = $pipeline("word-segmentation", model: $model);$inputs = new PyList(["开源技术小栈作者是Tinywan,你知道不?", "webman这个框架不错,建议你看看"]);PyCore::print($word_segmentation($inputs));輸出
[{'output': ['开源', '技术', '小', '栈', '作者', '是', 'Tinywan', ',', '你', '知道', '不', '?']},{'output': ['webman', '这个', '框架', '不错', ',', '建议', '你', '看看']}]建立預處理器和模型物件進行推理
from modelscope.models import Modelfrom modelscope.pipelines import pipelinefrom modelscope.preprocessors import Preprocessor, TokenClassificationTransformersPreprocessormodel = Model.from_pretrained('damo/nlp_structbert_word-segmentation_chinese-base')tokenizer = Preprocessor.from_pretrained(model.model_dir)# Or call the constructor directly: # tokenizer = TokenClassificationTransformersPreprocessor(model.model_dir)word_segmentation = pipeline('word-segmentation', model=model, preprocessor=tokenizer)inputs =['开源技术小栈作者是Tinywan,你知道不?','webman这个框架不错,建议你看看']print(word_segmentation(inputs))[{'output': ['开源', '技术', '小', '栈', '作者', '是', 'Tinywan', ',', '你', '知道', '不', '?']},{'output': ['webman', '这个', '框架', '不错', ',', '建议', '你', '看看']}]圖片
#注意:
- 確保你已經安裝了OpenCV函式庫。如果沒有安裝,你可以透過pip安裝
pip install opencv-python
没有安装会提示:PHP Fatal error: Uncaught PyError: No module named 'cv2' in /home/www/build/ai/demo3.php:4
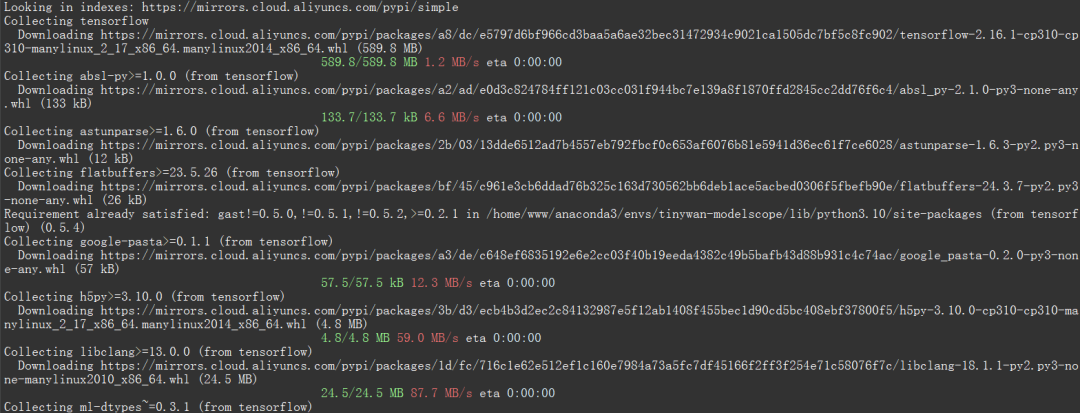
- 确保你已经安装深度学习框架包TensorFlow库
否则提示modelscope.pipelines.cv.image_matting_pipeline requires the TensorFlow library but it was not found in your environment. Checkout the instructions on the installation page: https://www.tensorflow.org/install and follow the ones that match your environment.。
报错信息表明,你正在尝试使用一个名为 modelscope.pipelines.cv.image_matting_pipeline 的模块,该模块依赖于 TensorFlow 库。然而,该模块无法正常工作,因为缺少必要的 TensorFlow 依赖。
可以使用以下命令安装最新版本的 TensorFlow
pip install tensorflow
 图片
图片
人像抠图('portrait-matting')
输入图片
 图片
图片
Python 代码
import cv2from modelscope.pipelines import pipelineportrait_matting = pipeline('portrait-matting')result = portrait_matting('https://modelscope.oss-cn-beijing.aliyuncs.com/test/images/image_matting.png')cv2.imwrite('result.png', result['output_img'])PHP 代码 tinywan-images.php
<?php $operator = PyCore::import("operator");$builtins = PyCore::import("builtins");$cv2 = PyCore::import('cv2');$pipeline = PyCore::import('modelscope.pipelines')->pipeline;$portrait_matting = $pipeline("portrait-matting");$result = $portrait_matting("https://modelscope.oss-cn-beijing.aliyuncs.com/test/images/image_matting.png");$cv2->imwrite("tinywan_result.png", $result->__getitem__("output_img"));加载本地文件图片$result = $portrait_matting("./tinywan.png");
执行结果
/usr/local/php-8.2.14/bin/php tinywan-images.php 2024-03-25 22:17:25,630 - modelscope - INFO - PyTorch version 2.2.1 Found.2024-03-25 22:17:25,631 - modelscope - INFO - TensorFlow version 2.16.1 Found.2024-03-25 22:17:25,631 - modelscope - INFO - Loading ast index from /home/www/.cache/modelscope/ast_indexer2024-03-25 22:17:25,668 - modelscope - INFO - Loading done! Current index file version is 1.13.0, with md5 f54e9d2dceb89a6c989540d66db83a65 and a total number of 972 components indexed2024-03-25 22:17:26,990 - modelscope - WARNING - Model revision not specified, use revision: v1.0.02024-03-25 22:17:27.623085: I tensorflow/core/util/port.cc:113] oneDNN custom operations are on. You may see slightly different numerical results due to floating-point round-off errors from different computation orders. To turn them off, set the environment variable `TF_ENABLE_ONEDNN_OPTS=0`.2024-03-25 22:17:27.678592: I tensorflow/core/platform/cpu_feature_guard.cc:210] This TensorFlow binary is optimized to use available CPU instructions in performance-critical operations.To enable the following instructions: AVX2 AVX512F AVX512_VNNI FMA, in other operations, rebuild TensorFlow with the appropriate compiler flags.2024-03-25 22:17:28.551510: W tensorflow/compiler/tf2tensorrt/utils/py_utils.cc:38] TF-TRT Warning: Could not find TensorRT2024-03-25 22:17:29,206 - modelscope - INFO - initiate model from /home/www/.cache/modelscope/hub/damo/cv_unet_image-matting2024-03-25 22:17:29,206 - modelscope - INFO - initiate model from location /home/www/.cache/modelscope/hub/damo/cv_unet_image-matting.2024-03-25 22:17:29,209 - modelscope - WARNING - No preprocessor field found in cfg.2024-03-25 22:17:29,210 - modelscope - WARNING - No val key and type key found in preprocessor domain of configuration.json file.2024-03-25 22:17:29,210 - modelscope - WARNING - Cannot find available config to build preprocessor at mode inference, current config: {'model_dir': '/home/www/.cache/modelscope/hub/damo/cv_unet_image-matting'}. trying to build by task and model information.2024-03-25 22:17:29,210 - modelscope - WARNING - Find task: portrait-matting, model type: None. Insufficient information to build preprocessor, skip building preprocessorWARNING:tensorflow:From /home/www/anaconda3/envs/tinywan-modelscope/lib/python3.10/site-packages/modelscope/utils/device.py:60: is_gpu_available (from tensorflow.python.framework.test_util) is deprecated and will be removed in a future version.Instructions for updating:Use `tf.config.list_physical_devices('GPU')` instead.2024-03-25 22:17:29,213 - modelscope - INFO - loading model from /home/www/.cache/modelscope/hub/damo/cv_unet_image-matting/tf_graph.pbWARNING:tensorflow:From /home/www/anaconda3/envs/tinywan-modelscope/lib/python3.10/site-packages/modelscope/pipelines/cv/image_matting_pipeline.py:45: FastGFile.__init__ (from tensorflow.python.platform.gfile) is deprecated and will be removed in a future version.Instructions for updating:Use tf.gfile.GFile.2024-03-25 22:17:29,745 - modelscope - INFO - load model done输出图片
 图片
图片
以上是TensorFlow深度學習架構模型推理Pipeline進行人像摳圖推理的詳細內容。更多資訊請關注PHP中文網其他相關文章!

熱AI工具

Undresser.AI Undress
人工智慧驅動的應用程序,用於創建逼真的裸體照片

AI Clothes Remover
用於從照片中去除衣服的線上人工智慧工具。

Undress AI Tool
免費脫衣圖片

Clothoff.io
AI脫衣器

AI Hentai Generator
免費產生 AI 無盡。

熱門文章
熱工具

記事本++7.3.1
好用且免費的程式碼編輯器

SublimeText3漢化版
中文版,非常好用

禪工作室 13.0.1
強大的PHP整合開發環境

Dreamweaver CS6
視覺化網頁開發工具

SublimeText3 Mac版
神級程式碼編輯軟體(SublimeText3)
熱門話題


 解決常見的pandas安裝問題:安裝錯誤的解讀與解決方法
Feb 19, 2024 am 09:19 AM
解決常見的pandas安裝問題:安裝錯誤的解讀與解決方法
Feb 19, 2024 am 09:19 AM
pandas安裝教學:解析常見安裝錯誤及其解決方法,需要具體程式碼範例引言:Pandas是一個強大的資料分析工具,廣泛應用於資料清洗、資料處理和資料視覺化等方面,因此在資料科學領域備受推崇。然而,由於環境配置和依賴問題,安裝pandas可能會遇到一些困難和錯誤。本文將為大家提供一份pandas安裝教程,並解析一些常見的安裝錯誤及其解決方法。一、安裝pandas
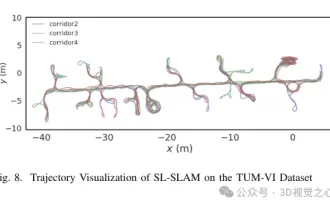 超越ORB-SLAM3! SL-SLAM:低光、嚴重抖動和弱紋理場景全搞定
May 30, 2024 am 09:35 AM
超越ORB-SLAM3! SL-SLAM:低光、嚴重抖動和弱紋理場景全搞定
May 30, 2024 am 09:35 AM
寫在前面今天我們探討下深度學習技術如何改善在複雜環境中基於視覺的SLAM(同時定位與地圖建構)表現。透過將深度特徵提取和深度匹配方法相結合,這裡介紹了一種多功能的混合視覺SLAM系統,旨在提高在諸如低光條件、動態光照、弱紋理區域和嚴重抖動等挑戰性場景中的適應性。我們的系統支援多種模式,包括拓展單目、立體、單目-慣性以及立體-慣性配置。除此之外,也分析如何將視覺SLAM與深度學習方法結合,以啟發其他研究。透過在公共資料集和自採樣資料上的廣泛實驗,展示了SL-SLAM在定位精度和追蹤魯棒性方面優
 高效率安裝:快速安裝pandas庫的技巧和技巧
Feb 21, 2024 am 09:45 AM
高效率安裝:快速安裝pandas庫的技巧和技巧
Feb 21, 2024 am 09:45 AM
高效安裝:快速安裝pandas庫的技巧和技巧,需要具體程式碼範例概述:Pandas是一個功能強大的資料處理和分析工具,非常受Python開發人員的歡迎。然而,安裝pandas庫有時可能會遇到一些挑戰,尤其是在網路條件較差的情況下。本文將介紹一些技巧和技巧,幫助您快速安裝pandas庫,並提供具體的程式碼範例。使用pip安裝:pip是Python的官方軟體包管理工
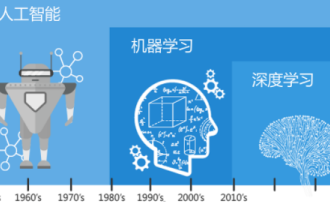 一文搞懂:AI、機器學習與深度學習的連結與區別
Mar 02, 2024 am 11:19 AM
一文搞懂:AI、機器學習與深度學習的連結與區別
Mar 02, 2024 am 11:19 AM
在當今科技日新月異的浪潮中,人工智慧(ArtificialIntelligence,AI)、機器學習(MachineLearning,ML)與深度學習(DeepLearning,DL)如同璀璨星辰,引領著資訊科技的新浪潮。這三個詞彙經常出現在各種前沿討論和實際應用中,但對於許多初涉此領域的探索者來說,它們的具體含義及相互之間的內在聯繫可能仍籠罩著一層神秘面紗。那讓我們先來看看這張圖。可以看出,深度學習、機器學習和人工智慧之間存在著緊密的關聯和遞進關係。深度學習是機器學習的一個特定領域,而機器學習
 超強!深度學習Top10演算法!
Mar 15, 2024 pm 03:46 PM
超強!深度學習Top10演算法!
Mar 15, 2024 pm 03:46 PM
自2006年深度學習概念被提出以來,20年快過去了,深度學習作為人工智慧領域的一場革命,已經催生了許多具有影響力的演算法。那麼,你所認為深度學習的top10演算法有哪些呢?以下是我心目中深度學習的頂尖演算法,它們在創新、應用價值和影響力方面都佔有重要地位。 1.深度神經網路(DNN)背景:深度神經網路(DNN)也叫多層感知機,是最普遍的深度學習演算法,發明之初由於算力瓶頸而飽受質疑,直到近些年算力、數據的爆發才迎來突破。 DNN是一種神經網路模型,它包含多個隱藏層。在該模型中,每一層將輸入傳遞給下一層,並
 Numpy安裝攻略:一文解決安裝難題
Feb 21, 2024 pm 08:15 PM
Numpy安裝攻略:一文解決安裝難題
Feb 21, 2024 pm 08:15 PM
Numpy安裝攻略:一文解決安裝難題,需要具體程式碼範例引言:Numpy是Python中一款強大的科學計算庫,它提供了高效的多維數組物件和對數組資料進行操作的工具。但是,對於初學者來說,安裝Numpy可能會帶來一些困擾。本文將為大家提供一份Numpy安裝攻略,幫助大家快速解決安裝難題。一、安裝Python環境:在安裝Numpy之前,首先需要確保已經安裝了Py
 AlphaFold 3 重磅問世,全面預測蛋白質與所有生命分子相互作用及結構,準確度遠超以往水平
Jul 16, 2024 am 12:08 AM
AlphaFold 3 重磅問世,全面預測蛋白質與所有生命分子相互作用及結構,準確度遠超以往水平
Jul 16, 2024 am 12:08 AM
编辑|萝卜皮自2021年发布强大的AlphaFold2以来,科学家们一直在使用蛋白质结构预测模型来绘制细胞内各种蛋白质结构的图谱、发现药物,并绘制每种已知蛋白质相互作用的「宇宙图」。就在刚刚,GoogleDeepMind发布了AlphaFold3模型,该模型能够对包括蛋白质、核酸、小分子、离子和修饰残基在内的复合物进行联合结构预测。AlphaFold3的准确性对比过去许多专用工具(蛋白质-配体相互作用、蛋白质-核酸相互作用、抗体-抗原预测)有显著提高。这表明,在单个统一的深度学习框架内,可以实现
 簡易pandas安裝教學:詳細指導如何在不同作業系統上安裝pandas
Feb 21, 2024 pm 06:00 PM
簡易pandas安裝教學:詳細指導如何在不同作業系統上安裝pandas
Feb 21, 2024 pm 06:00 PM
簡易pandas安裝教學:詳細指導如何在不同作業系統上安裝pandas,需要具體程式碼範例隨著資料處理和分析的需求不斷增加,pandas成為了許多資料科學家和分析師們的首選工具之一。 pandas是一個強大的資料處理和分析庫,可以輕鬆處理和分析大量結構化資料。本文將詳細介紹如何在不同作業系統上安裝pandas,以及提供具體的程式碼範例。在Windows作業系統上安
