原生javascript實作圖片按鈕切換_javascript技巧
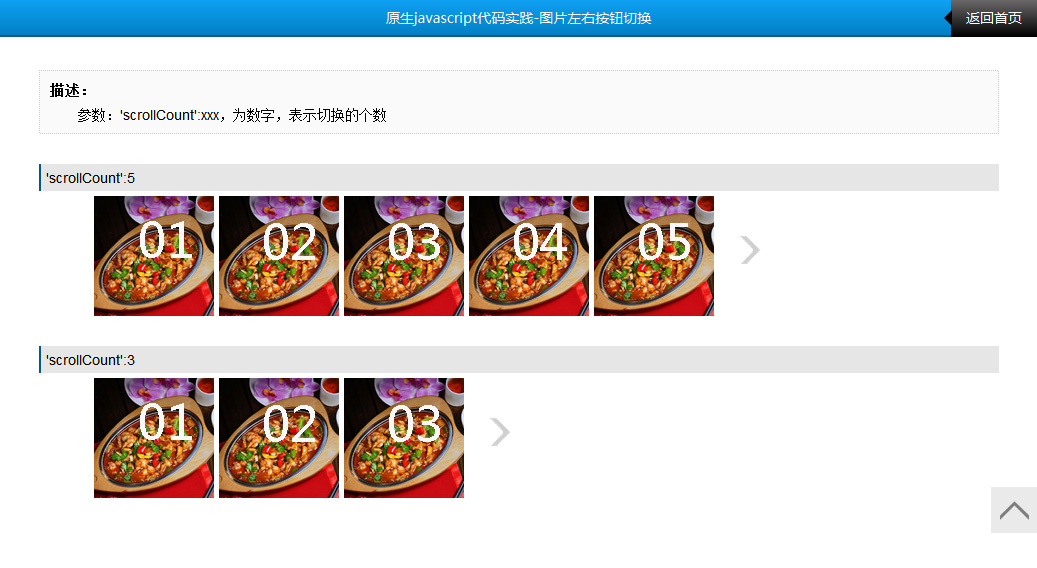
先給大家看下效果展示圖

以下為詳細程式碼:
function LGY_picSwitch(option){
this.oWrap = this.getId(option.wrapID); //最外層元素
this.olistWrap = this.getNodeByClassname(this.oWrap,'gy_picSwitch_listWrap')[0];
this.oUl = this.olistWrap.getElementsByTagName('ul')[0];
this.oBtnPrev = this.getNodeByClassname(this.oWrap,'gy_picSwitch_prev')[0];
this.oBtnNext = this.getNodeByClassname(this.oWrap,'gy_picSwitch_next')[0];
this.nLen = this.oUl.getElementsByTagName('li').length; //圖片總數
this.nScollCount = option.scrollCount; //每次捲動的數量
this.nScollLen = Math.ceil(this.nLen/option.scrollCount); // 切換判斷的最大值
this.nSwitchWidth = 0; //每次切換移動的距離,在程式碼裡面動態取得值
this.nIndex = 0; //切換圖片的目前索引
this.timer = null; //切換圖片的數值
this.int();
}
LGY_picSwitch.prototype = {
getId:function(id){
return document.getElementById(id);
},
getNodeByClassname:function(parent,classname){
var classElements = new Array();
var els = parent.getElementsByTagName('*');
var elsLen = els.length;
var pattern = new RegExp("(^|\s)" classname "(\s|$)");
for (i = 0, j = 0; i if ( pattern.test(els[i].className) ) {
類項[j] = els[i];
j ;
}
}
return classElements;
},
getCss:function(node,value)
{
return node.currentStyle?node.currentStyle[value]:getComputedStyle(node,null)[value];
},
setCss:function(node,val){
for(var v in val){
node.style.cssText = ';' v ':' val[v];
}
},
moveFn:function(node,value,targetValue,callback){
var _that = this;
clearInterval(this.timer);
this.timer = setInterval(function()
{
var val = parseFloat(_that.getCss(node,value));
var speed = ( targetValue- val )/8;
speed = speed>0?Math.ceil(speed):Math.floor(speed);
if(speed ==0)
{
clearInterval(_that.timer);
callback&&callback();
}
else
{
node.style[value] = ( val speed ) 'px'; }
},20);
},
picChange:函數(){
this.moveFn(this.oUl,'marginLeft',-this.nIndex*this.nSwitchWidth);
},
cancelBubble:函數(e){
e.stopPropagation?e.stopPropagation():e.cancelBubble = true;
},
btnIsShow:function(){
this.setCss(this.oBtnNext,{'display':'block'});
this.setCss(this.oBtnPrev,{'display':'block'});
if( this.nIndex == 0 ) this.setCss(this.oBtnPrev,{'display':'none'});
if( this.nIndex ==(this.nScollLen-1) ) this.setCss(this.oBtnNext,{'display':'none'});
},
btnPrev:function(){
var _that = this;
this.oBtnPrev.onclick = function(e){
var e = e || window.event;
_that.cancelBubble(e);
if(_that.nIndex != 0 ) {
_that.nIndex--;
_that.picChange();
_that.btnIsShow();
}
}
},
btnNext:function(){
var _that = this;
this.oBtnNext.onclick = function(e){
var e = e || window.event;
_that.cancelBubble(e);
if(_that.nIndex != (_that.nScollLen-1) ) {
_that.nIndex ;
_that.picChange();
_that.btnIsShow();
}
}
},
int:function(){
//動態取得移動的寬度
var oLi = this.oUl.getElementsByTagName('li')[0],
oLi_w = oLi.offsetWidth parseInt(this.getCss(oLi,'marginLeft')) parseInt(this.getCss(oLi,'marginRight'));
this.nSwitchWidth = oLi_w*this.nScollCount;
//按鈕顯示初始化
this.btnIsShow();
// 左右切換
this.btnPrev();
this.btnNext();
}
}
HTML程式碼:
/*
* HTML結構必須是以下:外層ID名,自己傳入 如下面的:id="gy_picSwitch02" ,ID名,自己隨便給
但,裡面的結構必需一樣,包含類別名稱classname
參數:'wrapID':'xxxx',最外層的ID名稱
'scrollCount':5,滾動的數量
*
*/
//實例化
new LGY_picSwitch({'wrapID':'gy_picSwitch','scrollCount':5});
是不是很方便的功能呢,使用也很簡單,這裡推薦給小夥伴,希望對大家能有所幫助

熱AI工具

Undresser.AI Undress
人工智慧驅動的應用程序,用於創建逼真的裸體照片

AI Clothes Remover
用於從照片中去除衣服的線上人工智慧工具。

Undress AI Tool
免費脫衣圖片

Clothoff.io
AI脫衣器

Video Face Swap
使用我們完全免費的人工智慧換臉工具,輕鬆在任何影片中換臉!

熱門文章

熱工具

記事本++7.3.1
好用且免費的程式碼編輯器

SublimeText3漢化版
中文版,非常好用

禪工作室 13.0.1
強大的PHP整合開發環境

Dreamweaver CS6
視覺化網頁開發工具

SublimeText3 Mac版
神級程式碼編輯軟體(SublimeText3)

熱門話題
 如何使用WebSocket和JavaScript實現線上語音辨識系統
Dec 17, 2023 pm 02:54 PM
如何使用WebSocket和JavaScript實現線上語音辨識系統引言:隨著科技的不斷發展,語音辨識技術已成為了人工智慧領域的重要組成部分。而基於WebSocket和JavaScript實現的線上語音辨識系統,具備了低延遲、即時性和跨平台的特點,成為了廣泛應用的解決方案。本文將介紹如何使用WebSocket和JavaScript來實現線上語音辨識系
 WebSocket與JavaScript:實現即時監控系統的關鍵技術
Dec 17, 2023 pm 05:30 PM
WebSocket與JavaScript:實現即時監控系統的關鍵技術引言:隨著互聯網技術的快速發展,即時監控系統在各個領域中得到了廣泛的應用。而實現即時監控的關鍵技術之一就是WebSocket與JavaScript的結合使用。本文將介紹WebSocket與JavaScript在即時監控系統中的應用,並給出程式碼範例,詳細解釋其實作原理。一、WebSocket技
 如何利用JavaScript和WebSocket實現即時線上點餐系統
Dec 17, 2023 pm 12:09 PM
如何利用JavaScript和WebSocket實現即時線上點餐系統介紹:隨著網路的普及和技術的進步,越來越多的餐廳開始提供線上點餐服務。為了實現即時線上點餐系統,我們可以利用JavaScript和WebSocket技術。 WebSocket是一種基於TCP協定的全雙工通訊協議,可實現客戶端與伺服器的即時雙向通訊。在即時線上點餐系統中,當使用者選擇菜餚並下訂單
 如何使用WebSocket和JavaScript實現線上預約系統
Dec 17, 2023 am 09:39 AM
如何使用WebSocket和JavaScript實現線上預約系統在當今數位化的時代,越來越多的業務和服務都需要提供線上預約功能。而實現一個高效、即時的線上預約系統是至關重要的。本文將介紹如何使用WebSocket和JavaScript來實作一個線上預約系統,並提供具體的程式碼範例。一、什麼是WebSocketWebSocket是一種在單一TCP連線上進行全雙工
 JavaScript與WebSocket:打造高效率的即時天氣預報系統
Dec 17, 2023 pm 05:13 PM
JavaScript和WebSocket:打造高效的即時天氣預報系統引言:如今,天氣預報的準確性對於日常生活以及決策制定具有重要意義。隨著技術的發展,我們可以透過即時獲取天氣數據來提供更準確可靠的天氣預報。在本文中,我們將學習如何使用JavaScript和WebSocket技術,來建立一個高效的即時天氣預報系統。本文將透過具體的程式碼範例來展示實現的過程。 We
 簡易JavaScript教學:取得HTTP狀態碼的方法
Jan 05, 2024 pm 06:08 PM
JavaScript教學:如何取得HTTP狀態碼,需要具體程式碼範例前言:在Web開發中,經常會涉及到與伺服器進行資料互動的場景。在與伺服器進行通訊時,我們經常需要取得傳回的HTTP狀態碼來判斷操作是否成功,並根據不同的狀態碼來進行對應的處理。本篇文章將教你如何使用JavaScript來取得HTTP狀態碼,並提供一些實用的程式碼範例。使用XMLHttpRequest
 javascript如何使用insertBefore
Nov 24, 2023 am 11:56 AM
用法:在JavaScript中,insertBefore()方法用於在DOM樹中插入一個新的節點。這個方法需要兩個參數:要插入的新節點和參考節點(即新節點將要插入的位置的節點)。
 JavaScript與WebSocket:打造高效率的即時影像處理系統
Dec 17, 2023 am 08:41 AM
JavaScript是一種廣泛應用於Web開發的程式語言,而WebSocket則是一種用於即時通訊的網路協定。結合二者的強大功能,我們可以打造一個高效率的即時影像處理系統。本文將介紹如何利用JavaScript和WebSocket來實作這個系統,並提供具體的程式碼範例。首先,我們需要明確指出即時影像處理系統的需求和目標。假設我們有一個攝影機設備,可以擷取即時的影像數


