

centos7安装mariadb的正确命令

使用的是linode的centos7系统,安装mysql发现已经默认的是mariadb。 但是不管是使用linode官网说明还是百度搜索到的的根本安装方法无法安装成功。 总是提示这一句: ERROR 2002 (HY000): Cant connect to local MySQL server through socket /var/lib/mysql/
使用的是linode的centos7系统,安装mysql发现已经默认的是mariadb。
但是不管是使用linode官网说明还是百度搜索到的的根本安装方法无法安装成功。
总是提示这一句:
ERROR 2002 (HY000): Can't connect to local MySQL server through socket '/var/lib/mysql/mysql.sock' (2)
最后通过google 搜索 install mariadb on centos 7得到了安装的关键一步。
现在安装成功,特此备注一下整个安装过程:
mysql:[root@localhost ~]# yum -y install mariadb*
Loaded plugins: fastestmirror
Loading mirror speeds from cached hostfile
 * base: mirrors.linode.com
 * extras: mirrors.linode.com
 * updates: mirrors.linode.com
Resolving Dependencies
--> Running transaction check
---> Package mariadb.x86_64 1:5.5.37-1.el7_0 will be installed
---> Package mariadb-bench.x86_64 1:5.5.37-1.el7_0 will be installed
---> Package mariadb-devel.x86_64 1:5.5.37-1.el7_0 will be installed
---> Package mariadb-embedded.x86_64 1:5.5.37-1.el7_0 will be installed
---> Package mariadb-embedded-devel.x86_64 1:5.5.37-1.el7_0 will be installed
---> Package mariadb-libs.x86_64 1:5.5.37-1.el7_0 will be installed
---> Package mariadb-server.x86_64 1:5.5.37-1.el7_0 will be installed
--> Processing Dependency: perl-DBD-MySQL for package: 1:mariadb-server-5.5.37-1.el7_0.x86_64
---> Package mariadb-test.x86_64 1:5.5.37-1.el7_0 will be installed
--> Running transaction check
---> Package perl-DBD-MySQL.x86_64 0:4.023-5.el7 will be installed
--> Finished Dependency Resolution

Dependencies Resolved

==========================================================================================================
 Package                           Arch              Version                     Repository          Size
==========================================================================================================
Installing:
 mariadb                           x86_64            1:5.5.37-1.el7_0            updates            8.9 M
 mariadb-bench                     x86_64            1:5.5.37-1.el7_0            updates            385 k
 mariadb-devel                     x86_64            1:5.5.37-1.el7_0            updates            744 k
 mariadb-embedded                  x86_64            1:5.5.37-1.el7_0            updates            3.6 M
 mariadb-embedded-devel            x86_64            1:5.5.37-1.el7_0            updates            7.4 M
 mariadb-libs                      x86_64            1:5.5.37-1.el7_0            updates            752 k
 mariadb-server                    x86_64            1:5.5.37-1.el7_0            updates             11 M
 mariadb-test                      x86_64            1:5.5.37-1.el7_0            updates            7.9 M
Installing for dependencies:
 perl-DBD-MySQL                    x86_64            4.023-5.el7                 base               140 k

Transaction Summary
==========================================================================================================
Install  8 Packages (+1 Dependent package)

Total download size: 40 M
Installed size: 279 M
Downloading packages:
(1/9): mariadb-bench-5.5.37-1.el7_0.x86_64.rpm                                     | 385 kB  00:00:00
(2/9): mariadb-devel-5.5.37-1.el7_0.x86_64.rpm                                     | 744 kB  00:00:00
(3/9): mariadb-embedded-5.5.37-1.el7_0.x86_64.rpm                                  | 3.6 MB  00:00:00
(4/9): mariadb-5.5.37-1.el7_0.x86_64.rpm                                           | 8.9 MB  00:00:00
(5/9): mariadb-libs-5.5.37-1.el7_0.x86_64.rpm                                      | 752 kB  00:00:00
(6/9): mariadb-server-5.5.37-1.el7_0.x86_64.rpm                                    |  11 MB  00:00:00
(7/9): mariadb-embedded-devel-5.5.37-1.el7_0.x86_64.rpm                            | 7.4 MB  00:00:00
(8/9): mariadb-test-5.5.37-1.el7_0.x86_64.rpm                                      | 7.9 MB  00:00:00
(9/9): perl-DBD-MySQL-4.023-5.el7.x86_64.rpm                                       | 140 kB  00:00:00
----------------------------------------------------------------------------------------------------------
Total                                                                      36 MB/s |  40 MB  00:00:01
Running transaction check
Running transaction test
Transaction test succeeded
Running transaction
  Installing : 1:mariadb-libs-5.5.37-1.el7_0.x86_64                                                   1/9
  Installing : 1:mariadb-5.5.37-1.el7_0.x86_64                                                        2/9
  Installing : perl-DBD-MySQL-4.023-5.el7.x86_64                                                      3/9
  Installing : 1:mariadb-server-5.5.37-1.el7_0.x86_64                                                 4/9
  Installing : 1:mariadb-devel-5.5.37-1.el7_0.x86_64                                                  5/9
  Installing : 1:mariadb-embedded-5.5.37-1.el7_0.x86_64                                               6/9
  Installing : 1:mariadb-embedded-devel-5.5.37-1.el7_0.x86_64                                         7/9
  Installing : 1:mariadb-test-5.5.37-1.el7_0.x86_64                                                   8/9
  Installing : 1:mariadb-bench-5.5.37-1.el7_0.x86_64                                                  9/9
  Verifying  : 1:mariadb-test-5.5.37-1.el7_0.x86_64                                                   1/9
  Verifying  : 1:mariadb-embedded-devel-5.5.37-1.el7_0.x86_64                                         2/9
  Verifying  : 1:mariadb-embedded-5.5.37-1.el7_0.x86_64                                               3/9
  Verifying  : 1:mariadb-libs-5.5.37-1.el7_0.x86_64                                                   4/9
  Verifying  : 1:mariadb-bench-5.5.37-1.el7_0.x86_64                                                  5/9
  Verifying  : 1:mariadb-5.5.37-1.el7_0.x86_64                                                        6/9
  Verifying  : 1:mariadb-server-5.5.37-1.el7_0.x86_64                                                 7/9
  Verifying  : perl-DBD-MySQL-4.023-5.el7.x86_64                                                      8/9
  Verifying  : 1:mariadb-devel-5.5.37-1.el7_0.x86_64                                                  9/9

Installed:
  mariadb.x86_64 1:5.5.37-1.el7_0                        mariadb-bench.x86_64 1:5.5.37-1.el7_0
  mariadb-devel.x86_64 1:5.5.37-1.el7_0                  mariadb-embedded.x86_64 1:5.5.37-1.el7_0
  mariadb-embedded-devel.x86_64 1:5.5.37-1.el7_0         mariadb-libs.x86_64 1:5.5.37-1.el7_0
  mariadb-server.x86_64 1:5.5.37-1.el7_0                 mariadb-test.x86_64 1:5.5.37-1.el7_0

Dependency Installed:
  perl-DBD-MySQL.x86_64 0:4.023-5.el7

Complete!
[root@localhost ~]# systemctl start mariadb.service
[root@localhost ~]# systemctl enable mariadb.service
ln -s '/usr/lib/systemd/system/mariadb.service' '/etc/systemd/system/multi-user.target.wants/mariadb.servi
ce'
[root@localhost ~]# mysql
Welcome to the MariaDB monitor.  Commands end with ; or \g.
Your MariaDB connection id is 2
Server version: 5.5.37-MariaDB MariaDB Server

Copyright (c) 2000, 2014, Oracle, Monty Program Ab and others.

Type 'help;' or '\h' for help. Type '\c' to clear the current input statement.

MariaDB [(none)]> logout
    -> exit
    ->
    -> ;
ERROR 1064 (42000): You have an error in your SQL syntax; check the manual that corresponds to your MariaD
B server version for the right syntax to use near 'logout
exit' at line 1
MariaDB [(none)]> exit
Bye
[root@localhost ~]# systemctl enable mariadb.service
[root@localhost ~]# mysql
Welcome to the MariaDB monitor.  Commands end with ; or \g.
Your MariaDB connection id is 3
Server version: 5.5.37-MariaDB MariaDB Server

Copyright (c) 2000, 2014, Oracle, Monty Program Ab and others.

Type 'help;' or '\h' for help. Type '\c' to clear the current input statement.

MariaDB [(none)]> show databases;
+--------------------+
| Database           |
+--------------------+
| information_schema |
| mysql              |
| performance_schema |
| test               |
+--------------------+
4 rows in set (0.00 sec)

MariaDB [(none)]> use test
Database changed
MariaDB [test]> show tables;
Empty set (0.00 sec)

MariaDB [test]> exit
Bye
[root@localhost ~]# mysql_secure_installation
/usr/bin/mysql_secure_installation: line 379: find_mysql_client: command not found

NOTE: RUNNING ALL PARTS OF THIS SCRIPT IS RECOMMENDED FOR ALL MariaDB
      SERVERS IN PRODUCTION USE!  PLEASE READ EACH STEP CAREFULLY!

In order to log into MariaDB to secure it, we'll need the current
password for the root user.  If you've just installed MariaDB, and
you haven't set the root password yet, the password will be blank,
so you should just press enter here.

ERROR 1045 (28000): Access denied for user 'root'@'localhost' (using password: YES)
Enter current password for root (enter for none):
OK, successfully used password, moving on...

Setting the root password ensures that nobody can log into the MariaDB
root user without the proper authorisation.

Set root password? [Y/n] y
New password:
Re-enter new password:
Password updated successfully!
Reloading privilege tables..
 ... Success!


By default, a MariaDB installation has an anonymous user, allowing anyone
to log into MariaDB without having to have a user account created for
them.  This is intended only for testing, and to make the installation
go a bit smoother.  You should remove them before moving into a
production environment.

Remove anonymous users? [Y/n] y
 ... Success!

Normally, root should only be allowed to connect from 'localhost'.  This
ensures that someone cannot guess at the root password from the network.

Disallow root login remotely? [Y/n] y
 ... Success!

By default, MariaDB comes with a database named 'test' that anyone can
access.  This is also intended only for testing, and should be removed
before moving into a production environment.

Remove test database and access to it? [Y/n] y
 - Dropping test database...
 ... Success!
 - Removing privileges on test database...
 ... Success!

Reloading the privilege tables will ensure that all changes made so far
will take effect immediately.

Reload privilege tables now? [Y/n] y
 ... Success!

Cleaning up...

All done!  If you've completed all of the above steps, your MariaDB
installation should now be secure.

Thanks for using MariaDB!
[root@localhost ~]# mysql -uroot -p
Enter password:
Welcome to the MariaDB monitor.  Commands end with ; or \g.
Your MariaDB connection id is 15
Server version: 5.5.37-MariaDB MariaDB Server

Copyright (c) 2000, 2014, Oracle, Monty Program Ab and others.

Type 'help;' or '\h' for help. Type '\c' to clear the current input statement.

MariaDB [(none)]> show databases;
+--------------------+
| Database           |
+--------------------+
| information_schema |
| mysql              |
| performance_schema |
| zbphp.com 		 |
+--------------------+
4 rows in set (0.00 sec)

MariaDB [(none)]>
热AI工具

Undresser.AI Undress
人工智能驱动的应用程序,用于创建逼真的裸体照片

AI Clothes Remover
用于从照片中去除衣服的在线人工智能工具。

Undress AI Tool
免费脱衣服图片

Clothoff.io
AI脱衣机

Video Face Swap
使用我们完全免费的人工智能换脸工具轻松在任何视频中换脸!

热门文章
热工具

记事本++7.3.1
好用且免费的代码编辑器

SublimeText3汉化版
中文版,非常好用

禅工作室 13.0.1
功能强大的PHP集成开发环境

Dreamweaver CS6
视觉化网页开发工具

SublimeText3 Mac版
神级代码编辑软件(SublimeText3)


 Win11系统无法安装中文语言包的解决方法
Mar 09, 2024 am 09:48 AM
Win11系统无法安装中文语言包的解决方法
Mar 09, 2024 am 09:48 AM
Win11系统无法安装中文语言包的解决方法随着Windows11系统的推出,许多用户开始升级他们的操作系统以体验新的功能和界面。然而,一些用户在升级后发现他们无法安装中文语言包,这给他们的使用体验带来了困扰。在本文中,我们将探讨Win11系统无法安装中文语言包的原因,并提供一些解决方法,帮助用户解决这一问题。原因分析首先,让我们来分析一下Win11系统无法
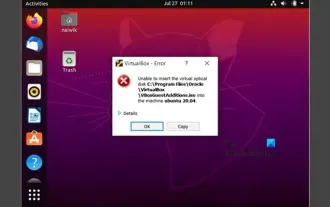 无法在VirtualBox中安装来宾添加
Mar 10, 2024 am 09:34 AM
无法在VirtualBox中安装来宾添加
Mar 10, 2024 am 09:34 AM
您可能无法在OracleVirtualBox中将来宾添加安装到虚拟机。当我们点击Devices>;InstallGuestAdditionsCDImage时,它只会抛出一个错误,如下所示:VirtualBox-错误:无法插入虚拟光盘C:将FilesOracleVirtualBoxVBoxGuestAdditions.iso编程到ubuntu机器中在这篇文章中,我们将了解当您无法在VirtualBox中安装来宾添加组件时该怎么办。无法在VirtualBox中安装来宾添加如果您无法在Virtua
 如何在Windows 11/10中运行SUDO命令
Mar 09, 2024 am 09:50 AM
如何在Windows 11/10中运行SUDO命令
Mar 09, 2024 am 09:50 AM
通过sudo命令,用户可以在提升权限模式下运行命令,而无需切换到超级用户模式。本文将介绍如何在Windows系统中模拟类似于sudo命令的功能。什么是数道司令部?Sudo(“超级用户do”的缩写)是一种命令行工具,允许基于Unix的操作系统(如Linux和MacOS)的用户以提升的权限执行命令,这些权限通常是管理员所拥有的。在Windows11/10中运行SUDO命令然而,随着最新发布的Windows11Insider预览版推出,Windows用户现在也可以体验到这一项功能。这一新功能使用户能够
 百度网盘下载成功但是安装不了怎么办?
Mar 13, 2024 pm 10:22 PM
百度网盘下载成功但是安装不了怎么办?
Mar 13, 2024 pm 10:22 PM
如果你已经成功下载了百度网盘的安装文件,但是无法正常安装,可能是软件文件的完整性发生了错误或者是残留文件和注册表项的问题,下面就让本站来为用户们来仔细的介绍一下百度网盘下载成功但是安装不了问题解析吧。 百度网盘下载成功但是安装不了问题解析 1、检查安装文件完整性:确保下载的安装文件完整且没有损坏。你可以重新下载一次,或者尝试使用其他可信的来源下载安装文件。 2、关闭杀毒软件和防火墙:某些杀毒软件或防火墙程序可能会阻止安装程序的正常运行。尝试将杀毒软件和防火墙禁用或退出,然后重新运行安装
 如何在Linux上安装安卓应用?
Mar 19, 2024 am 11:15 AM
如何在Linux上安装安卓应用?
Mar 19, 2024 am 11:15 AM
在Linux上安装安卓应用一直是许多用户所关心的问题,尤其是对于喜欢使用安卓应用的Linux用户来说,掌握如何在Linux系统上安装安卓应用是非常重要的。虽然在Linux系统上直接运行安卓应用并不像在Android平台上那么简单,但是通过使用模拟器或者第三方工具,我们依然可以在Linux上愉快地享受安卓应用的乐趣。下面将为大家介绍在Linux系统上安装安卓应
 如何在Ubuntu 24.04上安装Podman
Mar 22, 2024 am 11:26 AM
如何在Ubuntu 24.04上安装Podman
Mar 22, 2024 am 11:26 AM
如果您使用过Docker,则必须了解守护进程、容器及其功能。守护进程是在容器已在任何系统中使用时在后台运行的服务。Podman是一个免费的管理工具,用于管理和创建容器,而不依赖于任何守护程序,如Docker。因此,它在管理集装箱方面具有优势,而不需要长期的后台服务。此外,Podman不需要使用根级别的权限。本指南详细讨论了如何在Ubuntu24上安装Podman。更新系统我们首先要进行系统更新,打开Ubuntu24的Terminalshell。在安装和升级过程中,我们都需要使用命令行。一种简单的
 在Ubuntu 24.04上安装和运行Ubuntu笔记应用程序的方法
Mar 22, 2024 pm 04:40 PM
在Ubuntu 24.04上安装和运行Ubuntu笔记应用程序的方法
Mar 22, 2024 pm 04:40 PM
在高中学习的时候,有些学生做的笔记非常清晰准确,比同一个班级的其他人都做得更多。对于一些人来说,记笔记是一种爱好,而对于其他人来说,当他们很容易忘记任何重要事情的小信息时,则是一种必需品。Microsoft的NTFS应用程序对于那些希望保存除常规讲座以外的重要笔记的学生特别有用。在这篇文章中,我们将描述Ubuntu24上的Ubuntu应用程序的安装。更新Ubuntu系统在安装Ubuntu安装程序之前,在Ubuntu24上我们需要确保新配置的系统已经更新。我们可以使用Ubuntu系统中最著名的“a
 Win7电脑上安装Go语言的详细步骤
Mar 27, 2024 pm 02:00 PM
Win7电脑上安装Go语言的详细步骤
Mar 27, 2024 pm 02:00 PM
Win7电脑上安装Go语言的详细步骤Go(又称Golang)是一种由Google开发的开源编程语言,其简洁、高效和并发性能优秀,适合用于开发云端服务、网络应用和后端系统等领域。在Win7电脑上安装Go语言,可以让您快速入门这门语言并开始编写Go程序。下面将会详细介绍在Win7电脑上安装Go语言的步骤,并附上具体的代码示例。步骤一:下载Go语言安装包访问Go官
