

OSX as Transparent Wifi MITM Proxy

Yesterday I was in the situation where I wanted to debug an iOS deviceand what network calls it would make. Normally the trivial step is tojust define an HTTP proxy server in the wifi settings but that will onlywork for as long as you have
Yesterday I was in the situation where I wanted to debug an iOS device and what network calls it would make. Normally the trivial step is to just define an HTTP proxy server in the wifi settings but that will only work for as long as you have something that actually honors this proxy server. But there are better ways to transparently proxy connections from a device connected via Wifi which does not require any changes on the actual device.
The Tools
In order for this to work you need a device running OS X which is connected to the same network as the Wifi. Then you need to convince the Wifi device to see you as the gateway instead of the actual gateway. The easiest way is just to go to the settings and change the gateway to your computer's IP. The second ingredient is an HTTP proxy, ideally one that can also decrypt and reencrypt SSL traffic. Personally I can recommend Charles for that. Lastly you will need another proxy that can work transparently which sits between your device and Charles. On OS X redsocks gets this job done.
If you don't want to spend the money on Charles or you want to rewrite traffic with Python you can use mitmproxy.
The Setup
The first thing you will notice is that when you point your Wifi device to your computer it will loose network connectivity. That's because by default your computer won't forward packets. This can easily be changed through sysctl:
$ sudo sysctl -w net.inet.ip.forwarding=1
After that you should be able to browse the internet again on your Wifi device.
The second step is installing redsocks. If you have brew that's a very trivial operation:
$ brew install redsocks
Once installed you will need to create a config file for it. Call it redsocks.conf and place it in a folder from which you run redsocks:
base {
    log_debug = on;
    log_info = on;
    log = stderr;
    daemon = off;
    redirector = generic;
}
redsocks {
    local_ip = 0.0.0.0;
    local_port = 12345;
    ip = 127.0.0.1;
    port = 8889;
    // known types: socks4, socks5, http-connect, http-relay
    type = socks5;
}
Since I'm using Charles I take advantage of it's socks5 support and point it to localhost:8889 where Charles normally starts up if configured as Socks5 proxy. If you're using a regular HTTP proxy you can use http-connect as proxy type. The local_port defines where the actual transparent redsocks proxy opens.
All you have to do then is to start it:
$ redsocks
After that you will need to point all the traffic that is not from your computer and from port 80 and 443 of your Wifi through redsocks. On OS X the firewall canbe controlled through ipfw. In my case the wifi device is en1:
$ sudo ipfw add fwd 127.0.0.1,12345 tcp from not me to any 80 in via en1
$ sudo ipfw add fwd 127.0.0.1,12345 tcp from not me to any 443 in via en1
Working around OS X Bugs
Now currently if you finish that above setup you will notice that nothing actually works. The cause for this is a Bug in the OS X kernel that requires flipping the net.inet.ip.scopedroute flag to 0. I am not entirely sure what it does, but the internet reports that it breaks network sharing through the user preferences. In any case it fixes ipfw based forwarding so you can flip it with sysctl:
$ sudo sysctl -w net.inet.ip.scopedroute=0
Unfortunately in OS X Lion this flag can actually not be flipped from userspace so you need to set it as boot parameter and then restart your computer. You can do this by editing the /Library/Preferences/SystemConfiguration/com.apple.Boot.plist file:
<?xml version="1.0" encoding="UTF-8"?>

<plist version="1.0">
<dict>
  <key>Kernel Flags</key>
  <string>net.inet.ip.scopedroute=0</string>
</dict>
</plist>
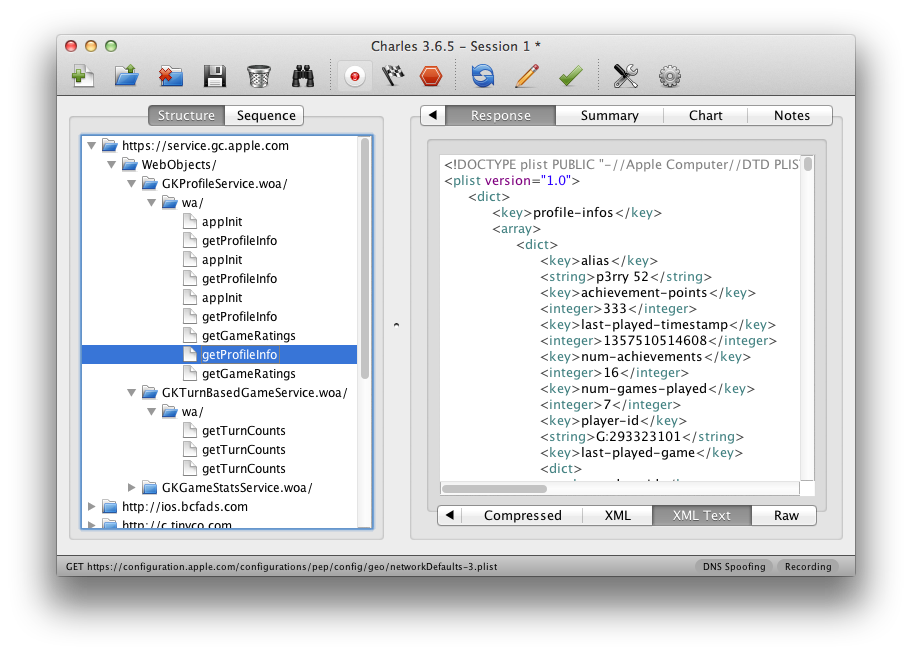
Installing SSL Certificates
After all that your HTTP traffic should show up in your SSL interception proxy. SSL will only work if the application on your Wifi device is trusting your SSL interception proxy's CA. For browsers for instance that's trivial to change. The Charles Certificate can be added to the trust store by following this link: charles.crt. Note that this will not work with applications that don't use the system's CA trust store. In that case you will need to recompile your application so that it trusts the Charles CA.
原文地址:OSX as Transparent Wifi MITM Proxy, 感谢原作者分享。

热AI工具

Undresser.AI Undress
人工智能驱动的应用程序,用于创建逼真的裸体照片

AI Clothes Remover
用于从照片中去除衣服的在线人工智能工具。

Undress AI Tool
免费脱衣服图片

Clothoff.io
AI脱衣机

Video Face Swap
使用我们完全免费的人工智能换脸工具轻松在任何视频中换脸!

热门文章
热工具

记事本++7.3.1
好用且免费的代码编辑器

SublimeText3汉化版
中文版,非常好用

禅工作室 13.0.1
功能强大的PHP集成开发环境

Dreamweaver CS6
视觉化网页开发工具

SublimeText3 Mac版
神级代码编辑软件(SublimeText3)


 惠普打印机连不上wifi怎么办-惠普打印机连不上wifi的解决方法
Mar 06, 2024 pm 01:00 PM
惠普打印机连不上wifi怎么办-惠普打印机连不上wifi的解决方法
Mar 06, 2024 pm 01:00 PM
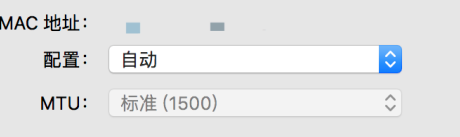
很多用户在使用惠普打印机的时候,不熟悉惠普打印机连不上wifi怎么办?下文小编就为各位带来了惠普打印机连不上wifi的解决方法,让我们一起来下文看看吧。惠普打印机mac地址设置为自动选择自动加入网络勾选更改网络配置使用dhcp输入密码连接惠普打印机显示连上wifi
 自己家的wifi显示不安全网络怎么回事
Nov 15, 2023 pm 02:39 PM
自己家的wifi显示不安全网络怎么回事
Nov 15, 2023 pm 02:39 PM
原因有:1、WiFi本身有问题;2、路由器可能过热或损坏;3、可能宽带欠费,导致无法上网;4、WiFi名称包含中文,导致部分电脑无法连接上网;5、电脑系统问题;6、IP地址设置问题;7、该无线网络没有设置无线密码等。解决方法:1、检查WiFi连接,确保设备已连接到正确的WiFi网络;2、检查路由器设置,可以尝试重新设置路由器,确保SSID和密码正确等等。
 手机wifi有个感叹号是为什么
Sep 18, 2023 pm 04:05 PM
手机wifi有个感叹号是为什么
Sep 18, 2023 pm 04:05 PM
手机wifi有个感叹号的原因可能是无法连接到互联网、信号弱、认证问题和IP地址冲突等。详细介绍:1、无法连接到互联网,如果Wi-Fi图标上出现感叹号,可能是因为手机无法连接到互联网,这可能是由于路由器断网、网络故障或者手机设置问题引起的;2、信号弱,如果Wi-Fi图标上出现感叹号,可能是由于Wi-Fi信号弱引起的,这可能是由于距离路由器太远、障碍物阻挡或者干扰信号等等。
 win10为何无法连接到Wi-Fi
Jan 16, 2024 pm 04:18 PM
win10为何无法连接到Wi-Fi
Jan 16, 2024 pm 04:18 PM
我们在使用win10操作系统连接wifi无线网的时候会发现出现了连不上wifi网络受限的提示。对于这种问题小编觉得可以尝试一下在网络和共享中心中找到自己的网络,然后进行一系列的调整设置。具体步骤就来看看小编是怎么做的吧~win10为什么连不上wifi方法一1、在电脑屏幕底部通知区域的无线WIFI图标处单击鼠标右键,选择“打开网络和Internet设置”,接着点击“更改适配器选项”按钮。2、在弹出的网络连接界面中,查找名为“WLAN”的无线连接,再次单击右键,并选择“关闭”(或为“禁用”)。3、待
 wifi打不开是什么原因 附:修复wifi功能打不开的方法
Mar 14, 2024 pm 03:34 PM
wifi打不开是什么原因 附:修复wifi功能打不开的方法
Mar 14, 2024 pm 03:34 PM
现在手机除了都有数据和wifi两种上网方法,OPPO手机也不例外,但是我们在使用时打不开wifi功能了要怎么办呢?先不要着急,不妨看下本期教程,就能帮助到您了!手机wifi功能无法开启怎么办可能是因为WLAN开关开启时会略有延迟,请等待2秒后观察是否开启,请勿连续点击。1、可尝试进入「设置>WLAN」,尝试重新打开WLAN开关。2、请打开/关闭一下飞行模式,尝试重新打开WLAN开关。3、重启手机尝试是否能正常打开WLAN。4、建议备份数据后恢复出厂设置尝试。若以上方法均未能解决您的问题,请携带购
 解决win10无法输入wifi密码的方法
Dec 30, 2023 pm 05:43 PM
解决win10无法输入wifi密码的方法
Dec 30, 2023 pm 05:43 PM
win10wifi不能输入密码是一个非常郁闷的问题,一般情况下就是卡主了,重新打开一下或者重启一下电脑就可以了,还是解决不了的用户,快点来看看详细的解决教程吧。win10wifi无法输入密码教程方法一:1、无法输入密码可能是我们的键盘连接出现了问题,仔细检查一下键盘是否可以使用。2、如果我们需要使用小键盘输入数字的话,还需要查看小键盘是否被锁定了。方法二:注:部分用户反映说执行此操作后,电脑无法开机。实际不是此项设置的原因,而是电脑系统本身有问题。执行此操作后,不会影响电脑的正常启动,电脑系统不
 wifi已连接不可上网是为什么
Dec 07, 2023 pm 05:00 PM
wifi已连接不可上网是为什么
Dec 07, 2023 pm 05:00 PM
wifi已连接不可上网的原因:1、WiFi信号弱;2、IP地址冲突;3、DNS服务器问题;4、路由器故障;5、网络供应商问题;6、WiFi网络本身的问题;7、路由器问题;8、设备网络设置问题;9、信号干扰或障碍物;10、设备问题。详细介绍:1、WiFi信号弱,WiFi信号的强弱直接影响到网络的稳定性和速度,如果连接的WiFi信号较弱,可能会导致网络连接不稳定或无法上网等等。
 Ubuntu18.04如何连接到隐藏的WiFi网络?
Jan 01, 2024 pm 03:58 PM
Ubuntu18.04如何连接到隐藏的WiFi网络?
Jan 01, 2024 pm 03:58 PM
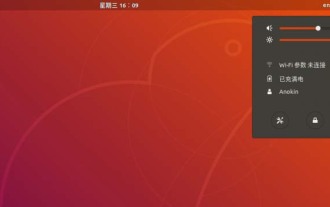
Ubuntu18.04想要隐藏的无线网络?该怎么连接wifi网络呢?下面我们就来看看详细的教程。1、启动Ubuntu后,点击桌面右上侧倒三角。2、弹出下拉菜单,点击选择【wifi设置】。3、进入【wifi设置】详情页。4、将鼠标移至wifi开关状态的右侧三道横的图标,点击该图标。5、弹出下拉菜单,鼠标单击选择里面的【连接到隐藏网络】。6、弹出【连接到隐藏的WiFi网络】对话框。需要输入WiFi网络名称、加密方式等信息。7、输入隐藏的WiFi网络名称;加密方式选择【WPA及WPA2个人】,然后输上
