

PHP防止XSS攻击之过滤、验证和转义之转义的例子

本文章来为各位介绍一篇关于PHP防止XSS攻击之过滤、验证和转义之转义的例子,希望这篇教程能够帮助到各位朋友。
PHP 转义实现
把输出渲染成网页或API响应时,一定要转义输出,这也是一种防护措施,能避免渲染恶意代码,造成XSS攻击,还能防止应用的用户无意中执行恶意代码。
我们可以使用前面提到的htmlentities函数转移输出,该函数的第二个参数一定要使用ENT_QUOTES,让这个函数转义单引号和双引号,而且,还要在第三个参数中指定合适的字符编码(通常是UTF-8),下面的例子演示了如何在渲染前转义HTML输出:
$output = '
<script>alert(“欢迎来到Laravel学院!")</script>
';echo htmlentities($output, ENT_QUOTES, ‘UTF-8');
如果不转义直接输出,会弹出提示框:
alert
转义之后输出变成:
<script>alert("欢迎访问Laravel学院!");</script>
现代PHP支持许多模板引擎,这些模板引擎在底层已经为了做好了转义处理,比如现在流行的twig/twig和smarty/smarty都会自动转义输出。这种默认处理方式很赞,为PHP Web应用提供了有力的安全保障。
Blade 模板引擎避免XSS攻击原理
Laravel使用的模板引擎是Blade,关于Blade的使用可以参考其官方文档,这里我们简单探讨下Laravel底层如何对输出进行转义处理。
一般我们在Laravel中返回视图内容会这么做:
return view(’test’, [‘data’=>$data]);
这是一个很简单的例子,意味着我们会在resources/views目录下找到test.blade.php视图文件,然后将$data变量传入其中,并将最终渲染结果作为响应的内容返回给用户。那么这一过程经历了哪些底层源码的处理,如果$data变量中包含脚本代码(如JavaScript脚本),又该怎么去处理呢?接下来我们让来一窥究竟。
首先我们从辅助函数view入手,当然这里我们也可以使用View:make,但是简单起见,我们一般用view函数,该函数定义在Illuminate\Foundation\helpers.php文件中:
function view($view = null, $data = [], $mergeData = [])
{
$factory = app(ViewFactory::class);
if (func_num_args() === 0) {
return $factory;
}
return $factory->make($view, $data, $mergeData);
}
该函数中的逻辑是从容器中取出视图工厂接口ViewFactory对应的实例$factory(该绑定关系在Illuminate\View\ViewServiceProvider的register方法中注册,此外这里还注册了模板引擎解析器EngineResolver,包括PhpEngine和载入BladeCompiler的CompilerEngine,以及视图文件查找器FileViewFinder,一句话,这里注册了视图解析所需的所有服务),如果传入了参数,则调用$factory上的make方法:
public function make($view, $data = [], $mergeData = [])
{
if (isset($this->aliases[$view])) {
$view = $this->aliases[$view];
}
$view = $this->normalizeName($view);
$path = $this->finder->find($view);
$data = array_merge($mergeData, $this->parseData($data));
$this->callCreator($view = new View($this, $this->getEngineFromPath($path), $view, $path, $data));
return $view;
}
这个方法位于Illuminate\View\Factory,这里所做的事情是获取视图文件的完整路径,合并传入变量,$this->getEngineFromPath会通过视图文件后缀获取相应的模板引擎,比如我们使用.blade.php结尾的视图文件则获得到的是CompilerEngine(即Blade模板引擎),否则将获取到PhpEngine,然后我们根据相应参数实例化View(Illuminate\View\View)对象并返回。需要注意的是View类中重写了__toString方法:
public function __toString()
{
return $this->render();
}
所以当我们打印$view实例的时候,实际上会调用View类的render方法,所以下一步我们理所应当研究render方法做了些什么:
public function render(callable $callback = null)
{
try {
$contents = $this->renderContents();
$response = isset($callback) ? call_user_func($callback, $this, $contents) : null;
// Once we have the contents of the view, we will flush the sections if we are
// done rendering all views so that there is nothing left hanging over when
// another view gets rendered in the future by the application developer.
$this->factory->flushSectionsIfDoneRendering();
return ! is_null($response) ? $response : $contents;
} catch (Exception $e) {
$this->factory->flushSections();
throw $e;
} catch (Throwable $e) {
$this->factory->flushSections();
throw $e;
}
}
这里重点是$this->renderContents()方法,我们继续深入研究View类中的renderContents方法:
protected function renderContents()
{
// We will keep track of the amount of views being rendered so we can flush
// the section after the complete rendering operation is done. This will
// clear out the sections for any separate views that may be rendered.
$this->factory->incrementRender();
$this->factory->callComposer($this);
$contents = $this->getContents();
// Once we've finished rendering the view, we'll decrement the render count
// so that each sections get flushed out next time a view is created and
// no old sections are staying around in the memory of an environment.
$this->factory->decrementRender();
return $contents;
}
我们重点关注$this->getContents()这里,进入getContents方法:
protected function getContents()
{
return $this->engine->get($this->path, $this->gatherData());
}
我们在前面已经提到,这里的$this->engine对应CompilerEngine(Illuminate\View\Engines\CompilerEngine),所以我们进入CompilerEngine的get方法:
public function get($path, array $data = [])
{
$this->lastCompiled[] = $path;
// If this given view has expired, which means it has simply been edited since
// it was last compiled, we will re-compile the views so we can evaluate a
// fresh copy of the view. We'll pass the compiler the path of the view.
if ($this->compiler->isExpired($path)) {
$this->compiler->compile($path);
}
$compiled = $this->compiler->getCompiledPath($path);
// Once we have the path to the compiled file, we will evaluate the paths with
// typical PHP just like any other templates. We also keep a stack of views
// which have been rendered for right exception messages to be generated.
$results = $this->evaluatePath($compiled, $data);
array_pop($this->lastCompiled);
return $results;
}
同样我们在之前提到,CompilerEngine使用的compiler是BladeCompiler,所以$this->compiler也就是Blade编译器,我们先看$this->compiler->compile($path);这一行(首次运行或者编译好的视图模板已过期会进这里),进入BladeCompiler的compile方法:
public function compile($path = null)
{
if ($path) {
$this->setPath($path);
}
if (! is_null($this->cachePath)) {
$contents = $this->compileString($this->files->get($this->getPath()));
$this->files->put($this->getCompiledPath($this->getPath()), $contents);
}
}
这里我们做的事情是先编译视图文件内容,然后将编译好的内容存放到视图编译路径(storage\framework\views)下对应的文件(一次编译,多次运行,以提高性能),这里我们重点关注的是$this->compileString方法,该方法中使用了token_get_all函数将视图文件代码分割成多个片段,如果片段是数组的话则循环调用$this->parseToken方法:
protected function parseToken($token)
{
list($id, $content) = $token;
if ($id == T_INLINE_HTML) {
foreach ($this->compilers as $type) {
$content = $this->{"compile{$type}"}($content);
}
}
return $content;
}
来到这里,我们已经很接近真相了,针对HTML代码(含Blade指令代码),循环调用compileExtensions、compileStatements、compileComments和compileEchos方法,我们重点关注输出方法compileEchos,Blade引擎默认提供了compileRawEchos、compileEscapedEchos和compileRegularEchos三种输出方法,对应的指令分别是{!! !!}、{{{ }}}和{{ }},顾名思义,compileRawEchos对应的是原生输出:
protected function compileRawEchos($value)
{
$pattern = sprintf('/(@)?%s\s*(.+?)\s*%s(\r?\n)?/s', $this->rawTags[0], $this->rawTags[1]);
$callback = function ($matches) {
$whitespace = empty($matches[3]) ? '' : $matches[3].$matches[3];
return $matches[1] ? substr($matches[0], 1) : 'compileEchoDefaults($matches[2]).'; ?>'.$whitespace;
};
return preg_replace_callback($pattern, $callback, $value);
}
即Blade视图中以{!! !!}包裹的变量会原生输出HTML,如果要显示图片、链接,推荐这种方式。
{{{}}}对应的CompileEscapedEchos,这个在Laravel 4.2及以前版本中用于转义,现在已经替换成了{{}},即调用compileRegularEchos方法:
protected function compileRegularEchos($value)
{
$pattern = sprintf('/(@)?%s\s*(.+?)\s*%s(\r?\n)?/s', $this->contentTags[0], $this->contentTags[1]);
$callback = function ($matches) {
$whitespace = empty($matches[3]) ? '' : $matches[3].$matches[3];
$wrapped = sprintf($this->echoFormat, $this->compileEchoDefaults($matches[2]));
return $matches[1] ? substr($matches[0], 1) : ''.$whitespace;
};
return preg_replace_callback($pattern, $callback, $value);
}
其中$this->echoFormat对应e(%s),无独有偶,compileEscapedEchos中也用到这个方法:
protected function compileEscapedEchos($value)
{
$pattern = sprintf('/(@)?%s\s*(.+?)\s*%s(\r?\n)?/s', $this->escapedTags[0], $this->escapedTags[1]);
$callback = function ($matches) {
$whitespace = empty($matches[3]) ? '' : $matches[3].$matches[3];
return $matches[1] ? $matches[0] : 'compileEchoDefaults($matches[2]).'); ?>'.$whitespace;
};
return preg_replace_callback($pattern, $callback, $value);
}
辅助函数e()定义在Illuminate\Support\helpers.php中:
function e($value)
{
if ($value instanceof Htmlable) {
return $value->toHtml();
}
return htmlentities($value, ENT_QUOTES, 'UTF-8', false);
}
其作用就是对输入的值进行转义。
经过这样的转义,视图中的{{ $data }}或被编译成,最终如何将$data传入视图输出,我们再回到CompilerEngine的get方法,看这一段:
$results = $this->evaluatePath($compiled, $data);
evaluatePath中传入了编译后的视图文件路径和传入的变量$data,该方法定义如下:
protected function evaluatePath($__path, $__data)
{
$obLevel = ob_get_level();ob_start();
extract($__data, EXTR_SKIP);
// We'll evaluate the contents of the view inside a try/catch block so we can
// flush out any stray output that might get out before an error occurs or
// an exception is thrown. This prevents any partial views from leaking.
try {
include $__path;
} catch (Exception $e) {
$this->handleViewException($e, $obLevel);
} catch (Throwable $e) {
$this->handleViewException(new FatalThrowableError($e), $obLevel);
}
return ltrim(ob_get_clean());
}
这里面调用了PHP系统函数extract将传入变量从数组中导入当前符号表(通过include $__path引入),其作用也就是将编译后视图文件中的变量悉数替换成传入的变量值(通过键名映射)。
好了,这就是Blade视图模板从渲染到输出的基本过程,可以看到我们通过{{}}来转义输出,从而达到避免XSS攻击的目的。

热AI工具

Undresser.AI Undress
人工智能驱动的应用程序,用于创建逼真的裸体照片

AI Clothes Remover
用于从照片中去除衣服的在线人工智能工具。

Undress AI Tool
免费脱衣服图片

Clothoff.io
AI脱衣机

AI Hentai Generator
免费生成ai无尽的。

热门文章
热工具

记事本++7.3.1
好用且免费的代码编辑器

SublimeText3汉化版
中文版,非常好用

禅工作室 13.0.1
功能强大的PHP集成开发环境

Dreamweaver CS6
视觉化网页开发工具

SublimeText3 Mac版
神级代码编辑软件(SublimeText3)
热门话题


 解决方法:您的组织要求您更改 PIN 码
Oct 04, 2023 pm 05:45 PM
解决方法:您的组织要求您更改 PIN 码
Oct 04, 2023 pm 05:45 PM
“你的组织要求你更改PIN消息”将显示在登录屏幕上。当在使用基于组织的帐户设置的电脑上达到PIN过期限制时,就会发生这种情况,在该电脑上,他们可以控制个人设备。但是,如果您使用个人帐户设置了Windows,则理想情况下不应显示错误消息。虽然情况并非总是如此。大多数遇到错误的用户使用个人帐户报告。为什么我的组织要求我在Windows11上更改我的PIN?可能是您的帐户与组织相关联,您的主要方法应该是验证这一点。联系域管理员会有所帮助!此外,配置错误的本地策略设置或不正确的注册表项也可能导致错误。即
 Windows 11 上调整窗口边框设置的方法:更改颜色和大小
Sep 22, 2023 am 11:37 AM
Windows 11 上调整窗口边框设置的方法:更改颜色和大小
Sep 22, 2023 am 11:37 AM
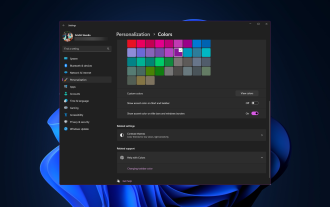
Windows11将清新优雅的设计带到了最前沿;现代界面允许您个性化和更改最精细的细节,例如窗口边框。在本指南中,我们将讨论分步说明,以帮助您在Windows操作系统中创建反映您的风格的环境。如何更改窗口边框设置?按+打开“设置”应用。WindowsI转到个性化,然后单击颜色设置。颜色更改窗口边框设置窗口11“宽度=”643“高度=”500“>找到在标题栏和窗口边框上显示强调色选项,然后切换它旁边的开关。若要在“开始”菜单和任务栏上显示主题色,请打开“在开始”菜单和任务栏上显示主题
 如何在 Windows 11 上更改标题栏颜色?
Sep 14, 2023 pm 03:33 PM
如何在 Windows 11 上更改标题栏颜色?
Sep 14, 2023 pm 03:33 PM
默认情况下,Windows11上的标题栏颜色取决于您选择的深色/浅色主题。但是,您可以将其更改为所需的任何颜色。在本指南中,我们将讨论三种方法的分步说明,以更改它并个性化您的桌面体验,使其具有视觉吸引力。是否可以更改活动和非活动窗口的标题栏颜色?是的,您可以使用“设置”应用更改活动窗口的标题栏颜色,也可以使用注册表编辑器更改非活动窗口的标题栏颜色。若要了解这些步骤,请转到下一部分。如何在Windows11中更改标题栏的颜色?1.使用“设置”应用按+打开设置窗口。WindowsI前往“个性化”,然
 OOBELANGUAGE错误Windows 11 / 10修复中出现问题的问题
Jul 16, 2023 pm 03:29 PM
OOBELANGUAGE错误Windows 11 / 10修复中出现问题的问题
Jul 16, 2023 pm 03:29 PM
您是否在Windows安装程序页面上看到“出现问题”以及“OOBELANGUAGE”语句?Windows的安装有时会因此类错误而停止。OOBE表示开箱即用的体验。正如错误提示所表示的那样,这是与OOBE语言选择相关的问题。没有什么可担心的,你可以通过OOBE屏幕本身的漂亮注册表编辑来解决这个问题。快速修复–1.单击OOBE应用底部的“重试”按钮。这将继续进行该过程,而不会再打嗝。2.使用电源按钮强制关闭系统。系统重新启动后,OOBE应继续。3.断开系统与互联网的连接。在脱机模式下完成OOBE的所
 Windows 11 上启用或禁用任务栏缩略图预览的方法
Sep 15, 2023 pm 03:57 PM
Windows 11 上启用或禁用任务栏缩略图预览的方法
Sep 15, 2023 pm 03:57 PM
任务栏缩略图可能很有趣,但它们也可能分散注意力或烦人。考虑到您将鼠标悬停在该区域的频率,您可能无意中关闭了重要窗口几次。另一个缺点是它使用更多的系统资源,因此,如果您一直在寻找一种提高资源效率的方法,我们将向您展示如何禁用它。不过,如果您的硬件规格可以处理它并且您喜欢预览版,则可以启用它。如何在Windows11中启用任务栏缩略图预览?1.使用“设置”应用点击键并单击设置。Windows单击系统,然后选择关于。点击高级系统设置。导航到“高级”选项卡,然后选择“性能”下的“设置”。在“视觉效果”选
 华为GT3 Pro和GT4的差异是什么?
Dec 29, 2023 pm 02:27 PM
华为GT3 Pro和GT4的差异是什么?
Dec 29, 2023 pm 02:27 PM
许多用户在选择智能手表的时候都会选择的华为的品牌,其中华为GT3pro和GT4都是非常热门的选择,不少用户都很好奇华为GT3pro和GT4有什么区别,下面就就给大家介绍一下二者。华为GT3pro和GT4有什么区别一、外观GT4:46mm和41mm,材质是玻璃表镜+不锈钢机身+高分纤维后壳。GT3pro:46.6mm和42.9mm,材质是蓝宝石玻璃表镜+钛金属机身/陶瓷机身+陶瓷后壳二、健康GT4:采用最新的华为Truseen5.5+算法,结果会更加的精准。GT3pro:多了ECG心电图和血管及安
 Windows 11 上的显示缩放比例调整指南
Sep 19, 2023 pm 06:45 PM
Windows 11 上的显示缩放比例调整指南
Sep 19, 2023 pm 06:45 PM
在Windows11上的显示缩放方面,我们都有不同的偏好。有些人喜欢大图标,有些人喜欢小图标。但是,我们都同意拥有正确的缩放比例很重要。字体缩放不良或图像过度缩放可能是工作时真正的生产力杀手,因此您需要知道如何对其进行自定义以充分利用系统功能。自定义缩放的优点:对于难以阅读屏幕上的文本的人来说,这是一个有用的功能。它可以帮助您一次在屏幕上查看更多内容。您可以创建仅适用于某些监视器和应用程序的自定义扩展配置文件。可以帮助提高低端硬件的性能。它使您可以更好地控制屏幕上的内容。如何在Windows11
 10种在 Windows 11 上调整亮度的方法
Dec 18, 2023 pm 02:21 PM
10种在 Windows 11 上调整亮度的方法
Dec 18, 2023 pm 02:21 PM
屏幕亮度是使用现代计算设备不可或缺的一部分,尤其是当您长时间注视屏幕时。它可以帮助您减轻眼睛疲劳,提高易读性,并轻松有效地查看内容。但是,根据您的设置,有时很难管理亮度,尤其是在具有新UI更改的Windows11上。如果您在调整亮度时遇到问题,以下是在Windows11上管理亮度的所有方法。如何在Windows11上更改亮度[10种方式解释]单显示器用户可以使用以下方法在Windows11上调整亮度。这包括使用单个显示器的台式机系统以及笔记本电脑。让我们开始吧。方法1:使用操作中心操作中心是访问
