
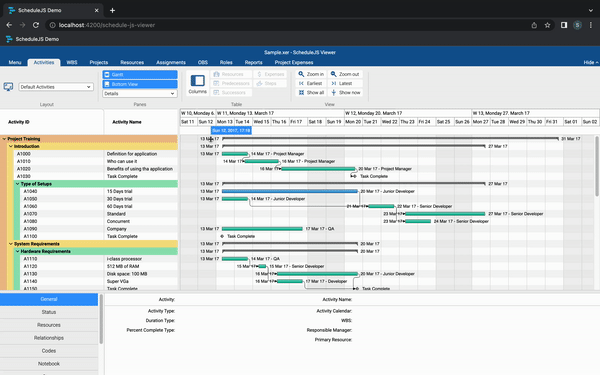
甘特图活动渲染器是 ScheduleJS 查看器的主要渲染器。本文将讨论它的构建方式以及该活动渲染器的特殊性。
构建渲染器类的第一步是通过扩展高阶框架类来继承属性和方法。
我们只想通过开始和结束时间维度来表示任务。用于执行此操作的 ScheduleJS 基本渲染器类是 ActivityBarRenderer 类。
我们需要向 ActivityBarRenderer 类提供自定义类型参数,以便可以访问自定义 Row 和 Activity 类提供的属性和方法使用基类 API。
让我们创建 ScheduleJsViewerTaskActivityRenderer 类来在各自的 ScheduleJsViewerTaskRow 中绘制每个 ScheduleJsViewerTaskActivity。
// Import the base ActivityBarRenderer class from ScheduleJS
import {ActivityBarRenderer} from "schedule";

// Import our custom Activity and Row types
import {ScheduleJsViewerTaskActivity} from "...";
import {ScheduleJsViewerTaskRow} from "...";

// Create our custom renderer by extending the ActivityBarRenderer class
export class ScheduleJsViewerTaskActivityRenderer extends ActivityBarRenderer<ScheduleJsViewerTaskActivity, ScheduleJsViewerTaskRow> { }
按原样,渲染器已经可以注册为使用 ActivityBarRenderer 的默认行为来绘制我们的活动。现在让我们深入了解如何自定义它。
在 ScheduleJS 中,ActivityRenderer 是我们使用 Graphics API 以编程方式注册的类,用于在其 Row 上绘制特定的 Activity。为了组织我们的 ScheduleJsViewerTaskActivityRenderer,我们将其代码分为三个部分:
属性是将在整个渲染器中重用的常量。按原样,这些属性只能在渲染器代码中直接编辑。我们可以想象一个特定的屏幕,用户可以在其中直接在 UI 中修改这些设置。
// Attributes

// Pixels sizings
private readonly _parentActivityTrianglesWidthPx: number = 5;
private readonly _parentActivityTrianglesHeightPx: number = 8;
private readonly _defaultLineWidthPx: number = 0.5;

// Colors palette
private readonly _parentActivityColor: string = Color.GRAY.toCssString();
private readonly _strokeColor: string = Color.BLACK.toCssString();
private readonly _defaultActivityGreen: Color = Color.rgb(28, 187, 158);
private readonly _defaultActivityBlue: Color = Color.rgb(53, 152, 214);
private readonly _onHoverFillColor: string = Color.ORANGE.toCssString();

// Opacity ratio for baseline activities
private readonly _baselineOpacityRatio: number = 0.6;
构造函数与我们的渲染器生命周期方法紧密耦合。在 ScheduleJS 查看器中,我们决定在用户切换屏幕时实例化渲染器以定义特殊性,并在实现此渲染器的每个选项卡中重用我们的代码。这意味着每次用户选择具有此渲染器的屏幕时都会运行构造函数。
// Constructor

// The renderer requires the graphics and the current tab variable
constructor(graphics: GraphicsBase<ScheduleJsViewerTaskRow>,
            private _currentRibbonMenuTab: ScheduleJsViewerRibbonMenuTabsEnum) {

  // The ActivityBarRenderer class requires the graphics and a name for the renderer
  super(graphics, ScheduleJsViewerRenderingConstants.taskActivityRendererName);

  // Default fill color when hovering an activity
  this.setFillHover(Color.web(this._onHoverFillColor));

  // Default stroke color when hovering an activity
  this.setStrokeHover(Color.BLACK);

  // Default stroke color
  this.setStroke(Color.BLACK);

  // Default thickness
  this.setLineWidth(this._defaultLineWidthPx);

  // Default bar height
  this.setBarHeight(8);

  // Default fill color based on current tab
  switch (_currentRibbonMenuTab) {
    // Change color for the WBS tab
    case ScheduleJsViewerRibbonMenuTabsEnum.WBS:
      this._parentActivityColor = ScheduleJsViewerColors.brown;
      this.setFill(this._defaultActivityBlue);
      break;
    default:
      this._parentActivityColor = Color.GRAY.toCssString();
      this.setFill(this._defaultActivityGreen);
      break;
  }

}
setFill、setStroke、setFillHover、setStrokeHover、setLineWidth 和 setBarHeight 是继承的,用于更改 ActivityBarRenderer 类的默认渲染特性。
该渲染器的默认功能如下:
框架会自动调用drawActivity方法来在画布上渲染我们的活动。它的所有参数都是动态填充的,允许您对活动的当前状态做出实时反应。
// Main drawing method

drawActivity(activityRef: ActivityRef<ScheduleJsViewerTaskActivity>,
             position: ViewPosition,
             ctx: CanvasRenderingContext2D,
             x: number,
             y: number,
             w: number,
             h: number,
             selected: boolean,
             hover: boolean,
             highlighted: boolean,
             pressed: boolean
            ): ActivityBounds {    // This method has to return ActivityBounds

    // True if current activity includes a comparison task
    const hasModifications = !!activityRef.getActivity().diffTask;

    // True if current row has children
    const isParent = activityRef.getRow().getChildren().length;

    // Set colors dynamically
    this._setActivityColor(activityRef, hasModifications);

    // Draw text
    this._drawActivityText(activityRef, ctx, x, y, w, h, hasModifications);

    // Run a custom method to draw parent activities or delegate to the default method
    return isParent
      ? this._drawParentActivity(activityRef, ctx, x, y, w, h, hover, hasModifications)
      : super.drawActivity(activityRef, position, ctx, x, y, w, h, selected, hover, highlighted, pressed);
  }
绘图将这样进行:
让我们仔细看看如何通过使用 _drawParentActivity 方法设计自己的方法来自由绘制您的 Activity。
// Draw the parent activity

private _drawParentActivity(activityRef: ActivityRef<ScheduleJsViewerTaskActivity>,
                            ctx: CanvasRenderingContext2D,
                            x: number,
                            y: number,
                            w: number,
                            h: number,
                            hover: boolean,
                            hasModifications: boolean
                           ): ActivityBounds {

    // Set padding
    const topPadding = h / 3.5;
    const leftPadding = 1;

    // Set CanvasRenderingContext2D
    ctx.lineWidth = this._defaultLineWidthPx;
    if (hover) {
      ctx.fillStyle = this._onHoverFillColor;
      ctx.strokeStyle = ScheduleJsViewerColors.brown;
    } else if (hasModifications) {
      ctx.fillStyle = Color.web(this._parentActivityColor).withOpacity(this._baselineOpacityRatio).toCssString();
      ctx.strokeStyle = `rgba(0,0,0,${this._baselineOpacityRatio})`;
    } else {
      ctx.fillStyle = this._parentActivityColor;
      ctx.strokeStyle = this._strokeColor;
    }

    // Draw elements
    ScheduleJsViewerTaskActivityRenderer._drawParentActivityStartTriangle(ctx, x + leftPadding, y + topPadding, this._parentActivityTrianglesWidthPx, this._parentActivityTrianglesHeightPx);
    ScheduleJsViewerTaskActivityRenderer._drawParentActivityBody(ctx, x + leftPadding, y + topPadding, w, this._parentActivityTrianglesWidthPx, this._parentActivityTrianglesHeightPx);
    ScheduleJsViewerTaskActivityRenderer._drawParentActivityEndTriangle(ctx, x + leftPadding, y + topPadding, w, this._parentActivityTrianglesWidthPx, this._parentActivityTrianglesHeightPx);

    // Return positions to update where your activity should be responsive
    return new ActivityBounds(activityRef, x, y, w, h);
  }
这里我们直接使用HTMLCanvas API通过设置CanvasRenderingContex2D来定义我们的绘制策略。此方法中完成的唯一与框架相关的操作是为当前父 Activity. 创建一些新的 ActivityBounds
框架使用ActivityBounds在底层创建一个地图来注册屏幕上的所有活动。该地图通过提供类似元素的逻辑来帮助开发人员构建基于准确信息的高级用户体验,同时利用 HTMLCanvas API.
的性能The draw elements methods like _drawParentActivityStartTriangle rely on the CanvasRenderingContext2D API to draw at the pixel level.
// Draw the start triangle element of the parent activity

private static _drawParentActivityStartTriangle(ctx: CanvasRenderingContext2D,
                                                x: number,
                                                y: number,
                                                triangleWidth: number,
                                                triangleHeight: number): void {
    ctx.beginPath();
    ctx.moveTo(x, y);
    ctx.lineTo(x , y + triangleHeight);
    ctx.lineTo(x + triangleWidth, y);
    ctx.lineTo(x, y);
    ctx.fill();
    ctx.stroke();
    ctx.closePath();
}
To register your brand-new renderer, use the graphics.setActivityRenderer method:
// Register the renderer

graphics.setActivityRenderer(ScheduleJsViewerTaskActivity, GanttLayout, new ScheduleJsViewerTaskActivityRenderer(graphics, currentRibbonMenuTab));
To see the video of the final result you can go to see: Building an ActivityRenderer
以上是构建一个 ActivityRenderer的详细内容。更多信息请关注PHP中文网其他相关文章!


