如何使用 CSS 构建倒计时器
作者:卡洛斯·穆库霍✏️
倒计时器是许多网站上的热门功能,可增强活动、销售和用户参与度的功能。虽然 JavaScript 通常用于网络上的动态行为,但也可以仅使用 CSS 创建功能强大且视觉上吸引人的倒计时器。
在本教程中,我们将探索这两种方法,从基本的 JavaScript 倒计时器开始,然后转向纯 CSS 倒计时器。最后,我们将使用 Chrome DevTools 比较两种方法的性能,并讨论它们各自的优缺点。
创建一个基本的 JavaScript 倒计时器
我们将首先创建一个每秒更新一次的简单倒计时器。计时器将包括一个开始和暂停按钮来控制其操作。
创建目录结构
在创建 JavaScript 倒计时器之前,我们需要创建一个目录来存储我们将在本教程中构建的应用程序。
打开终端窗口,导航到适合您的项目的目录,然后使用以下命令创建名为 countdown-timer 的目录:
mkdir countdown-timer
然后,导航到此目录:
cd countdown-timer
创建两个名为 javascript-countdown 和 css-only-countdown 的子目录,并在每个子目录中创建一个名为 public 的子目录:
mkdir javascript-countdown && mkdir javascript-countdown/public
mkdir css-only-countdown && mkdir css-only-countdown/public
创建应用程序服务器
接下来,导航到 javascript-countdown 子目录,使用默认设置初始化一个新的节点项目,并安装 Express 包:
cd javascript-countdown
npm init -y
npm install express
打开您最喜欢的文本编辑器,创建一个名为 server.js 的文件,并向其中添加以下代码:
const express = require('express');
const app = express();
const port = 3001

app.use(express.static('public'));
app.listen(port, () => {
  console.log(`Javascript countdown app server started on port ${port}`);
});
上面的代码创建了一个 Express 服务器,用于为端口 3001 中的 JavaScript 倒计时应用程序提供服务。
HTML结构
仍然在文本编辑器中,在 javascript-countdown 目录内的 public 子目录中创建以下文件:
- HTML 代码的index.html
- CSS 代码的 styles.css
- JavaScript 代码的index.js
将以下代码添加到index.html:
<!DOCTYPE html>
<html lang="en">
<head>
  <meta charset="UTF-8">
  <meta name="viewport" content="width=device-width, initial-scale=1.0">
  <link rel="stylesheet" href="styles.css">
  <title>Javascript Countdown Timer</title>
</head>

<body>
  <div class="container">
    <div class="controls">
      <button id="startBtn">Start</button>
      <button id="pauseBtn">Pause</button>
    </div>
    <div class="countdown-container">
      <div class="countdown"></div>
    </div>
  </div>
  <script src="index.js"></script>
</body>

</html>
此 HTML 文件设置了一个基本结构,其中包含一个包含控制按钮的容器和一个倒计时显示区域。
使用 JavaScript 实现倒计时逻辑
接下来,我们将添加 JavaScript 来管理倒计时逻辑。在index.js中添加以下代码:
window.addEventListener("load", () => {
  const startBtn = document.getElementById('startBtn');
  const pauseBtn = document.getElementById('pauseBtn');
  const countdownView = document.getElementsByClassName('countdown')[0];

  let totalTime = 10;
  let timeLeft;
  let countDownIntervalID;
  let isPaused = false;

  pauseBtn.style.display = 'none';
});
在此代码块中,我们通过各自的 ID 和类来初始化 startBtn、pauseBtn 和 countdownView 元素。我们还设置了一些初始变量:totalTime、timeLeft、countDownIntervalID 和 isPaused。此外,我们将暂停按钮设置为最初隐藏。
现在,让我们为开始和暂停按钮添加事件侦听器:
startBtn.addEventListener('click', startOrStopTimer);
pauseBtn.addEventListener('click', pauseOrResumeTimer);
这些行将单击事件侦听器附加到开始和暂停按钮。稍后定义函数startOrStopTimer 和pauseOrResumeTimer 来处理按钮单击。
添加以下代码来定义startOrStopTimer函数:
function startOrStopTimer() {
  startBtn.innerHTML = startBtn.innerHTML === 'Start' ? 'Stop' : 'Start';
  if (countDownIntervalID === undefined && !isPaused) {
    timeLeft = totalTime;
    startTimer();
    pauseBtn.style.display = 'inline';
  } else {
    stopTimer();
    countdownView.innerHTML = '';
    pauseBtn.style.display = 'none';
    isPaused = false;
    pauseBtn.innerHTML = 'Pause';
  }
}
在此函数中,我们在“开始”和“停止”之间切换开始按钮文本。如果倒计时未运行且未暂停,我们将 timeLeft 初始化为totalTime 并启动计时器。否则,我们停止计时器并重置视图。
现在,定义 startTimer 函数:
function startTimer() {
  countDownIntervalID = setInterval(() => {
    countdownView.innerHTML = timeLeft;

    if (timeLeft === 0) {
      stopTimer();
      startBtn.innerHTML = 'Start';
      pauseBtn.style.display = 'none';
      countdownView.innerHTML = '';
    } else {
      timeLeft = timeLeft - 1;
    }
  }, 1000);
}
该函数设置每秒更新倒计时的间隔。如果 timeLeft 达到零,我们将停止计时器,重置开始按钮文本,并隐藏暂停按钮。
接下来,添加stopTimer函数:
function stopTimer() {
  if (countDownIntervalID !== undefined) {
    clearInterval(countDownIntervalID);
    countDownIntervalID = undefined;
  }
}
此函数清除倒计时间隔并重置 countDownIntervalID。最后添加pauseOrResumeTimer函数:
function pauseOrResumeTimer() {
  isPaused = !isPaused;
  pauseBtn.innerHTML = isPaused ? 'Resume' : 'Pause';

  if (countDownIntervalID !== undefined) {
    stopTimer();
  } else {
    startTimer();
  }
}
在此函数中,我们在“暂停”和“恢复”之间切换暂停状态和按钮文本。如果倒计时正在运行,我们就停止计时器;否则,我们重新开始。
CSS 样式
现在,让我们使用 CSS 设置倒计时器的样式。将以下代码添加到 styles.css:
body {
  background-color: black;
  font-family: Arial, sans-serif;
  height: 100%;
}

.container {
  display: flex;
  flex-direction: column;
  justify-content: center;
  align-items: center;
}

.controls {
  width: 20%;
  margin-top: 10%;
  display: flex;
  justify-content: space-between;
  flex-direction: row;
  flex-wrap: wrap;
}

.countdown-container {
  position: relative;
  width: 20vw;
  height: 20vw;
  margin-top: 2%;
  border: 0.4em solid #9b51e0;
}

button {
  font-size: 1.5em;
  border: none;
  padding: 0.3em;
  background-color: #9b51e0;
  border-radius: 0.4em;
  color: white;
}

.countdown {
  position: relative;
  width: 100%;
  height: 100%;
  list-style: none;
  padding: 0;
  margin: 0;
  display: flex;
  justify-content: center;
  align-items: center;
  font-size: 5em;
  color: #9b51e0;
}
此 CSS 定义了倒计时器界面的样式。正文背景设置为黑色,我们使用 Arial 作为主要字体。 .container 类的样式使其内容居中并在元素之间提供间距。 .controls 类设置用于启动和暂停计时器的按钮的样式,确保它们均匀分布且响应灵敏。 .countdown-container 类定义倒计时显示的大小和外观,包括边框和边距。
返回终端并运行以下命令以开始提供 JavaScript 倒计时应用程序:
node server.js
Open a new tab in your browser, navigate to http://localhost:3001, and you should see something similar to the following: 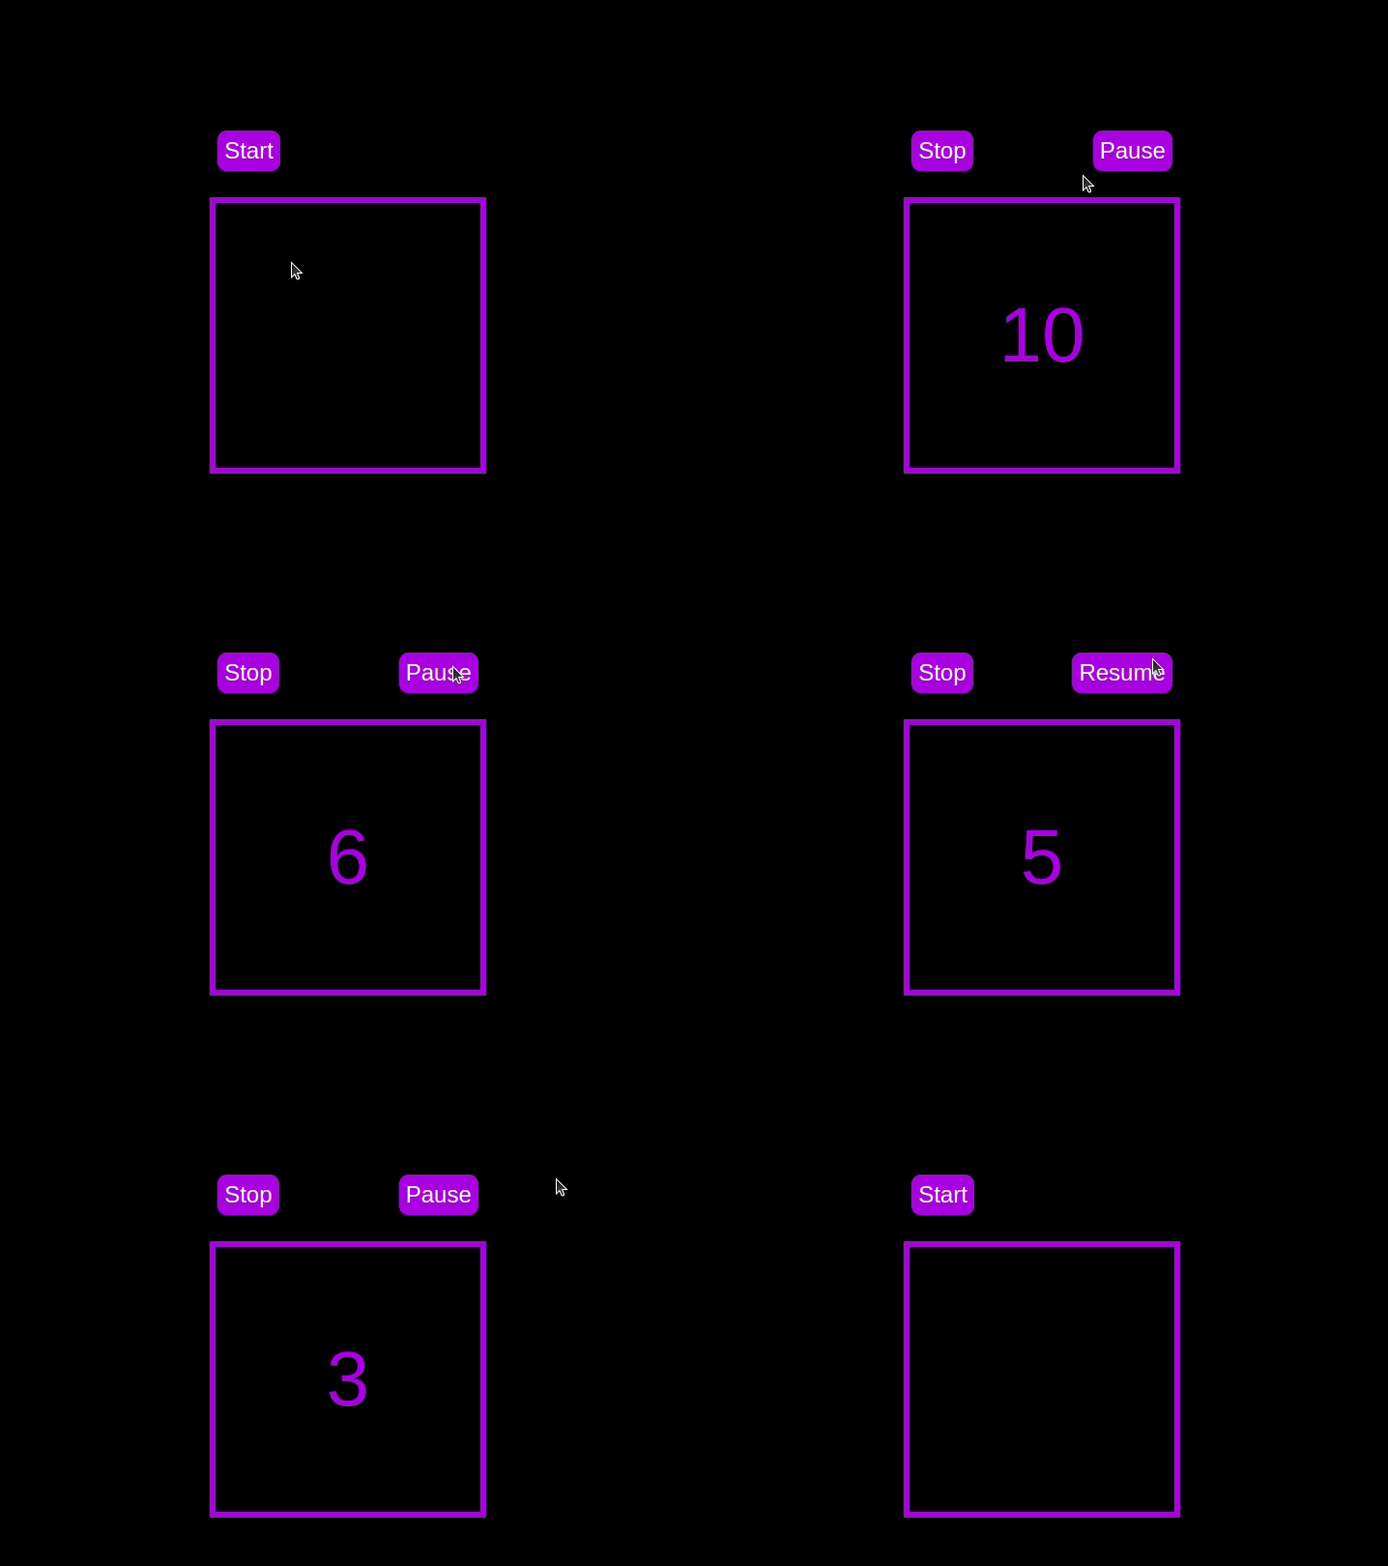 Test out the countdown timer and once you are done, terminate the server application and move to the next step.
Adding a circular progress indicator
To enhance the user experience of our countdown timer, let’s add a circular progress indicator to give the user a visual representation of the time remaining.
First, we need to modify our HTML code to include the circular progress element. In index.html, we add a span element with a class of circular-progress inside the countdown-container div. This span element will be used to create the circular progress indicator:
<div class="countdown-container">
  <span class="circular-progress"></span>
  <div class="countdown"></div>
</div>
Next, we need to define the CSS for the circular progress indicator. In styles.css, we add the following code:
.countdown-container {
  ...
  /* border : 0.4em solid #9b51e0; */
}
.circular-progress {
  width: 20vw;
  height: 20vw;
  border-radius: 50%;
  display: flex;
  justify-content: center;
  align-items: center;
  position: absolute;
  transition: 0.5s;
  background-color: #13171f;
}

.circular-progress::before {
  width: 18.5vw;
  height: 18.5vw;
  content: "";
  position: absolute;
  border-radius: 50%;
  background-color: black;
}
This code first removes the border from the countdown-container div, then sets the dimensions and shape of the circular progress indicator, as well as its position and background color. We also add a ::before pseudo-element to create the inner circle of the progress indicator.
Now we need to add the JavaScript code to animate the circular progress indicator.
Add the following code in the variables initialization block:
const circularProgressEl = document.getElementsByClassName("circular-progress")[0];
let circularProgress;
let circularProgressIntervalID;
This code initializes the circularProgressEl variable to target the circular progress element and creates two new variables, circularProgress and circularProgressIntervalID, that will be used to animate the progress indicator.
Add the following code below the pauseOrResumeTimer() function:
function startCircularProgressAnimation() {
  let start = totalTime - timeLeft;
  let degreesPerSecond = 360 / totalTime;
  let degreesPerInterval = degreesPerSecond / 20;
  circularProgress = degreesPerSecond * start;

  circularProgressIntervalID = setInterval(() => {
    if (Math.round(circularProgress) === 360) {
      clearInterval(circularProgressIntervalID);
    } else {
      circularProgress = circularProgress + degreesPerInterval;
      circularProgressEl.style.background = `conic-gradient(#9b51e0 ${circularProgress}deg, #13171f 0deg)`;
    }
  }, 50);
}
This code defines the startCircularProgressAnimation function, which calculates the starting point and degree of rotation for the circular progress indicator, and sets up an interval to animate the progress indicator.
Add the following code below the startCircularProgressAnimation:
function resumeCircularProgressAnimation() {
  startCircularProgressAnimation();
}

function pauseCircularProgressAnimation() {
  clearInterval(circularProgressIntervalID);
}

function stopCircularProgressAnimation() {
  clearInterval(circularProgressIntervalID);
  circularProgressEl.style.background = `conic-gradient(#9b51e0 0deg, #13171f 0deg)`;
}
This code defines the resumeCircularProgressAnimation, pauseCircularProgressAnimation, and stopCircularProgressAnimation functions, which are used to start, pause, and stop the circular progress animation.
Finally, we need to modify the startOrStopTimer and pauseOrResumeTimer functions to start and stop the circular progress animation along with the timer:
function startOrStopTimer() {
  // ...
  if (countDownIntervalID === undefined && !isPaused) {
    // ...
    startCircularProgressAnimation();
  } else {
    // ...
    stopCircularProgressAnimation();
  }
}

function pauseOrResumeTimer() {
  // ...
  if (countDownIntervalID !== undefined) {
    stopTimer();
    pauseCircularProgressAnimation();
  } else {
    startTimer();
    resumeCircularProgressAnimation();
  }
}
With these modifications, our countdown timer now includes a circular progress indicator that animates along with the timer.
Return to your terminal and run the following command to start serving the JavaScript countdown application:
node server.js
Go back to the tab in your browser where you visited the http://localhost:3001 URL, refresh the page, and you should see something similar to the following: 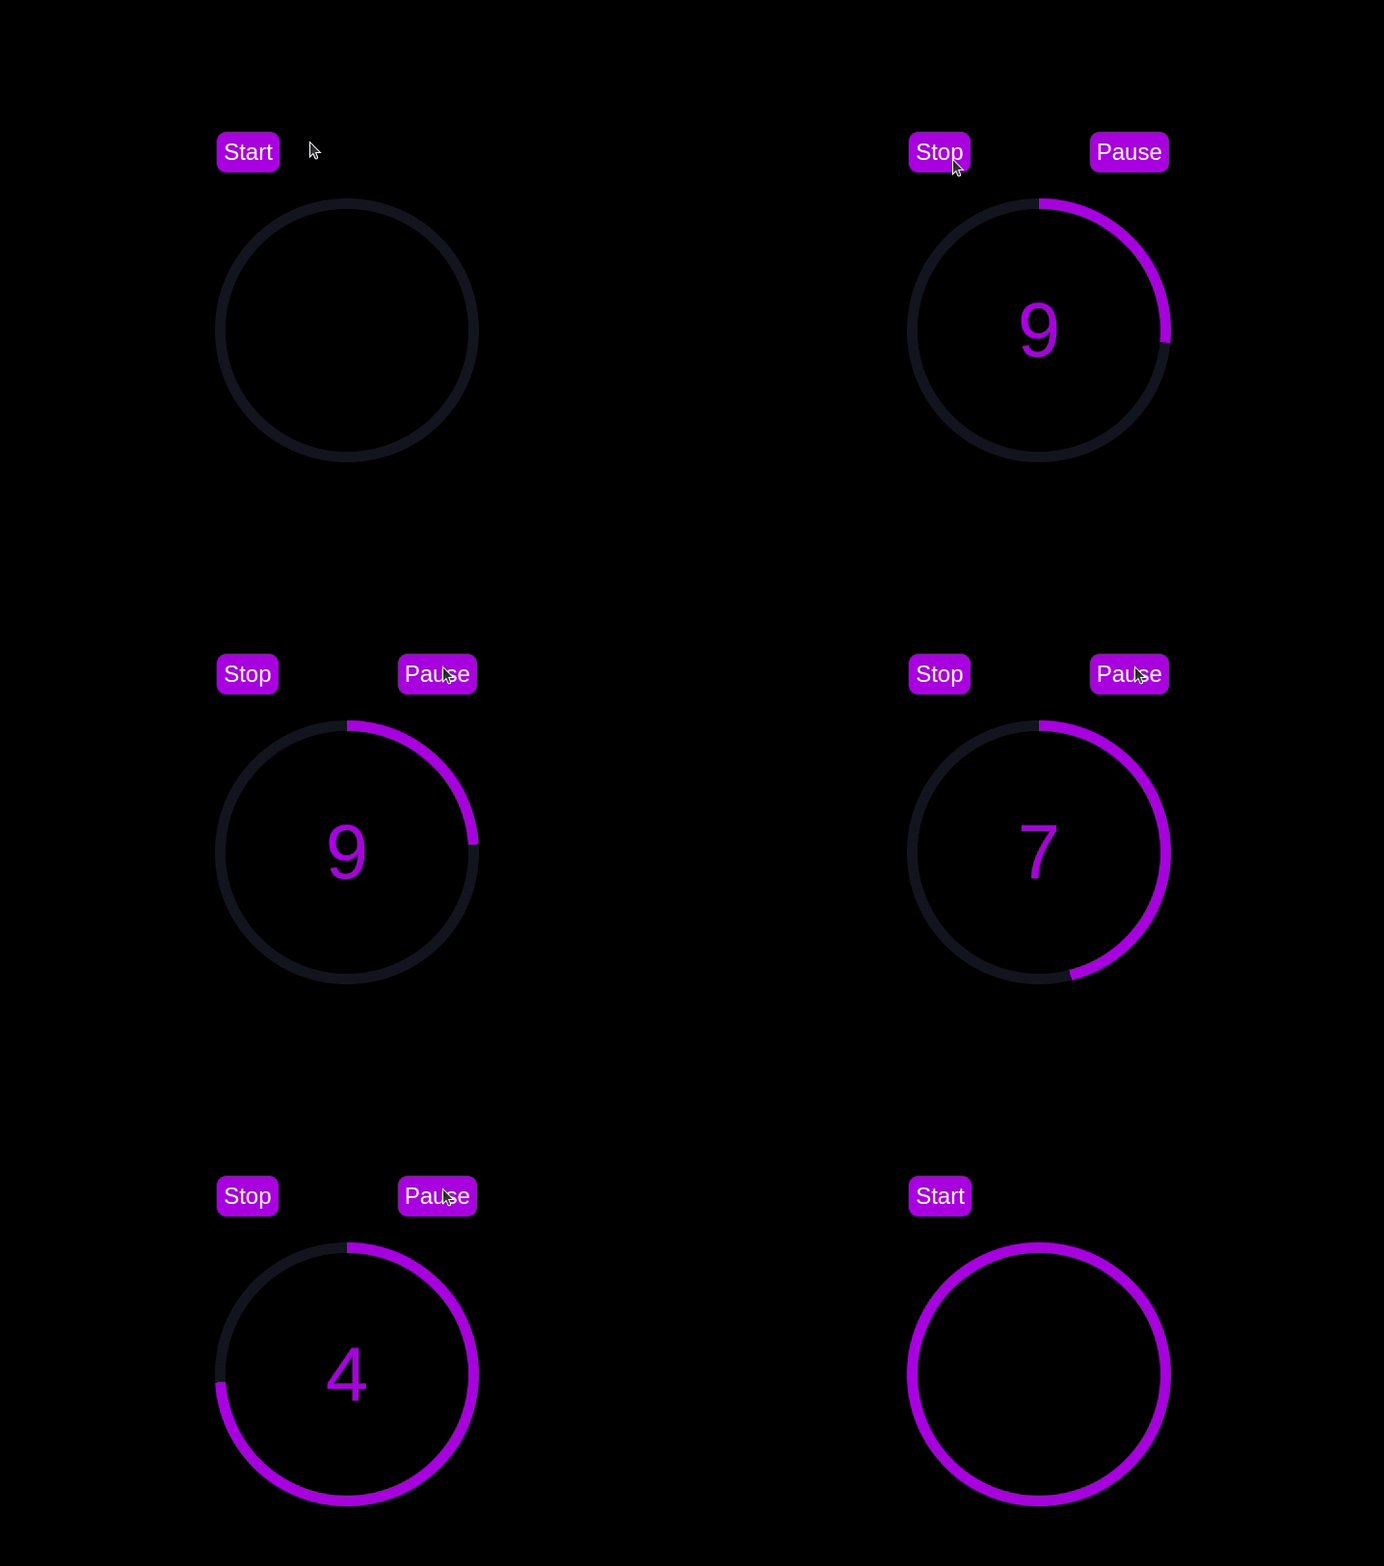
Implementing a CSS-only countdown timer
In this section, we'll dive into creating a countdown timer that updates every second and is made using only CSS. Our timer will be simple yet functional, featuring start and pause buttons to control its operation.
Creating the application server
Navigate to the css-only-countdown subdirectory, initialize a new node project, and install the express package:
cd ../css-only-countdown
npm init -y
npm install express
Then, return to your text editor, create a file named server.js, and add the following code to it:
const express = require('express');
const app = express();
const port = 3002
app.use(express.static('public'));

app.listen(port, () => {
  console.log(`Css-only countdown app server started on port ${port}`);
});
The code above creates an express server that will be used to serve the JavaScript countdown application in port 3002.
HTML structure
Still in your text editor, create the following files in the public subdirectory:
- index.html for the HTML code
- styles.css for the CSS code
Add the following code to the index.html file:
<!DOCTYPE html>
<html lang="en">
<head>
  <meta charset="UTF-8">
  <meta name="viewport" content="width=device-width, initial-scale=1.0">
  <link rel="stylesheet" href="styles.css">
  <title>CSS Countdown Timer</title>
</head>
<body>
  <div class="container">
    <div class="controls">
      <input type="checkbox" id="startBtn" class="checkbox-wrapper">
      <label for="startBtn" id="startLabel">
        <span>Stop</span>
        <span>Start</span>
      </label>
      <input type="checkbox" id="pauseBtn" class="checkbox-wrapper">
      <label for="pauseBtn" id="pauseLabel">
        <span>Resume</span>
        <span>Pause</span>
      </label>
      <div class="countdown-container">
        <ul class="countdown">
          <li>10</li>
          <li>9</li>
          <li>8</li>
          <li>7</li>
          <li>6</li>
          <li>5</li>
          <li>4</li>
          <li>3</li>
          <li>2</li>
          <li>1</li>
        </ul>
      </div>
    </div>
  </div>
</body>
</html>
This code sets up the basic structure of our countdown timer. It includes a container div that holds the controls for starting and pausing the timer, as well as the countdown display itself. The controls div contains two checkboxes with labels that will serve as our start and pause buttons. These buttons toggle their respective states using CSS, thanks to the checkbox hack.
The countdown-container div holds an unordered list (ul) of list items (li) representing the countdown numbers from 10 to one. These numbers will be displayed one by one as the timer counts down.
CSS styling
Now, let's style the countdown timer using CSS. Add the following code to styles.css:
body {
  background-color: black;
  font-family: Arial, sans-serif;
  height: 100%;
}

.container {
  display: flex;
  flex-direction: column;
  justify-content: center;
  align-items: center;
}

.controls {
  width: 20%;
  margin-top: 10%;
  display: flex;
  justify-content: space-between;
  flex-direction: row;
  flex-wrap: wrap;
}

.countdown-container {
  position: relative;
  width: 20vw;
  height: 20vw;
  margin-top: 12%;
  border : 0.4em solid #9b51e0;
}

#startLabel span {
  display: none;
}

label {
  cursor: pointer;
  font-size: 1.5em;
  padding: 0.3em;
  background-color: #9b51e0;
  border-radius: 0.4em;
  color: white;
}

#startBtn:checked~#startLabel span:nth-child(1) {
  display: inline;
}

#startBtn:not(:checked)~#startLabel span:nth-child(2) {
  display: inline;
}

#startBtn:not(:checked)~#pauseLabel,
#pauseBtn {
  display: none;
}

#pauseLabel span {
  display: none;
}

#pauseBtn:checked~#pauseLabel span:nth-child(1) {
  display: inline;
}

#pauseBtn:not(:checked)~#pauseLabel span:nth-child(2) {
  display: inline;
}

.checkbox-wrapper {
  display: none;
}
In this CSS file, we start by setting some basic styles for the body and container. The body has a black background and uses the Arial font. The container is centered using flexbox and has a margin to push it down from the top of the viewport.
The controls div is styled to be responsive and to ensure that the buttons are spaced out evenly. The countdown-container div is styled with a border, which will later be replaced by the circular progress indicator.
We use the checkbox hack to toggle the visibility of the labels for the start and pause buttons. Depending on whether the checkboxes are checked or not, different spans within the labels are displayed. This allows the labels to show different text (Start or Stop, Pause or Resume) based on the state of the checkboxes.
Now, add the following code to the bottom of the styles.css file:
.countdown {
  position: relative;
  width: 100%;
  height: 100%;
  list-style: none;
  padding: 0;
  margin: 0;
  display: flex;
  justify-content: center;
  align-items: center;
  font-size: 5em;
  color: #9b51e0;
}

.countdown li {
  position: absolute;
  opacity: 0;
  transition: opacity 1s linear;
}

#startBtn:checked~.countdown-container .countdown li:nth-child(1) {
  animation-delay: 0s;
}

#startBtn:checked~.countdown-container .countdown li:nth-child(2) {
  animation-delay: 1s;
}

#startBtn:checked~.countdown-container .countdown li:nth-child(3) {
  animation-delay: 2s;
}

#startBtn:checked~.countdown-container .countdown li:nth-child(4) {
  animation-delay: 3s;
}

#startBtn:checked~.countdown-container .countdown li:nth-child(5) {
  animation-delay: 4s;
}

#startBtn:checked~.countdown-container .countdown li:nth-child(6) {
  animation-delay: 5s;
}

#startBtn:checked~.countdown-container .countdown li:nth-child(7) {
  animation-delay: 6s;
}

#startBtn:checked~.countdown-container .countdown li:nth-child(8) {
  animation-delay: 7s;
}

#startBtn:checked~.countdown-container .countdown li:nth-child(9) {
  animation-delay: 8s;
}

#startBtn:checked~.countdown-container .countdown li:nth-child(10) {
  animation-delay: 9s;
}

@keyframes countdownAnimation {
  0%,
  10% {
    opacity: 1;
  }
  11%,
  100% {
    opacity: 0;
  }
}

#startBtn:checked~.countdown-container .countdown li {
  animation: countdownAnimation 10s steps(10) forwards;
}

#pauseBtn:checked~.countdown-container .countdown li {
  animation-play-state: paused;
}
With this code, we style the countdown list. The countdown class is positioned absolutely within the countdown-container, and its list items are initially hidden with opacity: 0.
We then use keyframes and the animation property to create the countdown effect. The list items are displayed one by one with a delay using the animation-delay property. The countdownAnimation keyframes control the visibility of each list item, making them visible for a short period before hiding them again.
We also pause the animation when the pause button is checked, using the animation-play-state property.
Go back to your terminal and run the following command to start serving the CSS-only countdown application:
node server.js
Open a new tab in your browser, navigate to http://localhost:3002 URL, and you should see something similar to the following: 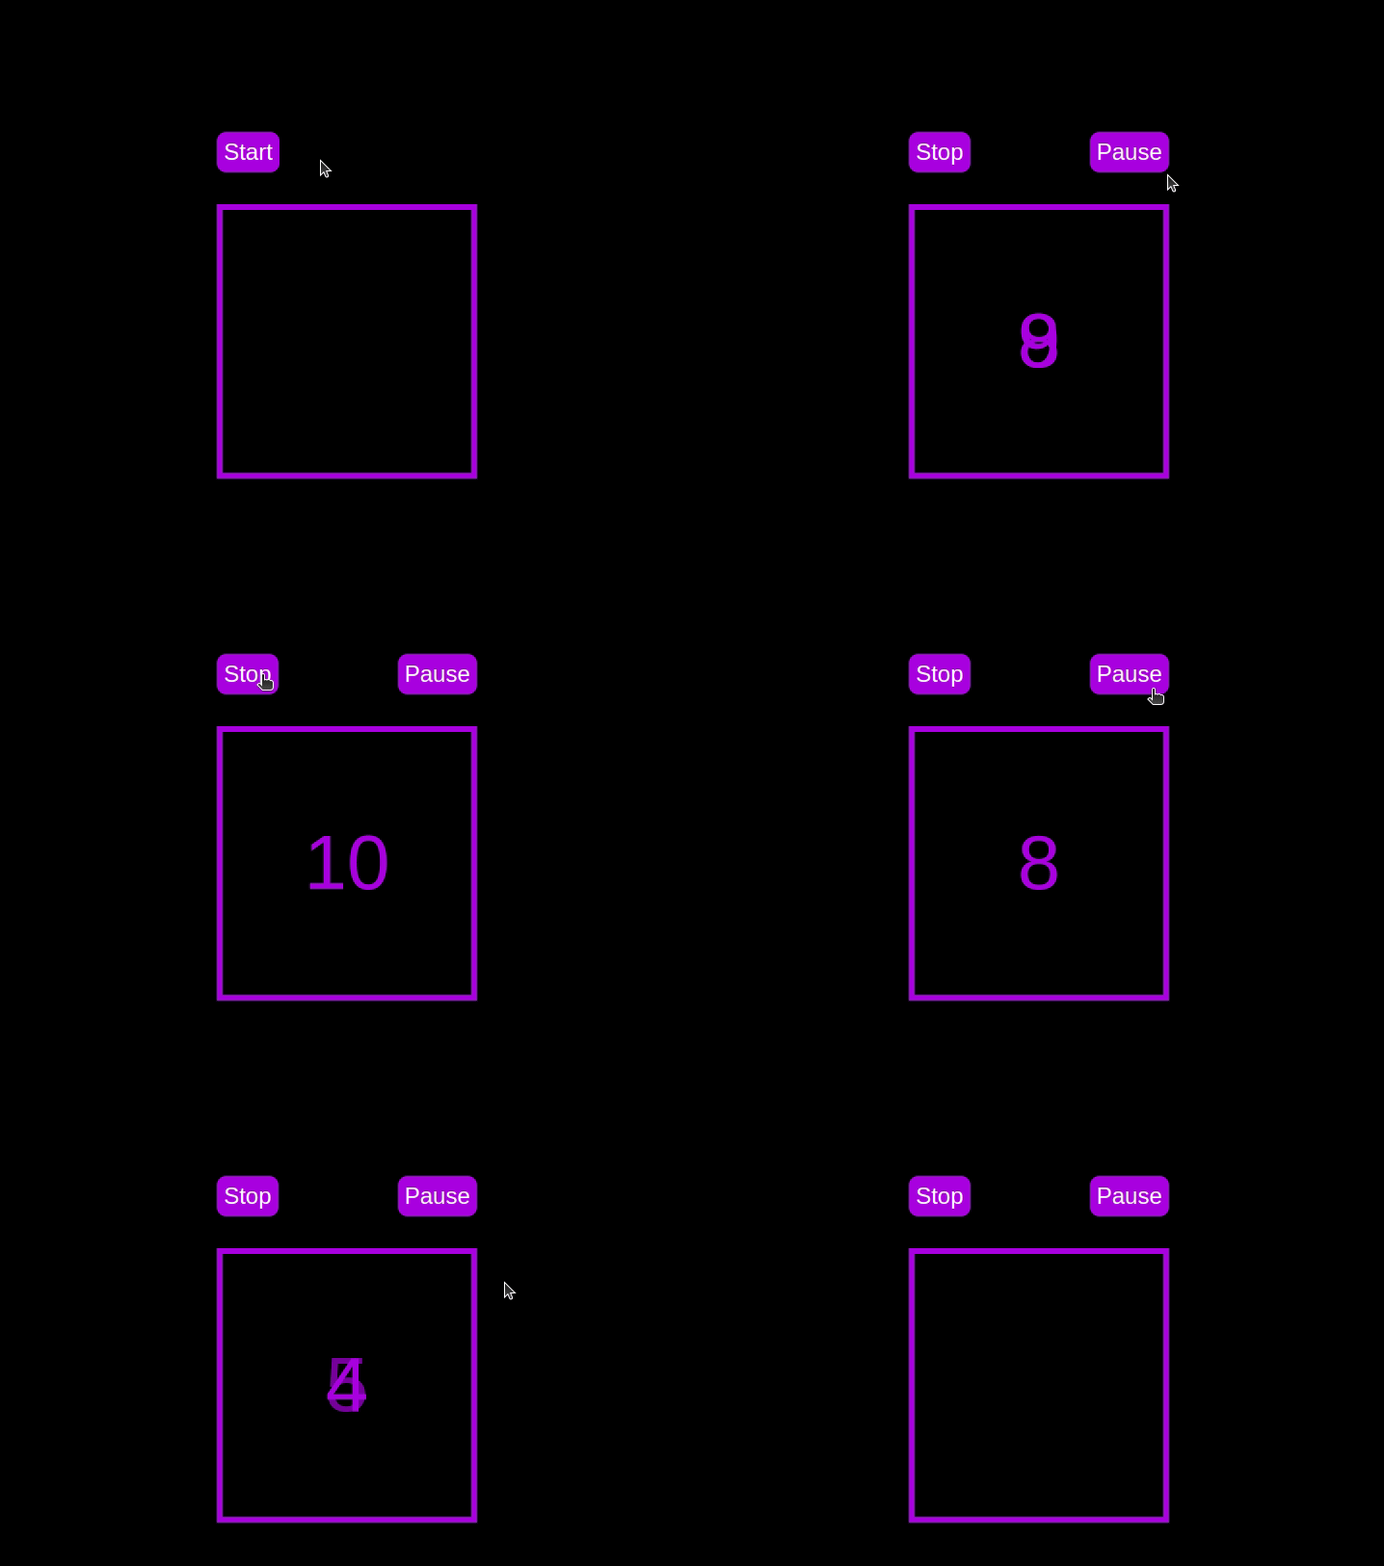 Test out the countdown timer and once you are done, terminate the server application and move to the next step.
Adding a circular progress indicator
To make the countdown timer more visually appealing, we can add a circular progress indicator that shows the remaining time. To do this, we will modify the HTML and CSS code as follows:
First, replace the countdown-container div in the index.html file with the following code:
<div class="countdown-container">
  <span class="circular-progress">
  </span>
  <ul class="countdown">
    <li>10</li>
    <li>9</li>
    <li>8</li>
    <li>7</li>
    <li>6</li>
    <li>5</li>
    <li>4</li>
    <li>3</li>
    <li>2</li>
    <li>1</li>
  </ul>
</div>
In this code, we add a span element with a class of circular-progress inside the countdown-container div.
Next, add the following code to the styles.css file:
.countdown-container {
  ...
  /* border : 0.4em solid #9b51e0; */
}

.circular-progress {
  width: 20vw;
  height: 20vw;
  border-radius: 50%;
  display: flex;
  justify-content: center;
  align-items: center;
  position: absolute;
  transition: 0.5s;
  background: conic-gradient(#9b51e0 var(--angle), #13171f 0deg);
}

.circular-progress::before {
  width: 18.5vw;
  height: 18.5vw;
  content: "";
  position: absolute;
  border-radius: 50%;
  background-color: black;
}

@keyframes circularProgressAnimation {
  to {
    --angle: 360deg;
  }
}

@property --angle {
  syntax: "<angle>";
  initial-value: 0deg;
  inherits: false;
}

#startBtn:checked~.countdown-container .circular-progress {
  opacity: 1;
  animation: circularProgressAnimation 10s linear;
}

#pauseBtn:checked~.countdown-container .circular-progress {
  animation-play-state: paused;
}
In this code, we first remove the border from the countdown-container div, and then add styles for the circular-progress class. The circular progress indicator is a span element that is absolutely positioned within the countdown-container. It uses a conic gradient to create the circular progress effect.
We also define a keyframe animation, circularProgressAnimation, that animates the progress indicator from 0 to 360 degrees over the duration of the countdown. The --angle CSS property is used to control the angle of the gradient.
Finally, we use the checkbox hack to start and pause the circular progress animation along with the countdown numbers. The animation is applied to the circular-progress span when the start button is checked and paused when the pause button is checked.
With these modifications, our countdown timer now includes a circular progress indicator that animates along with the timer.
Go back to your terminal and run the following command to start serving the CSS-only countdown application:
node server.js
Return to the tab in your browser where you visited the http://localhost:3002 URL, refresh the page, and you should see something similar to the following: 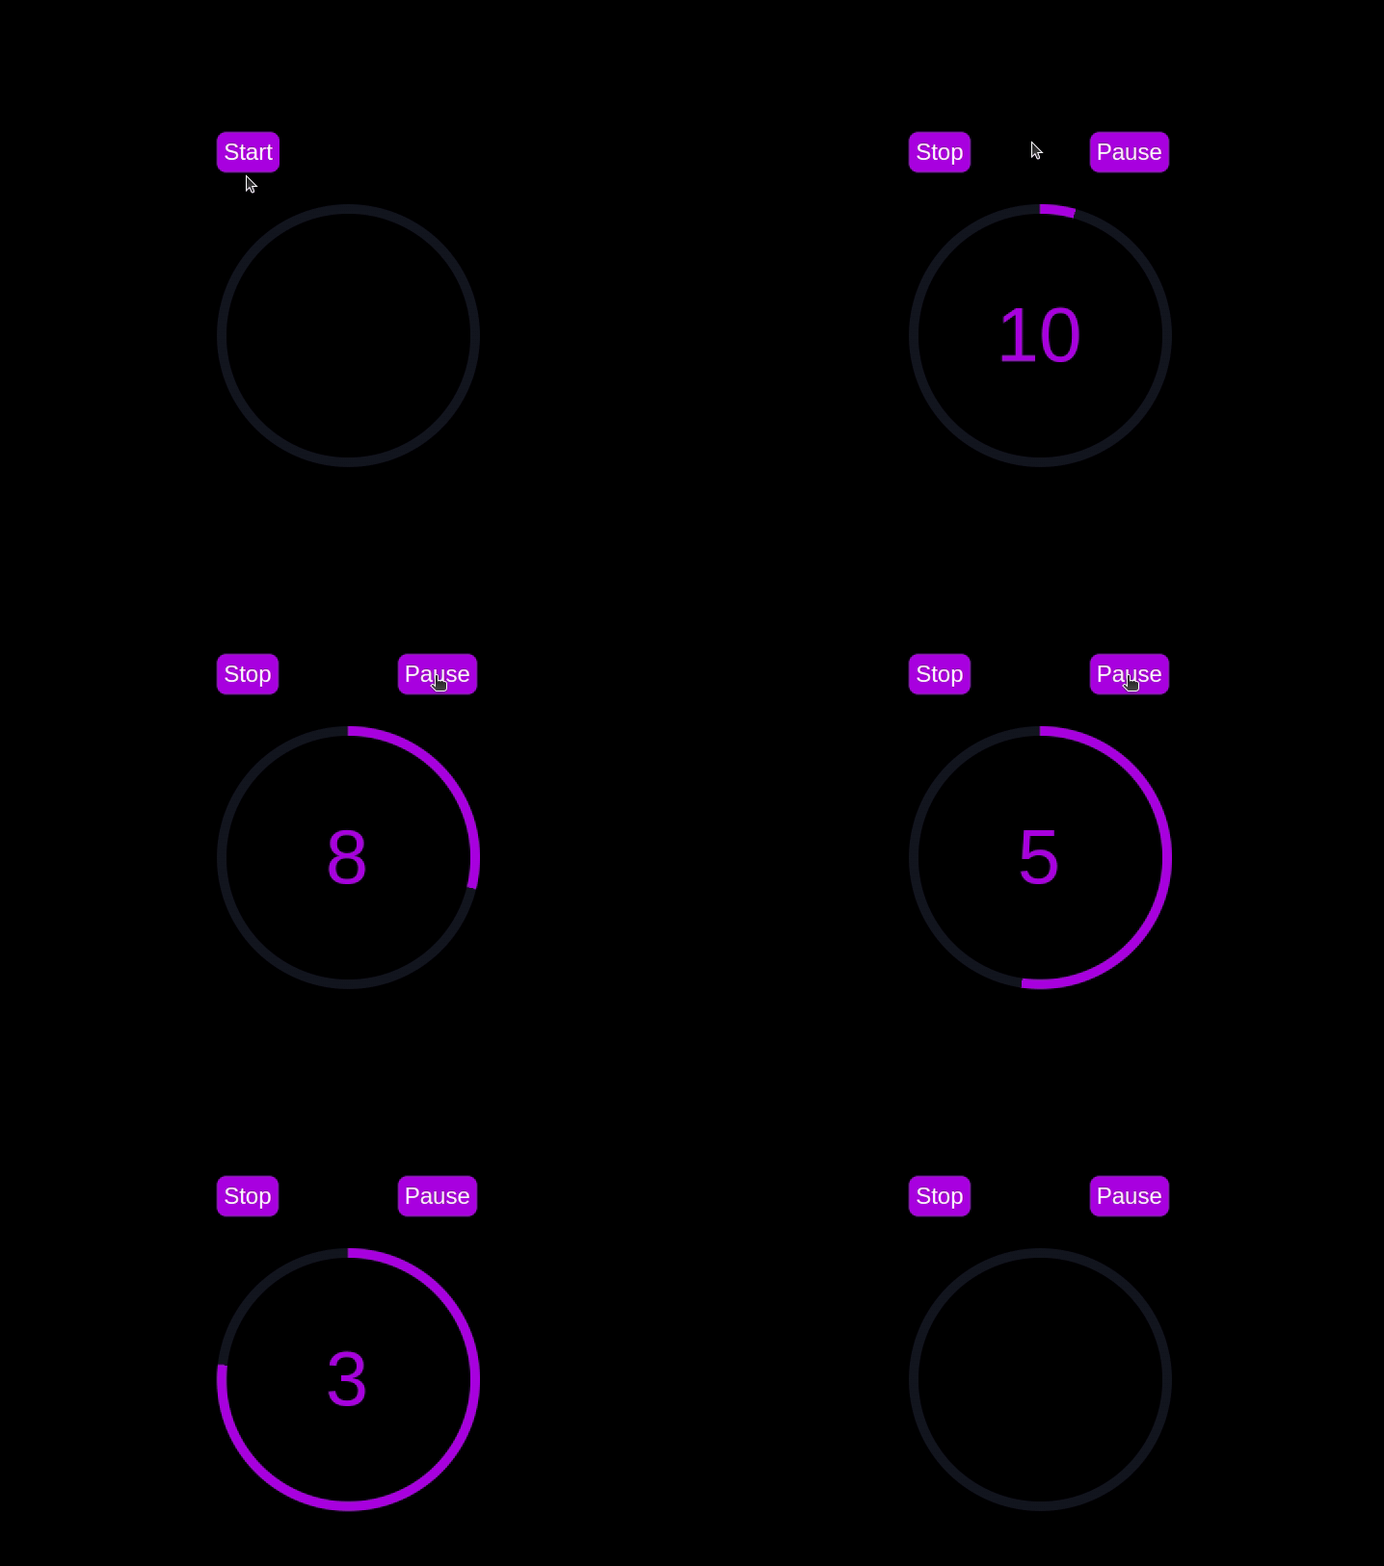
Using Chrome DevTools to compare timer performance
Now that we have implemented both the CSS-only and JavaScript countdown timers, let's compare their performance using Chrome DevTools.
To get started, open the Chrome browser and navigate to the webpage containing the countdown timers. Right-click anywhere on the page and select Inspect to open Chrome DevTools.
In the DevTools window, click on the Network tab and then refresh both the JavaScript and CSS-only countdown pages. This tab allows you to monitor all network requests made by the page, including HTML, CSS, JavaScript, and other resources: 
By analyzing the requests, you can determine how many resources are being loaded, their sizes, and the overall impact on page load time:
| CSS-only countdown timer | JavaScript countdown timer | |
|---|---|---|
| Number of requests | 2 | 3 |
| Total size | 4.5 KB | 4.7 KB |
| Page load | 24 ms | 27 ms |
从这些结果中,我们可以看到,与 JavaScript 倒计时器相比,纯 CSS 倒计时器需要更少的请求,并且总大小略小。这会导致纯 CSS 版本的页面加载时间稍微加快,从而使其在初始加载方面更加高效。
现在,在 DevTools 窗口中,导航到 Performance 选项卡,然后单击 Record 按钮启动录制会话。要评估 JavaScript 倒计时器,请单击相应页面上的 开始 按钮,并允许计时器运行。计时器停止后,在性能选项卡中停止录制。
对仅 JS 和 CSS 倒计时页面执行此过程,以收集每个实现的性能数据。 性能 选项卡提供页面运行时性能的全面分析,包括脚本编写、渲染和绘制时间。通过分析这些指标,您可以查明可能需要优化的区域,以增强 Web 应用程序的性能:
| CSS-only countdown timer | JavaScript countdown timer | |
|---|---|---|
| Scripting | 2 ms | 49 ms |
| Rendering | 510 ms | 103 ms |
| Painting | 275 ms | 55 ms |
解释这些结果时,我们发现纯 CSS 倒计时器的脚本编写时间明显低于 JavaScript 倒计时器,这表明执行开销最小。然而,纯 CSS 倒计时器的渲染和绘制时间更长。这是因为 CSS 动画有时需要浏览器付出更多努力来渲染,尤其是对于复杂的样式或过渡。
相比之下,JavaScript 倒计时计时器由于更新倒计时涉及的逻辑而显示出更高的脚本编写时间,但它受益于较低的渲染和绘制时间。这表明虽然 JavaScript 在脚本执行方面增加了一些开销,但它在更新 DOM 和渲染更改方面可以更有效。
总体而言,对于最小化脚本执行时间至关重要的场景,纯 CSS 倒数计时器更加高效,而 JavaScript 计时器在渲染和绘制时间是主要关注点的情况下可能表现更好。
每种方法的优缺点
探索了纯 CSS 和 JavaScript 倒计时器后,让我们权衡它们的优缺点,以确定哪种方法最适合您的需求。
仅 CSS 倒计时器
纯 CSS 倒计时器利用纯 CSS 实现倒计时效果,提供轻量级且简单的解决方案。
它的优点包括以下几点:
- 最小的脚本开销:正如我们的性能分析所示,仅 CSS 计时器需要很少的脚本,从而导致脚本执行的 CPU 使用率较低。这有利于增强整体页面性能,特别是在处理能力有限的设备上
- 简化的代码库:通过利用 CSS 进行动画,代码保持更干净且更易于维护。这种方式降低了实现的复杂度,可以让开发者更容易理解和管理代码
这种方法的缺点包括:
- 更高的渲染和绘画时间:仅 CSS 计时器往往具有更高的渲染和绘画时间。这是由于 CSS 动画的性质决定的,它对浏览器的渲染引擎的要求更高。这可能会影响具有多个动画或复杂布局的页面的性能
- 交互性有限:CSS 动画本质上不如 JavaScript 灵活。实现更多的交互功能,例如动态更新或条件逻辑,可能具有挑战性,并且可能需要额外的 JavaScript,部分否定了简单性优势
JavaScript 倒计时器
JavaScript 倒计时器则使用 JavaScript 来管理倒计时逻辑和 DOM 更新。这种方法提供了更好的控制和灵活性。
这种方法的优点包括:
- 增强的控制和灵活性:JavaScript 提供对倒计时逻辑和 DOM 操作的细粒度控制。这允许更复杂的交互、条件行为和动态更新,使其适合更复杂的应用程序
- 高效渲染和绘画:正如我们的性能分析所示,JavaScript 计时器受益于较低的渲染和绘画时间。 JavaScript 可以优化 DOM 的更新,从而在频繁更新的场景中实现更流畅的动画和更好的性能
缺点包括:
- 更高的脚本开销:JavaScript 倒计时器的主要缺点是增加了脚本编写时间。 JavaScript 逻辑引入了额外的 CPU 开销,这可能会影响性能,特别是在处理能力较低的设备或脚本使用量较大的页面上
- 复杂性增加:实现 JavaScript 倒计时器需要编写和管理更多代码,这会增加项目的复杂性。这种增加的复杂性会使代码库更难维护和调试
纯 CSS 计时器轻量级且易于理解,使其成为使用最少脚本进行简单倒计时的不错选择。然而,它可能难以处理更复杂的动画和交互功能。另一方面,JavaScript 计时器提供了更好的控制和灵活性,允许更动态的交互。这是以更高的脚本开销和增加的复杂性为代价的。
最终,两种方法之间的选择取决于您项目的具体需求以及您愿意接受的权衡。
结论
在本教程中,我们探索了两种创建倒计时器的方法:使用 JavaScript 和仅使用 CSS。我们从基本的 JavaScript 倒计时器开始,添加了功能和样式,使其用户友好且具有视觉吸引力。然后,我们实现了一个纯 CSS 倒计时器,展示了 CSS 创建简单而有效的动画的强大功能。
无论您选择纯 CSS 方法(因其简单性)还是 JavaScript 方法(因其灵活性),您现在都拥有实现适合您项目需求的倒计时器的工具和知识。
您的前端是否占用了用户的 CPU?
随着 Web 前端变得越来越复杂,资源贪婪的功能对浏览器的要求越来越高。如果您有兴趣监控和跟踪生产中所有用户的客户端 CPU 使用情况、内存使用情况等,请尝试 LogRocket。
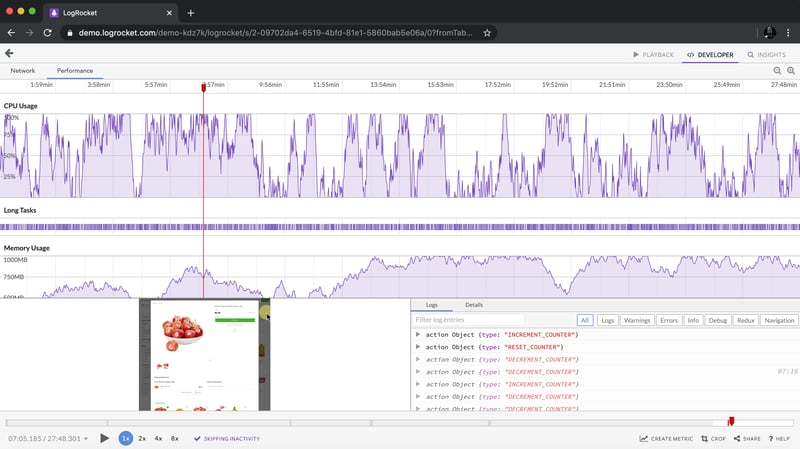
LogRocket 就像网络和移动应用程序的 DVR,记录网络应用程序、移动应用程序或网站中发生的所有情况。您无需猜测问题发生的原因,而是可以汇总并报告关键的前端性能指标、重放用户会话以及应用程序状态、记录网络请求并自动显示所有错误。
现代化调试 Web 和移动应用程序的方式 - 开始免费监控。
以上是如何使用 CSS 构建倒计时器的详细内容。更多信息请关注PHP中文网其他相关文章!

热AI工具

Undresser.AI Undress
人工智能驱动的应用程序,用于创建逼真的裸体照片

AI Clothes Remover
用于从照片中去除衣服的在线人工智能工具。

Undress AI Tool
免费脱衣服图片

Clothoff.io
AI脱衣机

Video Face Swap
使用我们完全免费的人工智能换脸工具轻松在任何视频中换脸!

热门文章

热工具

记事本++7.3.1
好用且免费的代码编辑器

SublimeText3汉化版
中文版,非常好用

禅工作室 13.0.1
功能强大的PHP集成开发环境

Dreamweaver CS6
视觉化网页开发工具

SublimeText3 Mac版
神级代码编辑软件(SublimeText3)
 每周平台新闻:HTML加载属性,主要的ARIA规格以及从iframe转移到Shadow dom
Apr 17, 2025 am 10:55 AM
在本周的平台新闻综述中,Chrome引入了一个用于加载的新属性,Web开发人员的可访问性规范以及BBC Move


