HTML 画布
本文将在 HTML Canvas 上看到大纲;如您所知,HTML 是一种标记语言。为了向访问者呈现信息,您可以编写 HTML,其中包含要显示的文本以及显示方式,即字体大小、颜色、方向等。在向页面添加视觉效果时,您需要链接并将图像嵌入到页面中,这些图像与主机上的 HTML 文件分开存储。
但是如果你需要在页面上画一些东西怎么办?
什么是 HTML Canvas?
HTML canvas(通过
语法:
<canvas id="example" width="200" height="200">
<em>Content here</em>
</canvas>
您可以通过 width 和 height 属性定义画布大小;还可以在标签中定义元素 ID,这样就可以在画布元素上使用 CSS 样式。以下是如何使用 Canvas 元素绘制矩形的示例:
代码:
<html>
<head>
<style>
#examplecanvas{border:2px solid green;}
</style>
</head>
<body>
<canvas id = "examplecanvas" width = "500" height = "300"></canvas>
</body>
</html>输出:

HTML Canvas 绘图示例
现在您已经了解了如何使用 canvas 元素绘制矩形,让我们看一下可以使用浏览器输出屏幕上的元素绘制的其他一些对象。
1.在页面上画一条线
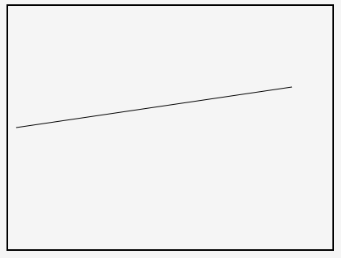
moveTo()、strike() 和 lineTo() 是可用于在网页上绘制直线的方法。正如您所猜测的,moveTo() 告诉光标在元素空间中的位置,而 lineTo() 是告诉线的端点的方法。 stroke() 使线条可见。以下是代码供您参考:
代码:
<!DOCTYPE html>
<html lang="en">
<head>
<title>Canvas Line Example</title>
<style>
canvas {
border: 2px solid black;
}
</style>
<script>
window.onload = function() {
var canvas = document.getElementById("examplecanvas");
var context = canvas.getContext("2d");
context.moveTo(10, 150);
context.lineTo(350, 100);
context.stroke();
};
</script>
</head>
<body>
<canvas id="examplecanvas" width="400" height="300"></canvas>
</body>
</html>输出:

2.在 HTML Canvas 上绘制圆形
与矩形不同,JavaScript 中没有特定的方法来绘制圆形。相反,我们可以使用 arc() 方法,该方法用于绘制圆弧,从而在画布中绘制圆形。要获得带有圆圈的画布,您可以使用以下命令:
语法:
context.arc(centerX, centerY, radius, 0, 2 * Math.PI, false);
这是带有圆圈的页面示例:
代码:
<html lang="en">
<head>
<meta charset="utf-8">
<title>Canvas with a circle</title>
<style>
canvas {
border: 3px solid red;
}
</style>
<script>
window.onload = function() {
var canvas = document.getElementById("examplecanvas");
var context = canvas.getContext("2d");
context.arc(250, 150, 90, 0, 2 * Math.PI, false);
context.stroke();
};
</script>
</head>
<body>
<canvas id="examplecanvas" width="500" height="300"></canvas>
</body>
</html>输出:

3.在 HTML Canvas 中绘制文本
文本也可以在 HTML Canvas 中绘制。要将文本显示到画布上,可以使用 filltext() 方法。以下是在 canvas 元素内包含文本的 HTML 页面示例:
代码:
<html lang="en">
<head>
<meta charset="utf-8">
<title>canvas with text inside the element</title>
<style>
canvas {
border: 3px solid red;
}
</style>
<script>
window.onload = function() {
var canvas = document.getElementById("examplecanvas");
var context = canvas.getContext("2d");
context.font = "bold 28px Arial";
context.fillText("This is text inside a canvas", 60, 100);
};
</script>
</head>
<body>
<canvas id="examplecanvas" width="500" height="200"></canvas>
</body>
</html>输出:

4.在 HTML Canvas 内绘制圆弧
正如我们讨论的圆,有一个名为 arc() 的方法,用于在 HTML Canvas 中绘制圆弧。这是该方法的语法,您所要做的就是添加变量:
context.arc(centerX, centerY, radiusOfArc, startAngle, endAngle, counterclockwise);
以下是一个 HTML 页面,画布元素内有一个圆弧:
代码:
<html lang="en">
<head>
<meta charset="utf-8">
<title>Arc inside an HTML Canvas</title>
<style>
canvas {
border: 3px solid red;
}
</style>
<script>
window.onload = function() {
var canvas = document.getElementById("examplecanvas");
var context = canvas.getContext("2d");
context.arc(300, 300, 200, 1.2 * Math.PI, 1.8 * Math.PI, false);
context.stroke();
};
</script>
</head>
<body>
<canvas id="examplecanvas" width="600" height="400"></canvas>
</body>
</html>输出:

5.绘制线性或圆形颜色渐变
您可以使用此方法 createLienearGradient() 在画布元素内绘制您选择的渐变。使用此方法,您必须使用 addColorStop() 来表示渐变颜色。
语法:
var gradient = context.createLinearGradient(startX, startY, endX, endY);
这是一个具有线性渐变的页面:
代码:
<html>
<body>
<canvas id="examplecanvas" width="400" height="200" style="border:2px solid red;">
If you are seeing this. the browser does not support the HTML5 canvas.</canvas>
<script>
var c = document.getElementById("examplecanvas");
var ctx = c.getContext("2d");
var gradient = ctx.createLinearGradient(0,0,200,0);
gradient.addColorStop(0,"green");
gradient.addColorStop(1,"red");
ctx.fillStyle = gradient;
ctx.fillRect(10,10,300,150);
</script>
</body>
</html>输出:

同样,绘制圆形渐变的方法是createRadialGradient()。
语法:
var gradient = context.createRadialGradient(startX, startY, startingRadius, endX, endY, endingRadius);
代码:
<html>
<body>
<canvas id="examplecanvas" width="200" height="100" style="border:2px solid red;">
If you are seeing this. the browser does not support the HTML5 canvas. </canvas>
<script>
var c = document.getElementById("examplecanvas");
var ctx = c.getContext("2d");
var gradient = ctx.createRadialGradient(80,50,10,100,50,90);
gradient.addColorStop(0,"blue");
gradient.addColorStop(1,"yellow");
ctx.fillStyle = gradient;
ctx.fillRect(10,10,150,80);
</script>
</body>
</html>输出:

结论
现在您已经熟悉了它是什么以及如何在网页中使用它,您应该对自己的网页设计技能更有信心。虽然在某些情况下可以使用图像,但 HTML 画布的好处是它具有可扩展性,并且在大小和处理能力方面更轻。
以上是HTML 画布的详细内容。更多信息请关注PHP中文网其他相关文章!

热AI工具

Undresser.AI Undress
人工智能驱动的应用程序,用于创建逼真的裸体照片

AI Clothes Remover
用于从照片中去除衣服的在线人工智能工具。

Undress AI Tool
免费脱衣服图片

Clothoff.io
AI脱衣机

Video Face Swap
使用我们完全免费的人工智能换脸工具轻松在任何视频中换脸!

热门文章

热工具

记事本++7.3.1
好用且免费的代码编辑器

SublimeText3汉化版
中文版,非常好用

禅工作室 13.0.1
功能强大的PHP集成开发环境

Dreamweaver CS6
视觉化网页开发工具

SublimeText3 Mac版
神级代码编辑软件(SublimeText3)


