

如何:使用 Docker 将 Django 和 Postgres 应用程序容器化

本文最初发表于船厂博客。
当您构建 Django 和 PostgreSQL 应用程序时,您可能正在考虑希望它检查的几个框:
- 便携式:我可以在机器或团队成员之间分发它吗?
- 可扩展:此应用程序能够处理用户数量、请求或一般工作负载的增加吗?
- 云原生:我可以在开发、临时、暂存和/或生产云环境中托管此应用程序吗?
使用 Docker 和 Docker Compose 可以帮助您的应用程序为开发生命周期的每个阶段(从本地到生产)做好准备。在这篇文章中,我们将介绍使用 Postgres 数据库为 Django 应用程序自定义 Dockerfile 和 Compose 文件的一些基础知识。
TLDR: Shipyard 维护着一个 Django / Postgres 入门应用程序,设置为使用 Docker 和 Docker Compose 构建和运行。在这里分叉。您可以将其用作项目模板或作为现有应用程序的参考。
姜戈是什么?
Django 是一个基于 Python 的开源 Web 框架。它主要用作网络应用程序的后端。 Django 遵循“自带电池”的理念——它配备了路由支持、登录框架、Web 服务器、数据库工具等等。 Django 经常被拿来与 Flask 进行比较,并且几乎在所有方面都得分更高。
您每天都在使用 Django 应用程序。 Spotify、Doordash、Instagram、Eventbrite 和 Pinterest 都拥有 Django - 这充分说明了它的可扩展性和可伸缩性。
Docker 化 Django 应用程序的好处
使用 Docker 容器运行 Django 应用程序可以解锁多个新用例。它立即改进了您的本地开发工作流程 - 使设置更清晰、更简单。
如果您想云托管您的项目,通常需要将其容器化。 Docker 容器的伟大之处在于它们可以在从本地到生产的每个开发阶段使用。您还可以分发您的 Docker 映像,以便其他人可以立即运行它,而无需任何安装或构建。
至少,如果您在项目中包含 Dockerfile,则可以确保它每次在每个系统上都以相同的方式构建和运行。
选择 Python 包管理器
我们的 Python 应用程序需要一个包管理器来跟踪、版本控制和安装其依赖项。这有助于我们管理依赖项初始化/更新,而不是单独执行它们,并跨机器保留包版本。
Pip 和 Poetry 都是 Python 流行的依赖管理器,尽管还有很多其他的依赖管理器(例如 uv、Conda、Rye)。
Pip 非常简单。用户可以在requirements.txt文件中列出他们的软件包及其各自的版本,然后运行pip install来设置它们。用户可以通过运行 pip freeze > 来捕获现有的依赖项及其版本。项目根目录中的requirements.txt。
Poetry 是适用于任何规模的应用程序的高性能包管理器,但它的配置比 Pip 稍微简单一些(它使用带有表、元数据和脚本的 TOML 文件)。 Poetry 还使用锁文件 (poetry.lock) 来“锁定”当前版本的依赖项(以及按版本其依赖项)。这样,如果您的项目在特定时间点在特定机器上运行,则该状态将被保留。运行诗歌 init 会提示用户一系列选项来生成 pyproject.toml 文件。
为 Django 应用程序编写 Dockerfile
要 Dockerize 您的 Django 应用程序,您将遵循经典的 Dockerfile 结构(设置基本映像、设置工作目录等),然后使用特定于项目的安装说明(可能在自述文件中找到)对其进行修改。
选择基础图像
我们可以选择一个轻量级的 Python 镜像作为这个 Dockerfile 的基础。要按标签浏览版本,请查看 Docker Hub 上的 Python 页面。我在这里选择 Alpine,因为它会使我们的图像保持较小:
FROM python:3.8.8-alpine3.13
设置工作目录
在这里,我们将定义 Docker 容器内的工作目录。后面提到的所有路径都与此相关。
WORKDIR /srv
安装系统依赖项
在配置 Poetry 之前,我们需要添加一些库:
RUN apk add --update --no-cache \
  gcc \
  libc-dev \
  libffi-dev \
  openssl-dev \
  bash \
  git \
  libtool \
  m4 \
  g++ \
  autoconf \
  automake \
  build-base \
  postgresql-dev
安装诗歌
接下来,我们将确保使用最新版本的 Pip,然后使用它在我们的容器内安装 Poetry:
RUN pip install --upgrade pip
RUN pip install poetry
Installing our project’s dependencies
This app’s dependencies are defined in our pyproject.toml and poetry.lock files. Let’s bring them over to the container’s working directory, and then install from their declarations:
ADD pyproject.toml poetry.lock ./
RUN poetry install
Adding and installing the project itself
Now, we’ll copy over the rest of the project, and install the Django project itself within the container:
ADD src ./src
RUN poetry install
Executing the start command
Finally, we’ll run our project’s start command. In this particular app, it’ll be the command that uses Poetry to start the Django development server:
CMD ["poetry", "run", "python", "src/manage.py", "runserver", "0:8080"]
The complete Dockerfile
When we combine the snippets from above, we’ll get this Dockerfile:
FROM python:3.8.8-alpine3.13

WORKDIR /srv

RUN apk add --update --no-cache \
  gcc \
  libc-dev \
  libffi-dev \
  openssl-dev \
  bash \
  git \
  libtool \
  m4 \
  g++ \
  autoconf \
  automake \
  build-base \
  postgresql-dev

RUN pip install --upgrade pip
RUN pip install poetry

ADD pyproject.toml poetry.lock ./
RUN poetry install

ADD src ./src
RUN poetry install

CMD ["poetry", "run", "python", "src/manage.py", "runserver", "0:8080"]
Writing a Docker Compose service definition for Django
We’re going to split this app into two services: django and postgres. Our django service will be built from our Dockerfile, containing all of our app’s local files.
Setting the build context
For this app, we want to build the django service from our single Dockerfile and use the entire root directory as our build context path. We can set our build label accordingly:
django:
  build: .
Setting host and container ports
We can map port 8080 on our host machine to 8080 within the container. This will also be the port we use to access our Django app — which will soon be live at http://localhost:8080.
ports:
  - '8080:8080'
Adding a service dependency
Since our Django app is connecting to a database, we want to instruct Compose to spin up our database container (postgres) first. We’ll use the depends_on label to make sure that service is ready and running before our django service starts:
depends_on:
  - postgres
Creating a bind mount
Since we’ll be sharing files between our host and this container, we can define a bind mount by using the volumes label. To set the volume, we’ll provide a local path, followed by a colon, followed by a path within the container. The ro flag gives the container read-only permissions for these files:
volumes:
  - './src:/srv/src:ro'
The end result
Combining all the options/configurations from above, our django service should look like this:
django:
  build: .
  ports:
    - '8080:8080'
  depends_on:
    - postgres
  volumes:
    - './src:/srv/src:ro'
Adding a PostgreSQL database
Our Django app is configured to connect to a PostgreSQL database. This is defined in our settings.py:
DATABASES = {
    'default': {
        'ENGINE': 'django.db.backends.postgresql',
        'NAME': 'app',
        'USER': 'obscure-user',
        'PASSWORD': 'obscure-password',
        'HOST': 'postgres',
        'PORT': 5432,
    }
}
Pulling the Postgres image
We can migrate our existing database to its own Docker container to isolate it from the base Django app. First, let’s define a postgres service in our Compose file and pull the latest lightweight Postgres image from Docker Hub:
postgres:
  image: 'postgres:14.13-alpine3.20'
Passing in env vars
To configure our PostgreSQL database, we can pass in a few environment variables to set credentials and paths. You may want to consider using a Secrets Manager for this.
environment:
  - POSTGRES_DB=app
  - POSTGRES_USER=obscure-user
  - POSTGRES_PASSWORD=obscure-password
  - PGDATA=/var/lib/postgresql/data/pgdata
Setting host and container ports
We can expose our container port by setting it to the default Postgres port: 5432. For this service, we’re only specifying a single port, which means that the host port will be randomized. This avoids collisions if you’re running multiple Postgres instances.
ports:
  - '5432'
Adding a named data volume
In our postgres definition, we can add a named volume. This is different from the bind mount that we created for the django service. This will persist our data after the Postgres container spins down.
volumes:
  - 'postgres:/var/lib/postgresql/data'
Outside of the service definitions and at the bottom of the Compose file, we’ll declare the named postgres volume again. By doing so, we can reference it from our other services if needed.
volumes:
  postgres:
Putting it all together
And here’s the resulting PostgreSQL definition in our Compose file:
  postgres:
    image: 'postgres:14.13-alpine3.20'
    environment:
      - POSTGRES_DB=app
      - POSTGRES_USER=obscure-user
      - POSTGRES_PASSWORD=obscure-password
      - PGDATA=/var/lib/postgresql/data/pgdata
    ports:
      - '5432'
    volumes:
      - 'postgres:/var/lib/postgresql/data'

volumes:
  postgres:
Deploying our app in a Shipyard ephemeral environment
We can get our app production-ready by deploying it in a Shipyard application — this means we’ll get an ephemeral environment for our base branch, as well as environments for every PR we open.

Adding Docker Compose labels
Shipyard transpiles Compose files to Kubernetes manifests, so we’ll add some labels to make it Kubernetes-compatible.
Under our django service, we can add two custom Shipyard labels:
labels:
  shipyard.init: 'poetry run python src/manage.py migrate'
  shipyard.route: '/'
- The shipyard.init label will run a database migration before our django service starts
- The shipyard.route label will send HTTP requests to this service’s port
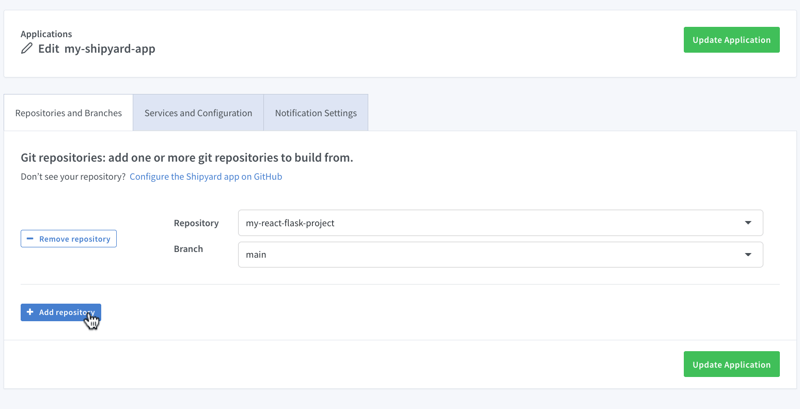
Creating a Shipyard app
Next, you can go to your Shipyard dashboard. If you haven’t already, sign up for a 30-day free trial.
Click the + Application button, then select your repo, services, and import your env vars.
Visiting the app
Once it finishes building, you can click the green Visit button to access your short-lived ephemeral environment. What comes next?
- View your app’s build, deploy, and run logs
- Use our GitHub Action or CircleCI orb to integrate with your CI/CD
- Add SSO visitors to your app
- Create a PR to see your code changes in a new environment
And that’s all!
Now you have a fully containerized Django app with a database! You can run it locally with Docker Compose, preview and test it in an ephemeral environment, and iterate until it’s production-ready.
Want to Dockerize a Yarn app next? Check out our guide!
以上是如何:使用 Docker 将 Django 和 Postgres 应用程序容器化的详细内容。更多信息请关注PHP中文网其他相关文章!

热AI工具

Undresser.AI Undress
人工智能驱动的应用程序,用于创建逼真的裸体照片

AI Clothes Remover
用于从照片中去除衣服的在线人工智能工具。

Undress AI Tool
免费脱衣服图片

Clothoff.io
AI脱衣机

Video Face Swap
使用我们完全免费的人工智能换脸工具轻松在任何视频中换脸!

热门文章
热工具

记事本++7.3.1
好用且免费的代码编辑器

SublimeText3汉化版
中文版,非常好用

禅工作室 13.0.1
功能强大的PHP集成开发环境

Dreamweaver CS6
视觉化网页开发工具

SublimeText3 Mac版
神级代码编辑软件(SublimeText3)


 Python与C:学习曲线和易用性
Apr 19, 2025 am 12:20 AM
Python与C:学习曲线和易用性
Apr 19, 2025 am 12:20 AM
Python更易学且易用,C 则更强大但复杂。1.Python语法简洁,适合初学者,动态类型和自动内存管理使其易用,但可能导致运行时错误。2.C 提供低级控制和高级特性,适合高性能应用,但学习门槛高,需手动管理内存和类型安全。
 学习Python:2小时的每日学习是否足够?
Apr 18, 2025 am 12:22 AM
学习Python:2小时的每日学习是否足够?
Apr 18, 2025 am 12:22 AM
每天学习Python两个小时是否足够?这取决于你的目标和学习方法。1)制定清晰的学习计划,2)选择合适的学习资源和方法,3)动手实践和复习巩固,可以在这段时间内逐步掌握Python的基本知识和高级功能。
 Python vs.C:探索性能和效率
Apr 18, 2025 am 12:20 AM
Python vs.C:探索性能和效率
Apr 18, 2025 am 12:20 AM
Python在开发效率上优于C ,但C 在执行性能上更高。1.Python的简洁语法和丰富库提高开发效率。2.C 的编译型特性和硬件控制提升执行性能。选择时需根据项目需求权衡开发速度与执行效率。
 Python vs. C:了解关键差异
Apr 21, 2025 am 12:18 AM
Python vs. C:了解关键差异
Apr 21, 2025 am 12:18 AM
Python和C 各有优势,选择应基于项目需求。1)Python适合快速开发和数据处理,因其简洁语法和动态类型。2)C 适用于高性能和系统编程,因其静态类型和手动内存管理。
 Python标准库的哪一部分是:列表或数组?
Apr 27, 2025 am 12:03 AM
Python标准库的哪一部分是:列表或数组?
Apr 27, 2025 am 12:03 AM
pythonlistsarepartofthestAndArdLibrary,herilearRaysarenot.listsarebuilt-In,多功能,和Rused ForStoringCollections,而EasaraySaraySaraySaraysaraySaraySaraysaraySaraysarrayModuleandleandleandlesscommonlyusedDduetolimitedFunctionalityFunctionalityFunctionality。
 Python:自动化,脚本和任务管理
Apr 16, 2025 am 12:14 AM
Python:自动化,脚本和任务管理
Apr 16, 2025 am 12:14 AM
Python在自动化、脚本编写和任务管理中表现出色。1)自动化:通过标准库如os、shutil实现文件备份。2)脚本编写:使用psutil库监控系统资源。3)任务管理:利用schedule库调度任务。Python的易用性和丰富库支持使其在这些领域中成为首选工具。
 科学计算的Python:详细的外观
Apr 19, 2025 am 12:15 AM
科学计算的Python:详细的外观
Apr 19, 2025 am 12:15 AM
Python在科学计算中的应用包括数据分析、机器学习、数值模拟和可视化。1.Numpy提供高效的多维数组和数学函数。2.SciPy扩展Numpy功能,提供优化和线性代数工具。3.Pandas用于数据处理和分析。4.Matplotlib用于生成各种图表和可视化结果。
 Web开发的Python:关键应用程序
Apr 18, 2025 am 12:20 AM
Web开发的Python:关键应用程序
Apr 18, 2025 am 12:20 AM
Python在Web开发中的关键应用包括使用Django和Flask框架、API开发、数据分析与可视化、机器学习与AI、以及性能优化。1.Django和Flask框架:Django适合快速开发复杂应用,Flask适用于小型或高度自定义项目。2.API开发:使用Flask或DjangoRESTFramework构建RESTfulAPI。3.数据分析与可视化:利用Python处理数据并通过Web界面展示。4.机器学习与AI:Python用于构建智能Web应用。5.性能优化:通过异步编程、缓存和代码优
