
 系统教程
Windows系列
5 Fixes for “An Error Occurred While Loading the Troubleshooter” in Windows 11
系统教程
Windows系列
5 Fixes for “An Error Occurred While Loading the Troubleshooter” in Windows 11
5 Fixes for “An Error Occurred While Loading the Troubleshooter” in Windows 11

Fix 1: Check the Diagnostic Service Status
Windows troubleshooters rely on a few diagnostic services. If these services glitch, you will face troubles while launching or using a troubleshooter. So, you must check and restart them using the Services utility. Here’s how:
Step 1: Press the Windows key to open the Start menu. Type services in the search bar and press Enter to open the Services app.
Step 2: Locate and right-click on Diagnostic Policy Service > select Restart. Also, restart the Diagnostic Service Host and Diagnostic System Host services.

Step 3: Close the Services app.
Fix 2: Remove a Recent Windows Update
Many users complained about their inability to launch and use built-in troubleshooters after installing a recent Windows update. So, you must remove the update to check if it stops the Windows troubleshooter from working on your PC.
Also, check if an update was reported in the support forums. This will help you pinpoint the update.
Step 1: Open Settings (Win + I) and go to Windows Update.
Step 2: Click on the Update history option.
Step 3: Scroll down and click on Uninstall updates.
Step 4: Find the most recent update you installed and click the Uninstall button.
Step 5: Click on the Uninstall button again to remove the update.

Step 6: Close the Settings app and restart your PC.
If you cannot uninstall the update, here is how to manage these problematic Windows updates.
Fix 3: Run Troubleshooter in Clean Boot State
Third-party programs and their background services can interfere with Windows components and prevent them from launching or working correctly. So, you must perform a clean boot to isolate the culprit service and remove the corresponding program from your PC. Here’s how:
Step 1: Press the Windows key to open the Start menu. Type msconfig in the search bar and press Enter to open the System Configuration app.

Step 2: Switch to the Services tab > click the Hide all Microsoft services checkbox > click on Disable all.

Step 3: Click on Apply, followed by OK to save the changes.

Step 4: It will then prompt you to restart the PC. Click on Restart now.
After your PC restarts, launch the troubleshooter and check if the 0x80004005 error code appears. If you don’t see any error message, it confirms the suspicion that a third-party service is interfering.
Relaunch the System Configuration tool, re-enable some services, and restart your PC. Repeat this process until you find the problematic service and remove it from your PC.
Fix 4: Run SFC and DISM Scans
You can use built-in command-line tools like SFC and DISM to repair corrupt system files and fix the damaged Windows Component store. Run both scans to identify and fix problems with your PC. Here’s how:
Step 1: Press the Windows key to open the Start menu. Type cmd in the search box and press the Ctrl + Shift + Enter to open it with admin permission.

Step 2: The User Account Control window will pop up. Click on Yes.
Step 3: Type the following command and press Enter to run an SFC scan:
<code>SFC /scannow</code>

Step 4: Execute the following commands to run DISM scans:
<code>DISM /Online /Cleanup-Image /CheckHealth<br>DISM /Online /Cleanup-Image /ScanHealth<br>DISM /Online /Cleanup-Image /RestoreHealth</code>

Step 5: Close the Command Prompt window afterward.
Fix 5: Try System Restore
System Restore is a lifesaver that allows you to revert your PC to an earlier time. If you have any available restore points, apply the most recent one. Usually, Windows creates a restore point when an update is installed. However, you will lose all programs installed after the restore point creation. Here’s how:
Step 1: Press the Windows key to open the Start menu. Type rstrui in the search box and press Enter to open System Restore. Click on Next.

Step 2: Select a restore point from the list and click on Next.

Follow the on-screen instructions to apply it. After a few minutes, your PC will restart and boot to the desktop.
以上是5 Fixes for “An Error Occurred While Loading the Troubleshooter” in Windows 11的详细内容。更多信息请关注PHP中文网其他相关文章!

热AI工具

Undresser.AI Undress
人工智能驱动的应用程序,用于创建逼真的裸体照片

AI Clothes Remover
用于从照片中去除衣服的在线人工智能工具。

Undress AI Tool
免费脱衣服图片

Clothoff.io
AI脱衣机

Video Face Swap
使用我们完全免费的人工智能换脸工具轻松在任何视频中换脸!

热门文章
热工具

记事本++7.3.1
好用且免费的代码编辑器

SublimeText3汉化版
中文版,非常好用

禅工作室 13.0.1
功能强大的PHP集成开发环境

Dreamweaver CS6
视觉化网页开发工具

SublimeText3 Mac版
神级代码编辑软件(SublimeText3)


 Windows KB5054979更新信息更新内容列表
Apr 15, 2025 pm 05:36 PM
Windows KB5054979更新信息更新内容列表
Apr 15, 2025 pm 05:36 PM
KB5054979是2025年3月27日发布的Windows 11版本24H2的累积安全更新。它针对.NET框架版本3.5和4.8.1,增强了安全性和整体稳定性。值得注意的是,该更新使用System.io API在UNC共享的文件和目录操作中解决了问题。提供了两种安装方法:一个通过Windows设置通过Windows Update下的更新,另一个通过Microsoft Update Catalog下载手册下载。
 Nanoleaf想要改变您的技术收费
Apr 17, 2025 am 01:03 AM
Nanoleaf想要改变您的技术收费
Apr 17, 2025 am 01:03 AM
Nanoleaf的Pegboard Desk Dock:时尚且功能型的桌子组织者 厌倦了相同的旧充电设置? NanoLeaf的新Pegboard Desk Dock提供了一种时尚且功能性的替代方案。 这款多功能桌配件拥有32个全彩RGB
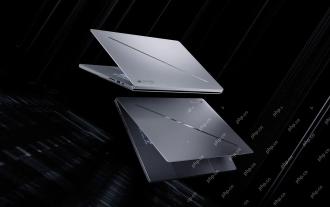 华硕&#039; Rog Zephyrus G14 OLED游戏笔记本电脑$ 300折扣
Apr 16, 2025 am 03:01 AM
华硕&#039; Rog Zephyrus G14 OLED游戏笔记本电脑$ 300折扣
Apr 16, 2025 am 03:01 AM
ASUS ROG Zephyrus G14 电竞笔记本电脑特惠! 现在购买ASUS ROG Zephyrus G14 电竞笔记本电脑,即可享受300美元的优惠!原价1999美元,现价仅需1699美元!随时随地畅享沉浸式游戏体验,或将其作为可靠的便携式工作站。 Best Buy目前提供这款2024款14英寸ASUS ROG Zephyrus G14电竞笔记本电脑的优惠活动。其强大的配置和性能令人印象深刻。 这款ASUS ROG Zephyrus G14电竞笔记本电脑在Best Buy的售价为16
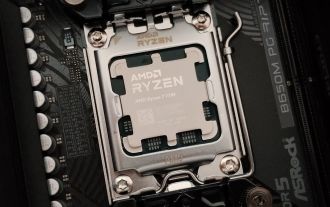 使用PBO获得了AMD CPU和AREN&#039; t?你错过了
Apr 12, 2025 pm 09:02 PM
使用PBO获得了AMD CPU和AREN&#039; t?你错过了
Apr 12, 2025 pm 09:02 PM
解锁Ryzen的潜力:精确提升超速驱动(PBO)的简单指南 超频您的新电脑似乎令人生畏。 尽管性能提高可能会感到难以捉摸,但留下潜在的启用甚至更具吸引力。幸运的是,AMD Ryzen Processo
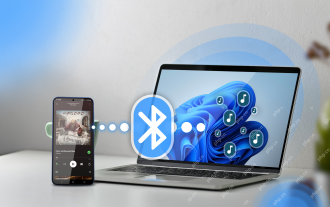 如何将Windows 11用作蓝牙音频接收器
Apr 15, 2025 am 03:01 AM
如何将Windows 11用作蓝牙音频接收器
Apr 15, 2025 am 03:01 AM
将Windows 11 PC变成蓝牙扬声器,并从手机中欣赏您喜欢的音乐!本指南向您展示了如何轻松将iPhone或Android设备连接到计算机进行音频播放。 步骤1:配对蓝牙设备 首先,PA
 您应该使用的5个隐藏窗口功能
Apr 16, 2025 am 12:57 AM
您应该使用的5个隐藏窗口功能
Apr 16, 2025 am 12:57 AM
解锁隐藏的Windows功能,以获得更流畅的体验! 发现令人惊讶的有用的Windows功能,可以显着增强您的计算体验。甚至经验丰富的Windows用户也可能在这里找到一些新技巧。 动态锁:自动
 微软最终可能会修复Windows 11&#039;开始菜单
Apr 10, 2025 pm 12:07 PM
微软最终可能会修复Windows 11&#039;开始菜单
Apr 10, 2025 pm 12:07 PM
Windows 11的开始菜单进行了急需的大修 Microsoft的Windows 11开始菜单,最初因其不太敏感的应用访问而受到批评,正在重新设计。 早期测试表明用户体验得到了极大的改进。 向上
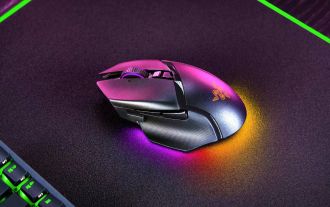 您可以以39%的折扣获得Razer Basilisk V3 Pro鼠标
Apr 09, 2025 am 03:01 AM
您可以以39%的折扣获得Razer Basilisk V3 Pro鼠标
Apr 09, 2025 am 03:01 AM
##### Razer Basilisk V3 Pro:高性能无线游戏鼠标 Razer Basilisk V3 Pro 是一款高性能无线游戏鼠标,拥有高度自定义性(11 个可编程按键、Chroma RGB)和多功能连接方式。它具有出色的传感器、耐用的开关和超长的电池续航时间。 如果您是一位寻求高品质无线鼠标且需要出色自定义选项的游戏玩家,现在是购买 Razer Basilisk V3 Pro 的绝佳时机。此次促销活动将价格降低了 39%,促销期有限。 这款鼠标尺寸较大,长 5.11 英寸,宽 2
