
>本文是由Vildan Softic审查的。感谢SitePoint所有的同行评审员制作SitePoint内容的最佳状态!
>它有助于将Atom软件包视为NPM模块。您对API的访问与在Node.js上运行的任何工具相同。因此,可以添加所需的任何NPM依赖性。还需要一个软件包。包含您项目的所有元数据。基本文件应如下:
<span>{
</span>  <span>"name": "your-package",
</span>  <span>"main": "./lib/main",
</span>  <span>"version": "0.1.0",
</span>  <span>"description": "A short description of your package",
</span>  <span>"keywords": [
</span>    <span>"awesome"
</span>  <span>],
</span>  <span>"repository": "https://github.com/<your-name>/<package>",
</span>  <span>"license": "MIT",
</span>  <span>"engines": {
</span>    <span>"atom": ">=1.0.0 <2.0.0"
</span>  <span>},
</span>  <span>"dependencies": {
</span>  <span>}
</span><span>}
</span>重要的密钥是主要的 - 定义软件包的主要入口点(默认为index.js/index.coffee)和引擎 - 讲述了您的软件包运行哪个版本的原子。还有一组可选的键可用,在“ WordCount”软件包文档>(extact package.json)>中记录
软件包源代码>您的主文件必须是一个单身对象,该对象维护包装的整个生命周期。即使您的软件包仅由单个视图组成,它也将从此对象进行管理。您的入口点需要一个激活方法,但也应具有
>可选deactivate()和serialize()。 激活您的软件包
<span>// lib/main.js
</span><span>'use babel';
</span>
<span>// This is your main singleton.
</span><span>// The whole state of your package will be stored and managed here.
</span><span>const YourPackage = {
</span>  <span>activate (state) {
</span>    <span>// Activates and restores the previous session of your package.
</span>  <span>},
</span>  <span>deactivate () {
</span>    <span>// When the user or Atom itself kills a window, this method is called.
</span>  <span>},
</span>  <span>serialize () {
</span>    <span>// To save the current package's state, this method should return
</span>    <span>// an object containing all required data.
</span>  <span>}
</span><span>};
</span>
<span>export default YourPackage;
</span>序列化所有内容!
>
这个非常基本的组件采用一个对象,该对象将用作组件的内部数据。然后,您的组件可能会与数据进行一些工作,并且可以通过serialize()方法序列化其状态。
><span>{
</span> <span>"name": "your-package",
</span> <span>"main": "./lib/main",
</span> <span>"version": "0.1.0",
</span> <span>"description": "A short description of your package",
</span> <span>"keywords": [
</span> <span>"awesome"
</span> <span>],
</span> <span>"repository": "https://github.com/<your-name>/<package>",
</span> <span>"license": "MIT",
</span> <span>"engines": {
</span> <span>"atom": ">=1.0.0 <2.0.0"
</span> <span>},
</span> <span>"dependencies": {
</span> <span>}
</span><span>}
</span>为了使所有这些有用,必须在包装中调用和序列化此组件。
<span>// lib/main.js
</span><span>'use babel';
</span>
<span>// This is your main singleton.
</span><span>// The whole state of your package will be stored and managed here.
</span><span>const YourPackage = {
</span> <span>activate (state) {
</span> <span>// Activates and restores the previous session of your package.
</span> <span>},
</span> <span>deactivate () {
</span> <span>// When the user or Atom itself kills a window, this method is called.
</span> <span>},
</span> <span>serialize () {
</span> <span>// To save the current package's state, this method should return
</span> <span>// an object containing all required data.
</span> <span>}
</span><span>};
</span>
<span>export default YourPackage;
</span>> 为了使所有这些都成为可能,您必须使用Atom.deserializers.add()。
窗格和视图窗格是原子中的单个窗口。它包含所有称为“项目”的打开选项卡。这些窗格存储在Atom.workspace对象中。使用atom.workspace.getactivepane()您请求当前的活动窗格。窗格对象不包含任何DOM元素,而是Atom内部组件的所有实例(例如TextEditor,GutterContainer,NotificationManager)。了解这些窗格对于为您的软件包创建自定义视图至关重要。
atom.workspace.addmodalpanel()方法在Atom的工作区中添加了模态元素。如果要向窗格添加自定义视图(例如,对于设置页面),则需要更多的工作。
><span>// lib/main.js
</span><span>import <span>{ CompositeDisposable }</span> from 'atom';
</span>
<span>const YourPackage = {
</span> <span>subscriptions: null,
</span>
<span>activate (state) {
</span> <span>// Assign a new instance of CompositeDisposable...
</span> <span>this.subscriptions = new CompositeDisposable();
</span>
<span>// ...and adding commands.
</span> <span>this.subscriptions.add(
</span> atom<span>.commands.add('atom-workspace', {
</span> <span>'your-package:toggle': this.togglePackage
</span> <span>})
</span> <span>);
</span> <span>},
</span>
<span>// When your package get's deactivated, all added
</span> <span>// subscriptions will be disposed of at once.
</span> <span>deactivate () {
</span> <span>this.subscriptions.dispose();
</span> <span>},
</span>
<span>togglePackage () {
</span> <span>// Code to toggle the package state.
</span> <span>}
</span><span>};
</span><span>// lib/fancy-component.js
</span><span>class FancyComponent {
</span> <span>constructor (configData) {
</span> <span>this.data = configData;
</span> <span>}
</span>
<span>// This method will be called when the class
</span> <span>// is restored by Atom.
</span> <span>static deserialize (config) {
</span> <span>return new FancyComponent(config);
</span> <span>}
</span>
<span>// The returned object will be used to restore
</span> <span>// or save your data by Atom.
</span> <span>// The "deserializer" key must be the name of your class.
</span> <span>serialize () {
</span> <span>return {
</span> <span>deserializer: 'FancyComponent',
</span> <span>data: this.data
</span> <span>};
</span> <span>}
</span>
<span>doSomethingWithData () {}
</span><span>}
</span>
<span>// Add class to Atom's deserialization system
</span>atom<span>.deserializers.add(FancyComponent);
</span>
<span>export default FancyComponent;
</span>>软件包配置应在JSON模式中描述。要添加设置,您的软件包对象需要带有数据的配置密钥。另外,您可以将配置移至config-schema.json文件并导入。这样可以使您的配置分开并组织结构。
>这将在包装的设置页面上自动创建配置。所有受支持类型的列表可以在Atom API文档的“配置”页面上找到。您的设置对象以及所有其他软件包配置都存储在atom.config对象中。
>获得和设置<span>// lib/main.js
</span><span>import <span>FancyComponent</span> from './fancy-component';
</span><span>import <span>SomeView</span> from './some-view';
</span>
<span>const YourPackage = {
</span> <span>fancyComponent: null,
</span> <span>someView: null,
</span>
<span>activate (state) {
</span> <span>// If the component has been saved at a previous session of Atom,
</span> <span>// it will be restored from the deserialization system. It calls your
</span> <span>// your components static 'deserialize()' method.
</span> <span>if (state.fancy) {
</span> <span>this.fancyComponent = atom.deserializers.deserialize(state.fancy);
</span> <span>}
</span> <span>else {
</span> <span>this.fancyComponent = new FancyComponent({ otherData: 'will be used instead' });
</span> <span>}
</span>
<span>// More activation logic.
</span> <span>},
</span>
<span>// As well as your component, your package has a serialize method
</span> <span>// to save the current state.
</span> <span>serialize () {
</span> <span>return {
</span> <span>fancy: this.fancyComponent.serialize(),
</span> <span>view: this.someView.serialize()
</span> <span>};
</span> <span>}
</span><span>};
</span><span>// lib/custom-view-element.js
</span><span>export default class YourPackageView {
</span> <span>constructor (state) {
</span> <span>this.data = state;
</span> <span>this.element = document.createElement('div');
</span> <span>this.message = document.createElement('span');
</span> <span>this.textNode = document.createTextNode(this.data.content);
</span>
<span>this.element.classList.add('your-package');
</span> <span>this.message.classList.add('your-package-message');
</span>
<span>this.message.appendChild(this.textNode);
</span> <span>this.element.appendChild(this.message);
</span> <span>}
</span>
<span>serialize () {
</span> <span>return {
</span> <span>data: this.data
</span> <span>};
</span> <span>}
</span>
<span>destroy () {
</span> <span>this.element.remove();
</span> <span>}
</span>
<span>getElement () {
</span> <span>return this.element;
</span> <span>}
</span>
<span>doSomethingWithData () {}
</span><span>}
</span>>
<span>{
</span>  <span>"name": "your-package",
</span>  <span>"main": "./lib/main",
</span>  <span>"version": "0.1.0",
</span>  <span>"description": "A short description of your package",
</span>  <span>"keywords": [
</span>    <span>"awesome"
</span>  <span>],
</span>  <span>"repository": "https://github.com/<your-name>/<package>",
</span>  <span>"license": "MIT",
</span>  <span>"engines": {
</span>    <span>"atom": ">=1.0.0 <2.0.0"
</span>  <span>},
</span>  <span>"dependencies": {
</span>  <span>}
</span><span>}
</span>要聆听更改,您可以观察更改的配置,或者将侦听器(称为ondidchange())到关键路径。他们俩都返回一个可用于.dispose()退订的一次性。
> 再次,将它们添加到Compositedisposable的实例中,您可以立即处理多个事件:或单独处置它们:
<span>// lib/main.js
</span><span>'use babel';
</span>
<span>// This is your main singleton.
</span><span>// The whole state of your package will be stored and managed here.
</span><span>const YourPackage = {
</span>  <span>activate (state) {
</span>    <span>// Activates and restores the previous session of your package.
</span>  <span>},
</span>  <span>deactivate () {
</span>    <span>// When the user or Atom itself kills a window, this method is called.
</span>  <span>},
</span>  <span>serialize () {
</span>    <span>// To save the current package's state, this method should return
</span>    <span>// an object containing all required data.
</span>  <span>}
</span><span>};
</span>
<span>export default YourPackage;
</span>用菜单和keymaps进行微调
进行微调<span>// lib/main.js
</span><span>import <span>{ CompositeDisposable }</span> from 'atom';
</span>
<span>const YourPackage = {
</span> <span>subscriptions: null,
</span>
<span>activate (state) {
</span> <span>// Assign a new instance of CompositeDisposable...
</span> <span>this.subscriptions = new CompositeDisposable();
</span>
<span>// ...and adding commands.
</span> <span>this.subscriptions.add(
</span> atom<span>.commands.add('atom-workspace', {
</span> <span>'your-package:toggle': this.togglePackage
</span> <span>})
</span> <span>);
</span> <span>},
</span>
<span>// When your package get's deactivated, all added
</span> <span>// subscriptions will be disposed of at once.
</span> <span>deactivate () {
</span> <span>this.subscriptions.dispose();
</span> <span>},
</span>
<span>togglePackage () {
</span> <span>// Code to toggle the package state.
</span> <span>}
</span><span>};
</span>>菜单定义可以作为JSON文件存储在菜单/顶级目录中,也可以在包装的菜单键中存储。以下示例将命令添加到“软件包”菜单栏和编辑器的上下文菜单中。右键单击编辑器内部时出现上下文菜单。
keymaps
<span>// lib/fancy-component.js
</span><span>class FancyComponent {
</span>  <span>constructor (configData) {
</span>    <span>this.data = configData;
</span>  <span>}
</span>
  <span>// This method will be called when the class
</span>  <span>// is restored by Atom.
</span>  <span>static deserialize (config) {
</span>    <span>return new FancyComponent(config);
</span>  <span>}
</span>
  <span>// The returned object will be used to restore
</span>  <span>// or save your data by Atom.
</span>  <span>// The "deserializer" key must be the name of your class.
</span>  <span>serialize () {
</span>    <span>return {
</span>      <span>deserializer: 'FancyComponent',
</span>      <span>data: this.data
</span>    <span>};
</span>  <span>}
</span>
  <span>doSomethingWithData () {}
</span><span>}
</span>
<span>// Add class to Atom's deserialization system
</span>atom<span>.deserializers.add(FancyComponent);
</span>
<span>export default FancyComponent;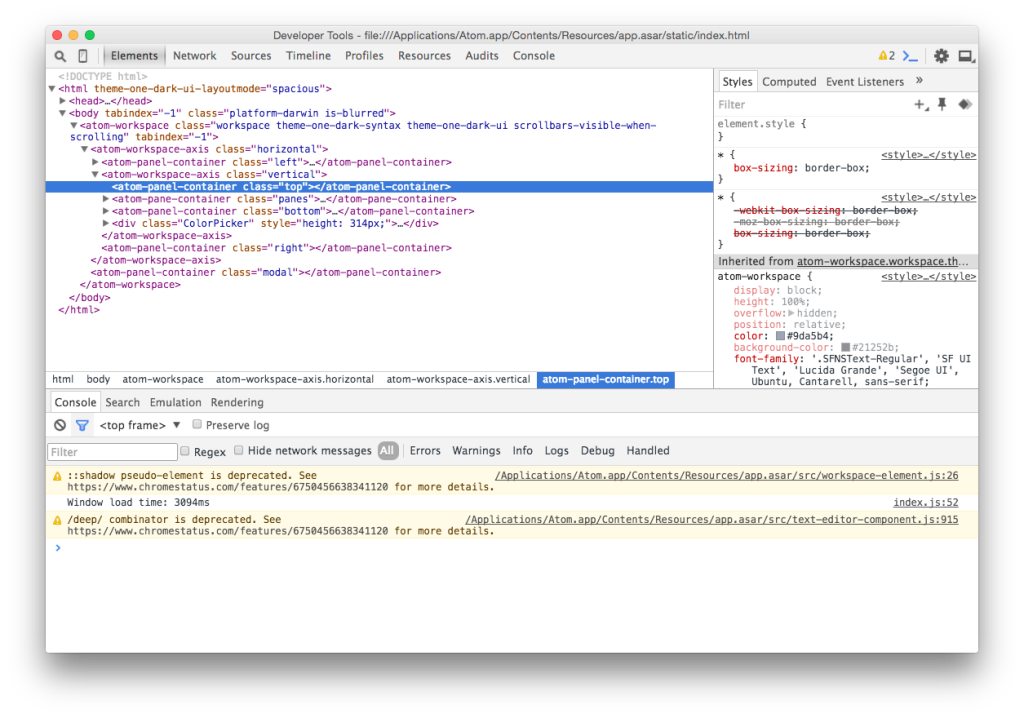
</span>> 使用Chrome Developer Tools进行调试
<span>// lib/main.js
</span><span>import <span>FancyComponent</span> from './fancy-component';
</span><span>import <span>SomeView</span> from './some-view';
</span>
<span>const YourPackage = {
</span>  <span>fancyComponent: null,
</span>  <span>someView: null,
</span>
  <span>activate (state) {
</span>    <span>// If the component has been saved at a previous session of Atom,
</span>    <span>// it will be restored from the deserialization system. It calls your
</span>    <span>// your components static 'deserialize()' method.
</span>    <span>if (state.fancy) {
</span>      <span>this.fancyComponent = atom.deserializers.deserialize(state.fancy);
</span>    <span>}
</span>    <span>else {
</span>      <span>this.fancyComponent = new FancyComponent({ otherData: 'will be used instead' });
</span>    <span>}
</span>
    <span>// More activation logic.
</span>  <span>},
</span>
  <span>// As well as your component, your package has a serialize method
</span>  <span>// to save the current state.
</span>  <span>serialize () {
</span>    <span>return {
</span>      <span>fancy: this.fancyComponent.serialize(),
</span>      <span>view: this.someView.serialize()
</span>    <span>};
</span>  <span>}
</span><span>};
</span>>
>
要运行测试,您可以使用窗口:Run-Package-Specs命令或转到View>“开发人员”> Run Package Specs。如果您想在Travis CI上运行软件包规格,则在Atom的博客上有一个简短的文章,涉及如何设置它。这是很多输入。原子的实际流量或执行顺序大致如下(注意:测试不是软件包流的一部分)。
>
使用香草JavaScript编写原子软件包的经常询问问题(常见问题解答)什么是香草javaScript,为什么在编写原子包中它很重要?这在编写原子软件包方面很重要,因为它允许使用轻巧,高效且高度可定制的代码。使用Vanilla JavaScript,开发人员可以创建更快,更安全且更易于调试和维护的软件包。它还确保包装不依赖任何第三方库,从而使它们更可靠,更健壮。使用香草JavaScript的Atom软件包,您首先需要设置开发环境。这包括安装Node.js和Atom。安装了这些安装后,您可以使用Atom软件包生成器创建一个新软件包。之后,您可以使用香草JavaScript开始编写软件包。请记住要遵循原子包指南,以确保您的软件包与Atom编辑器兼容。 //导入导入来自'./ module.js'; >如何使我的原子包与不同版本的原子兼容?为了确保您的原子包与不同版本的原子兼容,您应该遵循原子API指南,避免使用不推荐使用的API。您还应该在不同版本的原子上测试包装,以识别和解决任何兼容性问题。此外,您可以在软件包的包装文件中指定最低所需的原子版。可以使用APM Publish命令将其发布到Atom软件包存储库。在发布之前,您需要使用APM版本命令创建软件包的新版本。您还需要为您的软件包创建一个GitHub存储库,然后将代码推向其。 //在module.js
中导出一个函数,导出函数myfunction(){// function code eke>}
atom提供一个内置的开发人员工具面板您可以用来调试包裹。您可以通过查看>开发人员>切换开发人员工具来打开此面板。在这里,您可以检查代码,设置断点,并监视变量和网络活动。此外,您可以在代码中使用Console.log()语句将其输出值以调试目的输出值。
>我可以在用Vanilla Javascript编写的Atom软件包中使用ES6功能吗? ATOM包中的ES6功能。 Atom的基础node.js运行时间支持大多数ES6功能,包括let and and const声明,箭头功能,模板文字等。但是,您应该确保使用ES6功能不会引起与旧版本的Atom的兼容性问题。
>如何处理用Vanilla JavaScript编写的Atom软件包中的错误?这使您可以捕获和处理在执行代码期间可能发生的异常。您也可以使用Atom.Notifications API向用户显示错误消息。此API提供了显示不同类型的通知的方法,包括错误通知。
>
以上是如何使用香草JavaScript编写原子包装的详细内容。更多信息请关注PHP中文网其他相关文章!


