

带有条件格式的颜色代码Outlook电子邮件,日历和任务

Struggling to keep your Outlook inbox organized? Learn how to highlight your emails, tasks, meetings and appointments with conditional formatting.
As your inboxes are overflowing with never-ending streams of emails and calendars are packed with numerous appointments, it's easy to feel swamped. However, there's a helpful tool in Microsoft Outlook called conditional formatting. This feature lets you automatically color-code your messages and calendar events based on certain criteria, making it easier to stay organized and focused amidst the chaos.
Note. This article covers conditional formatting in the classic Outlook application. For instructions on how to highlight emails in the new app and Outlook online, please refer to this tutorial: Conditional formatting in new Outlook and on the web.
What is conditional formatting in Outlook?
Outlook conditional formatting allows you to automatically apply specific formatting to emails, tasks and calendar items based on predefined rules or conditions. This functionality goes beyond mere aesthetics - it serves as a visual aid, providing instant insights into the importance, urgency, or nature of each item.
With conditional formatting, you can set up rules that determine how emails, task and calendar entries should be formatted based on various criteria, such as sender, subject, importance, category, or even specific words or phrases. Once these rules are established, Outlook automatically applies the specified formatting whenever an item meets the defined criteria.
For example, urgent emails from a particular sender can be highlighted in red, while messages related to a specific project can be marked with another distinctive color. Likewise, in the calendar, you can assign different colors to appointments that differ in importance, organizer, or attendees to easily recognize significant events and monitor their agendas.
Overall, conditional formatting in Outlook offers visual cues that help you prioritize what matters most, sort everything out, and make good use of your time.

Default conditional formats in Outlook
Microsoft Outlook comes pre-equipped with several color-coding options for emails and tasks, which you might already be using without even realizing it. Here's a rundown of some default formats:
- Unread - messages that you haven't read yet show up in a bold and blue font.
- Not Sent - emails that have never been sent are displayed in italics.
- Expired - messages past their expiration date and completed tasks appear in a grey and strikethrough font.
- Overdue - messages and tasks that are past a defined due date are highlighted in red.
To view the list of conditional formatting rules that are already in your Outlook, do the following:
- Choose the target folder, whether it's emails, tasks, or calendars.
- Head to the View tab and click View Settings in the Current View group.

- In the Advanced View Settings dialog box, click Conditional Formatting.
You'll see a set of default rules, like the ones for Outlook emails shown here:


Any custom rules you've created for this specific view will also be displayed in this dialog box.
Tips:
- It's not possible to delete the inbuilt rules, but you can temporarily turn them off by clearing the check box for a certain rule.
- It's not possible to edit the criteria for the default rules, but you can change their formatting to better suit your personal preferences and communication style.
How to color code Outlook emails using conditional formatting
To color code your emails the way you want, you can create a custom conditional formatting rule by following these steps:
- Start by choosing the folder where you want to apply the rule, such as Inbox.
- On the View tab, in the Current View group, click View Settings.
- In the Advanced View Settings dialog box, click Conditional Formatting.
- Click the Add button to start creating a new rule.
- In the Name box, type a descriptive name for your rule.
- Click the Font… button to set up formatting for the rule.
- In the Font dialog box, select your preferred font color, size, and style, then confirm by clicking OK.
- Click Condition… to specify the criteria under which the rule will be applied.
- In the Filter dialog box, you'll be setting the conditions for the rule. There are three tabs here - Messages, More Choices, and Advanced - each offering a variety of options. On the Messages tab, you'll find the most commonly used criteria such as the sender, recipient, subject or message body keywords.
- Click OK three times to close all dialogs and apply the newly created formatting rule.


Done! Your rule is applied immediately, and your inbox is now color-coded according to your specified criteria.
For instance, emails from a specific sender containing the word "important" in the subject line are highlighted in maroon, making them easily recognizable amidst your other messages.

Note. Outlook conditional formatting rules are specific to the view in which you create them. If you want the rule to work for other folders, you can apply the current view to those folders.
How to color code Outlook calendar
If you wish to enhance the organization and clarity of your calendars, you can highlight your meetings and appointments in different colors based on various criteria such as sender, location, attendees, or importance. Here's how to do it:
- Select your Calendar folder in Outlook.
- Go to the View tab and click View Settings in the Current View group.
- In the dialog box that appears, choose Conditional Formatting.
- In the Conditional Formatting dialog box, click Add to make a new rule.
- Name your rule and pick a color from the Color dropdown.
- Click the Condition… button.
- In the Filter dialog box, you can choose from various fields and criteria. For example, to highlight meeting requests from your admin or supervisor, add their email address to the Organize By box.
- For additional options, switch to the More Choices tab. Here, you can set more conditions, such as highlighting appointments and meetings with high importance.
- For even more flexibility, go to the Advanced tab. Then, click on Field > All Appointment Fields and choose the relevant item. For example, to highlight appointments and meetings where you are a required attendee, select All Appointment Fields > Required Attendees.
- In the Value box, type your own name or the name of any other person to whom the criteria should apply, and click Add to List.
- If needed, add more criteria in the same manner. Once done, click OK three times to close all the dialogs and save your rule.


In this example, we've created a formatting rule that highlights calendar items in the teal color when three conditions are met: the appointment or meeting is organized by admin, has high importance, and you (or the specified person) are a required attendee.
Conditional formatting for Outlook tasks
Similar to emails, Outlook offers predefined conditional formatting rules for tasks to help you manage your to-do list more effectively:
- Complete tasks - appear in grey with a strikethrough to indicate that they've been completed.
- Overdue tasks – are highlighted in red to draw attention to tasks that are past their due date.
- Unread tasks - appear in bold to signify tasks that you haven't reviewed yet.

If you're looking to customize the appearance of your tasks for a more visually appealing look, you can add custom conditional formatting rules. The process and options for color-coding tasks are identical to those for emails. Here's a quick rundown of the steps:
- Select the tasks folder in your Outlook.
- On the View tab, in the Current View group, click View Settings.
- In the dialog box that appears, choose Conditional Formatting.
- Click the Add button to make a new rule.
- Give your rule a name and click Font… to choose the desired formatting.
- Click Condition… to open the Filter dialog where you configure the criteria for your rule.
- Click OK three times to close all dialog boxes and apply the new rule.
For instance, to highlight high-priority tasks that haven't been started yet, you can set up a rule as follows:
- First, on the More Choices tab of the Filter dialog, set the importance to "high".
- Then, switch to the Advanced tab and select Field > All Task Fields > Status.
- Finally, choose "not started" for the status and add the statement to the list.


As a result, your high-priority tasks that are yet to be started will be visually distinct, making it easier for you to prioritize and manage your workload.
Examples of Outlook conditional formatting
Now that you've grasped the basics of conditional formatting in Outlook, let's explore some practical examples of color-coding emails.
How to highlight emails from a specific sender
If you want to ensure that messages from a particular sender stand out in your inbox, follow these steps to set up a formatting rule:
- Select the Inbox folder or another folder where your ingoing messages are stored.
- Open the Conditional Formatting dialog and add a new rule.
- On the Messages tab of the Filter dialog, define the criteria for the rule in one of these ways:
- In the From box, enter the sender's name exactly as it appears in the From field of received emails.
- Alternatively, type the sender's email address into the From box.
- If you're in an Exchange environment, click the From… button to select the sender from the Global Address List of your company.

These steps will help you mark messages from the specified sender with your preferred color, making them easy to identify and prioritize in your inbox.
Tip. It's advisable to base the rule on the email address rather than the sender's name to ensure accuracy. Even a minor discrepancy in the sender's name could prevent the rule from working correctly.
How to color code emails sent to a particular recipient
To make messages sent to a particular person easily distinguishable in your Sent Items folder, create a formatting rule in this way:
- Select the Sent Items folder where your outgoing messages are stored.
- Open the Conditional Formatting dialog and add a new rule with the following criteria:
- In the Sent To field, enter the email address of the intended recipient.
- In an Exchange environment, use the Sent To button to select the recipient from the Global Address List.

By implementing this rule, messages sent to the specified email address will be highlighted according to your chosen color, enabling you to track the target communications with ease.
How to color code messages containing certain words
Color-coding emails containing specific words can be a helpful way to quickly identify important or relevant communications. Follow these steps to set up a formatting rule:
- Select the folder where you want the rule to apply, such as your Inbox or any other designated folder.
- Add a new rule with the following criteria:
- In the Search for the word(s) box, type the particular word or phrase the rule should react to.
- Use the In dropdown list to define whether to search in the subject, subject and message body, or common text fields.

This feature is particularly useful for identifying emails related to specific projects or subjects of interest, allowing you to focus on what matters most.
How to color code emails sent only to you
If you're seeking to prioritize messages sent exclusively to you over those received from distribution lists or where you're included on the Cc or Bcc fields, you can highlight such messages by performing these steps:
- Select Inbox or any other relevant folder.
- Add a new rule and click the Condition… button.
- In the Filter dialog box, on the Messages tab, select the Where I am checkbox, and then choose "the only person on the To line" for the criteria.

This way, Outlook will apply the chosen format to any messages that only you receive, helping you in promptly responding to communications that are meant just for you.
How to highlight emails larger than 1MB with attachments
To visually identify large emails with attachments, carry out these steps:
- Select Inbox or any other folder where you want the rule to apply.
- Add a new rule and click the Condition… button.
- In the Filter dialog, switch to the More Choices tab.
- Select the Only items with checkbox, and from the dropdown list choose "one or more attachments".
- In the Size dropdown list, pick "greater than", and then type 1024 in the box (1024 kilobytes is 1MB).

Once the rule is created, Outlook will automatically apply the specified formatting to any messages larger than 1MB with attachments, making them visually distinct in your inbox.
How to color code not responded meeting requests
To highlight meeting requests that you have not yet responded to, create the following conditional formatting rule:
- Select Inbox or any other folder containing meeting requests.
- Add a new rule and click the Condition… button.
- In the Filter dialog, switch to the Advanced tab.
- Click Field and choose All Appointment fields > Meeting Status.
- In the text box under Field, you will see "Meeting Status", with the condition set to "equals". Under Value, select "not yet responded" from the dropdown list, and then click the Add to List button.
- Your statement is now added to the criteria list. Click OK to confirm and close the Filter dialog.
- Click OK again to close the Conditional Formatting dialog.


Outlook will now format any meeting requests waiting for your response with the selected color, making them stand out in your inbox.
How to manage, edit and delete conditional formats in Outlook
To view, modify, or delete conditional formatting rules set for a specific folder in Outlook, follow these steps:
- Select the folder of interest. That could be one of your mail folders, tasks or calendars.
- Open the Conditional Formatting dialog box: View tab > View Settings > Conditional Formatting.
- Select the rule you want to manage and perform one of these actions:
- Change formatting - click Font, and then choose the color, style, size, and effects you want to use for the rule.
- Modify criteria - click Condition to edit the criteria for the selected rule.
- Sort - use the Move Up and Move Down buttons to change the priority in which the rules are applied.
- Turn off - to temporarily disable a rule, clear the checkbox next to it.
- Delete - to permanently remove a rule, click the Delete button.

Note. Default rules have limited customization options. You can only adjust their text formatting, not the criteria. Default rules cannot be deleted, only turned off.
Outlook color-coding tips
Understanding the inner mechanics of conditional formatting in Outlook can improve the consistency and efficiency of your email handling. Here are some helpful tips to help you get the most out of it and avoid any surprises.
Apply conditional formatting rules to multiple folders
Outlook conditional formatting rules work only for folders that have the same view as the folder where the rule is made. To use your rules for other folders, you can copy the current folder's view to other folders of the same kind. For this, choose the target folder, then go to the View tab and click Change View > Apply Current View to Other Mail Folders. To apply the view for all subfolders, select the corresponding checkbox. Please remember that special folders like Sent Items, Drafts, and Junk have their own views and cannot get the current view applied.

Specify emails rather than names
For the conditional formats to work correctly, it's crucial that the name specified in the rule precisely matches the display name in the message. Therefore, when specifying names of senders or recipients, accuracy is key. A more reliable approach is to base the rule on the email address or select senders/recipients from the Global Address List.
Properly arrange the rules
Sorting rules using the Move Up and Move Down buttons affects the order in which the rules are applied. Higher listed rules take precedence over lower ones.
For example, suppose you have two custom rules for messages from the same sender, say Jane, with different formatting. Rule 1 highlights all emails in purple and rule 2 highlights unread messages in fuchsia. If rule 1 is listed above rule 2, all messages from Jane will be purple.
Avoid creating too many rules
Using too many colors might make things messy instead of organized. So, be selective and avoid overwhelming your mailbox with excessive color-coding. It's better to keep things simple and clear.
To sum up, learning how to use conditional formatting in Outlook can really make a difference in how you manage your emails and schedule. By following our simple tips, you can keep your inbox organized, stay on track with your tasks, and avoid getting overwhelmed. Just remember to keep things simple and not go overboard with too many color codes.
以上是带有条件格式的颜色代码Outlook电子邮件,日历和任务的详细内容。更多信息请关注PHP中文网其他相关文章!

热AI工具

Undresser.AI Undress
人工智能驱动的应用程序,用于创建逼真的裸体照片

AI Clothes Remover
用于从照片中去除衣服的在线人工智能工具。

Undress AI Tool
免费脱衣服图片

Clothoff.io
AI脱衣机

Video Face Swap
使用我们完全免费的人工智能换脸工具轻松在任何视频中换脸!

热门文章
热工具

记事本++7.3.1
好用且免费的代码编辑器

SublimeText3汉化版
中文版,非常好用

禅工作室 13.0.1
功能强大的PHP集成开发环境

Dreamweaver CS6
视觉化网页开发工具

SublimeText3 Mac版
神级代码编辑软件(SublimeText3)


 如何将日历添加到Outlook:共享,Internet日历,ICAL文件
Apr 03, 2025 am 09:06 AM
如何将日历添加到Outlook:共享,Internet日历,ICAL文件
Apr 03, 2025 am 09:06 AM
本文介绍了如何在Outlook Desktop应用程序中访问和利用共享日历,包括导入Icalendar文件。 以前,我们介绍了分享您的Outlook日历。 现在,让我们探索如何查看与之共享的日历
 如何使用示例使用Flash Fill ofecl
Apr 05, 2025 am 09:15 AM
如何使用示例使用Flash Fill ofecl
Apr 05, 2025 am 09:15 AM
本教程为Excel的Flash Fill功能提供了综合指南,这是一种可自动化数据输入任务的强大工具。 它涵盖了从定义和位置到高级用法和故障排除的各个方面。 了解Excel的FLA

 Excel共享工作簿:如何为多个用户共享Excel文件
Apr 11, 2025 am 11:58 AM
Excel共享工作簿:如何为多个用户共享Excel文件
Apr 11, 2025 am 11:58 AM
本教程提供了共享Excel工作簿,涵盖各种方法,访问控制和冲突解决方案的综合指南。 现代Excel版本(2010年,2013年,2016年及以后)简化了协作编辑,消除了M的需求
 如何在Excel中拼写检查
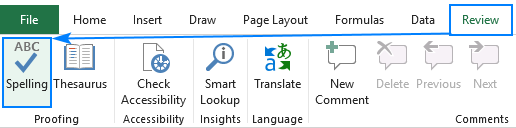
Apr 06, 2025 am 09:10 AM
如何在Excel中拼写检查
Apr 06, 2025 am 09:10 AM
该教程展示了在Excel中进行拼写检查的各种方法:手动检查,VBA宏和使用专用工具。 学习检查单元格,范围,工作表和整个工作簿中的拼写。 虽然Excel不是文字处理器,但它的spel
 Excel:组行自动或手动,崩溃并扩展行
Apr 08, 2025 am 11:17 AM
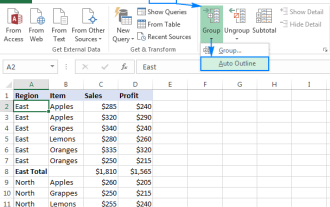
Excel:组行自动或手动,崩溃并扩展行
Apr 08, 2025 am 11:17 AM
本教程演示了如何通过对行进行分组来简化复杂的Excel电子表格,从而使数据易于分析。学会快速隐藏或显示行组,并将整个轮廓崩溃到特定的级别。 大型的详细电子表格可以是
 Excel中的绝对值:ABS功能与公式示例
Apr 06, 2025 am 09:12 AM
Excel中的绝对值:ABS功能与公式示例
Apr 06, 2025 am 09:12 AM
本教程解释了绝对价值的概念,并演示了ABS函数的实用Excel应用,以计算数据集中的绝对值。 数字可能是正面的或负数的,但有时只有正值是需要的
 Google电子表格Countif函数带有公式示例
Apr 11, 2025 pm 12:03 PM
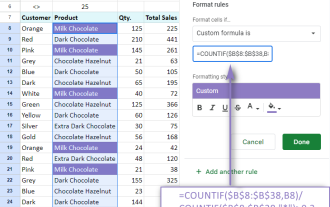
Google电子表格Countif函数带有公式示例
Apr 11, 2025 pm 12:03 PM
Google主张Countif:综合指南 本指南探讨了Google表中的多功能Countif函数,展示了其超出简单单元格计数的应用程序。 我们将介绍从精确和部分比赛到Han的各种情况
