服务器端的JavaScript脚本 Node.js 使用入门_javascript技巧
node.js
首先下载node.js,然后解压到E盘,改名为node,然后开始菜单输入cmd,用cd命令切换到nodejs的解压目录:

第一个例子:hello world。
在node目录下建立hello.js文件,然后在里面输入:
复制代码 代码如下:
var sys = require("sys");
sys.puts("Hello world");
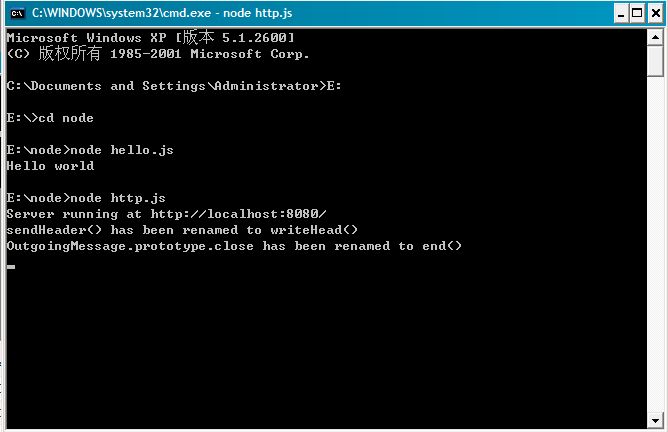
然后我们在命名台中输入命令node hello.js,就能看到命名台输出结果Hello world。
第二个例子:hello world2。
好了,这次我们试从游览器中输出hello world。在node目录下建立http.js,然后输入:
复制代码 代码如下:
var sys = require("sys"),
http = require("http");
http.createServer(function(request, response) {
response.sendHeader(200, {"Content-Type": "text/html"});
response.write("Hello World!");
response.close();
}).listen(8080);
sys.puts("Server running at http://localhost:8080/");
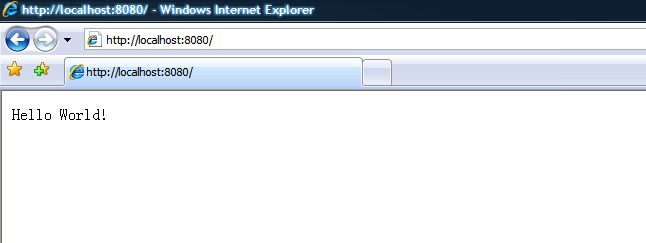
然后我们在命名台中输入命令node http.js,在浏览器输入http://localhost:8080/


node.js提供一个Buffer类用于转换不同编码的字符串。目前支持三种类型:'ascii','utf8'与'binary'。详见这里
复制代码 代码如下:
var Buffer = require('buffer').Buffer,
buf = new Buffer(256),
len = buf.write('\u00bd + \u00bc = \u00be', 0);
console.log(len + " bytes: " + buf.toString('utf8', 0, len));
第四个例子:hello world3。
复制代码 代码如下:
//synopsis.js
//synopsis 摘要, 梗概,大纲
var http = require('http');
http.createServer(function (request, response) {
response.writeHead(200, {'Content-Type': 'text/plain'});
response.end('Hello World\n');
}).listen(8124);
console.log('Server running at http://127.0.0.1:8124/');
前台地址栏:http://localhost:8124/
第五个例子:编译C文件
复制代码 代码如下:
#include #include int main(){ printf("Hello World!!!"); exit(0); }
本站声明
本文内容由网友自发贡献,版权归原作者所有,本站不承担相应法律责任。如您发现有涉嫌抄袭侵权的内容,请联系admin@php.cn

热AI工具

Undresser.AI Undress
人工智能驱动的应用程序,用于创建逼真的裸体照片

AI Clothes Remover
用于从照片中去除衣服的在线人工智能工具。

Undress AI Tool
免费脱衣服图片

Clothoff.io
AI脱衣机

AI Hentai Generator
免费生成ai无尽的。

热门文章
R.E.P.O.能量晶体解释及其做什么(黄色晶体)
2 周前
By 尊渡假赌尊渡假赌尊渡假赌
击败分裂小说需要多长时间?
1 个月前
By DDD
R.E.P.O.最佳图形设置
2 周前
By 尊渡假赌尊渡假赌尊渡假赌
刺客信条阴影:贝壳谜语解决方案
1 周前
By DDD
R.E.P.O.如果您听不到任何人,如何修复音频
2 周前
By 尊渡假赌尊渡假赌尊渡假赌

热工具

记事本++7.3.1
好用且免费的代码编辑器

SublimeText3汉化版
中文版,非常好用

禅工作室 13.0.1
功能强大的PHP集成开发环境

Dreamweaver CS6
视觉化网页开发工具

SublimeText3 Mac版
神级代码编辑软件(SublimeText3)
 一文聊聊Node中的内存控制
Apr 26, 2023 pm 05:37 PM
基于无阻塞、事件驱动建立的Node服务,具有内存消耗低的优点,非常适合处理海量的网络请求。在海量请求的前提下,就需要考虑“内存控制”的相关问题了。 1. V8的垃圾回收机制与内存限制 Js由垃圾回收机
 Node.js 19正式发布,聊聊它的 6 大特性!
Nov 16, 2022 pm 08:34 PM
Node 19已正式发布,下面本篇文章就来带大家详解了解一下Node.js 19的 6 大特性,希望对大家有所帮助!
 深入聊聊Node中的File模块
Apr 24, 2023 pm 05:49 PM
文件模块是对底层文件操作的封装,例如文件读写/打开关闭/删除添加等等 文件模块最大的特点就是所有的方法都提供的**同步**和**异步**两个版本,具有 sync 后缀的方法都是同步方法,没有的都是异
 聊聊如何选择一个最好的Node.js Docker镜像?
Dec 13, 2022 pm 08:00 PM
选择一个Node的Docker镜像看起来像是一件小事,但是镜像的大小和潜在漏洞可能会对你的CI/CD流程和安全造成重大的影响。那我们如何选择一个最好Node.js Docker镜像呢?
 node无法用npm命令怎么办
Feb 08, 2023 am 10:09 AM
node无法用npm命令是因为没有正确配置环境变量,其解决办法是:1、打开“系统属性”;2、找到“环境变量”->“系统变量”,然后编辑环境变量;3、找到nodejs所在的文件夹;4、点击“确定”即可。
 一起聊聊Node中的事件循环
Apr 11, 2023 pm 07:08 PM
事件循环是 Node.js 的基本组成部分,通过确保主线程不被阻塞来实现异步编程,了解事件循环对构建高效应用程序至关重要。下面本篇文章就来带大家深入了解Node中的事件循环 ,希望对大家有所帮助!


