响应式布局的简单案例介绍
响应式布局
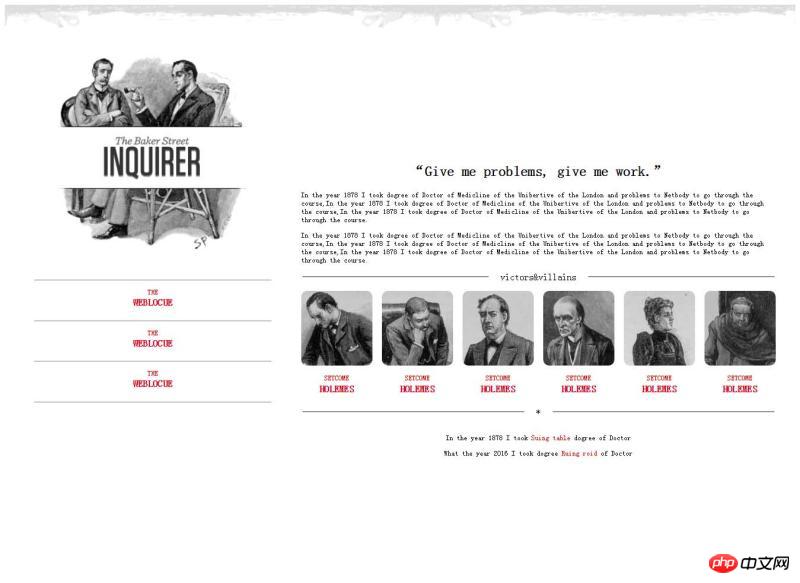
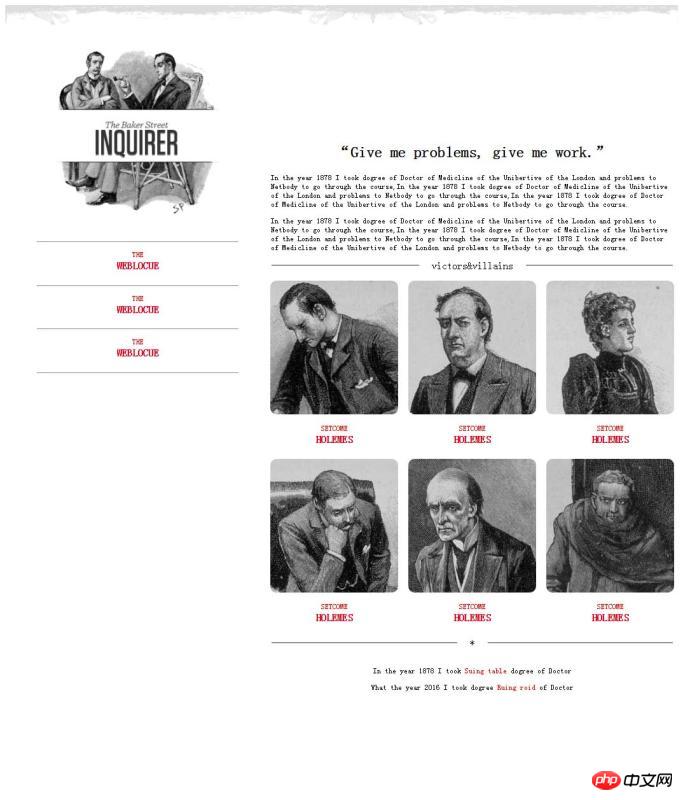
响应式布局在面对不同分辨率设备灵活性强,在平时的网页设计中基本上都要用到响应式布局设计,它给我们提供了良好的用户浏览页面,能带给我们更好的客户体验,下面给大家分享下我做的一个简单的响应式的布局:


不同的页面会适用不同大小浏览器页面,它会随着分辨率的变化而变化。代码展示如下:
<!DOCTYPE html>
<html>
<head>
<meta charset="utf-8" />
<title></title>
<style>
  p{
    font-size: 12px;
  }
  header{
    width: 100%;
  }
  header img{
    width: 100%;
  }
  @media (min-width: 1300px) and (max-width:1400px) {
    #left{
      float: left;
      width: 30%;
      margin: 0px 50px;
    }
    #left #logo-bg{
      margin: 10% 10%;
      width: 80%;
      position: relative;
    }
    #left #logo{
      float: left;
      width: 12%;
      position: absolute;
      left: 13%;
      top: 230px;
    }
    #left p{
      margin-bottom: -20px;
    }
    #left p,h4{
      text-align: center;
      color: red;
    }
    #right{
      float: left;
      width: 60%;
      margin: 15% 0px;
    }
    #right h2{
      text-align: center;
    }
    #right fieldset{
      text-align: center;
      border-left: none;
      border-right: none;
      border-bottom: none;
    }
    #right fieldset legend{
      padding: 0px 20px;
    }
    #fen{
      width: 100%;
      -webkit-column-count: 6;
      -moz-column-count: 6;
      -o-column-count: 6;
      -ms-column-count: 6;
      column-count: 6;
      -webkit-column-gap: 1em;
      -moz-column-gap: 1em;
      -o-column-gap: 1em;
      -ms-column-gap: 1em;
      column-gap: 1em;
    }
    #fen img{
      width: 100%;
      border-radius: 10px 10px 10px 10px;
    }
    #fen p,h4{
      text-align: center;
      color: red;
    }
    #fen p{
      margin-bottom: -20px;
    }
    #di p{
      text-align: center;
    }
    #di p span{
       color: red;
    }
  }
  @media (min-width: 1000px) and (max-width:1300px){
    #left{
      float: left;
      width: 30%;
      margin: 0px 50px;
    }
    #left #logo-bg{
      margin: 10% 10%;
      width: 80%;
      position: relative;
    }
    #left #logo{
      width: 12%;
      position: absolute;
      left: 14%;
      top: 190px;
    }
    #left p{
      margin-bottom: -20px;
    }
    #left p,h4{
      text-align: center;
      color: red;
    }
    #right{
      float: left;
      width: 60%;
      margin: 15% 0px;
    }
    #right h2{
      text-align: center;
    }
    #right fieldset{
      text-align: center;
      border-left: none;
      border-right: none;
      border-bottom: none;
    }
    #right fieldset legend{
      padding: 0px 20px;
    }
    #fen{
      width: 100%;
      -webkit-column-count: 3;
      -moz-column-count: 3;
      -o-column-count: 3;
      -ms-column-count: 3;
      column-count: 3;
      -webkit-column-gap: 1em;
      -moz-column-gap: 1em;
      -o-column-gap: 1em;
      -ms-column-gap: 1em;
      column-gap: 1em;
    }
    #fen img{
        width: 100%;
        border-radius: 10px 10px 10px 10px;
    }
    #fen p,h4{
        text-align: center;
        color: red;
      }
    #fen p{
        margin-bottom: -20px;
    }
    #di p{
      text-align: center;
    }
    #di p span{
      color: red;
    }
  }
</style>
</head>
<body>
  <header>
    <img src="img/rag.png" />
  </header>
  <aside id="left">
    <img src="img/logo-bg.png" id="logo-bg"/>
    <img src="img/logo.png" id="logo" />
    <hr />
    <p>THE</p>
    <h4>WEBLOCUE</h4>
    <hr />
    <p>THE</p>
    <h4>WEBLOCUE</h4>
    <hr />
    <p>THE</p>
    <h4>WEBLOCUE</h4>
    <hr />
  </aside>
  <article id="right">
    <h2>“Give me problems, give me work.”</h2>
    <p>In the year 1878 I took dogree of Doctor of Medicline of the Unibertive of the London and problems to Netbody to go through the course,In the year 1878 I took dogree of Doctor of Medicline of the Unibertive of the London and problems to Netbody to go through the course,In the year 1878 I took dogree of Doctor of Medicline of the Unibertive of the London and problems to Netbody to go through the course.</p>
    <p>In the year 1878 I took dogree of Doctor of Medicline of the Unibertive of the London and problems to Netbody to go through the course,In the year 1878 I took dogree of Doctor of Medicline of the Unibertive of the London and problems to Netbody to go through the course,In the year 1878 I took dogree of Doctor of Medicline of the Unibertive of the London and problems to Netbody to go through the course.</p>
    <fieldset><legend>victors</legend></fieldset>
    <p id="fen">
      <img src="img/1.jpg" />
      <p>SETCOME</p>
      <h4>HOLEMES</h4>
      <img src="img/2.jpg" />
      <p>SETCOME</p>
      <h4>HOLEMES</h4>
      <img src="img/3.jpg" />
      <p>SETCOME</p>
      <h4>HOLEMES</h4>
      <img src="img/4.jpg" />
      <p>SETCOME</p>
      <h4>HOLEMES</h4>
      <img src="img/5.jpg" />
      <p>SETCOME</p>
      <h4>HOLEMES</h4>
      <img src="img/6.jpg" />
      <p>SETCOME</p>
      <h4>HOLEMES</h4>
    </p>
    <fieldset><legend>*</legend></fieldset>
    <p id="di">
      <p>In the year 1878 I took <span>Suing table</span> dogree of Doctor</p>
      <p>What the year 2016 I took dogree <span>Ruing roid</span> of Doctor</p>
    </p>
  </article>
</body>
</html>做的不够严谨,因为时间问题,请见谅。
以上这篇响应式布局的简单案例就是小编分享给大家的全部内容了,希望能给大家一个参考,也希望大家多多支持PHP中文网。
更多响应式布局的简单案例介绍相关文章请关注PHP中文网!

热AI工具

Undresser.AI Undress
人工智能驱动的应用程序,用于创建逼真的裸体照片

AI Clothes Remover
用于从照片中去除衣服的在线人工智能工具。

Undress AI Tool
免费脱衣服图片

Clothoff.io
AI脱衣机

Video Face Swap
使用我们完全免费的人工智能换脸工具轻松在任何视频中换脸!

热门文章

热工具

记事本++7.3.1
好用且免费的代码编辑器

SublimeText3汉化版
中文版,非常好用

禅工作室 13.0.1
功能强大的PHP集成开发环境

Dreamweaver CS6
视觉化网页开发工具

SublimeText3 Mac版
神级代码编辑软件(SublimeText3)
 如何使用HTML和CSS创建一个响应式博客列表布局
Oct 21, 2023 am 10:00 AM
如何使用HTML和CSS创建一个响应式博客列表布局在当今的数字时代,博客已经成为了人们分享自己观点和经验的重要平台。而为了吸引更多读者,一个漂亮且响应式的博客列表布局是至关重要的。在本文中,我们将学习如何使用HTML和CSS创建一个简单而又实用的响应式博客列表布局。首先,我们需要准备一些基本的HTML代码。以下是一个简单的博客列表布局的HTML结构:<
 响应式布局设计的单位选择指南
Jan 27, 2024 am 08:26 AM
随着移动设备的普及和技术的发展,响应式布局成为了设计师们必备的技能之一。响应式布局旨在为不同尺寸的屏幕提供最佳的用户体验,让网页在不同设备上都能自动调整布局,保证内容的可读性和可用性。选择合适的单位是响应式布局设计的关键步骤之一。本文将介绍一些常用的单位,并提供选择单位的建议。像素(px):像素是屏幕上的最小单位,它是一种绝对单位,不会随屏幕尺寸的改变而自动
 如何使用HTML和CSS创建一个响应式博客布局
Oct 21, 2023 am 10:54 AM
如何使用HTML和CSS创建一个响应式博客布局在当今互联网时代,博客已经成为人们分享知识、经验和故事的重要平台。设计一个吸引人且具有响应式布局的博客,可以让你的内容更好地展示在不同尺寸和设备上,提升用户体验。本文将介绍如何使用HTML和CSS来创建一个响应式博客布局,同时提供具体的代码示例。一、HTML结构首先,我们需要搭建博客的基本HTML结构。以下是一个
 探究最佳响应式布局框架:竞争激烈!
Feb 19, 2024 pm 05:19 PM
响应式布局框架大比拼:谁是最佳选择?随着移动设备的普及和多样化,网页的响应式布局变得越来越重要。为了满足用户的不同设备和屏幕尺寸,在设计和开发网页时采用响应式布局框架是必不可少的。然而,面对众多的框架选择,我们不禁要问:哪个是最佳选择?以下将对目前比较流行的三种响应式布局框架进行比较评价,它们分别是Bootstrap、Foundation和Tailwind
 HTML的响应式布局设计指南之实现方法
Jan 27, 2024 am 08:26 AM
如何利用HTML实现响应式布局设计随着移动设备的普及和互联网的快速发展,响应式布局成为了设计师必备的技能。响应式布局可以让网站在不同的设备上自动适应不同的屏幕尺寸和分辨率,使用户可以获得更好的浏览体验。本文将介绍如何利用HTML实现响应式布局设计,并提供具体的代码示例。使用@media查询@media查询是CSS3中的一个功能,它可以根据不同的媒体条件来应用
 CSS布局教程:实现两栏响应式布局的最佳方法
Oct 18, 2023 am 11:04 AM
CSS布局教程:实现两栏响应式布局的最佳方法简介:在网页设计中,响应式布局是一种非常重要的技术,它能使网页根据用户设备的屏幕大小和分辨率自动调整布局,提供更好的用户体验。在本教程中,我们将介绍如何使用CSS来实现一个简单的两栏响应式布局,并提供具体的代码示例。一、HTML结构:首先,我们需要创建一个基本的HTML结构,如下所示:<!DOCTYPEht
 响应式布局中使用HTML固定定位的实用技巧
Jan 20, 2024 am 09:55 AM
HTML固定定位在响应式布局中的应用技巧,需要具体代码示例随着移动设备的普及和用户对响应式布局的需求增加,开发人员在网页设计中遇到了更多的挑战。其中一个关键问题就是如何实现固定定位,以确保在不同屏幕尺寸下,元素能够固定在页面的特定位置。本文将介绍HTML固定定位在响应式布局中的应用技巧,并提供具体代码示例。HTML中的固定定位是通过CSS的position属
 如何使用HTML和CSS创建一个响应式相册展示布局
Oct 19, 2023 am 08:51 AM
如何使用HTML和CSS创建一个响应式相册展示布局相册展示布局是网站中常见的一种页面布局类型,可以用于展示图片、照片、图像等内容。在今天移动设备普及的环境下,一个好的相册展示布局需要具备响应式设计,能够适应不同尺寸的屏幕,并且在不同设备上具有良好的显示效果。本文将介绍如何使用HTML和CSS来创建一个响应式相册展示布局,并提供具体的代码示例。希望读者能通过示


