

详细介绍webpack实用配置

前面的话
上文介绍了webpack入门,本文将详细介绍webpack实用配置
版本号
以entry.js打包为bundle.js为例,出口的filename可以设置为[id]、[name]、[hash]、[chunkhash]等替换形式,如下所示
1 2 3 4 5 |
|
则出口文件为0-main-0c1dce21f6c5db455fb4.js

如果index.html要引用打包后的js文件,由于文件名称不确定,并不好解决。这时,就需要使用html-webpack-plugin插件。该插件并不是内置插件,所以需要安装
1 |
|
HtmlWebpackPlugin简化了HTML文件的创建,以便为webpack包提供服务。这对于在文件名中包含每次会随着变异会发生变化的哈希的webpack bundle尤其有用
1 2 3 4 5 6 7 8 |
|
通过以上的配置,如果在当前路径,index.html不存在,则生成;如果存在,则替换

[注意]如果htmlwebpackplugin不进行配置,参数为空, plugins: [new HtmlWebpackPlugin()]。默认地,生成的html文件名称为'index.html',标题为'Webpack APP'

【标签位置】
htmlwebpackplugin插件的常用设置是设置script标签插入的位置,默认插入到body标签中,但可以使用inject:'head',设置插入到head标签中
1 2 3 4 5 6 7 8 |
|
【图标设置】
设置favicon属性,可以设置网页的小图标
1 2 3 4 5 6 7 8 |
|

【压缩】
设置minify属性,可以压缩html文件,默认为false,即不压缩
1 2 3 4 5 6 7 8 9 10 |
|
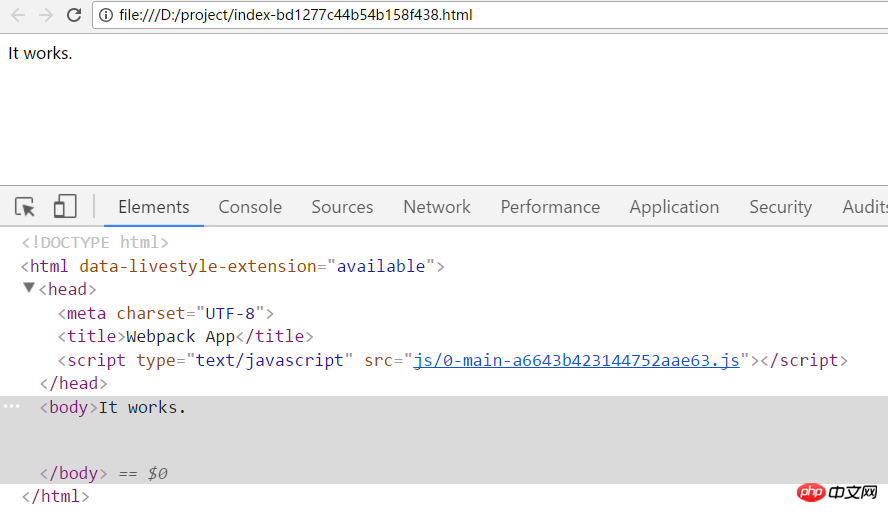
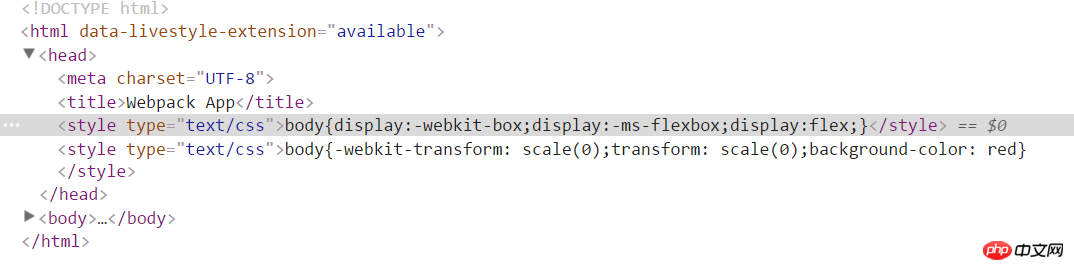
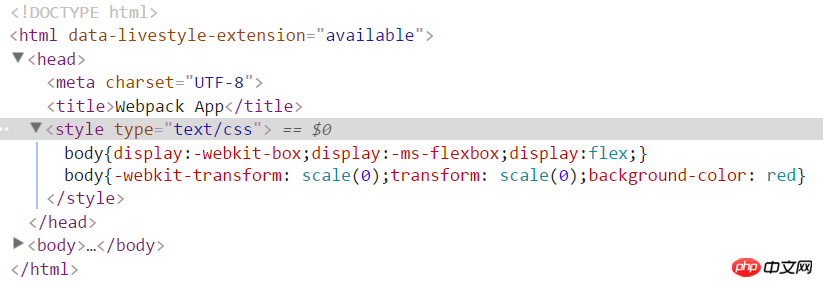
使用webpack打包后的index.html代码如下
1 |
|
模板文件
HtmlWebpackPlugin除了提供模块版本号的功能,还可以使用模板文件
例如,模板文件为template.html,内容如下
1 2 3 4 5 6 7 8 9 10 11 |
|
webpack配置文件如下
1 2 3 4 5 6 7 |
|
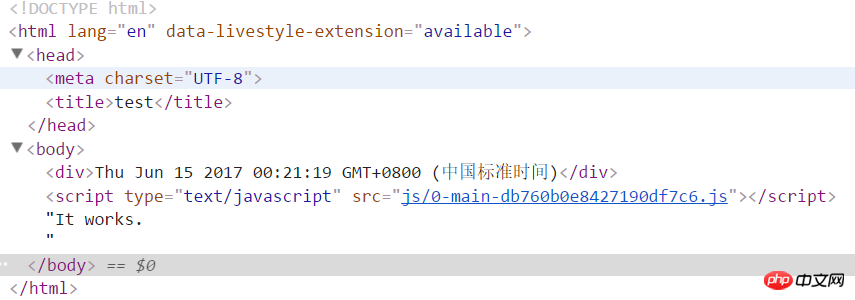
生成的index-[hash].html以'template.html'文件为模板

[注意]如果在htmlwebpackplugin中使用了模板,则指定title不会生效,因为要以模板的title为准
1 2 3 4 5 6 7 8 9 |
|

【传参】
模块文件当然是可以传参的,一般地,使用ejs语法。例如,在模板文件中,使用<%= htmlWebpackPlugin.options.title %>,即可读取htmlWebpackPlugin插件中'title'属性的值
[注意]模板文件中的'htmlWebpackPlugin'是固定的,不能随意更改。与webpack.config.js文件中,require()该插件的命名无关
1 2 3 4 5 6 7 8 9 10 11 12 13 14 15 16 17 18 19 |
|
【模板组件】
下面利用模板组件组合成一个html文件,以ejs模板语言为例
1 2 3 4 5 6 7 8 9 10 11 12 13 14 15 16 17 18 19 20 21 22 23 24 25 26 27 28 |
|
运行结果报错,提示子模板加载失败
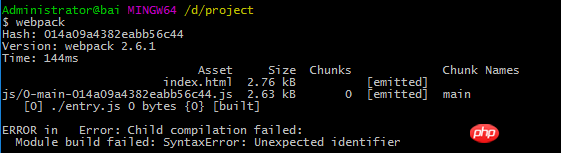
这是因为HtmlWebpackPlugin插件并不具备ejs模板语言所有的功能,其中一个就是不能识别<%include %>语句,这时需要安装一个ejs-compiled-loader
1 |
|
安装完成后,修改配置文件如下,表示使用ejs-compiled-loader来编译template.html
[注意]该插件中的include路径相对于webpack配置文件的位置,而不是模板文件template.html的位置
1 2 3 4 5 6 7 8 |
|
结果如下

多页面
对于多页面来说,一般地,有多个入口文件。不同的html页面输出对应不同的入口文件。 插件plugins()是一个数组,每new一个HtmlWebpackPlugin(),就可以输出一个html页面。这里有两个重要的属性:chunks和excludeChunks,chunks表示所包含的入口文件,excludeChunks表示要排除的入口文件
1 2 3 4 5 6 7 8 9 10 11 12 13 14 15 16 17 18 19 20 21 22 23 24 25 26 27 |
|
结果如下
1 |
|
内联
在前面的例子中,都是以链接的形式引入入口文件的。有时,为了追求性能,会将其处理为内联的形式。这里就需要安装一个扩展插件html-webpack-inline-source-plugin,专门用来处理入口文件内联的
1 |
|
该插件的使用很简单,使用require()语句引入后,在插件plugins()新建一个html-webpack-inline-source-plugin对象,然后在html-webpack-plugin对象中添加inlineSource属性即可
1 |
|
1 2 3 4 5 6 7 8 9 10 |
|
结果如下
1 2 3 4 5 6 7 8 9 10 11 |
|
babel
下面使用babel来进行es最新标准的代码向es5代码的转换,首先需要安装babel核心程序,及babel-loader
1 |
|
在使用babel-loader进行代码转换之前,要先了解到ecmascript标准变化很快,且浏览器支持情况不同。所以,出现了'es2015'、'es2016'、'es2017'、'latest'、'env(new)'等多个不同的标准。这时,要需要来选择从哪个标准进行转换,需要安装插件babel-preset-env
1 |
|
在 webpack 配置对象中,需要添加 babel-loader 到 module 的 loaders 列表中
1 2 3 4 5 6 7 8 9 10 11 12 13 14 15 16 17 18 19 20 |
|
1 2 |
|
【打包速度】
运行后,页面控制台输出1,转换正常。但是,babel的转换过程却很慢

前面的博文webpack的四个基本概念,我们介绍过loader的test属性表示该loader必须满足的条件,上面代码中使用/\.js$/ 来匹配,这样也许会去转译 node_modules 目录或者其他不需要的源代码。这样会大大增加webpack的编译时间
要排除 node_modules,就要使用 loaders 配置的 exclude 选项,表示哪些除外,exclude:/node_modules/
[注意]exclude也应该用正则的形式,如果用__dirname +'/node_modules'的形式则不会生效
1 2 3 4 5 6 7 8 9 10 11 12 13 14 15 16 17 18 19 20 21 |
|

当然了,除了exclude选项,也有include选项,能够明确被打包的文件时,使用include将使打包速度更快
对于include来说,它比较特别,字符串形式__dirname + './src/'和正则形式/\.\/src/都支持,经过测试,这两种形式的打包速度类似
1 2 3 4 5 6 7 8 9 10 11 12 13 14 15 16 17 18 19 20 21 |
|

CSS
在webpack入门博文中由介绍过CSS插件的简单使用,接下来将详细介绍
首先,要安装css-loader和style-loader,css-loader用于读取并加载css文件,style-loader将它插入到页面中
[特别注意]在处理css时,最好不要使用include、exclude等属性。include、exclude属性是加快babel转换速度的,和css没什么关系,而且会添乱
1 |
|
1 2 3 4 5 6 7 8 9 10 11 12 13 14 15 |
|
效果如下

【自动前缀】
页面加载CSS往往并不像上面的情况这么简单,需要处理很多问题,其中一个就是浏览器前缀问题。对于某些属性来说,比如transform,不同浏览器的版本对其支持程度不同,浏览器前缀也不同。这时,就需要能够根据实际情况,自动增加前缀,而postcss-loader就是这样的工具,而且功能要强大的多
首先,先安装postcss-loader
1 |
|
然后,安装postcss的自动前缀的插件autoprefixer
1 |
|
配置如下
1 2 3 4 5 6 7 8 9 10 11 12 13 14 15 16 17 18 19 20 21 |
|
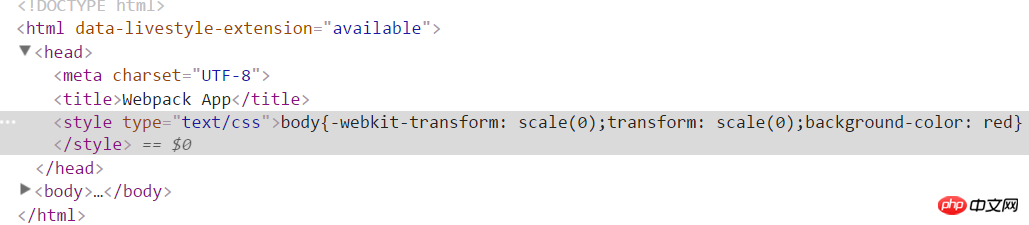
结果如下
如果css文件中出现@import,则有两种处理方式,一种是将postcss文件单独写成配置文件postcss.config.js
1 2 3 4 5 6 7 8 9 10 11 12 13 14 15 16 17 18 19 20 21 22 |
|
结果如下
另一种需要安装postcss-import插件
1 |
|
1 2 3 4 5 6 7 8 9 10 11 12 13 14 15 16 17 18 19 20 21 22 23 24 25 26 27 28 29 |
|
结果如下
【sass】
首先,需要安装sass-loader及node-sass
[注意]关于node-sass安装的问题移步至此
1 |
|
由于sass-loader中已经自带了关于@import处理的问题。所以,不需要css-loader及postcss-loader的额外处理
1 2 3 4 5 6 7 8 9 10 11 12 13 14 15 16 17 18 19 20 21 22 23 24 25 26 27 |
|
结果如下

【分离CSS】
默认地,CSS作为模块资源被打包到入口js文件中。有时,需要把CSS文件分离出来,这时就需要用到extract-text-webpack-plugin插件
1 |
|
该插件的配置如下
1 2 3 4 5 6 7 8 9 10 11 12 13 14 15 16 17 18 19 20 21 22 23 |
|
结果如下,该插件将入口文件中引用的 *.css,移动到独立分离的 CSS 文件。因此,你的样式将不再内嵌到 JS bundle 中,而是会放到一个单独的 CSS 文件(即 styles.css)当中。 如果样式文件大小较大,这会做更快提前加载,因为 CSS bundle 会跟 JS bundle 并行加载

图片资源
webpack在处理图片、音乐、电影等资源文件时,需要使用file-loader
1 |
|
默认情况下,使用file-loader生成的文件的文件名就是文件内容的MD5哈希值并保留原始扩展名
以引入图片资源例,有以下几种情况
1、通过css文件的background属性引入
1 2 3 4 5 6 7 8 9 10 11 12 13 14 15 16 17 18 19 |
|
结果如下

2、通过模板html文件img标签引入,这时需要使用${require('')}将相对路径包裹一次
1 2 3 4 5 6 7 8 9 10 11 12 13 14 15 16 17 18 19 20 21 22 23 24 25 26 27 28 |
|
结果如下

3、若模板使用ejs-compiled-loader插件,则无法使用${require('')}语句,需要使用HtmlWebpackPlugin传参来构造绝对路径
1 2 3 4 5 6 7 8 9 10 11 12 13 14 15 16 17 18 19 20 21 22 23 24 25 26 27 28 29 30 31 32 |
|
结果如下

【file-loader参数】
文件名模板占位符有如下几种
1 2 3 4 5 6 7 8 9 |
|
1 2 3 4 5 6 7 8 |
|
或者
1 2 3 4 |
|
结果如下

【url-loader】
url-loader功能类似于file-loader,但是在文件大小(单位byte)低于指定的限制时,可以返回一个dataURL
可以通过传递查询参数(query parameter)来指定限制(默认为不限制)。
如果文件大小超过限制,将转为使用 file-loader,所有的查询参数也会传过去
1 |
|
图片的大小为1.1kb,下面将限制设置为2000,则图片将以base64格式传递
1 2 3 4 |
|
结果如下

如果将限制大小设置为1000,图片以src的形式传递
1 2 3 4 5 6 7 8 9 |
|

【image-webpack-loader】
使用image-webpack-loader来压缩图片
1 |
|
插件一张大小为4.1kb的名称为'm.jpg'的图片,配置如下
1 2 3 4 5 |
|
结果如下所示,生成大小为3.28kb,名称为'm-c7083.jpg'的图片

实用配置
下面将使用webpack搭建一个实用的开发环境
1 2 3 4 5 6 7 8 9 10 11 12 13 14 15 16 17 18 19 20 21 22 23 24 25 26 27 28 29 30 31 32 33 |
|
以上是详细介绍webpack实用配置的详细内容。更多信息请关注PHP中文网其他相关文章!

热AI工具

Undresser.AI Undress
人工智能驱动的应用程序,用于创建逼真的裸体照片

AI Clothes Remover
用于从照片中去除衣服的在线人工智能工具。

Undress AI Tool
免费脱衣服图片

Clothoff.io
AI脱衣机

Video Face Swap
使用我们完全免费的人工智能换脸工具轻松在任何视频中换脸!
热门文章
热工具

记事本++7.3.1
好用且免费的代码编辑器

SublimeText3汉化版
中文版,非常好用

禅工作室 13.0.1
功能强大的PHP集成开发环境

Dreamweaver CS6
视觉化网页开发工具

SublimeText3 Mac版
神级代码编辑软件(SublimeText3)


 Linux系统中GDM的工作原理及配置方法
Mar 01, 2024 pm 06:36 PM
Linux系统中GDM的工作原理及配置方法
Mar 01, 2024 pm 06:36 PM
标题:Linux系统中GDM的工作原理及配置方法在Linux操作系统中,GDM(GNOMEDisplayManager)是一种常见的显示管理器,用于控制图形用户界面(GUI)登录和用户会话管理。本文将介绍GDM的工作原理和配置方法,以及提供具体的代码示例。一、GDM的工作原理GDM是GNOME桌面环境下的显示管理器,负责启动X服务器并提供登录界面,用户输
 PyCharm新手指南:学会在PyCharm中删除项目
Feb 23, 2024 pm 09:39 PM
PyCharm新手指南:学会在PyCharm中删除项目
Feb 23, 2024 pm 09:39 PM
PyCharm新手指南:删除项目的实用技巧PyCharm是一款功能强大的Python集成开发环境(IDE),在进行项目开发时,有时候需要删除项目或项目中的文件。本文将介绍在PyCharm中删除项目的实用技巧,并提供具体的代码示例帮助新手更好地理解和应用。1.删除项目删除项目意味着删除整个项目文件夹,这在我们需要清理或重建项目时非常有用。在PyCharm中删
 全角英文字母转换为半角形式的实用技巧
Mar 26, 2024 am 09:54 AM
全角英文字母转换为半角形式的实用技巧
Mar 26, 2024 am 09:54 AM
全角英文字母转换为半角形式的实用技巧在现代生活中,我们经常会接触到英文字母,在使用电脑、手机等设备时也经常需要输入英文字母。然而,有时候我们会遇到全角英文字母的情况,而我们需要使用的是半角形式。那么,如何将全角英文字母转换为半角形式呢?下面就为大家介绍一些实用的技巧。首先,全角英文字母和数字是指在输入法中占据一个全角位置的字符,而半角英文字母和数字则是占据一
 了解Linux Bashrc:功能、配置与使用方法
Mar 20, 2024 pm 03:30 PM
了解Linux Bashrc:功能、配置与使用方法
Mar 20, 2024 pm 03:30 PM
了解LinuxBashrc:功能、配置与使用方法在Linux系统中,Bashrc(BourneAgainShellruncommands)是一个非常重要的配置文件,其中包含了系统启动时自动运行的各种命令和设置。Bashrc文件通常位于用户的家目录下,是一个隐藏文件,它的作用是为用户自定义设置Bashshell的环境。一、Bashrc的功能设置环境
 win11系统如何配置工作组
Feb 22, 2024 pm 09:50 PM
win11系统如何配置工作组
Feb 22, 2024 pm 09:50 PM
Win11系统如何配置工作组工作组是一种在局域网中连接多台计算机的方式,它允许计算机之间共享文件、打印机和其他资源。在Win11系统中,配置工作组非常简单,只需按照以下步骤操作即可。步骤1:打开“设置”应用程序首先,点击Win11系统的“开始”按钮,然后在弹出的菜单中选择“设置”应用程序。你也可以使用快捷键“Win+I”打开“设置”。步骤2:选择“系统”在“设置”应用程序中,你会看到多个选项。请点击“系统”选项,进入系统设置页面。步骤3:选择“关于”在“系统”设置页面中,你会看到多个子选项。请点
 Linux系统中如何配置和安装FTPS
Mar 20, 2024 pm 02:03 PM
Linux系统中如何配置和安装FTPS
Mar 20, 2024 pm 02:03 PM
标题:Linux系统中如何配置和安装FTPS,需要具体代码示例在Linux系统中,FTPS是一种安全的文件传输协议,与FTP相比,FTPS通过TLS/SSL协议对传输的数据进行加密,提高了数据传输的安全性。在本文中,将介绍如何在Linux系统中配置和安装FTPS,并提供具体的代码示例。步骤一:安装vsftpd打开终端,输入以下命令安装vsftpd:sudo
 MyBatis Generator配置参数解读及最佳实践
Feb 23, 2024 am 09:51 AM
MyBatis Generator配置参数解读及最佳实践
Feb 23, 2024 am 09:51 AM
MyBatisGenerator是MyBatis官方提供的一个代码生成工具,可以帮助开发人员快速生成符合数据库表结构的JavaBean、Mapper接口以及XML映射文件。在使用MyBatisGenerator进行代码生成的过程中,配置参数的设置是至关重要的。本文将从配置参数的角度出发,深入探讨MyBatisGenerator的
 CentOS7系统安装和配置 DRBD?实现高可用性和数据冗余教程!
Feb 22, 2024 pm 02:13 PM
CentOS7系统安装和配置 DRBD?实现高可用性和数据冗余教程!
Feb 22, 2024 pm 02:13 PM
DRBD(DistributedReplicatedBlockDevice)是一种用于实现数据冗余和高可用性的开源解决方案。下面是在CentOS7系统上安装和配置DRBD的教程:安装DRBD:打开终端并以管理员身份登录到CentOS7系统。运行以下命令以安装DRBD软件包:sudoyuminstalldrbd配置DRBD:编辑DRBD配置文件(通常位于/etc/drbd.d目录下),配置DRBD资源的设置。例如,可以定义主节点和备份节点的IP地址、端口和设备等。确保主节点和备份节点之间可以通过网
