

web.config 配置文件示例详解
这篇文章主要给大家介绍了关于.NET Core 2.0迁移技巧之web.config 配置文件的相关资料,文中通过示例代码介绍的非常详细,对大家的学习或者工作具有一定的参考学习价值,需要的朋友们下面跟着小编来一起学习学习吧。
前言
相信大家应该都知道.NET Core现在不再支持原来的web.config配置文件了,取而代之的是json或xml配置文件。官方推荐的项目配置方式是使用appsettings.json配置文件,这对现有一些重度使用web.cofig配置的项目迁移可能是不可接受的。
但是好消息是,我们是可以直接在.NET Core 2.0项目种利用上现有的web.config的。本文将详细介绍.NET Core 2.0迁移之web.config 配置文件的相关内容,下面话不多说了,来一起看看详细的介绍吧。
迁移方法
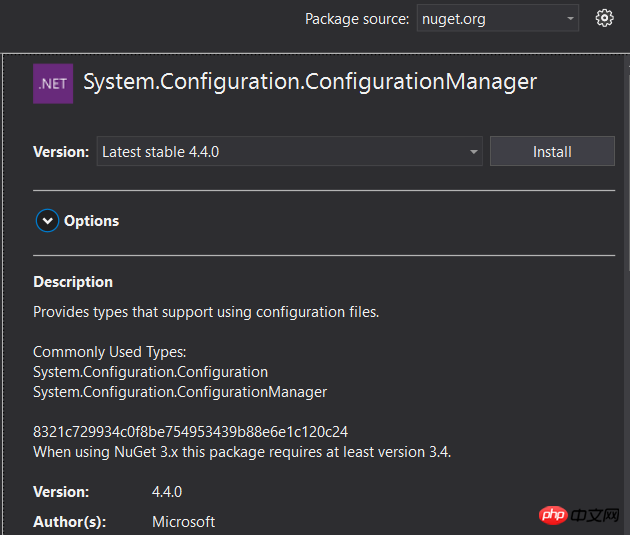
1.首先在解决方案中引入System.Configuration.ConfigurationManager,只有引入它才可以让我们已有的读取web.config代码起作用.
2. 导入web.config文件到项目根目录,并将名称修改为app.config. 因为.NET Core的项目本质是控制台应用,所以ConfigurationManager的API会去默认读取app.config配置文件,而不是web.config配置文件。

3.去除config中和需要的配置无关的内容,主要是<system.web> , <system.webServer>和<system.codedom>等典型asp.net标签。
移除前:
<?xml version="1.0" encoding="utf-8"?>
<configuration> <configSections> <!-- For more information on Entity Framework configuration, visit http://go.microsoft.com/fwlink/?LinkID=237468 --> <section name="entityFramework" type="System.Data.Entity.Internal.ConfigFile.EntityFrameworkSection, EntityFramework, Version=6.0.0.0, Culture=neutral, PublicKeyToken=b77a5c561934e089" requirePermission="false" /> </configSections> <connectionStrings> <add name="DefaultConnection" connectionString="Data Source=(LocalDb)\MSSQLLocalDB;AttachDbFilename=|DataDirectory|\aspnet-WebApplication24-20170824065102.mdf;Initial Catalog=aspnet-WebApplication24-20170824065102;Integrated Security=True"
 providerName="System.Data.SqlClient" /> </connectionStrings>
 <appSettings>
 <add key="webpages:Version" value="3.0.0.0" />
 <add key="webpages:Enabled" value="false" />
 <add key="ClientValidationEnabled" value="true" />
 <add key="UnobtrusiveJavaScriptEnabled" value="true" />
 <add key="MyKey" value="true"/>
 </appSettings>
 <system.web>
 <compilation debug="true" targetFramework="4.7" />
 <httpRuntime targetFramework="4.7" />
 <httpModules>
 <add name="ApplicationInsightsWebTracking" type="Microsoft.ApplicationInsights.Web.ApplicationInsightsHttpModule, Microsoft.AI.Web" />
 </httpModules>
 </system.web>
 <runtime>
 <assemblyBinding xmlns="urn:schemas-microsoft-com:asm.v1">
 <dependentAssembly>
 <assemblyIdentity name="Newtonsoft.Json" culture="neutral" publicKeyToken="30ad4fe6b2a6aeed" />
 <bindingRedirect oldVersion="0.0.0.0-6.0.0.0" newVersion="6.0.0.0" />
 </dependentAssembly>
 <dependentAssembly>
 <assemblyIdentity name="System.Web.Optimization" publicKeyToken="31bf3856ad364e35" />
 <bindingRedirect oldVersion="1.0.0.0-1.1.0.0" newVersion="1.1.0.0" />
 </dependentAssembly>
 <dependentAssembly>
 <assemblyIdentity name="WebGrease" publicKeyToken="31bf3856ad364e35" />
 <bindingRedirect oldVersion="0.0.0.0-1.5.2.14234" newVersion="1.5.2.14234" />
 </dependentAssembly>
 <dependentAssembly>
 <assemblyIdentity name="System.Web.Helpers" publicKeyToken="31bf3856ad364e35" />
 <bindingRedirect oldVersion="1.0.0.0-3.0.0.0" newVersion="3.0.0.0" />
 </dependentAssembly>
 <dependentAssembly>
 <assemblyIdentity name="System.Web.WebPages" publicKeyToken="31bf3856ad364e35" />
 <bindingRedirect oldVersion="1.0.0.0-3.0.0.0" newVersion="3.0.0.0" />
 </dependentAssembly>
 <dependentAssembly>
 <assemblyIdentity name="System.Web.Mvc" publicKeyToken="31bf3856ad364e35" />
 <bindingRedirect oldVersion="1.0.0.0-5.2.3.0" newVersion="5.2.3.0" />
 </dependentAssembly>
 </assemblyBinding>
 </runtime>
 <system.webServer>
 <validation validateIntegratedModeConfiguration="false" />
 <modules>
 <remove name="ApplicationInsightsWebTracking" />
 <add name="ApplicationInsightsWebTracking" type="Microsoft.ApplicationInsights.Web.ApplicationInsightsHttpModule, Microsoft.AI.Web" preCondition="managedHandler" />
 </modules>
 </system.webServer>
 <system.codedom>
 <compilers>
 <compiler language="c#;cs;csharp" extension=".cs" type="Microsoft.CodeDom.Providers.DotNetCompilerPlatform.CSharpCodeProvider, Microsoft.CodeDom.Providers.DotNetCompilerPlatform, Version=1.0.5.0, Culture=neutral, PublicKeyToken=31bf3856ad364e35" warningLevel="4" compilerOptions="/langversion:default /nowarn:1659;1699;1701" />
 <compiler language="vb;vbs;visualbasic;vbscript" extension=".vb" type="Microsoft.CodeDom.Providers.DotNetCompilerPlatform.VBCodeProvider, Microsoft.CodeDom.Providers.DotNetCompilerPlatform, Version=1.0.5.0, Culture=neutral, PublicKeyToken=31bf3856ad364e35" warningLevel="4" compilerOptions="/langversion:default /nowarn:41008 /define:_MYTYPE=\"Web\" /optionInfer+" />
 </compilers>
 </system.codedom>
</configuration>
修改后:
<?xml version="1.0" encoding="utf-8"?>
<configuration>
 <configSections>
 <!-- For more information on Entity Framework configuration, visit http://go.microsoft.com/fwlink/?LinkID=237468 -->
 <section name="entityFramework" type="System.Data.Entity.Internal.ConfigFile.EntityFrameworkSection, EntityFramework, Version=6.0.0.0, Culture=neutral, PublicKeyToken=b77a5c561934e089" requirePermission="false" />
 </configSections>
 <connectionStrings>
 <add name="DefaultConnection" connectionString="Data Source=(LocalDb)\MSSQLLocalDB;AttachDbFilename=|DataDirectory|\aspnet-WebApplication24-20170824065102.mdf;Initial Catalog=aspnet-WebApplication24-20170824065102;Integrated Security=True"
 providerName="System.Data.SqlClient" />
 </connectionStrings>
 <appSettings>
 <add key="webpages:Version" value="3.0.0.0" />
 <add key="webpages:Enabled" value="false" />
 <add key="ClientValidationEnabled" value="true" />
 <add key="UnobtrusiveJavaScriptEnabled" value="true" />
 <add key="MyKey" value="true"/>
 </appSettings>
</configuration>
4.测试原ASP.NET代码,查看读取配置值
using System.Configuration;

namespace WebConfigTest.Configuration
{
 public class ConfigurationService
 {
 public static bool GetConfigValue(string key)
 {
 var result = false;
 var val= ConfigurationManager.AppSettings[key];
 if (val != null)
 {
 result = bool.Parse(val);
 }
 return result;
 }
 }
}打个断点,看下读取配置值是否正确:
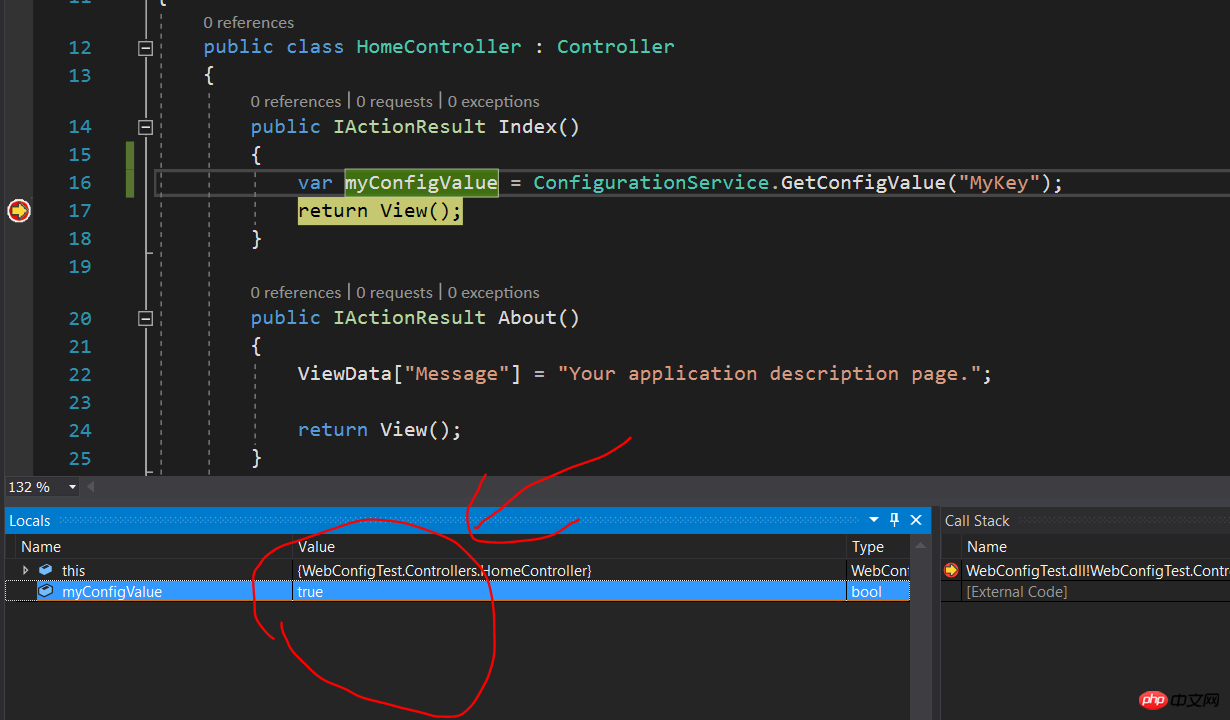
大功告成,读取的配置值完全正确。
大家可以使用这个方法快速迁移现有配置文件和代码过去啦。
以上是web.config 配置文件示例详解的详细内容。更多信息请关注PHP中文网其他相关文章!

热AI工具

Undresser.AI Undress
人工智能驱动的应用程序,用于创建逼真的裸体照片

AI Clothes Remover
用于从照片中去除衣服的在线人工智能工具。

Undress AI Tool
免费脱衣服图片

Clothoff.io
AI脱衣机

Video Face Swap
使用我们完全免费的人工智能换脸工具轻松在任何视频中换脸!

热门文章
热工具

记事本++7.3.1
好用且免费的代码编辑器

SublimeText3汉化版
中文版,非常好用

禅工作室 13.0.1
功能强大的PHP集成开发环境

Dreamweaver CS6
视觉化网页开发工具

SublimeText3 Mac版
神级代码编辑软件(SublimeText3)


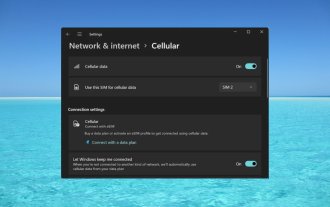 如何在 Windows 11 上启用或禁用 eSIM
Sep 20, 2023 pm 05:17 PM
如何在 Windows 11 上启用或禁用 eSIM
Sep 20, 2023 pm 05:17 PM
如果你从移动运营商处购买了笔记本电脑,则很可能可以选择激活eSIM并使用手机网络将计算机连接到Internet。有了eSIM,您无需将另一张物理SIM卡插入笔记本电脑,因为它已经内置。当您的设备无法连接到网络时,它非常有用。如何检查我的Windows11设备是否兼容eSIM卡?单击“开始”按钮,然后转到“网络和互联网”>“蜂窝>设置”。如果您没有看到“蜂窝移动网络”选项,则您的设备没有eSIM功能,您应该选中其他选项,例如使用移动设备将笔记本电脑连接到热点。为了激活和
 超全!Python中常见的配置文件写法
Apr 11, 2023 pm 10:22 PM
超全!Python中常见的配置文件写法
Apr 11, 2023 pm 10:22 PM
为什么要写配置文件这个固定文件我们可以直接写成一个 .py 文件,例如 settings.py 或 config.py,这样的好处就是能够在同一工程下直接通过 import 来导入当中的部分;但如果我们需要在其他非 Python 的平台进行配置文件共享时,写成单个 .py 就不是一个很好的选择。这时我们就应该选择通用的配置文件类型来作为存储这些固定的部分。目前常用且流行的配置文件格式类型主要有 ini、json、toml、yaml、xml 等,这些类型的配置文件我们都可以通过标准库或第三方库来进
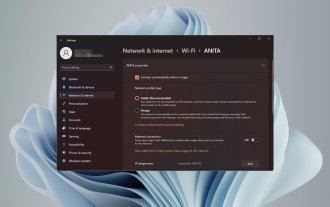 如何在 Windows 11 中更改网络类型为专用或公共
Aug 24, 2023 pm 12:37 PM
如何在 Windows 11 中更改网络类型为专用或公共
Aug 24, 2023 pm 12:37 PM
设置无线网络很常见,但选择或更改网络类型可能会令人困惑,尤其是在您不知道后果的情况下。如果您正在寻找有关如何在Windows11中将网络类型从公共更改为私有或反之亦然的建议,请继续阅读以获取一些有用的信息。Windows11中有哪些不同的网络配置文件?Windows11附带了许多网络配置文件,这些配置文件本质上是可用于配置各种网络连接的设置集。如果您在家中或办公室有多个连接,这将非常有用,因此您不必每次连接到新网络时都进行所有设置。专用和公用网络配置文件是Windows11中的两种常见类型,但通
 win10用户配置文件在哪? Win10设置用户配置文件的方法
Jun 25, 2024 pm 05:55 PM
win10用户配置文件在哪? Win10设置用户配置文件的方法
Jun 25, 2024 pm 05:55 PM
最近有不少Win10系统的用户想要更改用户配置文件,但不清楚具体如何操作,本文将给大家带来Win10系统设置用户配置文件的操作方法吧!Win10如何设置用户配置文件1、首先,按下“Win+I”键打开设置界面,并点击进入到“系统”设置。2、接着,在打开的界面中,点击左侧的“关于”,再找到并点击其中的“高级系统设置”。3、然后,在弹出的窗口中,切换到“”选项栏,并点击下方“用户配
 超全!Python 中常见的配置文件写法
Apr 13, 2023 am 08:31 AM
超全!Python 中常见的配置文件写法
Apr 13, 2023 am 08:31 AM
为什么要写配置文件在开发过程中,我们常常会用到一些固定参数或者是常量。对于这些较为固定且常用到的部分,往往会将其写到一个固定文件中,避免在不同的模块代码中重复出现从而保持核心代码整洁。这个固定文件我们可以直接写成一个 .py 文件,例如 settings.py 或 config.py,这样的好处就是能够在同一工程下直接通过 import 来导入当中的部分;但如果我们需要在其他非 Python 的平台进行配置文件共享时,写成单个 .py 就不是一个很好的选择。这时我们就应该选择通用的配置文件类型来
 有效的解决eclipse编辑器中乱码问题的方法
Jan 04, 2024 pm 06:56 PM
有效的解决eclipse编辑器中乱码问题的方法
Jan 04, 2024 pm 06:56 PM
解决eclipse乱码问题的有效方法,需要具体代码示例近年来,随着软件开发的飞速发展,eclipse作为最受欢迎的集成开发环境之一,为众多开发者提供了便利和高效。然而,使用eclipse时可能会遇到乱码问题,这对于项目开发和代码阅读带来了困扰。本文将介绍一些解决eclipse乱码问题的有效方法,并提供具体代码示例。修改eclipse文件编码设置:在eclip
 在Ubuntu上安装Helm
Mar 20, 2024 pm 06:41 PM
在Ubuntu上安装Helm
Mar 20, 2024 pm 06:41 PM
Helm是Kubernetes的一个重要组件,它通过将配置文件捆绑到一个称为HelmChart的包中来简化Kubernetes应用程序的部署。这种方法使得更新单个配置文件比修改多个文件更加便捷。借助Helm,用户可以轻松地部署Kubernetes应用程序,简化了整个部署过程,提高了效率。在本指南中,我将介绍在Ubuntu上实现Helm的不同方法。请注意:以下指南中的命令适用于Ubuntu22.04以及所有Ubuntu版本和基于Debian的发行版。这些命令经过测试,应该在您的系统上正常运行。在U
 spring如何配置文件
Jan 18, 2024 pm 03:53 PM
spring如何配置文件
Jan 18, 2024 pm 03:53 PM
spring配置文件的步骤:1、创建XML配置文件;2、添加必要的依赖;3、配置数据源;4、定义bean;5、配置其他组件;6、注入依赖;7、配置环境;8、启用自动装配;9、部署应用程序;10、启动应用程序。详细介绍:1、创建XML配置文件,在项目的资源目录下创建一个XML文件,这个文件将包含Spring的配置信息;2、添加必要的依赖等等。
