MySQL安装之编码设置的图文详解
一、MySQL的安装
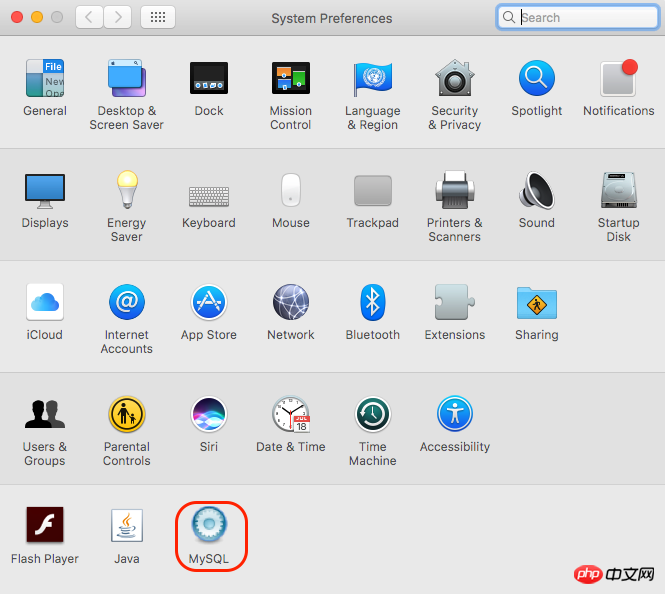
从官网中下载Mac OS X 10.12 (x86, 64-bit), DMG Archive(mysql-5.7.19-macos10.12-x86_64.dmg)版,双击按提示安装,安装完成后可在控制面板下启动关闭MySQL服务器,

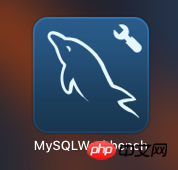
同时安装客户端:MySQL Workbench.app,

启动MySQL服务器,打开MySQL Workbench,输入初始密码,随即提示修改初始密码。
二、设置Terminal下登录路径:
在/Users/**/新建文件:.bash_profile
文件中输入:
export PATH=${PATH}:/usr/local/mysql/bin保存即可。在Terminal下,即可使用"mysql -u root -p"进行登录。
三、数据库编码问题
在Terminal中登录MySQL客户端(mysql -u root -p)查看数据库编码,命令如下:
mysql> SHOW VARIABLES LIKE 'char%';
发现
character_set_database | latin1
character_set_server | latin1
需要进行编码设置,但安装文件里无my.cnf文件,网上很多解决方法都没用,只能自建my.cnf文件。
关闭MySQL服务器,使用MacVim创建my.cnf,输入内容为:
# Example MySQL config file for medium systems.
#
# This is for a system with little memory (32M - 64M) where MySQL plays
# an important part, or systems up to 128M where MySQL is used together with
# other programs (such as a web server)
#
# MySQL programs look for option files in a set of
# locations which depend on the deployment platform.
# You can copy this option file to one of those
# locations. For information about these locations, see:
# http://dev.mysql.com/doc/mysql/en/option-files.html #
# In this file, you can use all long options that a program supports.
# If you want to know which options a program supports, run the program
# with the "--help" option.
# The following options will be passed to all MySQL clients
[client] default-character-set=utf8
#password = your_password
port = 3306
socket = /tmp/mysql.sock
# Here follows entries for some specific programs
# The MySQL server
[mysqld]
character-set-server=utf8
init_connect='SET NAMES utf8
port = 3306
socket = /tmp/mysql.sock
skip-external-locking
key_buffer_size = 16M
max_allowed_packet = 1M
table_open_cache = 64
sort_buffer_size = 512K
net_buffer_length = 8K
read_buffer_size = 256K
read_rnd_buffer_size = 512K
myisam_sort_buffer_size = 8M
character-set-server=utf8
init_connect='SET NAMES utf8' # Don't listen on a TCP/IP port at all. This can be a security enhancement, # if all processes that need to connect to mysqld run on the same host.
# All interaction with mysqld must be made via Unix sockets or named pipes.
# Note that using this option without enabling named pipes on Windows
# (via the "enable-named-pipe" option) will render mysqld useless! #
#skip-networking
# Replication Master Server (default)
# binary logging is required for replication
log-bin=mysql-bin
# binary logging format - mixed recommended
binlog_format=mixed
# required unique id between 1 and 2^32 - 1
# defaults to 1 if master-host is not set
# but will not function as a master if omitted
server-id = 1
# Replication Slave (comment out master section to use this)
#
# To configure this host as a replication slave, you can choose between
# two methods :
#
# 1) Use the CHANGE MASTER TO command (fully described in our manual) -
# the syntax is:
#
# CHANGE MASTER TO MASTER_HOST=<host>, MASTER_PORT=<port>,
# MASTER_USER=<user>, MASTER_PASSWORD=<password> ;
#
# where you replace <host>, <user>, <password> by quoted strings and
# <port> by the master's port number (3306 by default). #
# Example:
#
# CHANGE MASTER TO MASTER_HOST='125.564.12.1', MASTER_PORT=3306,
# MASTER_USER='joe', MASTER_PASSWORD='secret';
#
# OR
#
# 2) Set the variables below. However, in case you choose this method, then
# start replication for the first time (even unsuccessfully, for example
# if you mistyped the password in master-password and the slave fails to
# connect), the slave will create a master.info file, and any later
# change in this file to the variables' values below will be ignored and # overridden by the content of the master.info file, unless you shutdown
# the slave server, delete master.info and restart the slaver server.
# For that reason, you may want to leave the lines below untouched
# (commented) and instead use CHANGE MASTER TO (see above)
#
# required unique id between 2 and 2^32 - 1
# (and different from the master)
# defaults to 2 if master-host is set
# but will not function as a slave if omitted
#server-id = 2
#
# The replication master for this slave - required
#master-host = <hostname>
#
# The username the slave will use for authentication when connecting
# to the master - required
#master-user = <username>
#
# The password the slave will authenticate with when connecting to
# the master - required
#master-password = <password>
#
# The port the master is listening on.
# optional - defaults to 3306
#master-port = <port>
#
# binary logging - not required for slaves, but recommended
#log-bin=mysql-bin
# Uncomment the following if you are using InnoDB tables
#innodb_data_home_dir = /usr/local/mysql/data
#innodb_data_file_path = ibdata1:10M:autoextend
#innodb_log_group_home_dir = /usr/local/mysql/data
# You can set .._buffer_pool_size up to 50 - 80 %
# of RAM but beware of setting memory usage too high
#innodb_buffer_pool_size = 16M
#innodb_additional_mem_pool_size = 2M
# Set .._log_file_size to 25 % of buffer pool size
#innodb_log_file_size = 5M
#innodb_log_buffer_size = 8M
#innodb_flush_log_at_trx_commit = 1
#innodb_lock_wait_timeout = 50
[mysqldump]
quick
max_allowed_packet = 16M
[mysql]
no-auto-rehash
# Remove the next comment character if you are not familiar with SQL
#safe-updates
default-character-set=utf8
[myisamchk]
key_buffer_size = 20M
sort_buffer_size = 20M
read_buffer = 2M
write_buffer = 2M
[mysqlhotcopy]
interactive-timeout保存并将文件存在至/etc/目录之下,重启mysql服务器,即修改成功,
如果还是不能插入汉字,请重新创建数据库和表。
以上是MySQL安装之编码设置的图文详解的详细内容。更多信息请关注PHP中文网其他相关文章!

热AI工具

Undresser.AI Undress
人工智能驱动的应用程序,用于创建逼真的裸体照片

AI Clothes Remover
用于从照片中去除衣服的在线人工智能工具。

Undress AI Tool
免费脱衣服图片

Clothoff.io
AI脱衣机

AI Hentai Generator
免费生成ai无尽的。

热门文章

热工具

记事本++7.3.1
好用且免费的代码编辑器

SublimeText3汉化版
中文版,非常好用

禅工作室 13.0.1
功能强大的PHP集成开发环境

Dreamweaver CS6
视觉化网页开发工具

SublimeText3 Mac版
神级代码编辑软件(SublimeText3)

热门话题
 MySQL:初学者的数据管理易用性
Apr 09, 2025 am 12:07 AM
MySQL适合初学者使用,因为它安装简单、功能强大且易于管理数据。1.安装和配置简单,适用于多种操作系统。2.支持基本操作如创建数据库和表、插入、查询、更新和删除数据。3.提供高级功能如JOIN操作和子查询。4.可以通过索引、查询优化和分表分区来提升性能。5.支持备份、恢复和安全措施,确保数据的安全和一致性。
 navicat premium怎么创建
Apr 09, 2025 am 07:09 AM
使用 Navicat Premium 创建数据库:连接到数据库服务器并输入连接参数。右键单击服务器并选择“创建数据库”。输入新数据库的名称和指定字符集和排序规则。连接到新数据库并在“对象浏览器”中创建表。右键单击表并选择“插入数据”来插入数据。
 忘记数据库密码,能在Navicat中找回吗?
Apr 08, 2025 pm 09:51 PM
Navicat本身不存储数据库密码,只能找回加密后的密码。解决办法:1. 检查密码管理器;2. 检查Navicat的“记住密码”功能;3. 重置数据库密码;4. 联系数据库管理员。
 mysql:简单的概念,用于轻松学习
Apr 10, 2025 am 09:29 AM
MySQL是一个开源的关系型数据库管理系统。1)创建数据库和表:使用CREATEDATABASE和CREATETABLE命令。2)基本操作:INSERT、UPDATE、DELETE和SELECT。3)高级操作:JOIN、子查询和事务处理。4)调试技巧:检查语法、数据类型和权限。5)优化建议:使用索引、避免SELECT*和使用事务。
 Navicat for MariaDB如何查看数据库密码?
Apr 08, 2025 pm 09:18 PM
Navicat for MariaDB 无法直接查看数据库密码,因为密码以加密形式存储。为确保数据库安全,有三个方法可重置密码:通过 Navicat 重置密码,设置复杂密码。查看配置文件(不推荐,风险高)。使用系统命令行工具(不推荐,需要对命令行工具精通)。
 navicat怎么新建连接mysql
Apr 09, 2025 am 07:21 AM
可在 Navicat 中通过以下步骤新建 MySQL 连接:打开应用程序并选择“新建连接”(Ctrl N)。选择“MySQL”作为连接类型。输入主机名/IP 地址、端口、用户名和密码。(可选)配置高级选项。保存连接并输入连接名称。
 MySQL和SQL:开发人员的基本技能
Apr 10, 2025 am 09:30 AM
MySQL和SQL是开发者必备技能。1.MySQL是开源的关系型数据库管理系统,SQL是用于管理和操作数据库的标准语言。2.MySQL通过高效的数据存储和检索功能支持多种存储引擎,SQL通过简单语句完成复杂数据操作。3.使用示例包括基本查询和高级查询,如按条件过滤和排序。4.常见错误包括语法错误和性能问题,可通过检查SQL语句和使用EXPLAIN命令优化。5.性能优化技巧包括使用索引、避免全表扫描、优化JOIN操作和提升代码可读性。
 navicat如何执行sql
Apr 08, 2025 pm 11:42 PM
在 Navicat 中执行 SQL 的步骤:连接到数据库。创建 SQL 编辑器窗口。编写 SQL 查询或脚本。单击“运行”按钮执行查询或脚本。查看结果(如果执行查询的话)。


