

vue父子组件传值及slot应用步骤详解
这次给大家带来vue父子组件传值及slot应用步骤详解,vue父子组件传值及slot应用的注意事项有哪些,下面就是实战案例,一起来看一下。
一.父子组件传值
<!DOCTYPE html>
<html lang="en">
<head>
  <meta charset="UTF-8">
  <title>父子组件传值</title>
  <style>
  </style>
  <script src="./vue.js"></script>
</head>
<body>
  <p id="root">
    <counter :count="0" @numberchange="handleChange"></counter>
    <counter :count="0" @numberchange="handleChange"></counter>
    <p>{{total}}</p>
    <validate-content content="hello world"></validate-content>
  </p>
  <script>
   //父组件向子组件传值用 props ,加:号后传递的为js表达式,示例中则为数字,不加:号代表的是字符串
   var counter = { //局部注册
     props:['count'],
     data:function(){//在子组件中定义数据,data不能是对象,必须是一个函数。
       return {
         number:this.count
       }
     },
     template:'<p @click="handleClick2">{{number}}</p>',
     methods:{
      handleClick2:function(){
        this.number ++;
        //this.count++; 父组件可以传值给子组件,但子组件不可以修改父组件属性,这里这么写会报错。
        this.$emit("numberchange",this.number);//子组件向父组件传递事件,值
      }
    }
   }
   var validateContent = {
    props:{
      //content:[Number,String] //组件参数校验,可以多选
      content:{//组件参数校验
        type:String,
        required:true,
        default:"default value",
        validator:function(value){
          return value.length > 5
        }
      }
     },
     template:'<p >{{content}}</p>',
   }
   var vm = new Vue({
     el:'#root',
     data:{
       total:0
     },
     methods:{
      handleChange:function(number){
        console.log(number)
        // this.total +=1;
      }
     },
     components:{
       counter, //局部注册要在根节点注册组件
       validateContent
     }
   })
  </script>
</body>
</html>二.父组件向子组件传递DOM
先看一个示例
<body>
  <p id="root">
    <child><p>Qin</p></child>
  </p>
  <script>
   let child = {
     template :`<p>
           <p>hello world</p>
        </p>`
   }
   var vm = new Vue({
     el:'#root',
     components:{
       child
     }
   })
  </script>
</body>打开查看器查看一下
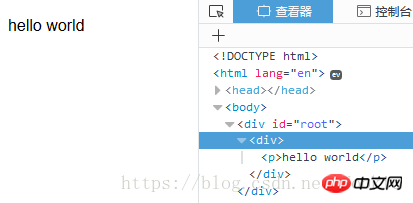
发现Qin不见了
<p>Qin</p>1
查看官方文档 , https://cn.vuejs.org/v2/guide/components-slots.html
我们得出结论:如果 child 没有包含一个 < slot > 元素,则任何传入它的内容都会被抛弃
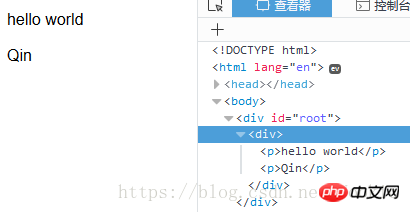
我们加入插槽
<body>
  <p id="root">
    <child><p>Qin</p></child>
  </p>
  <script>
   let child = {
     template :`<p>
           <p>hello world</p>
           <slot></slot>
        </p>`
   }
   var vm = new Vue({
     el:'#root',
     components:{
       child
     }
   })
  </script>
</body>发现Qin能正常显示,且slot将会被替换为解析后的片段 < p > Qin < /p >
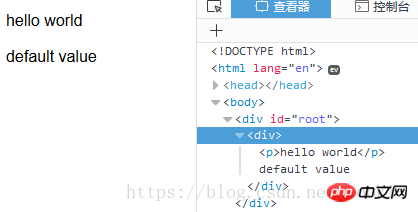
当父组件不向子组件传值的时候,slot还可以作为父组件默认值出现
<body>
  <p id="root">
    <child></child>
  </p>
  <script>
   let child = {
     template :`<p>
           <p>hello world</p>
           <slot>default value</slot>
        </p>`
   }
   var vm = new Vue({
     el:'#root',
     components:{
       child
     }
   })
  </script>
</body>效果图
具名插槽
如果想使用多个插槽,我们先看看效果:
<body>
  <p id="root">
    <child>
      <header>This is header</header>
      <footer>This is footer</footer>
    </child>
  </p>
  <script>
   let child = {
     template :
       `<p>
           <slot></slot>
           <p>Main content</p>
           <slot></slot>
        </p>`
   }
   var vm = new Vue({
     el:'#root',
     components:{
       child
     }
   })
  </script>
</body>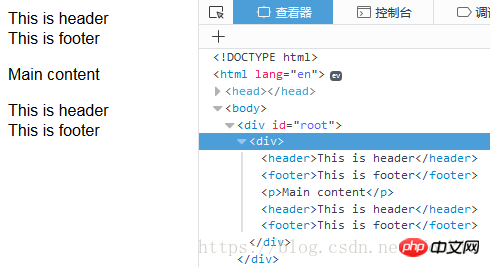
发现出现了多个header和footer,要解决这个问题就要用到具名插槽
我们修改代码如下:
<body>
  <p id="root">
    <child>
      <header slot="header">This is header</header>
      <footer slot="footer">This is footer</footer>
    </child>
  </p>
  <script>
   let child = {
     template :
       `<p>
           <slot name="header"></slot>
           <p>Main content</p>
           <slot name="footer"></slot>
        </p>`
   }
   var vm = new Vue({
     el:'#root',
     components:{
       child
     }
   })
  </script>
</body>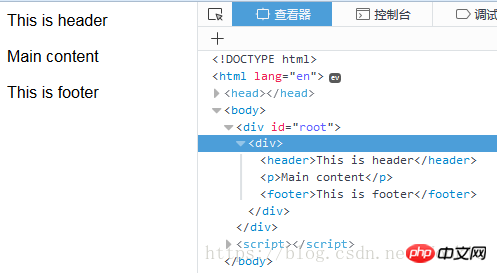
可以看到显示正常了
相信看了本文案例你已经掌握了方法,更多精彩请关注php中文网其它相关文章!
推荐阅读:
VeeValidate在vue项目里表单校验使用案例代码分析
以上是vue父子组件传值及slot应用步骤详解的详细内容。更多信息请关注PHP中文网其他相关文章!

热AI工具

Undresser.AI Undress
人工智能驱动的应用程序,用于创建逼真的裸体照片

AI Clothes Remover
用于从照片中去除衣服的在线人工智能工具。

Undress AI Tool
免费脱衣服图片

Clothoff.io
AI脱衣机

AI Hentai Generator
免费生成ai无尽的。

热门文章
热工具

记事本++7.3.1
好用且免费的代码编辑器

SublimeText3汉化版
中文版,非常好用

禅工作室 13.0.1
功能强大的PHP集成开发环境

Dreamweaver CS6
视觉化网页开发工具

SublimeText3 Mac版
神级代码编辑软件(SublimeText3)
热门话题


 如何在iPhone中使Google地图成为默认地图
Apr 17, 2024 pm 07:34 PM
如何在iPhone中使Google地图成为默认地图
Apr 17, 2024 pm 07:34 PM
iPhone上的默认地图是Apple专有的地理位置提供商“地图”。尽管地图越来越好,但它在美国以外的地区运行不佳。与谷歌地图相比,它没有什么可提供的。在本文中,我们讨论了使用Google地图成为iPhone上的默认地图的可行性步骤。如何在iPhone中使Google地图成为默认地图将Google地图设置为手机上的默认地图应用程序比您想象的要容易。请按照以下步骤操作–先决条件步骤–您必须在手机上安装Gmail。步骤1–打开AppStore。步骤2–搜索“Gmail”。步骤3–点击Gmail应用旁
 升级微信最新版本的步骤(轻松掌握微信最新版本的升级方法)
Jun 01, 2024 pm 10:24 PM
升级微信最新版本的步骤(轻松掌握微信最新版本的升级方法)
Jun 01, 2024 pm 10:24 PM
不断推出新版本以提供更好的使用体验,微信作为中国的社交媒体平台之一。升级微信至最新版本是非常重要的,家人和同事的联系、为了保持与朋友、及时了解最新动态。1.了解最新版本的特性与改进了解最新版本的特性与改进非常重要,在升级微信之前。性能改进和错误修复,通过查看微信官方网站或应用商店中的更新说明、你可以了解到新版本所带来的各种新功能。2.检查当前微信版本我们需要检查当前手机上已安装的微信版本、在升级微信之前。点击,打开微信应用“我”然后选择,菜单“关于”在这里你可以看到当前微信的版本号,。3.打开应
 此 Apple ID 尚未在 iTunes Store 中使用:修复
Jun 10, 2024 pm 05:42 PM
此 Apple ID 尚未在 iTunes Store 中使用:修复
Jun 10, 2024 pm 05:42 PM
使用AppleID登录iTunesStore时,可能会在屏幕上抛出此错误提示“此AppleID尚未在iTunesStore中使用”。没有什么可担心的错误提示,您可以按照这些解决方案集进行修复。修复1–更改送货地址此提示出现在iTunesStore中的主要原因是您的AppleID个人资料中没有正确的地址。步骤1–首先,打开iPhone上的iPhone设置。步骤2–AppleID应位于所有其他设置的顶部。所以,打开它。步骤3–在那里,打开“付款和运输”选项。步骤4–使用面容ID验证您的访问权限。步骤
 Shazam应用程序在iPhone中无法运行:修复
Jun 08, 2024 pm 12:36 PM
Shazam应用程序在iPhone中无法运行:修复
Jun 08, 2024 pm 12:36 PM
iPhone上的Shazam应用程序有问题?Shazam可帮助您通过聆听歌曲找到歌曲。但是,如果Shazam无法正常工作或无法识别歌曲,则必须手动对其进行故障排除。修复Shazam应用程序不会花费很长时间。因此,无需再浪费时间,请按照以下步骤解决Shazam应用程序的问题。修复1–禁用粗体文本功能iPhone上的粗体文本可能是Shazam无法正常运行的原因。步骤1–您只能从iPhone设置中执行此操作。所以,打开它。步骤2–接下来,打开其中的“显示和亮度”设置。步骤3–如果您发现启用了“粗体文本
 iPhone屏幕截图不起作用:如何修复
May 03, 2024 pm 09:16 PM
iPhone屏幕截图不起作用:如何修复
May 03, 2024 pm 09:16 PM
屏幕截图功能在您的iPhone上不起作用吗?截屏非常简单,因为您只需同时按住“提高音量”按钮和“电源”按钮即可抓取手机屏幕。但是,还有其他方法可以在设备上捕获帧。修复1–使用辅助触摸使用辅助触摸功能截取屏幕截图。步骤1–转到您的手机设置。步骤2–接下来,点击以打开“辅助功能”设置。步骤3–打开“触摸”设置。步骤4–接下来,打开“辅助触摸”设置。步骤5–打开手机上的“辅助触摸”。步骤6–打开“自定义顶级菜单”以访问它。步骤7–现在,您只需将这些功能中的任何一个链接到屏幕捕获即可。因此,点击那里的首
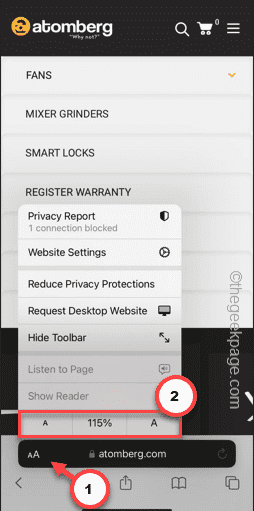 iPhone上的Safari缩小问题:这是修复程序
Apr 20, 2024 am 08:08 AM
iPhone上的Safari缩小问题:这是修复程序
Apr 20, 2024 am 08:08 AM
如果您无法控制Safari中的缩放级别,完成工作可能会非常棘手。因此,如果Safari看起来被缩小了,那对您来说可能会有问题。您可以通过以下几种方法解决Safari中的这个缩小小问题。1.光标放大:在Safari菜单栏中选择“显示”>“放大光标”。这将使光标在屏幕上更加显眼,从而更容易控制。2.移动鼠标:这可能听起来很简单,但有时只需将鼠标移动到屏幕上的另一个位置,可能会自动恢复正常大小。3.使用键盘快捷键修复1–重置缩放级别您可以直接从Safari浏览器控制缩放级别。步骤1–当您在Safari
 iPhone中缺少时钟应用程序:如何修复
May 03, 2024 pm 09:19 PM
iPhone中缺少时钟应用程序:如何修复
May 03, 2024 pm 09:19 PM
您的手机中缺少时钟应用程序吗?日期和时间仍将显示在iPhone的状态栏上。但是,如果没有时钟应用程序,您将无法使用世界时钟、秒表、闹钟等多项功能。因此,修复时钟应用程序的缺失应该是您的待办事项列表的首位。这些解决方案可以帮助您解决此问题。修复1–放置时钟应用程序如果您错误地从主屏幕中删除了时钟应用程序,您可以将时钟应用程序放回原位。步骤1–解锁iPhone并开始向左侧滑动,直到到达“应用程序库”页面。步骤2–接下来,在搜索框中搜索“时钟”。步骤3–当您在搜索结果中看到下方的“时钟”时,请按住它并
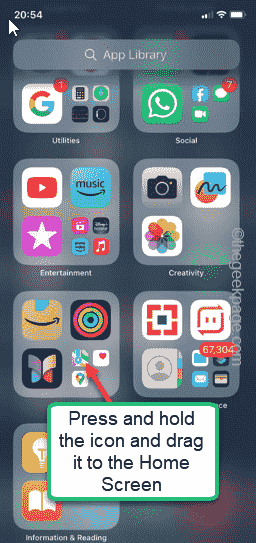 如何在iPhone中撤消从主屏幕中删除
Apr 17, 2024 pm 07:37 PM
如何在iPhone中撤消从主屏幕中删除
Apr 17, 2024 pm 07:37 PM
从主屏幕中删除了重要内容并试图将其取回?您可以通过多种方式将应用程序图标放回屏幕。我们已经讨论了您可以遵循的所有方法,并将应用程序图标放回主屏幕如何在iPhone中撤消从主屏幕中删除正如我们之前提到的,有几种方法可以在iPhone上恢复此更改。方法1–替换应用程序库中的应用程序图标您可以直接从应用程序库将应用程序图标放置在主屏幕上。第1步–横向滑动以查找应用程序库中的所有应用程序。步骤2–找到您之前删除的应用程序图标。步骤3–只需将应用程序图标从主库拖动到主屏幕上的正确位置即可。这是将应用程序图
