

使用iview的ui框架自定义播放器
这次给大家带来使用iview的ui框架自定义播放器,使用iview的ui框架自定义播放器注意事项有哪些,下面就是实战案例,一起来看一下。

图2-收起侧边栏;
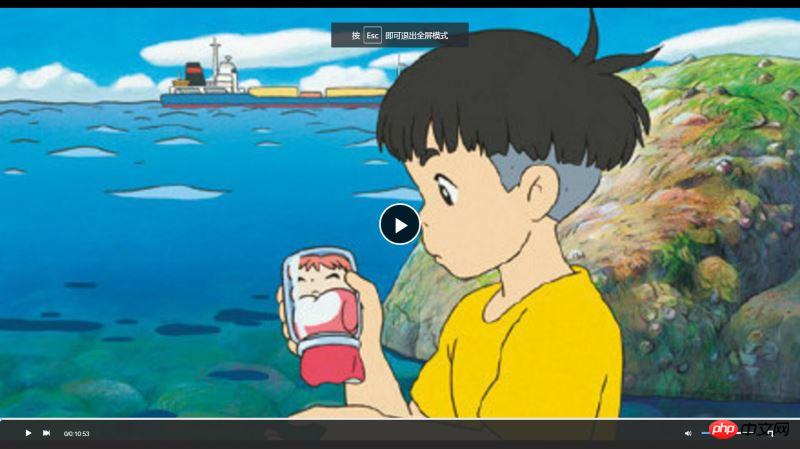
图三:全屏。
写在前面
本次项目中需要用到vue,vue-video-player,我用的是iview的ui框架,但是ui框架无妨,这里关注的是基于video.js开发的vue-video-player的使用,以及如何操作video.js中的api。
vue-video-player 项目地址:https://github.com/surmon-china/vue-video-player。
video.js文档地址:http://docs.videojs.com/docs/api/player.html。
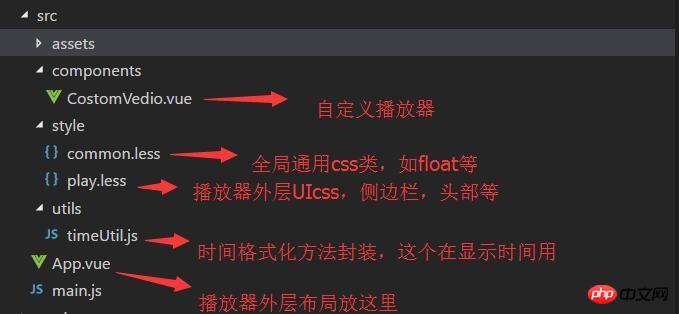
项目目录:
一、外层ui布局
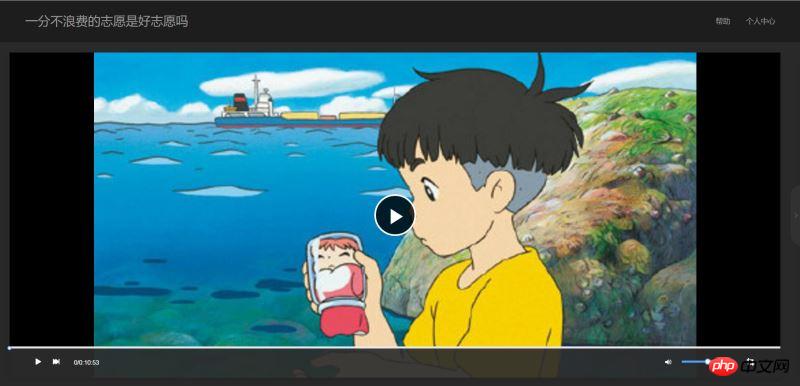
图一中可以看到,本次项目使用的是两栏自适应布局,其中,右侧为播放列表,固定宽度500px,左边是播放器box,播放列表box可根据手柄点击展开或收起,而播放器box也跟随播放列表的展开/收缩进行宽度自适应。
(因录制动画太大传不上,可clone我的程序下来运行可见)。
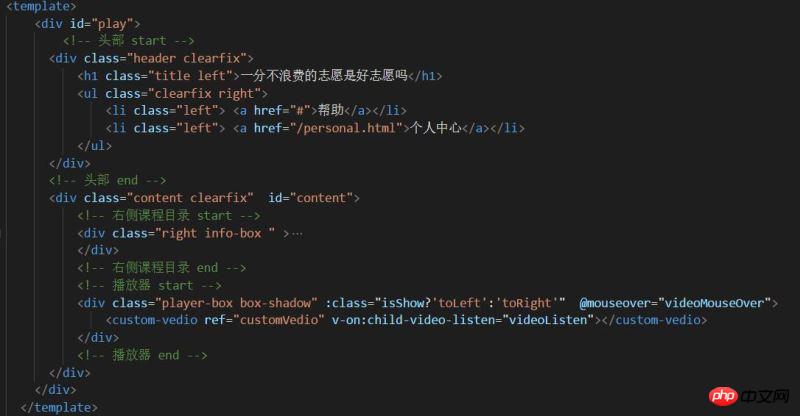
html代码结构如此:
收缩展开的时候加上一个过度动画,这里选择使用css手写动画:
view plain copy
.transition{
       transition: all 1s ease;
       -moz-transition: all 1s ease;
       -webkit-transition: all 1s ease;
       -o-transition: all 1s ease;
   }
view plain copy
.toLeft{
        .transition;
        margin-right: 540px !important;
    }
    .toRight{
        .transition;
        margin-right: 40px !important;
    }
    .toHide{
        .transition;
        right: -500px !important;
    }
    .toShow{
        .transition;
        right: 0px !important;
    }
view plain copy
// 播放区
    .player-box{
        margin-right: 540px;
        height: 100%;
        position: relative;
    }
view plain copy
//侧边信息区
    .info-box{
        width: 520px;
        height: 100%;
        background: transparent;
        position: relative;
        overflow: hidden;
    }
[css] view plain copy
// 内容区
.content{
    background: #292929;
    position: relative;
    padding: 20px 0 20px 20px;

}二、播放器ui
整个自定义的播放器ui封装成了一个组件--CostomVedio.vue,播放区使用的是vue-video-player的播放器,但是底部控制栏是自定义的,不使用播放器自带的controlBar,通常通用的这些都不符合设计哥哥的要求,所以我们需要自定义播放器UI。
html结构代码如下:
view plain copy
<template>
    <p class="custom-video-outer-box" @mouseover="videoMouseOver">
      <video-player  class="video-player-box"
                 ref="videoPlayer"
                 :options="playerOptions"
                 :playsinline="true"
                 customEventName="customstatechangedeventname"
                 @play="onPlayerPlay($event)"
                 @pause="onPlayerPause($event)"
                 @ended="onPlayerEnded($event)"
                 @waiting="onPlayerWaiting($event)"
                 @playing="onPlayerPlaying($event)"
                 @loadeddata="onPlayerLoadeddata($event)"
                 @timeupdate="onPlayerTimeupdate($event)"
                 @statechanged="playerStateChanged($event)"
                 @ready="playerReadied"
                 >

                  <!-- @canplay="onPlayerCanplay($event)" -->
                   <!-- @canplaythrough="onPlayerCanplaythrough($event)" -->

       </video-player>
          <!-- 底部进度条 start -->
         <transition name="fade">
                <p class="bottomCtrl" v-show="isBottomCtrlShow" id="bottomCtrl">
                    <!--  -->
                    <!-- <p class="bottomCtrl" v-show="false"> -->
                <!-- <p class="bottomCtrl"  > -->

                    <Slider v-model="playerCtrl.currentTimeInt" class="progress-slider" :max="playerCtrl.durationInt" :tip-format="progressTipFormat" @on-change="progressChange"></Slider>
                    <p class="clearfix" >
                        <p class="left">
                                <!-- 暂停 -->
                                <span v-on:click="play" v-if="!playerCtrl.isPlay" class="icon">
                                    <Icon type="play"></Icon>
                                </span>
                                <!-- 播放 -->
                                <span v-else v-on:click="pause" class="icon">
                                     <Icon type="stop"></Icon>
                                </span>

                                <!-- 下一曲 -->
                                <span class="icon" v-on:click="nextClick">
                                    <Icon type="skip-forward"></Icon>
                                </span>

                            <span class="time">
                                {{playerCtrl.currentTime}}/{{playerCtrl.duration}}
                            </span>
                        </p>
                        <p class="right clearfix">
                                <p class="voice-box clearfix left">
                                    <!-- 音量 -->
                                    <Icon type="volume-medium" class="left icon"></Icon>
                                    <Slider v-model="playerCtrl.voiceSlider" class="voice-slider left " max=100 @on-change="volumeChange"></Slider>
                                </p>
                                 <!-- 全屏 -->
                                 <span class="icon left" @click="fullScreenHandle">
                                    <Icon type="crop" class="full-screen" ></Icon>
                                 </span>
                        </p>
                    </p>
                </p>
         </transition>
       </p>
</template>具体思路就是,使用播放器铺满播放区,使用position定位将自定义的controlBar固定在播放区的底部,这里注意controlBar的z-index一定要足够大,否则在全屏的时候不在最上层看不到。
css样式:
view plain copy
<style lang="less">
    .video-player-box{
        height: 100% !important;
        width: 100% !important;
    }
 //底部进度条
    .bottomCtrl{
        line-height: 60px;
        height: 60px;
        overflow: visible;
        position: absolute;
        bottom: 0;
        left: 0;
        background-color: rgba(45, 45, 45, .92);
        width: 100%;
        padding: 0 50px;
        color: #fff;
        z-index: 999999999999999;
        .icon{
            font-size: 16px;
            line-height: 60px;
            cursor: pointer;
        }
        .icon+.icon{
            margin-left: 20px;
        }
    }
    .custom-video-outer-box{
        position: relative;
        height: 100%;
        width: 100%;
    }
    .progress-slider{
        position: absolute;
        width: 100%;
        top: 0;
        left: 0;
        height: 18px;
        line-height: 18px;
        .ivu-slider-wrap{
            margin: 0 !important;
            border-radius: 0 !important;
        }
        .ivu-slider-button-wrap{
             line-height: normal !important;
        }
        .ivu-slider-button{
            height: 8px !important;
            width: 8px !important;
        }
    }
    .voice-box{
        .voice-slider{
            width: 100px;
            margin-left: 20px;
        }
        .ivu-slider-wrap{
            margin: 27px 0 !important;
        }
    }
    .time{
        margin-left: 25px;
    }
    .full-screen{
       margin-left: 25px;
        line-height: 60px;
    }
    .ivu-progress-outer{
        padding: 0 10px !important;
    }
    .vjs-big-play-button{
        height: 80px !important;
        width: 80px !important;
        line-height: 80px !important;
        text-align: center;
        background:rgba(0, 0, 0, 0.8) !important;
        border-radius: 50% !important;
        top: 50% !important;
        left: 50% !important;
        margin-left: -40px !important;
        margin-top: -40px !important;
    }
    #vjs_video_3{
        max-height: 100% !important;
        width: 100% !important;
        height: 100% !important;
    }
    .video-player-box>p{
        height: 100% !important;
        width: 100% !important;
    }
    .video-js .vjs-big-play-button{
        font-size: 5em !important;
    }
    video{
        max-height: 100% !important;
    }
</style>三、实现自定义controlBar功能
接下来就是实现自定义controlBar的功能,如播放,暂停,下一曲,播放进度,剩余时间,全屏,音量调节等。
这里我们肯定要先看video.js的相应api了,虽然是英文的但是上边写的很清楚,很容易看明白。
video.js api文档地址:http://docs.videojs.com/docs/api/player.html
1. 播放,暂停,下一曲,全屏主要就是监听我们添加的自定义按钮click事件,然后调用播放器API执行相应操作,并改变状态。
view plain copy
// 播放
 play(){
     this.player.play();
 },
 // 暂停
 pause(){
      this.player.pause();
 },
 //下一曲
 nextClick(){
     console.log("自定义","下一曲点击");

 },
 //全屏
 fullScreenHandle(){
     console.log("全屏");
     if(!this.player.isFullscreen()){
         this.player.requestFullscreen();
         this.player.isFullscreen(true);
     }else{
          this.player.exitFullscreen();
          this.player.isFullscreen(false);
     }
},当然,在vue-video-player中的播放器会在回调方法中监听状态的变化:
view plain copy
<video-player  class="video-player-box"
                ref="videoPlayer"
                :options="playerOptions"
                :playsinline="true"
                customEventName="customstatechangedeventname"
                @play="onPlayerPlay($event)"
                @pause="onPlayerPause($event)"
                @ended="onPlayerEnded($event)"
                @waiting="onPlayerWaiting($event)"
                @playing="onPlayerPlaying($event)"
                @loadeddata="onPlayerLoadeddata($event)"
                @timeupdate="onPlayerTimeupdate($event)"
                @statechanged="playerStateChanged($event)"
                @ready="playerReadied"
                >
                 <!-- @canplay="onPlayerCanplay($event)" -->
                  <!-- @canplaythrough="onPlayerCanplaythrough($event)" -->

      </video-player>
我们可以根据这些状态变化,相应的改变我们的UI,比如播放时显示“暂停”按钮,暂停时显示“播放”等功能。
2.播放进度,剩余时间,音量调节
播放进度的话是根据在播放器onPlayerTimeupdate()回调方法中,通过currentTime这个方法来获取当前播放的进度时间,单位S,因为这里我使用的是slider,进度都是整数计算,所以这里我需要两个变量存放,一个是整数形式,另一个是格式化好时分秒之后的string形式,用以显示。
view plain copy
//时间更新
           onPlayerTimeupdate(player){
               this.playerCtrl.currentTime=timeUtil.secondToDate(player.currentTime());
               this.playerCtrl.currentTimeInt=Math.floor(player.currentTime());
               console.log("当前音量",player.volume());
},定点播放,即用户点击进度条某个地方,即可在这个点进度播放,使用的是slider的
view plain copy
@on-change="progressChange"
这个方法监听slider定点,
view plain copy
//进度条被拉动
           progressChange(val){
               this.player.currentTime(val);
               this.playerCtrl.currentTimeInt=val;
               this.playerCtrl.currentTime=timeUtil.secondToDate(val);
},拿到定点的值,然后通过player的currentTime设置跳到定点播放。
音量调节的做法跟播放进度相似:
一开始初始化的时候记得配置
view plain copy
muted:false,//开始声音
来开启声音,否则静音状态下调节声音无效。
使用player.volume(val)这个api设置音量,其中val=0,表示声音off,val=1表示声音最大,0.5表示声音设置在half。
四:总结
最后在app.vue/需要用到这个播放器的地方 引入自定义播放器组件即可。vue-video-player是大神基于video.js开发的适用于vue.js框架的组件,具有良好兼容性,所以我们在vue中使用这个播放器组件本质还是使用video.js,我们要更多的去了解video.js中的api并使用他。
相信看了本文案例你已经掌握了方法,更多精彩请关注php中文网其它相关文章!
推荐阅读:
以上是使用iview的ui框架自定义播放器的详细内容。更多信息请关注PHP中文网其他相关文章!

热AI工具

Undresser.AI Undress
人工智能驱动的应用程序,用于创建逼真的裸体照片

AI Clothes Remover
用于从照片中去除衣服的在线人工智能工具。

Undress AI Tool
免费脱衣服图片

Clothoff.io
AI脱衣机

AI Hentai Generator
免费生成ai无尽的。

热门文章
热工具

记事本++7.3.1
好用且免费的代码编辑器

SublimeText3汉化版
中文版,非常好用

禅工作室 13.0.1
功能强大的PHP集成开发环境

Dreamweaver CS6
视觉化网页开发工具

SublimeText3 Mac版
神级代码编辑软件(SublimeText3)
热门话题


 vue怎么给按钮添加函数
Apr 08, 2025 am 08:51 AM
vue怎么给按钮添加函数
Apr 08, 2025 am 08:51 AM
可以通过以下步骤为 Vue 按钮添加函数:将 HTML 模板中的按钮绑定到一个方法。在 Vue 实例中定义该方法并编写函数逻辑。
 vue中怎么用bootstrap
Apr 07, 2025 pm 11:33 PM
vue中怎么用bootstrap
Apr 07, 2025 pm 11:33 PM
在 Vue.js 中使用 Bootstrap 分为五个步骤:安装 Bootstrap。在 main.js 中导入 Bootstrap。直接在模板中使用 Bootstrap 组件。可选:自定义样式。可选:使用插件。
 vue.js怎么引用js文件
Apr 07, 2025 pm 11:27 PM
vue.js怎么引用js文件
Apr 07, 2025 pm 11:27 PM
在 Vue.js 中引用 JS 文件的方法有三种:直接使用 <script> 标签指定路径;利用 mounted() 生命周期钩子动态导入;通过 Vuex 状态管理库进行导入。
 vue中的watch怎么用
Apr 07, 2025 pm 11:36 PM
vue中的watch怎么用
Apr 07, 2025 pm 11:36 PM
Vue.js 中的 watch 选项允许开发者监听特定数据的变化。当数据发生变化时,watch 会触发一个回调函数,用于执行更新视图或其他任务。其配置选项包括 immediate,用于指定是否立即执行回调,以及 deep,用于指定是否递归监听对象或数组的更改。
 vue返回上一页的方法
Apr 07, 2025 pm 11:30 PM
vue返回上一页的方法
Apr 07, 2025 pm 11:30 PM
Vue.js 返回上一页有四种方法:$router.go(-1)$router.back()使用 <router-link to="/"> 组件window.history.back(),方法选择取决于场景。
 Vue 实现跑马灯/文字滚动效果
Apr 07, 2025 pm 10:51 PM
Vue 实现跑马灯/文字滚动效果
Apr 07, 2025 pm 10:51 PM
在 Vue 中实现跑马灯/文字滚动效果,可以使用 CSS 动画或第三方库。本文介绍了使用 CSS 动画的方法:创建滚动文本,用 <div> 包裹文本。定义 CSS 动画,设置 overflow: hidden、width 和 animation。定义关键帧,设置动画开始和结束时的 transform: translateX()。调整动画属性,如持续时间、滚动速度和方向。
 vue分页怎么用
Apr 08, 2025 am 06:45 AM
vue分页怎么用
Apr 08, 2025 am 06:45 AM
分页是一种将大数据集拆分为小页面的技术,提高性能和用户体验。在 Vue 中,可以使用以下内置方法进行分页:计算总页数:totalPages()遍历页码:v-for 指令设置当前页:currentPage获取当前页数据:currentPageData()
 怎样查询vue的版本
Apr 07, 2025 pm 11:24 PM
怎样查询vue的版本
Apr 07, 2025 pm 11:24 PM
可以通过以下方法查询 Vue 版本:使用 Vue Devtools 在浏览器的控制台中查看“Vue”选项卡。使用 npm 运行“npm list -g vue”命令。在 package.json 文件的“dependencies”对象中查找 Vue 项。对于 Vue CLI 项目,运行“vue --version”命令。检查 HTML 文件中引用 Vue 文件的 <script> 标签中的版本信息。
