Python + wordcloud 十分钟学会生成英文词云
基于python生成的wordcloud
词云在这两年一直都热门话题,如果你耐下性子花个10分钟看看这篇文章,或许你就再也不用羡慕那些会词云的人了。这不是一项高深莫测的技术,你也可以学会。快来试试吧!

本篇我们讲解的是如何制作英文词云,下一期我们将给大家带来如何制作中文词云,敬请期待!
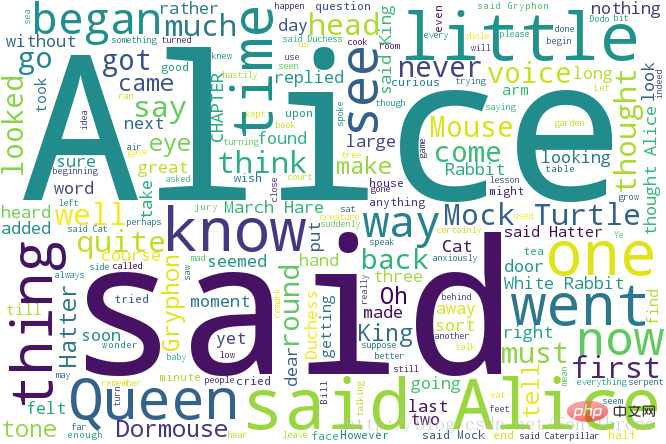
快速生成词云
from wordcloud import WordCloud
f = open(u'txt/AliceEN.txt','r').read()
wordcloud = WordCloud(background_color="white",width=1000, height=860, margin=2).generate(f)
# width,height,margin可以设置图片属性
# generate 可以对全部文本进行自动分词,但是他对中文支持不好,对中文的分词处理请看我的下一篇文章
#wordcloud = WordCloud(font_path = r'D:\Fonts\simkai.ttf').generate(f)
# 你可以通过font_path参数来设置字体集
#background_color参数为设置背景颜色,默认颜色为黑色
import matplotlib.pyplot as plt
plt.imshow(wordcloud)
plt.axis("off")
plt.show()
wordcloud.to_file('test.png')# 保存图片,但是在第三模块的例子中 图片大小将会按照 mask 保存

自定义字体颜色
这段代码主要来自wordcloud的github,你可以在github下载该例子
#!/usr/bin/env python
"""
Colored by Group Example
========================
Generating a word cloud that assigns colors to words based on
a predefined mapping from colors to words
"""
from wordcloud import (WordCloud, get_single_color_func)
import matplotlib.pyplot as plt
class SimpleGroupedColorFunc(object):
    """Create a color function object which assigns EXACT colors
       to certain words based on the color to words mapping
       Parameters
       ----------
       color_to_words : dict(str -> list(str))
         A dictionary that maps a color to the list of words.
       default_color : str
         Color that will be assigned to a word that's not a member
         of any value from color_to_words.
    """
    def __init__(self, color_to_words, default_color):
        self.word_to_color = {word: color
                              for (color, words) in color_to_words.items()
                              for word in words}
        self.default_color = default_color
    def __call__(self, word, **kwargs):
        return self.word_to_color.get(word, self.default_color)
class GroupedColorFunc(object):
    """Create a color function object which assigns DIFFERENT SHADES of
       specified colors to certain words based on the color to words mapping.
       Uses wordcloud.get_single_color_func
       Parameters
       ----------
       color_to_words : dict(str -> list(str))
         A dictionary that maps a color to the list of words.
       default_color : str
         Color that will be assigned to a word that's not a member
         of any value from color_to_words.
    """
    def __init__(self, color_to_words, default_color):
        self.color_func_to_words = [
            (get_single_color_func(color), set(words))
            for (color, words) in color_to_words.items()]
        self.default_color_func = get_single_color_func(default_color)
    def get_color_func(self, word):
        """Returns a single_color_func associated with the word"""
        try:
            color_func = next(
                color_func for (color_func, words) in self.color_func_to_words
                if word in words)
        except StopIteration:
            color_func = self.default_color_func
        return color_func
    def __call__(self, word, **kwargs):
        return self.get_color_func(word)(word, **kwargs)
text = """The Zen of Python, by Tim Peters
Beautiful is better than ugly.
Explicit is better than implicit.
Simple is better than complex.
Complex is better than complicated.
Flat is better than nested.
Sparse is better than dense.
Readability counts.
Special cases aren't special enough to break the rules.
Although practicality beats purity.
Errors should never pass silently.
Unless explicitly silenced.
In the face of ambiguity, refuse the temptation to guess.
There should be one-- and preferably only one --obvious way to do it.
Although that way may not be obvious at first unless you're Dutch.
Now is better than never.
Although never is often better than *right* now.
If the implementation is hard to explain, it's a bad idea.
If the implementation is easy to explain, it may be a good idea.
Namespaces are one honking great idea -- let's do more of those!"""
# Since the text is small collocations are turned off and text is lower-cased
wc = WordCloud(collocations=False).generate(text.lower())
# 自定义所有单词的颜色
color_to_words = {
    # words below will be colored with a green single color function
    '#00ff00': ['beautiful', 'explicit', 'simple', 'sparse',
                'readability', 'rules', 'practicality',
                'explicitly', 'one', 'now', 'easy', 'obvious', 'better'],
    # will be colored with a red single color function
    'red': ['ugly', 'implicit', 'complex', 'complicated', 'nested',
            'dense', 'special', 'errors', 'silently', 'ambiguity',
            'guess', 'hard']
}
# Words that are not in any of the color_to_words values
# will be colored with a grey single color function
default_color = 'grey'
# Create a color function with single tone
# grouped_color_func = SimpleGroupedColorFunc(color_to_words, default_color)
# Create a color function with multiple tones
grouped_color_func = GroupedColorFunc(color_to_words, default_color)
# Apply our color function
# 如果你也可以将color_func的参数设置为图片,详细的说明请看 下一部分
wc.recolor(color_func=grouped_color_func)
# Plot
plt.figure()
plt.imshow(wc, interpolation="bilinear")
plt.axis("off")
plt.show()
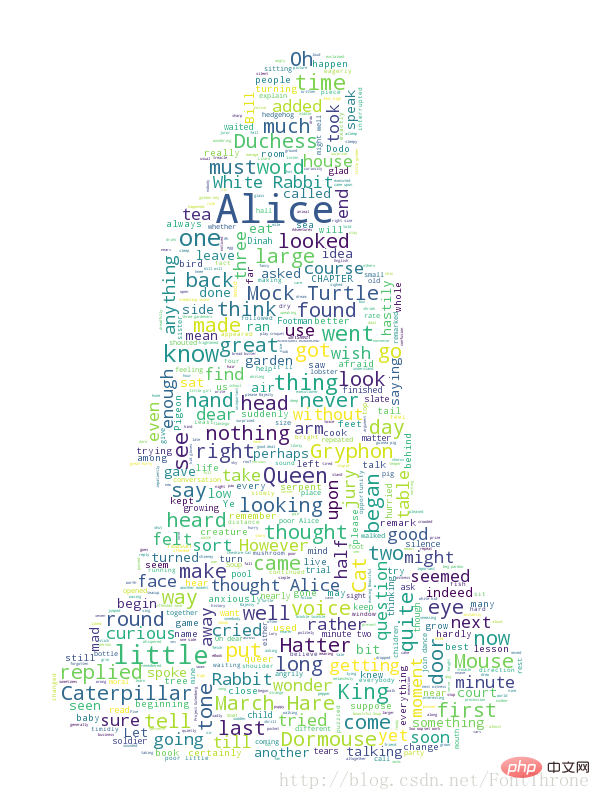
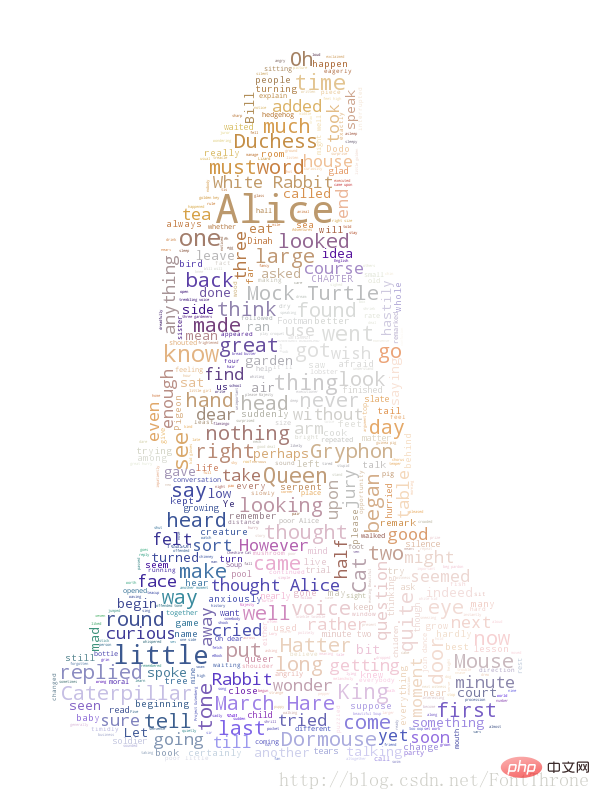
利用背景图片生成词云,设置停用词词集
该段代码主要来自于wordcloud的github,你同样可以在github下载该例子以及原图片与效果图
#!/usr/bin/env python
"""
Image-colored wordcloud
=======================
You can color a word-cloud by using an image-based coloring strategy
implemented in ImageColorGenerator. It uses the average color of the region
occupied by the word in a source image. You can combine this with masking -
pure-white will be interpreted as 'don't occupy' by the WordCloud object when
passed as mask.
If you want white as a legal color, you can just pass a different image to
"mask", but make sure the image shapes line up.
"""
from os import path
from PIL import Image
import numpy as np
import matplotlib.pyplot as plt
from wordcloud import WordCloud, STOPWORDS, ImageColorGenerator
d = path.dirname(__file__)
# Read the whole text.
text = open(path.join(d, 'alice.txt')).read()
# read the mask / color image taken from
# http://jirkavinse.deviantart.com/art/quot-Real-Life-quot-Alice-282261010
alice_coloring = np.array(Image.open(path.join(d, "alice_color.png")))
# 设置停用词
stopwords = set(STOPWORDS)
stopwords.add("said")
# 你可以通过 mask 参数 来设置词云形状
wc = WordCloud(background_color="white", max_words=2000, mask=alice_coloring,
               stopwords=stopwords, max_font_size=40, random_state=42)
# generate word cloud
wc.generate(text)
# create coloring from image
image_colors = ImageColorGenerator(alice_coloring)
# show
# 在只设置mask的情况下,你将会得到一个拥有图片形状的词云
plt.imshow(wc, interpolation="bilinear")
plt.axis("off")
plt.figure()
# recolor wordcloud and show
# we could also give color_func=image_colors directly in the constructor
# 我们还可以直接在构造函数中直接给颜色
# 通过这种方式词云将会按照给定的图片颜色布局生成字体颜色策略
plt.imshow(wc.recolor(color_func=image_colors), interpolation="bilinear")
plt.axis("off")
plt.figure()
plt.imshow(alice_coloring, cmap=plt.cm.gray, interpolation="bilinear")
plt.axis("off")
plt.show()展示效果如下:


以上是Python + wordcloud 十分钟学会生成英文词云的详细内容。更多信息请关注PHP中文网其他相关文章!

热AI工具

Undresser.AI Undress
人工智能驱动的应用程序,用于创建逼真的裸体照片

AI Clothes Remover
用于从照片中去除衣服的在线人工智能工具。

Undress AI Tool
免费脱衣服图片

Clothoff.io
AI脱衣机

AI Hentai Generator
免费生成ai无尽的。

热门文章

热工具

记事本++7.3.1
好用且免费的代码编辑器

SublimeText3汉化版
中文版,非常好用

禅工作室 13.0.1
功能强大的PHP集成开发环境

Dreamweaver CS6
视觉化网页开发工具

SublimeText3 Mac版
神级代码编辑软件(SublimeText3)

热门话题
 PHP和Python:代码示例和比较
Apr 15, 2025 am 12:07 AM
PHP和Python各有优劣,选择取决于项目需求和个人偏好。1.PHP适合快速开发和维护大型Web应用。2.Python在数据科学和机器学习领域占据主导地位。
 CentOS上PyTorch的GPU支持情况如何
Apr 14, 2025 pm 06:48 PM
在CentOS系统上启用PyTorchGPU加速,需要安装CUDA、cuDNN以及PyTorch的GPU版本。以下步骤将引导您完成这一过程:CUDA和cuDNN安装确定CUDA版本兼容性:使用nvidia-smi命令查看您的NVIDIA显卡支持的CUDA版本。例如,您的MX450显卡可能支持CUDA11.1或更高版本。下载并安装CUDAToolkit:访问NVIDIACUDAToolkit官网,根据您显卡支持的最高CUDA版本下载并安装相应的版本。安装cuDNN库:前
 docker原理详解
Apr 14, 2025 pm 11:57 PM
Docker利用Linux内核特性,提供高效、隔离的应用运行环境。其工作原理如下:1. 镜像作为只读模板,包含运行应用所需的一切;2. 联合文件系统(UnionFS)层叠多个文件系统,只存储差异部分,节省空间并加快速度;3. 守护进程管理镜像和容器,客户端用于交互;4. Namespaces和cgroups实现容器隔离和资源限制;5. 多种网络模式支持容器互联。理解这些核心概念,才能更好地利用Docker。
 Python vs. JavaScript:社区,图书馆和资源
Apr 15, 2025 am 12:16 AM
Python和JavaScript在社区、库和资源方面的对比各有优劣。1)Python社区友好,适合初学者,但前端开发资源不如JavaScript丰富。2)Python在数据科学和机器学习库方面强大,JavaScript则在前端开发库和框架上更胜一筹。3)两者的学习资源都丰富,但Python适合从官方文档开始,JavaScript则以MDNWebDocs为佳。选择应基于项目需求和个人兴趣。
 minio安装centos兼容性
Apr 14, 2025 pm 05:45 PM
MinIO对象存储:CentOS系统下的高性能部署MinIO是一款基于Go语言开发的高性能、分布式对象存储系统,与AmazonS3兼容。它支持多种客户端语言,包括Java、Python、JavaScript和Go。本文将简要介绍MinIO在CentOS系统上的安装和兼容性。CentOS版本兼容性MinIO已在多个CentOS版本上得到验证,包括但不限于:CentOS7.9:提供完整的安装指南,涵盖集群配置、环境准备、配置文件设置、磁盘分区以及MinI
 CentOS上PyTorch的分布式训练如何操作
Apr 14, 2025 pm 06:36 PM
在CentOS系统上进行PyTorch分布式训练,需要按照以下步骤操作:PyTorch安装:前提是CentOS系统已安装Python和pip。根据您的CUDA版本,从PyTorch官网获取合适的安装命令。对于仅需CPU的训练,可以使用以下命令:pipinstalltorchtorchvisiontorchaudio如需GPU支持,请确保已安装对应版本的CUDA和cuDNN,并使用相应的PyTorch版本进行安装。分布式环境配置:分布式训练通常需要多台机器或单机多GPU。所
 CentOS上PyTorch版本怎么选
Apr 14, 2025 pm 06:51 PM
在CentOS系统上安装PyTorch,需要仔细选择合适的版本,并考虑以下几个关键因素:一、系统环境兼容性:操作系统:建议使用CentOS7或更高版本。CUDA与cuDNN:PyTorch版本与CUDA版本密切相关。例如,PyTorch1.9.0需要CUDA11.1,而PyTorch2.0.1则需要CUDA11.3。cuDNN版本也必须与CUDA版本匹配。选择PyTorch版本前,务必确认已安装兼容的CUDA和cuDNN版本。Python版本:PyTorch官方支
 centos如何安装nginx
Apr 14, 2025 pm 08:06 PM
CentOS 安装 Nginx 需要遵循以下步骤:安装依赖包,如开发工具、pcre-devel 和 openssl-devel。下载 Nginx 源码包,解压后编译安装,并指定安装路径为 /usr/local/nginx。创建 Nginx 用户和用户组,并设置权限。修改配置文件 nginx.conf,配置监听端口和域名/IP 地址。启动 Nginx 服务。需要注意常见的错误,如依赖问题、端口冲突和配置文件错误。性能优化需要根据具体情况调整,如开启缓存和调整 worker 进程数量。


