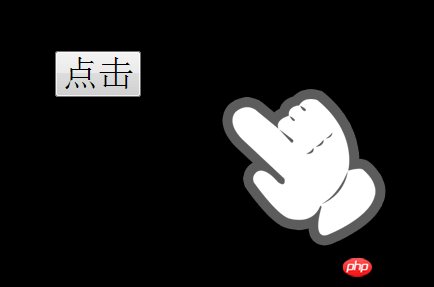
这篇文章主要介绍了JS实现的鼠标跟随代码,带有卡通手型点击效果。涉及JavaScript鼠标事件的响应与页面元素的动态调用技巧,需要的朋友可以参考下,具体如下:
一个跟随鼠标的小手效果,鼠标移在哪里,小手就跟着移向哪里,会出现手的效果,放在链接上的时候,手会变化,两只手很可爱哦,JS鼠标跟随代码分享与大家。
运行效果截图如下:

在线演示地址如下:
http://demo.jb51.net/js/2015/js-handle-style-focus-codes/
具体代码如下:
<!DOCTYPE html PUBLIC "-//W3C//DTD XHTML 1.0 Transitional//EN"
"http://www.w3.org/TR/xhtml1/DTD/xhtml1-transitional.dtd">
<html xmlns="http://www.w3.org/1999/xhtml">
<head>
<meta http-equiv="Content-Type" content="text/html; charset=utf-8" />
<title>可爱的鼠标跟随</title>
<style>
html{ background:#000;}
body,html,input{ cursor:none;}
body,html{ height:100%;}
#cursor{ position:absolute; left:100px; top:100px; display:block;}
</style>
<script>
window.onload = function(){
var oCursor = document.getElementById("cursor");
document.onmousemove=function (ev){
var oEvent=ev||event,
oWidth = document.documentElement.clientWidth,
oHeight = document.documentElement.clientHeight,
scrollTop=document.documentElement.scrollTop + oEvent.clientY,
scrollLeft=document.documentElement.scrollLeft + oEvent.clientX;
if(scrollTop > oHeight-oCursor.offsetHeight){
oCursor.style.top = oHeight-oCursor.offsetHeight+'px';
}else if(scrollTop < 0){
oCursor.style.top = 0;
}else{
oCursor.style.top = scrollTop+'px';
}
if(scrollLeft > oWidth-oCursor.offsetWidth){
oCursor.style.left = oWidth-oCursor.offsetWidth+'px';
}else{
oCursor.style.left = scrollLeft+'px';
}
document.onmousedown = function(){
oCursor.innerHTML = "<img src='images/cursor_hover.png' />";
return false;
}
document.onmouseup = function(){
oCursor.innerHTML = "<img src='images/cursor.png' />";
}
};
}
</script>
</head>
<body>
<p id="cursor"><img src="images/cursor.png" /></p>
<input type="button" style="font-size:36px; margin:100px;" value="点击" onclick="window.open('http://www.baidu.com')" />
</body>
</html>以上就是本章的全部内容,希望对大家JavaScript程序设计有所帮助,更多相关教程请访问JavaScript视频教程!


