
下面由phpstorm教程栏目给大家介绍phpstorm hyperf单元测试配置,希望对需要的朋友有所帮助!

tips:把登录成功后的token放到缓存, 下次接口请求可以直接从缓存取。
<?php
declare(strict_types=1);
/**
* This file is part of Hyperf.
*
* @link https://www.hyperf.io
* @document https://doc.hyperf.io
* @contact group@hyperf.io
* @license https://github.com/hyperf-cloud/hyperf/blob/master/LICENSE
*/
namespace HyperfTest;
use App\Model\SysUser;
use App\Service\Instance\JwtInstance;
use Hyperf\Testing\Client;
use PHPUnit\Framework\TestCase;
/**
* Class HttpTestCase.
* @method get($uri, $data = [], $headers = [])
* @method post($uri, $data = [], $headers = [])
* @method json($uri, $data = [], $headers = [])
* @method file($uri, $data = [], $headers = [])
*/
abstract class AdminTestCase extends TestCase
{
/**
* @var Client
*/
protected $client;
// token缓存key
protected $cacheKey = 'test_admin_token';
// token
protected $header = [];
public function __construct($name = null, array $data = [], $dataName = '')
{
parent::__construct($name, $data, $dataName);
$this->client = di(Client::class);
$this->login();
}
public function __call($name, $arguments)
{
return $this->client->{$name}(...$arguments);
}
/**
* @return mixed|string
* @throws \Psr\SimpleCache\InvalidArgumentException
*/
public function login()
{
$token = cache()->get($this->cacheKey);
$this->header['token'] = $token;
if (!$token) {
$userId = 1;
$user = SysUser::query()->where(['user_id' => $userId])->first();
$token = JwtInstance::instance()->encode($user);
$this->header['token'] = $token;
// 设置到缓存
cache()->set($this->cacheKey, $token, 43200);
}
return $token;
}
/**
* @param array $result
* @return false|string
*/
public function pretty(array $result)
{
// 表示成功
$this->assertSame(0, 0);
echo json_encode($result, JSON_PRETTY_PRINT | JSON_UNESCAPED_SLASHES | JSON_UNESCAPED_UNICODE) . PHP_EOL;
}
}<?php
/**
* Created by PhpStorm.
* User: phpstorm
* Date: 2020/6/9 14:36
* Description:
*/
namespace HyperfTest\Cases\Admin;
use App\Service\SysUserService;
use HyperfTest\AdminTestCase;
use Swoole\Coroutine\Channel;
use Hyperf\Utils\Context;
class SysUserControllerTest extends AdminTestCase
{
// 测试
public function testGet()
{
// $this->assertTrue(true);
$res = $this->client->get('/');
// $this->assertSame(0, $res['code']);
$this->pretty($res);
}
/**
* 后台用户列表
* 执行命令:composer test -- --filter testGetSysUserList --group adminUser
*
* @group adminUser
*/
public function testGetSysUserList()
{
$params = [
'username' => '',
'page' => 1,
'limit' => 20
];
$result = $this->get('/admin/sys/user/list', $params, $this->header);
$this->pretty($result);
}
}
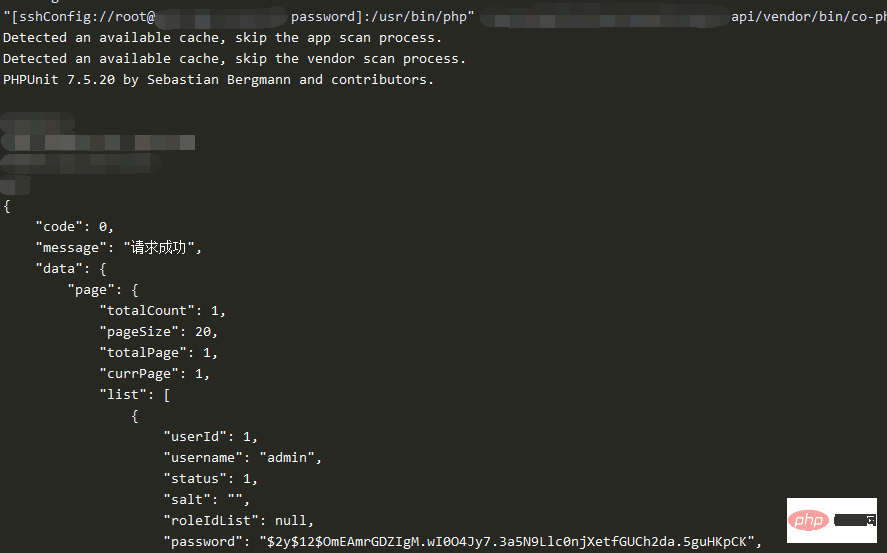
composer test -- --filter testGetSysUserList --group adminUser

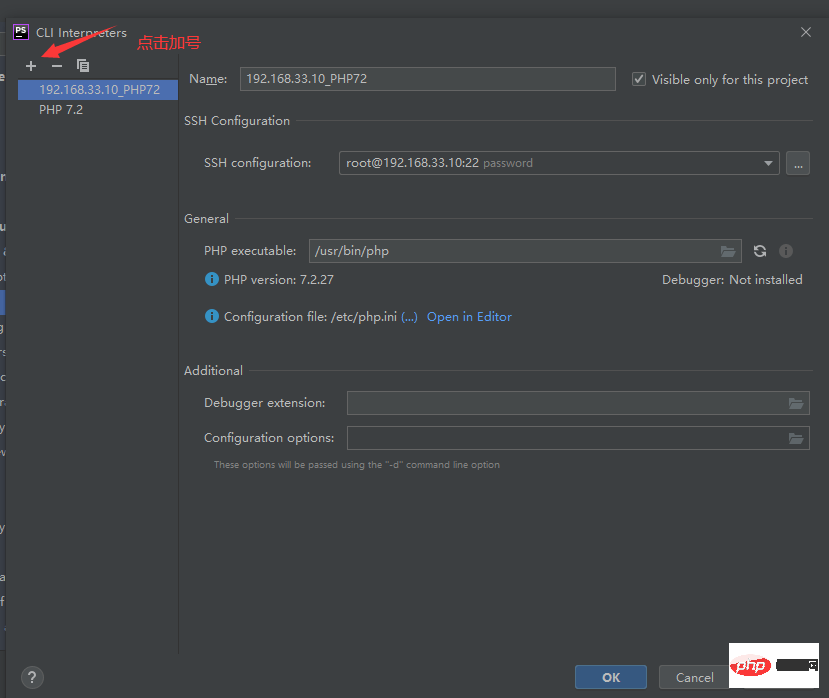
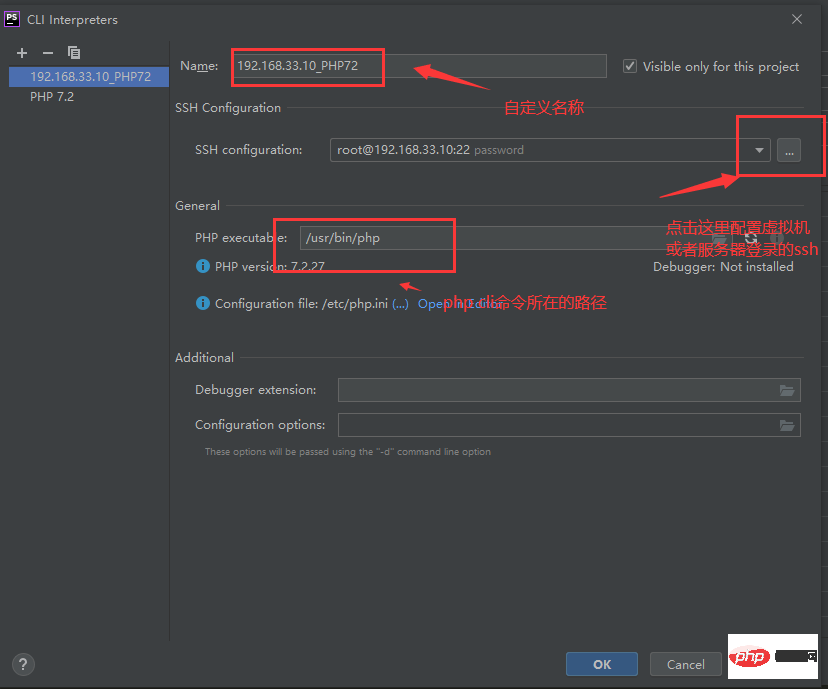
配置完点击【OK】或者【Apply】
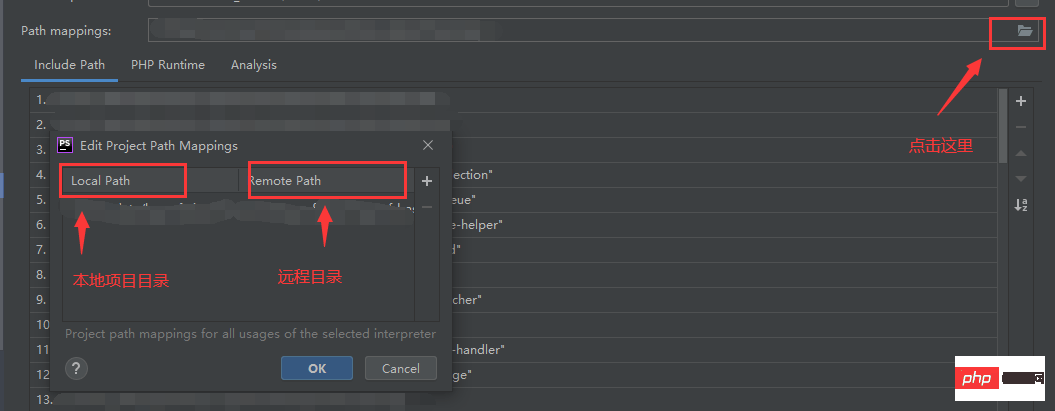
点击【OK】
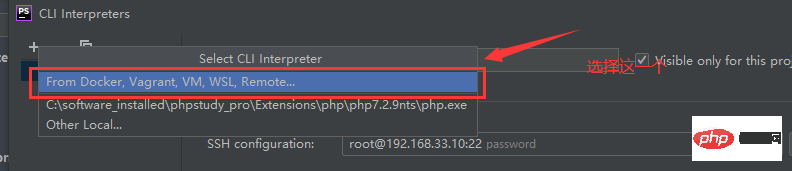
打开phpstorm->settings->languages & Frameworks->PHP->Test Frameworks
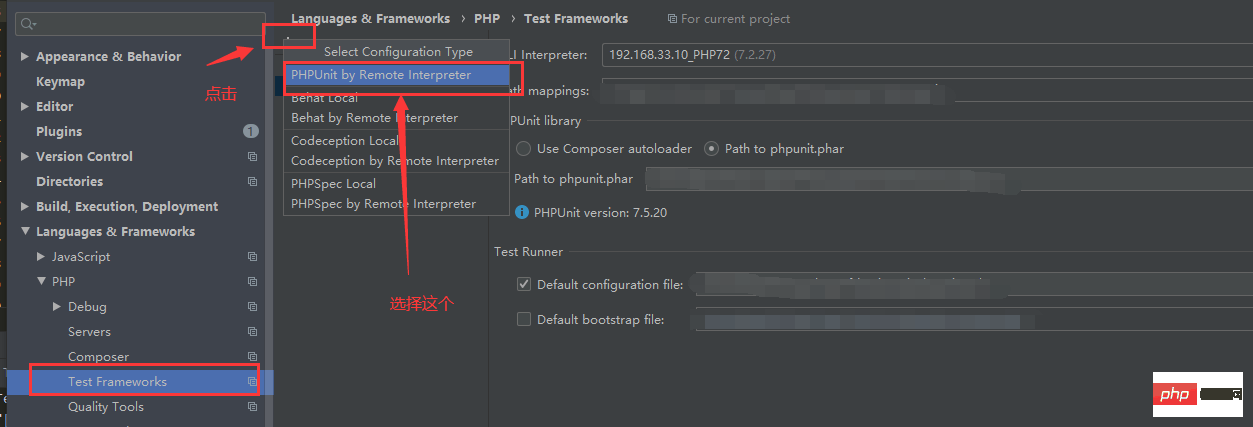
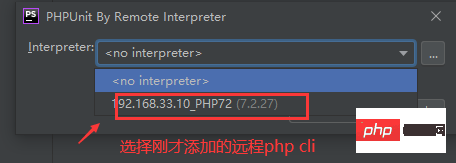
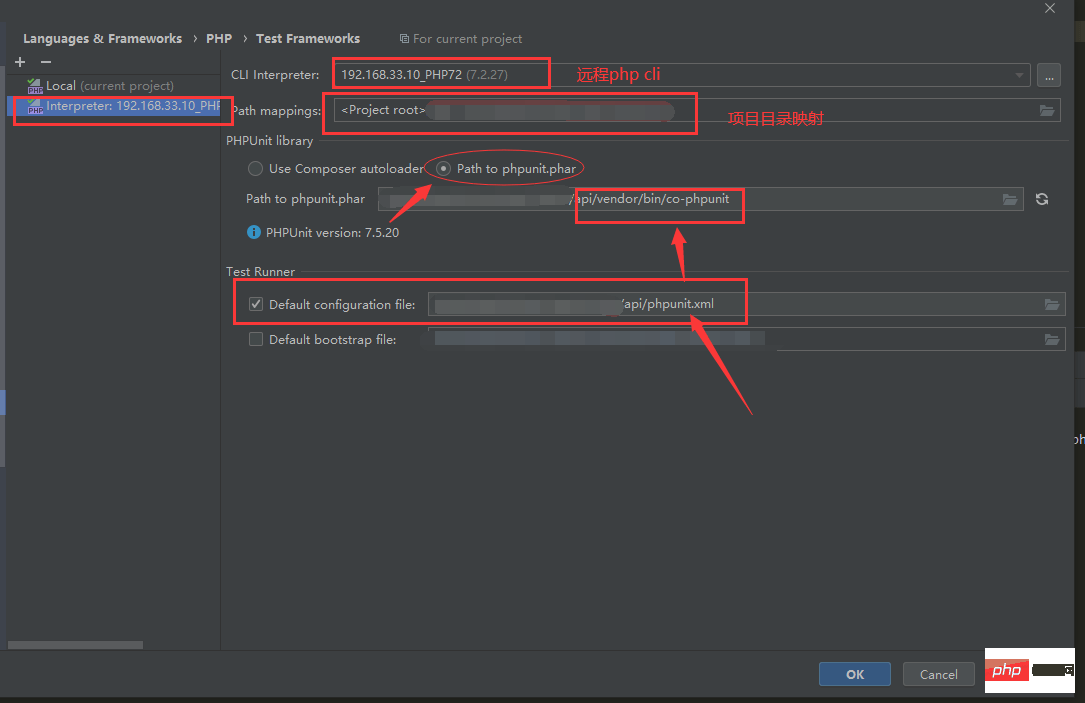
如图所示配置,点击【OK】或者 【Apply】保存
然后就可以愉快的hyperf 单元调试啦。
以上是教你进行phpstorm hyperf单元测试配置的详细内容。更多信息请关注PHP中文网其他相关文章!


