使用css grid构建复杂布局的小技巧!(值得收藏)

(推荐教程:CSS教程)
网格布局是现代CSS中最强大的功能之一。使用网格布局可以帮助我们在没有任何外部 UI 框架的情况下构建复杂的、快速响的布局。在这篇文章中,将会介绍所有我们需要了解的 CSS 网格知识 。
CSS 网格的基础知识
我们直接进入代码,如下所示,先写些标签,源码在这个链接里面:https://codepen.io/Shadid/pen/zYqNvgv
<p class="container">
  <header>Header</header>
  <aside>Aside 1</aside>
  <section>Section</section>
  <aside>Aside 2</aside>
  <footer>Footer</footer>
</p>
在上面,我们创建了一个header、两个aside和一个footer元素,并将它们包装在一个container 元素中。我们为容器元素中的所有元素添加背景色和字体大小。
.container > * {
  background: aquamarine;
  font-size: 30px;
}运行的网页如下:

现在我们添加一些网格属性:
.container {
  display: grid;
  grid-gap: 5px;
  grid-template-areas:
    "header"
    "aside-1"
    "aside-2"
    "section"
    "footer"
}

/* Assign grid areas to elements */
header {
  grid-area: header;
}

aside:nth-of-type(1) {
  grid-area: aside-1;
}

aside:nth-of-type(2) {
  grid-area: aside-2;
}

section {
  grid-area: section;
}

footer {
  grid-area: footer;
}首先,我们定义了display:grid,它将启用网格布局,然后我们使用grid-gap在网格元素中增加间隙。
接下来,我们为每个html元素分配了一个网格区域名称。在container 类中,我们可以使用grid-template-areas`属性定 义html 模板的外观,注意网格模板区域是如何排列的。
grid-template-areas:
    "header"
    "aside-1"
    "aside-2"
    "section"
    "footer"
元素的顺序与 dom 结构不同。但是,最终按我们网络区域的顺序来展示。

下一步是使我们的页面具有响应性。我们希望在更大的屏幕上使用不同的布局。CSS网格使得处理媒体查询和创建响应式布局变得非常容易。看下面代码:
@media (min-width: 670px) {
  .container {
    grid-template-areas:
      "header  header  header"
      "aside-1 section  aside-2"
      "footer    footer    footer"
  }
}我们所要做的就是在媒体查询中重新排序网格模板区域。

网格列和行
如何使用 CSS 网格来组织列和? 先从下面的代码开始:
<p class="container">
  <p class="item">One</p>
  <p class="item">Two</p>
  <p class="item">Three</p>
  <p class="item">Four</p>
  <p class="item">Five</p>
  <p class="item">Six</p>
</p>
添加一些基本的 css
.container {
  display: grid;
  height: 100vh;
  grid-gap: 10px;
}

.item {
  background: lightcoral;
}我们为上面的 dom 结构使用了网格布局,并使用grid-gap增加了风格之间的间距。 现在,我们使用grid-template-columns属性来添加一些列。
.container {
    display: grid;
    height: 100vh;
    grid-gap: 10px;
    grid-template-columns: 100px 200px auto auto;
}就像这样,我们使用了列。 我们指定第一列为100px,第二列为200px。 由于我们在第3列和第4列中应用了auto,因此剩余的屏幕长度将在其中分成两半。
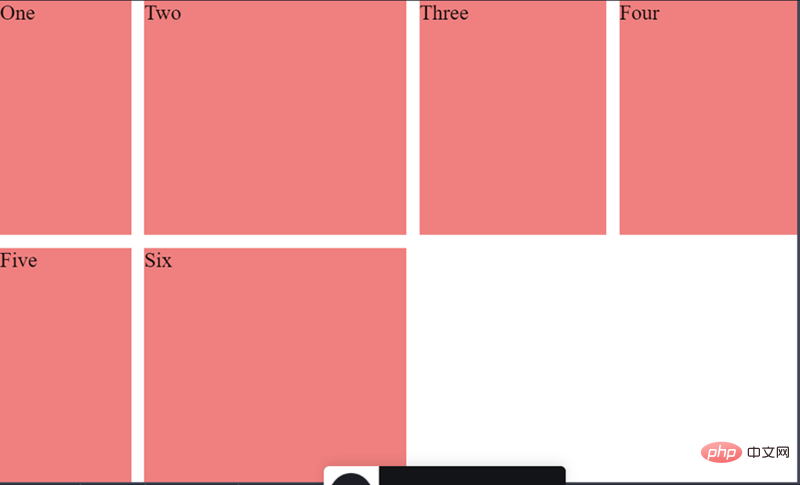
可以看到现在页面中有一个空白。 如果我想将第六列移至第三列和第四列怎么办? 为此,我们可以使用grid-column-start和grid-column-end属性。
.item:nth-of-type(6) {
  grid-column-start: 3;
  grid-column-end: 5;
}注意,我们使用grid-column-end: 5,值5指向列线。 第四列在网格的第五行结束。 grid-column-start和grid-column-end值是指网格线。
如果你觉得网格线的值让人困惑,你也可以使用span,下面的效果与上面一样:
.item:nth-of-type(6) {
  grid-column-start: 3;
  grid-column-end: span 2;
}对于span 2,指定p占用网格中的两个插槽。 现在,假设要扩展第二列填充下面的空白区域。 我们也可以通过grid-column-start属性轻松地做到这一点。
.item:nth-of-type(2) {
  grid-row-start: span 2;
}我们使用span和grid-row-start来指定我们想要占据两个插槽。
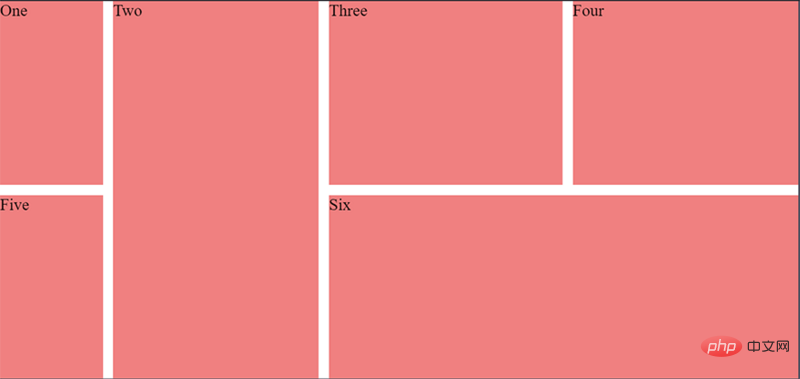
如上所见,我们已经能够使用少量的CSS网格属性来构建非常复杂的布局。
有效地使用 grid-templates
现在来看看grid-templates,在本节中,我们将讨论如何为不同的屏幕大小创建不同的布局。
首先,还是先来一段 dom 结构:
<p class="container">
  <header>header</header>
  <aside>Left</aside>
  <section>Section</section>
  <aside>Right</aside>
  <footer>Footer</footer>
</p>
接着,添加一些样式:
``
.container {
 display: grid;
 height: 100vh;
 grid-gap: 10px;
}
.container > * {
 background: coral;
 display: flex;
 justify-content: center;
 align-items: center;
}`
``我们给元素添加了背景色。从上面的代码中可以看到,我们也使用了flex属性。我们可以将flex和grid结合在一起。在这个特殊的例子中,我们使用flex属性中心对齐内容。
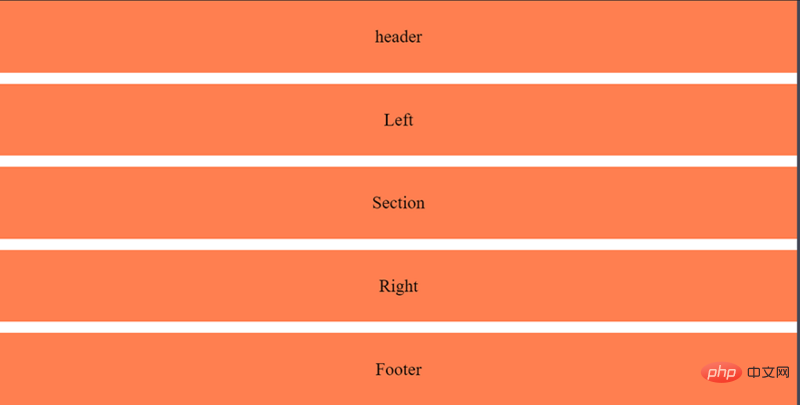
对于移动端,我们希望section在header下面,right 在 section 下面,我们可以使用网格区域来完成。首先,我们定义网格区域:
.container {
  display: grid;
  height: 100vh;
  grid-gap: 10px;
  grid-template-areas:
   "header"
    "section"
    "right"
    "left"
    "footer"
}

aside:nth-of-type(1) {
  grid-area: left;
}

aside:nth-of-type(2) {
  grid-area: right;
}

section {
  grid-area: section;
}

footer {
  grid-area: footer;
}

header {
  grid-area: header;
}在 grid-template-areas 中可以看到,我们先有header ,然后是section,然后是right,最后是left。此外,我们希望我们的section比 left 和 right都大点。为了实现这一点,我们可以使用rid-template-rows 属性
.container {
  display: grid;
  height: 100vh;
  grid-gap: 10px;
  grid-template-areas:
    "header"
    "section"
    "right"
    "left"
    "footer";
  grid-template-rows: 1fr 6fr 2fr 2fr 1fr;
}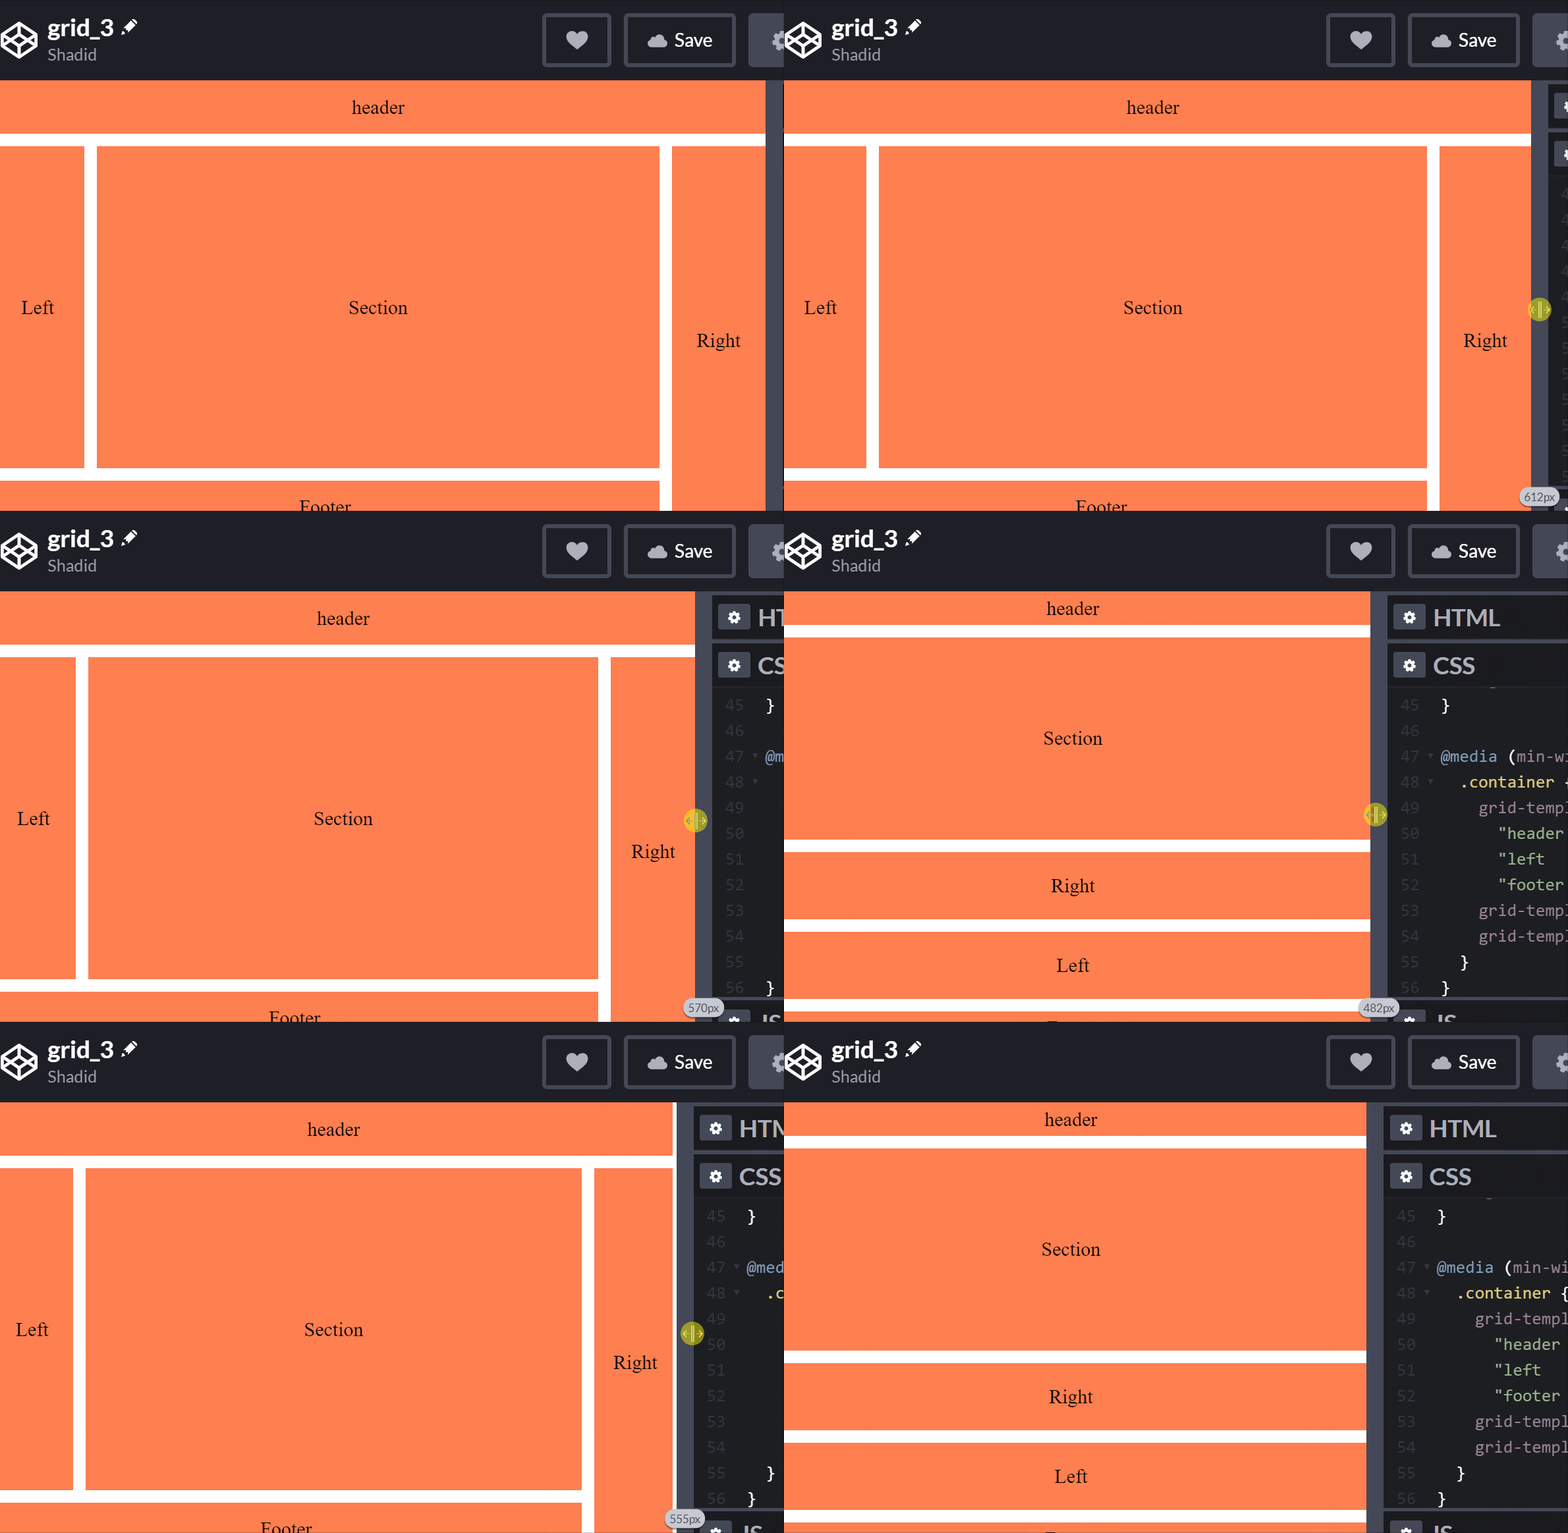
我们可以根据需要设置移动端的视图,接下我们使用媒体查询来适配一下大屏幕:
@media (min-width: 500px)  {
  .container {
    grid-template-areas:
      "header header  header"
      "left   section right"
      "footer footer  right";
    grid-template-rows: 1fr 6fr 1fr;
    grid-template-columns: 1fr 6fr 1fr;
  }
}如何使用minmax函数动态跟踪元素的大小
假设我们有两列,它们均匀地占据了屏幕上的可用空间。通过使用 grid-template-columns,我们可以很容易地做到这一点。但是,如果我们想要其中一个在200px到500px之间呢?我们的列可以适应不同的屏幕尺寸,但其中一个永远不会大于500px或小于200px。
对于这些类型的场景,我们使用minmax函数。 让我们来看看它的实际效果。
<p class="container">
  <p class="one">One</p>
  <p class="two">Two</p>
</p>
.container {
  display: grid;
  height: 100vh;
  grid-template-columns: minmax(200px, 500px) minmax(100px, auto);
}
.one {
  background: cyan;
}
.two {
  background: pink;
}在这个例子中,第一列总是在200px到500px之间。然而,第二列的最小值可以是100px,对于更大的屏幕,它将覆盖屏幕的其余部分。
如何使用 repeat 函数?
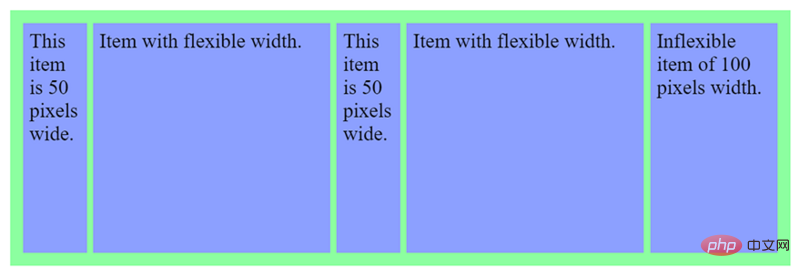
我们讨论一下元素中的重复模式。我们如何处理它们?我们可以重复我们的代码或使用javascript。不过,还有另一种方法可以用css来实现。repeat函数表示轨道列表的一个重复片段,允许以更紧凑的形式编写显示重复模式的大量列或行。
<p id="container">
  <p>
    This item is 50 pixels wide.
  </p>
  <p>
    Item with flexible width.
  </p>
  <p>
    This item is 50 pixels wide.
  </p>
  <p>
    Item with flexible width.
  </p>
  <p>
    Inflexible item of 100 pixels width.
  </p>
</p>#container {
display: grid;
grid-template-columns: repeat(2, 50px 1fr) 100px;
grid-gap: 5px;
box-sizing: border-box;
height: 200px;
width: 100%;
background-color: #8cffa0;
padding: 10px;
}
#container > p {
background-color: #8ca0ff;
padding: 5px;
}
嵌套网格
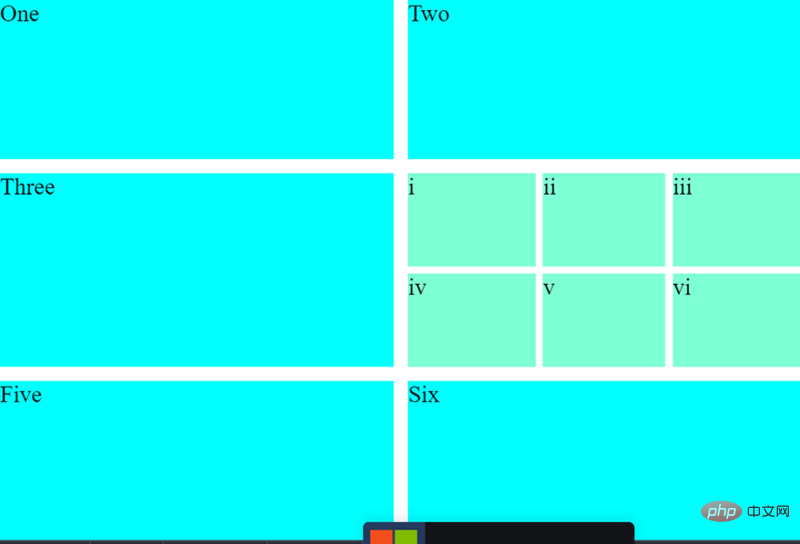
我还可以将网格嵌套在另一个网格中, 来看看如何实现这一点:
<p class="container">
  <p class="item">One</p>
  <p class="item">Two</p>
  <p class="item">Three</p>
  <p class="item inner-grid">
    <p class="item">i</p>
    <p class="item">ii</p>
    <p class="item">iii</p>
    <p class="item">iv</p>
    <p class="item">v</p>
    <p class="item">vi</p>
  </p>
  <p class="item">Five</p>
  <p class="item">Six</p>
</p>我们首先在外部container上声明网格:
.container {
  display: grid;
  height: 100vh;
  grid-gap: 10px;
  grid-template-columns: repeat(auto-fill, minmax(200px, auto))
}注意,我们在网格模板中有一个repeat函数,并将其与一个minmax函数组合在一起。我们现在也可以将网格属性应用到内部网格。
.inner-grid {
  display: grid;
  background: white;
  height: 100%;
  grid-gap: 5px;
  grid-template-columns: repeat(3, auto);
}这样,我们网格中嵌套了一个网格。
今天就跟大家分享到这里,感谢大家的观看,我们下期再见!
原文地址:https://blog.soshace.com/how-to-build-complex-layouts-with-css-grid/
作者:Shadid Haque
更多编程相关知识,请访问:编程入门!!
以上是使用css grid构建复杂布局的小技巧!(值得收藏)的详细内容。更多信息请关注PHP中文网其他相关文章!

热AI工具

Undresser.AI Undress
人工智能驱动的应用程序,用于创建逼真的裸体照片

AI Clothes Remover
用于从照片中去除衣服的在线人工智能工具。

Undress AI Tool
免费脱衣服图片

Clothoff.io
AI脱衣机

AI Hentai Generator
免费生成ai无尽的。

热门文章

热工具

记事本++7.3.1
好用且免费的代码编辑器

SublimeText3汉化版
中文版,非常好用

禅工作室 13.0.1
功能强大的PHP集成开发环境

Dreamweaver CS6
视觉化网页开发工具

SublimeText3 Mac版
神级代码编辑软件(SublimeText3)

热门话题
 bootstrap按钮怎么用
Apr 07, 2025 pm 03:09 PM
如何使用 Bootstrap 按钮?引入 Bootstrap CSS创建按钮元素并添加 Bootstrap 按钮类添加按钮文本
 bootstrap怎么调整大小
Apr 07, 2025 pm 03:18 PM
要调整 Bootstrap 中元素大小,可以使用尺寸类,具体包括:调整宽度:.col-、.w-、.mw-调整高度:.h-、.min-h-、.max-h-
 bootstrap怎么设置框架
Apr 07, 2025 pm 03:27 PM
要设置 Bootstrap 框架,需要按照以下步骤:1. 通过 CDN 引用 Bootstrap 文件;2. 下载文件并将其托管在自己的服务器上;3. 在 HTML 中包含 Bootstrap 文件;4. 根据需要编译 Sass/Less;5. 导入定制文件(可选)。设置完成后,即可使用 Bootstrap 的网格系统、组件和样式创建响应式网站和应用程序。
 bootstrap怎么插入图片
Apr 07, 2025 pm 03:30 PM
在 Bootstrap 中插入图片有以下几种方法:直接插入图片,使用 HTML 的 img 标签。使用 Bootstrap 图像组件,可以提供响应式图片和更多样式。设置图片大小,使用 img-fluid 类可以使图片自适应。设置边框,使用 img-bordered 类。设置圆角,使用 img-rounded 类。设置阴影,使用 shadow 类。调整图片大小和位置,使用 CSS 样式。使用背景图片,使用 background-image CSS 属性。
 bootstrap怎么看日期
Apr 07, 2025 pm 03:03 PM
答案:可以使用 Bootstrap 的日期选择器组件在页面中查看日期。步骤:引入 Bootstrap 框架。在 HTML 中创建日期选择器输入框。Bootstrap 将自动为选择器添加样式。使用 JavaScript 获取选定的日期。
 bootstrap日期怎么验证
Apr 07, 2025 pm 03:06 PM
在 Bootstrap 中验证日期,需遵循以下步骤:引入必需的脚本和样式;初始化日期选择器组件;设置 data-bv-date 属性以启用验证;配置验证规则(如日期格式、错误消息等);集成 Bootstrap 验证框架,并在表单提交时自动验证日期输入。
 bootstrap怎么写分割线
Apr 07, 2025 pm 03:12 PM
创建 Bootstrap 分割线有两种方法:使用 标签,可创建水平分割线。使用 CSS border 属性,可创建自定义样式的分割线。
 bootstrap如何上传文件
Apr 07, 2025 pm 01:09 PM
可以通过 Bootstrap 实现文件上传功能,步骤如下:引入 Bootstrap CSS 和 JavaScript 文件;创建文件输入字段;创建文件上传按钮;处理文件上传(使用 FormData 收集数据,然后发送到服务器);自定义样式(可选)。


