css img不透明度如何设置
css img不透明度的设置方法:首先创建一个HTML和css示例文件;然后通过给指定img设置样式为“img{opacity:0.4;filter:alpha(opacity=40);}”即可。

本教程操作环境:Windows7系统、HTML5&&CSS3版本,该方法适用于所有品牌电脑。
推荐:《css视频教程》
通过 CSS 创建透明图像是很容易的。
注释:CSS opacity 属性是 W3C CSS 推荐标准的一部分。
创建透明图像 - Hover 效果
在本例中,当用户将鼠标指针移动到图片上时,会改变图片的透明度。
创建文本在背景图像上的透明框
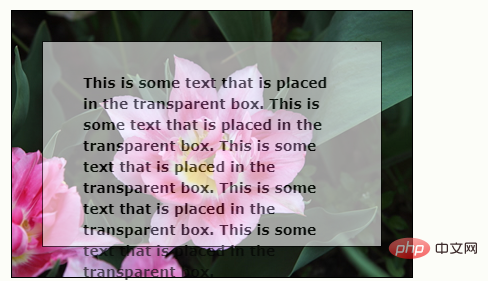
本例创建了一个包围文本的半透明框。
实例 1 - 创建透明图像
定义透明效果的 CSS3 属性是 opacity。
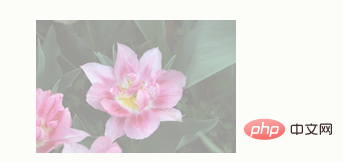
首先,我们将展示如何通过 CSS 来创建透明图像。
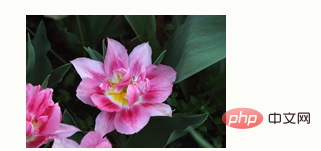
常规图像:
带有透明度的相同图像:
请看下面的 CSS:
img
{
opacity:0.4;
filter:alpha(opacity=40); /* 针对 IE8 以及更早的版本 */
}IE9, Firefox, Chrome, Opera 和 Safari 使用属性 opacity 来设定透明度。opacity 属性能够设置的值从 0.0 到 1.0。值越小,越透明。
IE8 以及更早的版本使用滤镜 filter:alpha(opacity=x)。x 能够取的值从 0 到 100。值越小,越透明。
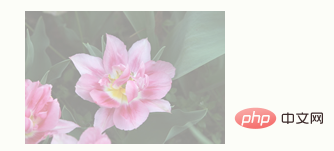
实例 2 - 图像透明度 - Hover 效果
请把鼠标指针移动到图像上:
CSS 是这样的:
img
{
opacity:0.4;
filter:alpha(opacity=40); /* 针对 IE8 以及更早的版本 */
}
img:hover
{
opacity:1.0;
filter:alpha(opacity=100); /* 针对 IE8 以及更早的版本 */
}第一个 CSS 代码块类似实例 1 中的代码。此外,我们已经设置了当鼠标指针位于图像上时的样式。在这个例子中,当指针移动到图像上时,我们希望图像是不透明的。
对应的 CSS 是:opacity=1。
IE8 以及更早的浏览器:filter:alpha(opacity=100)。
当鼠标指针移出图像后,图像会再次透明。
实例 3 - 透明框中的文本
This is some text that is placed in the transparent box. This is some text that is placed in the transparent box. This is some text that is placed in the transparent box. This is some text that is placed in the transparent box. This is some text that is placed in the transparent box.
源代码是这样的:
<!DOCTYPE html>
<html>
<head>
<style>
div.background
{
width: 400px;
height: 266px;
background: url('/i/tulip_peach_blossom_w.jpg') no-repeat;
border: 1px solid black;
}
div.transbox
{
width: 338px;
height: 204px;
margin:30px;
background-color: #ffffff;
border: 1px solid black;
/* for IE */
filter:alpha(opacity=60);
/* CSS3 standard */
opacity:0.6;
}
div.transbox p
{
margin: 30px 40px;
}
</style>
</head>
<body>
<div class="background">
<div class="transbox">
<p>
This is some text that is placed in the transparent box.
This is some text that is placed in the transparent box.
This is some text that is placed in the transparent box.
This is some text that is placed in the transparent box.
This is some text that is placed in the transparent box.
</p>
</div>
</div>
</body>
</html>首先,我们创建一个 div 元素 (class="background"),它有固定的高度和宽度、背景图像,以及边框。然后我们在第一个 div 内创建稍小的 div (class="transbox")。"transbox" div 有固定的宽度、背景色和边框 - 并且它是透明的。在透明 div 内部,我们在 p 元素中加入了一些文本。
以上是css img不透明度如何设置的详细内容。更多信息请关注PHP中文网其他相关文章!

热AI工具

Undresser.AI Undress
人工智能驱动的应用程序,用于创建逼真的裸体照片

AI Clothes Remover
用于从照片中去除衣服的在线人工智能工具。

Undress AI Tool
免费脱衣服图片

Clothoff.io
AI脱衣机

AI Hentai Generator
免费生成ai无尽的。

热门文章

热工具

记事本++7.3.1
好用且免费的代码编辑器

SublimeText3汉化版
中文版,非常好用

禅工作室 13.0.1
功能强大的PHP集成开发环境

Dreamweaver CS6
视觉化网页开发工具

SublimeText3 Mac版
神级代码编辑软件(SublimeText3)

热门话题
 bootstrap怎么写分割线
Apr 07, 2025 pm 03:12 PM
创建 Bootstrap 分割线有两种方法:使用 标签,可创建水平分割线。使用 CSS border 属性,可创建自定义样式的分割线。
 HTML,CSS和JavaScript的角色:核心职责
Apr 08, 2025 pm 07:05 PM
HTML定义网页结构,CSS负责样式和布局,JavaScript赋予动态交互。三者在网页开发中各司其职,共同构建丰富多彩的网站。
 vue中怎么用bootstrap
Apr 07, 2025 pm 11:33 PM
在 Vue.js 中使用 Bootstrap 分为五个步骤:安装 Bootstrap。在 main.js 中导入 Bootstrap。直接在模板中使用 Bootstrap 组件。可选:自定义样式。可选:使用插件。
 bootstrap怎么插入图片
Apr 07, 2025 pm 03:30 PM
在 Bootstrap 中插入图片有以下几种方法:直接插入图片,使用 HTML 的 img 标签。使用 Bootstrap 图像组件,可以提供响应式图片和更多样式。设置图片大小,使用 img-fluid 类可以使图片自适应。设置边框,使用 img-bordered 类。设置圆角,使用 img-rounded 类。设置阴影,使用 shadow 类。调整图片大小和位置,使用 CSS 样式。使用背景图片,使用 background-image CSS 属性。
 bootstrap怎么调整大小
Apr 07, 2025 pm 03:18 PM
要调整 Bootstrap 中元素大小,可以使用尺寸类,具体包括:调整宽度:.col-、.w-、.mw-调整高度:.h-、.min-h-、.max-h-
 bootstrap怎么设置框架
Apr 07, 2025 pm 03:27 PM
要设置 Bootstrap 框架,需要按照以下步骤:1. 通过 CDN 引用 Bootstrap 文件;2. 下载文件并将其托管在自己的服务器上;3. 在 HTML 中包含 Bootstrap 文件;4. 根据需要编译 Sass/Less;5. 导入定制文件(可选)。设置完成后,即可使用 Bootstrap 的网格系统、组件和样式创建响应式网站和应用程序。
 bootstrap按钮怎么用
Apr 07, 2025 pm 03:09 PM
如何使用 Bootstrap 按钮?引入 Bootstrap CSS创建按钮元素并添加 Bootstrap 按钮类添加按钮文本
 bootstrap怎么看日期
Apr 07, 2025 pm 03:03 PM
答案:可以使用 Bootstrap 的日期选择器组件在页面中查看日期。步骤:引入 Bootstrap 框架。在 HTML 中创建日期选择器输入框。Bootstrap 将自动为选择器添加样式。使用 JavaScript 获取选定的日期。


