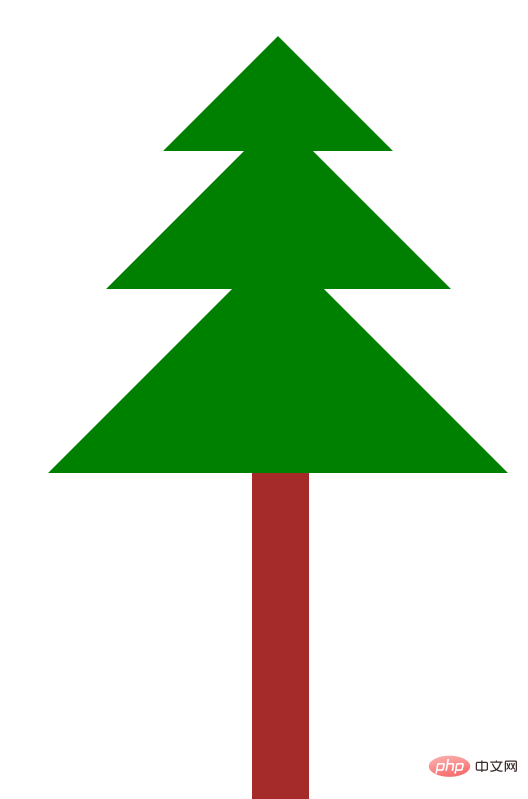
绘制方法:1、定义3个div标签,使用border属性将其修饰成3个大小不同的三角形;2、使用margin属性控制3个三角形的位置,形成树冠;3、定义1个div标签制作树干,使用margin属性将其定位到树冠下方即可。

本教程操作环境:windows7系统、CSS3&&HTML5版、Dell G3电脑。
今天给大家讲一讲如何用css画一颗简单的树。在画树之前,首先要学会画一个三角形。
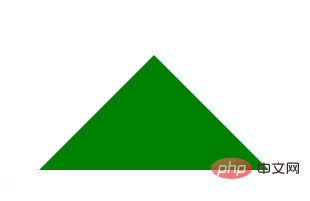
这里我们用边框来画一个三角形。首先给一个div,然后把它的宽高设置为0,把他的边框设置你想要的尺寸,线为实线,颜色为你想要的颜色。这里以画上三角为例,你就要把他的下边框颜色设置为你想要的颜色(这里以绿色为例),然后把其他三边设置为透明色,这样就可以画一个三角形出来了。下面就是画上三角的代码:
<!DOCTYPE html>
<html>
	<head>
		<meta charset="utf-8" />
		<title></title>
		<style>
			.div1{
				width: 0px;
				height: 0px;
				border-top: 100px solid transparent;
				border-bottom: 100px solid green;
				border-left: 100px solid transparent;
				border-right: 100px solid transparent;
			}
		</style>
	</head>
	<body>
		<div class="div1"></div>
	</body>
</html>这是效果图:

要想三角形的上面那个角贴在浏览器的上面,那么border-top: 100px solid transparent;这句话就可以不要,也可以把这个尺寸设置为1px。
这是下三角的代码:
<!DOCTYPE html>
<html>
	<head>
		<meta charset="utf-8" />
		<title></title>
		<style>
			.div1{
				width: 0px;
				height: 0px;
				border-top: 100px solid green;
				border-bottom: 100px solid transparent;
				border-left: 100px solid transparent;
				border-right: 100px solid transparent;
			}
		</style>
	</head>
	<body>
		<div class="div1"></div>
	</body>
</html>这是效果图:

接下来就可以画一棵树了,首先给一个大的div,用来放整棵树,然后再在里面放四个div,前三个div用来画三角形,也就是树的上半部分(叶子);下半部分就是树干,也就是第四个div。再用margin属性调div的位置(只学了边距,之后可以用定位来做)。这样一颗完整的树就画出来了;下面是详细代码
<!DOCTYPE html>
<html>
	<head>
		<meta charset="UTF-8">
		<title></title>
		<style type="text/css">
			.father{
				width: 1000px;
				height: 1000px;
				margin-top: 296px;
				margin-left: 800px;
			}
			.son1{
				width: 0px;
				height: 0px;
				border-top: 100px solid transparent;
				border-bottom: 100px solid green;
				border-left: 100px solid transparent;
				border-right: 100px solid transparent;
				margin-top: -98px;
				margin-left: 100px;
			}
			.son2{
				width: 0px;
				height: 0px;
				border-top: 150px solid transparent;
				border-bottom: 150px solid green;
				border-left: 150px solid transparent;
				border-right: 150px solid transparent;
				margin-top: -180px;
				margin-left: 50px;
			}
			.son3{
				width: 0px;
				height: 0px;
				border-top: 200px solid transparent;
				border-bottom: 200px solid green;
				border-left: 200px solid transparent;
				border-right: 200px solid transparent;
				margin-top: -240px;

			}
			.son4{
				width: 50px;
				height: 300px;
				background-color: brown;
				margin-left: 177px;
			}
		</style>
	</head>
	<body>
		<div class="father">
			<div class="son1"></div>
			<div class="son2"></div>
			<div class="son3"></div>
			<div class="son4"></div>
		</div>
	</body>
</html>这是最终的效果图

推荐学习:CSS视频教程
以上是用css怎么画树的详细内容。更多信息请关注PHP中文网其他相关文章!


