Django配合Bootstrap怎么制作计算器(实战)
本篇文章手把手带大家使用Django Bootstrap制作一个计算器,希望对大家有所帮助!

准备工作
创建一个应用
)
添加应用到配置
)
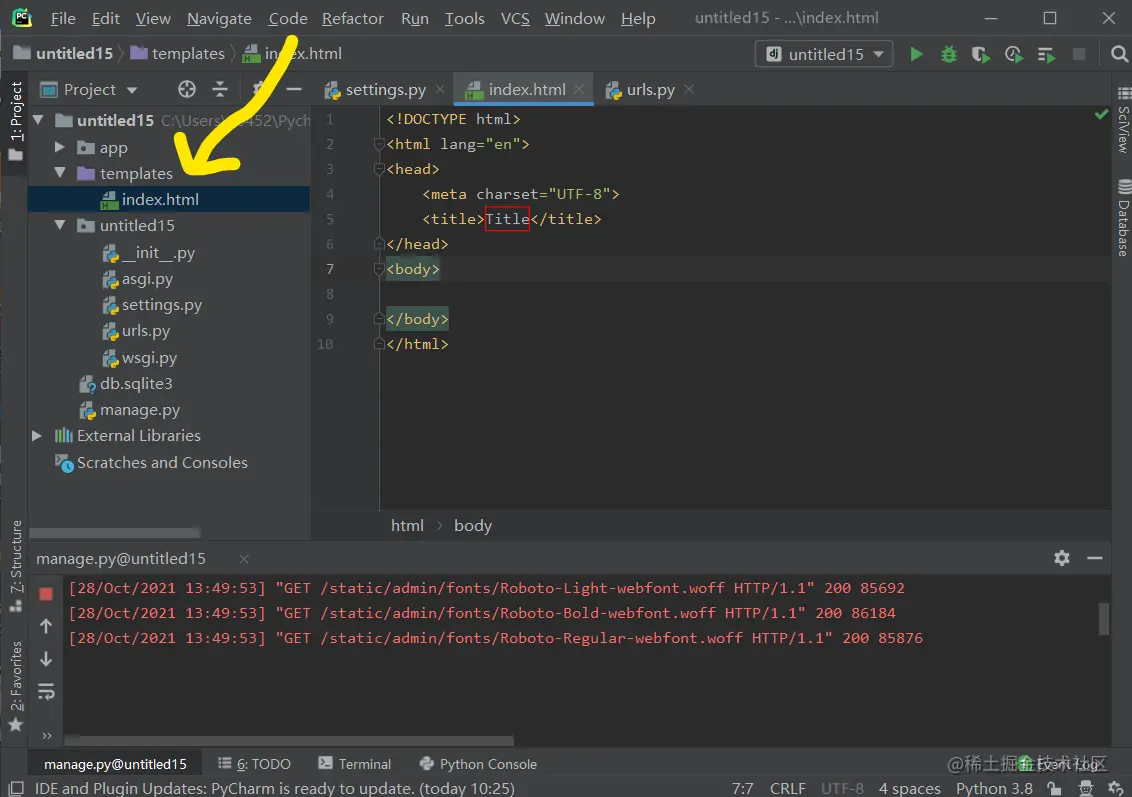
创建一个html

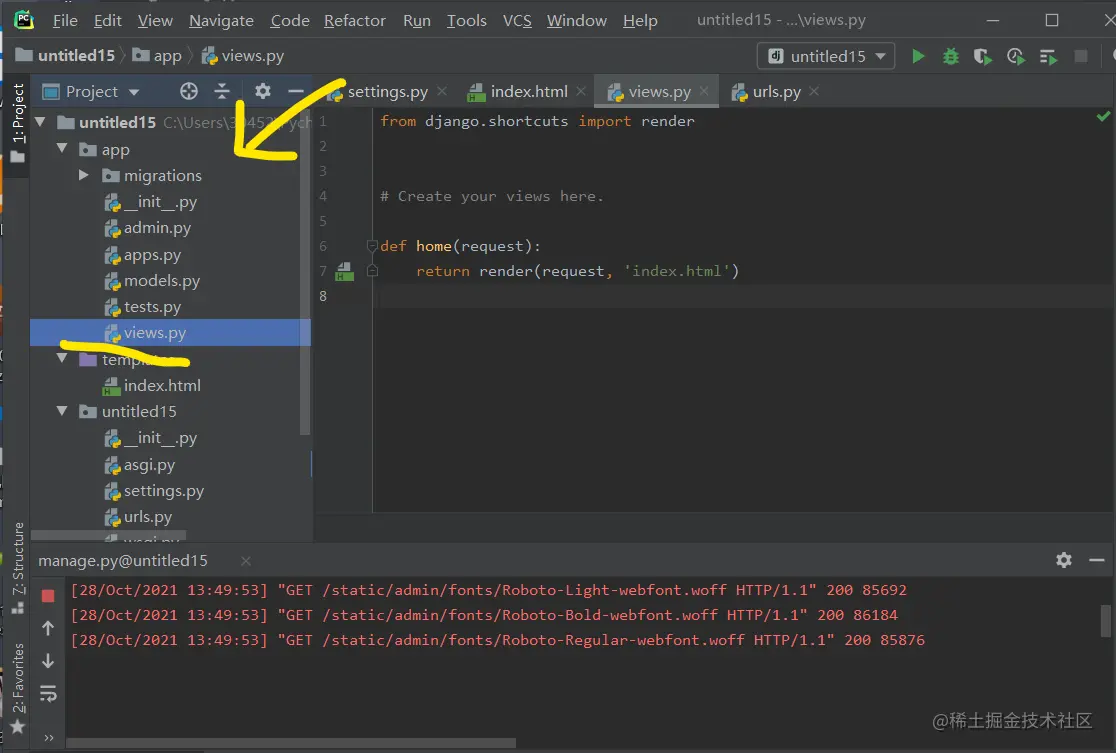
编写视图函数
from django.shortcuts import render


# Create your views here.

def home(request):
    return render(request, 'index.html')
配置路由
from django.contrib import admin
from django.urls import path,include

from app.views import home

urlpatterns = [
    path('admin/', admin.site.urls),
    path('',home,name='hoome'),
])
导入Bootstrap前端框架
下载地址
https://github.com/twbs/bootstrap/releases/download/v3.4.1/bootstrap-3.4.1-dist.zip
将css、fonts、js复制到static文件夹下 没有则创建该文件夹。【相关推荐:《bootstrap教程》】
)
编写前端内容
{% load static %}
<!DOCTYPE html>
<html>
<head>
<meta charset="UTF-8">
<title>计算器</title>
<link rel="stylesheet" href="{% static 'css/bootstrap.min.css' %}">
<script src="https://cdn.jsdelivr.net/npm/jquery@1.12.4/dist/jquery.min.js"></script>
<script src="{% static 'js/bootstrap.min.js' %}"></script>
<style>
body{
background-position: center 0;
background-repeat: no-repeat;
background-attachment: fixed;
background-size: cover;
-webkit-background-size: cover;
-o-background-size: cover;
-moz-background-size: cover;
-ms-background-size:cover;
}
.input_show{
margin-top: 35px;
max-width: 280px;
height: 35px;
}
.btn_num{
margin:1px 1px 1px 1px;
width: 60px;
}
.btn_clear{
margin-left: 40px;
margin-right: 20px;
}
.extenContent{
height: 300px;
}
</style>
</head>
<body>
<div>
<div>
<div class="col-xs-1 col-sm-4"> </div>
<div id="computer" class="col-xs-1 col-sm-6">
<input type="text" id="txt_code" name="txt_code" value="" class="form-control input_show" placeholder="" disabled>
<input type="text" id="txt_result" name="txt_result" value="" class="form-control input_show" placeholder="结果" disabled>
<br>
<div>
<button type="button" class="btn btn-default btn_num" onclick="fun_7()">7</button>
<button type="button" class="btn btn-default btn_num" onclick="fun_8()">8</button>
<button type="button" class="btn btn-default btn_num" onclick="fun_9()">9</button>
<button type="button" class="btn btn-default btn_num" onclick="fun_div()">/</button>
<br>
<button type="button" class="btn btn-default btn_num" onclick="fun_4()">4</button>
<button type="button" class="btn btn-default btn_num" onclick="fun_5()">5</button>
<button type="button" class="btn btn-default btn_num" onclick="fun_6()">6</button>
<button type="button" class="btn btn-default btn_num" onclick="fun_mul()">*</button>
<br>
<button type="button" class="btn btn-default btn_num" onclick="fun_1()">1</button>
<button type="button" class="btn btn-default btn_num" onclick="fun_2()">2</button>
<button type="button" class="btn btn-default btn_num" onclick="fun_3()">3</button>
<button type="button" class="btn btn-default btn_num" onclick="fun_sub()">-</button>
<br>
<button type="button" class="btn btn-default btn_num" onclick="fun_0()">0</button>
<button type="button" class="btn btn-default btn_num" onclick="fun_00()">00</button>
<button type="button" class="btn btn-default btn_num" onclick="fun_dot()">.</button>
<button type="button" class="btn btn-default btn_num" onclick="fun_add()">+</button>
</div>
<div>
<br>
<button type="button" class="btn btn-success btn-lg btn_clear" id="lgbut_clear" onclick="fun_clear()">
清空
</button>
<button type="button" class="btn btn-primary btn-lg" id="lgbut_compute" >
计算
</button>
</div>
</div>
<div class="col-xs-1 col-sm-2"></div>
</div>
</div>
<div></div>
<script>
var x=document.getElementById("txt_code");
var y=document.getElementById("txt_result");
function fun_7() {
x.value+='7';
}
function fun_8() {
x.value+='8';
}
function fun_9() {
x.value+='9';
}
function fun_div() {
x.value+='/';
}
function fun_4() {
x.value+='4';
}
function fun_5() {
x.value+='5';
}
function fun_6() {
x.value+='6';
}
function fun_mul() {
x.value+='*';
}
function fun_1() {
x.value+='1';
}
function fun_2() {
x.value+='2';
}
function fun_3() {
x.value+='3';
}
function fun_sub() {
x.value+='-';
}
function fun_0() {
x.value+='0';
}
function fun_00() {
x.value+='00';
}
function fun_dot() {
x.value+='.';
}
function fun_add() {
x.value+='+';
}
function fun_clear() {
x.value='';
y.value='';
}
</script>
<script>
function ShowResult(data) {
var y = document.getElementById('txt_result');
y.value = data['result'];
}
</script>
<script>
$('#lgbut_compute').click(function () {
$.ajax({
url:'compute/',
type:'POST',
data:{
'code':$('#txt_code').val()
},
dataType:'json',
success:ShowResult
})
})
</script>
</body>
</html>编写视图函数
import subprocess

from django.http import JsonResponse
from django.shortcuts import render

# Create your views here.
from django.views.decorators.csrf import csrf_exempt
from django.views.decorators.http import require_POST


def home(request):
    return render(request, 'index.html')


@csrf_exempt
def compute(request):
    code = request.POST.get('code')
    try:
        code = 'print(' + code + ')'
        result = subprocess.check_output(['python', '-c', code], universal_newlines=True, stderr=subprocess.STDOUT,timeout=30)
    except:
        result='输入错误'

return JsonResponse(data={'result': result}))
测试
)
)
)
更多关于bootstrap的相关知识,可访问:bootstrap基础教程!!
以上是Django配合Bootstrap怎么制作计算器(实战)的详细内容。更多信息请关注PHP中文网其他相关文章!

热AI工具

Undresser.AI Undress
人工智能驱动的应用程序,用于创建逼真的裸体照片

AI Clothes Remover
用于从照片中去除衣服的在线人工智能工具。

Undress AI Tool
免费脱衣服图片

Clothoff.io
AI脱衣机

AI Hentai Generator
免费生成ai无尽的。

热门文章

热工具

记事本++7.3.1
好用且免费的代码编辑器

SublimeText3汉化版
中文版,非常好用

禅工作室 13.0.1
功能强大的PHP集成开发环境

Dreamweaver CS6
视觉化网页开发工具

SublimeText3 Mac版
神级代码编辑软件(SublimeText3)

热门话题
 bootstrap搜索栏怎么获取
Apr 07, 2025 pm 03:33 PM
如何使用 Bootstrap 获取搜索栏的值:确定搜索栏的 ID 或名称。使用 JavaScript 获取 DOM 元素。获取元素的值。执行所需的操作。
 vue中怎么用bootstrap
Apr 07, 2025 pm 11:33 PM
在 Vue.js 中使用 Bootstrap 分为五个步骤:安装 Bootstrap。在 main.js 中导入 Bootstrap。直接在模板中使用 Bootstrap 组件。可选:自定义样式。可选:使用插件。
 bootstrap怎么写分割线
Apr 07, 2025 pm 03:12 PM
创建 Bootstrap 分割线有两种方法:使用 标签,可创建水平分割线。使用 CSS border 属性,可创建自定义样式的分割线。
 bootstrap垂直居中怎么弄
Apr 07, 2025 pm 03:21 PM
使用 Bootstrap 实现垂直居中:flexbox 法:使用 d-flex、justify-content-center 和 align-items-center 类,将元素置于 flexbox 容器内。align-items-center 类法:对于不支持 flexbox 的浏览器,使用 align-items-center 类,前提是父元素具有已定义的高度。
 bootstrap怎么调整大小
Apr 07, 2025 pm 03:18 PM
要调整 Bootstrap 中元素大小,可以使用尺寸类,具体包括:调整宽度:.col-、.w-、.mw-调整高度:.h-、.min-h-、.max-h-
 bootstrap怎么设置框架
Apr 07, 2025 pm 03:27 PM
要设置 Bootstrap 框架,需要按照以下步骤:1. 通过 CDN 引用 Bootstrap 文件;2. 下载文件并将其托管在自己的服务器上;3. 在 HTML 中包含 Bootstrap 文件;4. 根据需要编译 Sass/Less;5. 导入定制文件(可选)。设置完成后,即可使用 Bootstrap 的网格系统、组件和样式创建响应式网站和应用程序。
 bootstrap怎么插入图片
Apr 07, 2025 pm 03:30 PM
在 Bootstrap 中插入图片有以下几种方法:直接插入图片,使用 HTML 的 img 标签。使用 Bootstrap 图像组件,可以提供响应式图片和更多样式。设置图片大小,使用 img-fluid 类可以使图片自适应。设置边框,使用 img-bordered 类。设置圆角,使用 img-rounded 类。设置阴影,使用 shadow 类。调整图片大小和位置,使用 CSS 样式。使用背景图片,使用 background-image CSS 属性。
 Bootstrap Table使用AJAX获取数据出现乱码怎么办
Apr 07, 2025 am 11:54 AM
使用AJAX从服务器获取数据时Bootstrap Table出现乱码的解决方法:1. 设置服务器端代码的正确字符编码(如UTF-8)。2. 在AJAX请求中设置请求头,指定接受的字符编码(Accept-Charset)。3. 使用Bootstrap Table的"unescape"转换器将已转义的HTML实体解码为原始字符。


