

聊聊Angular中懒加载模块并动态显示它的组件

不通过路由的情况下, 怎么懒加载一个angular模块,并动态创建其中声明的组件?下面本篇文章给大家介绍一下方法,希望对大家有所帮助!

环境: Angular 13.x.x
angular中支持可以通过路由来懒加载某些页面模块已达到减少首屏尺寸, 提高首屏加载速度的目的. 但是这种通过路由的方式有时候是无法满足需求的。【相关教程推荐:《angularjs视频教程》】
比如, 点击一个按钮后显示一行工具栏, 这个工具栏组件我不希望它默认打包进main.js, 而是用户点按钮后动态把组件加载并显示出来.
那为什么要动态加载呢? 如果直接在目标页面组件引入工具栏组件, 那么工具栏组件中的代码就会被打包进目标页面组件所在的模块, 这会导致目标页面组件所在的模块生成的js体积变大; 通过动态懒加载的方式, 可以让工具栏组件只在用户点了按钮后再加载, 这样就可以达到减少首屏尺寸的目的.
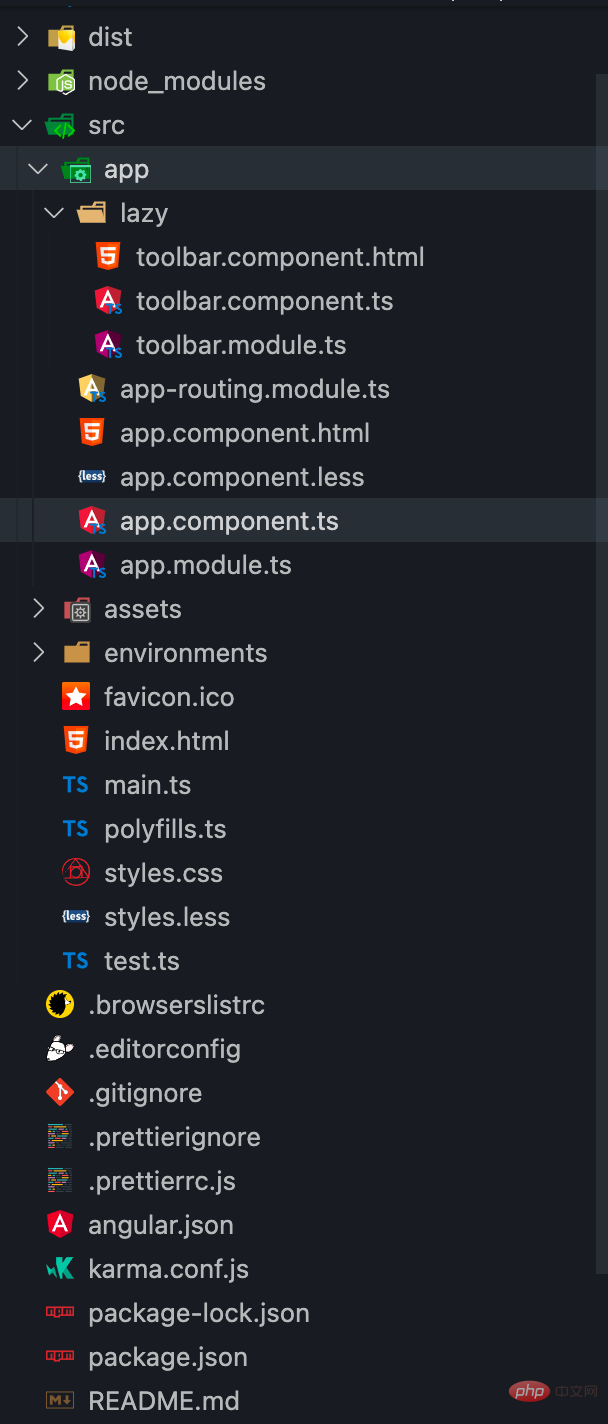
为了演示, 新建一个angular项目, 然后再新建一个ToolbarModule, 项目的目录结构如图
为了达到演示的目的, 我在ToolbarModule的html模板中放了个将近1m的base64图片, 然后直接在AppModule中引用ToolbarModule, 然后执行ng build, 执行结果如图

可以看到打包尺寸到达了1.42mb, 也就是说用户每次刷新这个页面, 不管用户有没有点击显示工具栏按钮, 工具栏组件相关的内容都会被加载出来, 这造成了资源的浪费, 所以下面将ToolbarModule从AppModule的imports声明中移除, 然后在用户点击首次点击显示时懒加载工具栏组件.
懒加载工具栏组件
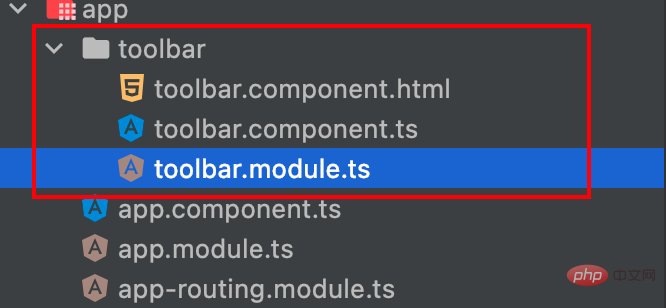
首先, 新建一个ToolbarModule和ToolbarComponent, 并在ToolbarModule声明ToolbarComponent
toolbar.module.ts
import { NgModule } from '@angular/core';
import { CommonModule } from '@angular/common';
import { ToolbarComponent } from './toolbar.component';

@NgModule({
    declarations: [ToolbarComponent],
    imports: [CommonModule],
    exports: [ToolbarComponent],
})
class ToolbarModule {}

export { ToolbarComponent, ToolbarModule };toolbar.component.ts
import { Component, OnInit } from '@angular/core';

@Component({
    selector: 'toolbar',
    templateUrl: './toolbar.component.html',
    styles: [
        `
    svg {
      width: 64px;
      height: 64px;
    }
    img {
      width: 64px;
      height: 64px;
      object-fit: cover;
    }
    `,
    ],
})
export class ToolbarComponent implements OnInit {
    constructor() {}

    ngOnInit(): void {}
}toolbar.component.html
<p class="flex">
  <svg t="1652618923451" class="icon" viewBox="0 0 1024 1024" version="1.1" xmlns="http://www.w3.org/2000/svg" p-id="2104" width="200" height="200"><path d="M412 618m-348 0a348 348 0 1 0 696 0 348 348 0 1 0-696 0Z" fill="#C9F4EB" p-id="2105"></path><path d="M673.19 393h-333a25 25 0 0 1 0-50h333a25 25 0 0 1 0 50zM600.89 235H423.11C367.91 235 323 190.28 323 135.32v-12.5a25 25 0 0 1 50 0v12.5c0 27.39 22.48 49.68 50.11 49.68h177.78c27.63 0 50.11-22.29 50.11-49.68v-16.5a25 25 0 1 1 50 0v16.5c0 54.96-44.91 99.68-100.11 99.68zM673.19 585.5h-333a25 25 0 0 1 0-50h333a25 25 0 0 1 0 50zM467 778H340a25 25 0 0 1 0-50h127a25 25 0 0 1 0 50z" fill="#087E6A" p-id="2106"></path><path d="M739.76 952H273.62a125.14 125.14 0 0 1-125-125V197a125.14 125.14 0 0 1 125-125h466.14a125.14 125.14 0 0 1 125 125v630a125.14 125.14 0 0 1-125 125zM273.62 122a75.08 75.08 0 0 0-75 75v630a75.08 75.08 0 0 0 75 75h466.14a75.08 75.08 0 0 0 75-75V197a75.08 75.08 0 0 0-75-75z" fill="#087E6A" p-id="2107"></path></svg>
  <svg t="1652618941842"
       class="icon"
       viewBox="0 0 1024 1024"
       version="1.1"
       xmlns="http://www.w3.org/2000/svg"
       p-id="2247"
       width="200"
       height="200">
    <path d="M415 624m-348 0a348 348 0 1 0 696 0 348 348 0 1 0-696 0Z"
          fill="#C9F4EB"
          p-id="2248"></path>
    <path d="M695 790H362a25 25 0 0 1 0-50h333a25 25 0 0 1 0 50zM583 649H362a25 25 0 0 1 0-50h221a25 25 0 0 1 0 50zM262 287H129a25 25 0 0 1 0-50h133a25 25 0 0 1 0 50zM262 455.33H129a25 25 0 1 1 0-50h133a25 25 0 0 1 0 50zM262 623.67H129a25 25 0 0 1 0-50h133a25 25 0 0 1 0 50zM262 792H129a25 25 0 0 1 0-50h133a25 25 0 0 1 0 50z"
          fill="#087E6A"
          p-id="2249"></path>
    <path d="M761.76 964H295.62a125.14 125.14 0 0 1-125-125V209a125.14 125.14 0 0 1 125-125h466.14a125.14 125.14 0 0 1 125 125v630a125.14 125.14 0 0 1-125 125zM295.62 134a75.09 75.09 0 0 0-75 75v630a75.08 75.08 0 0 0 75 75h466.14a75.08 75.08 0 0 0 75-75V209a75.09 75.09 0 0 0-75-75z"
          fill="#087E6A"
          p-id="2250"></path>
    <path d="M617 376H443a25 25 0 0 1 0-50h174a25 25 0 0 1 0 50z"
          fill="#087E6A"
          p-id="2251"></path>
    <path d="M530 463a25 25 0 0 1-25-25V264a25 25 0 0 1 50 0v174a25 25 0 0 1-25 25z"
          fill="#087E6A"
          p-id="2252"></path>
  </svg>
  <img src="<这里应该是一张大小将近1M的base64图片, 内容较大, 就略去了...>" alt="">
</p>然后再AppComponent的中按钮点击事件处理程序中写加载工具栏模块的代码:
app.component.ts
import { Component, createNgModuleRef, Injector, ViewChild, ViewContainerRef } from '@angular/core';
@Component({
selector: 'root',
template: `
<p class="container h-screen flex items-center flex-col w-100 justify-center">
<p class="mb-3"
[ngClass]="{ hidden: !isToolbarVisible }">
<ng-container #toolbar></ng-container>
</p>
<p>
<button (click)="toggleToolbarVisibility()"
class="bg-blue-500 hover:bg-blue-700 text-white font-bold py-2 px-4 rounded">{{ isToolbarVisible ? '隐藏' : '显示' }}</button>
<p class="mt-3">首屏内容</p>
</p>
</p>
`,
})
export class AppComponent {
title = 'ngx-lazy-load-demo';
toolbarLoaded = false;
isToolbarVisible = false;
@ViewChild('toolbar', { read: ViewContainerRef }) toolbarViewRef!: ViewContainerRef;
constructor(private _injector: Injector) {}
toggleToolbarVisibility() {
this.isToolbarVisible = !this.isToolbarVisible;
this.loadToolbarModule().then();
}
private async loadToolbarModule() {
    if (this.toolbarLoaded) return;
    this.toolbarLoaded = true;
    const { ToolbarModule, ToolbarComponent } = await import('./toolbar/toolbar.module');
    const moduleRef = createNgModuleRef(ToolbarModule, this._injector);
    const { injector } = moduleRef;
    const componentRef = this.toolbarViewRef.createComponent(ToolbarComponent, {
        injector,
        ngModuleRef: moduleRef,
    });
}
}关键在于其中的第32-42行, 首先通过一个动态import导入toolbar.module.ts中的模块, 然后调用createNgModuleRef并传入当前组件的Injector作为ToolbarModule的父级Injector, 这样就实例化了ToolbarModule得到了moduleRef对象, 最后就是调用html模板中声明的<ng-container #toolbar></ng-container>的ViewContainerRef对象的createComponent方法创建ToolbarComponent组件
private async loadToolbarModule() {
if (this.toolbarLoaded) return;
this.toolbarLoaded = true;
const { ToolbarModule, ToolbarComponent } = await import('./toolbar/toolbar.module');
const moduleRef = createNgModuleRef(ToolbarModule, this._injector);
const { injector } = moduleRef;
const componentRef = this.toolbarViewRef.createComponent(ToolbarComponent, {
injector,
ngModuleRef: moduleRef,
});
}此时再来看下这番操作后执行ng build打包的尺寸大小
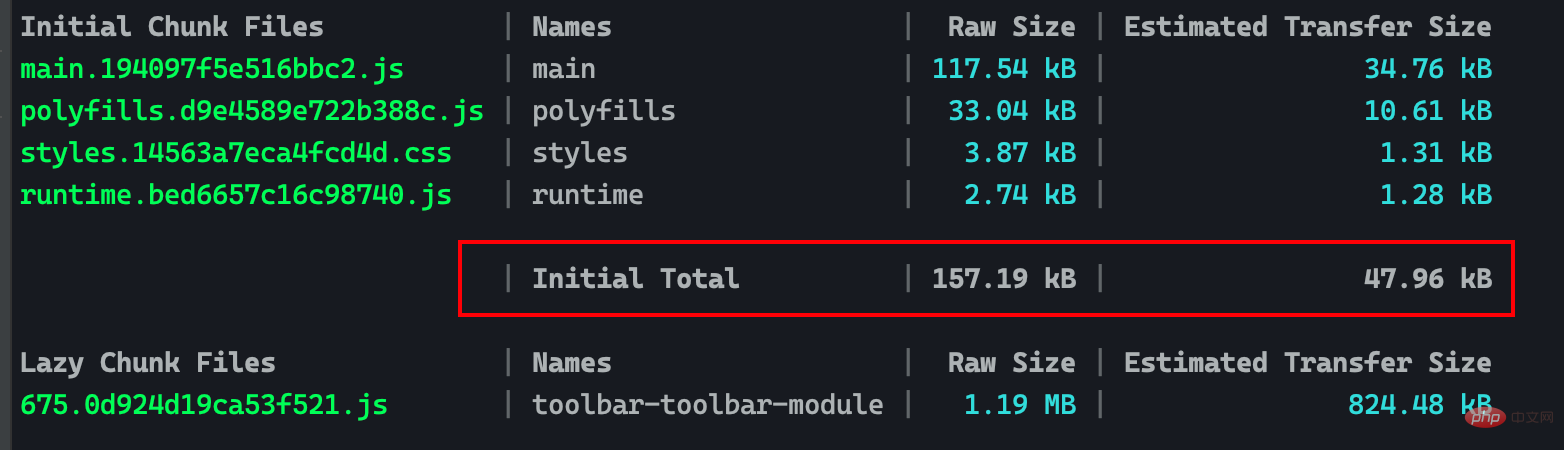
可以看到首屏尺寸没有开头那么离谱了, 原因是没有在AppModule和AppComponent直接导入ToolbarModule和ToolbarComponent, ToolbarModule被打进了另外的js文件中(Lazy Chunk Files), 当首次点击显示按钮时, 就会加载这个包含ToolbarModule的js文件
注意看下面的gif演示中, 首次点击显示按钮, 浏览器网络调试工具中会多出一个对src_app_toolbar_toolbar_module_ts.js文件的请求
更多编程相关知识,请访问:编程视频!!
以上是聊聊Angular中懒加载模块并动态显示它的组件的详细内容。更多信息请关注PHP中文网其他相关文章!

热AI工具

Undresser.AI Undress
人工智能驱动的应用程序,用于创建逼真的裸体照片

AI Clothes Remover
用于从照片中去除衣服的在线人工智能工具。

Undress AI Tool
免费脱衣服图片

Clothoff.io
AI脱衣机

AI Hentai Generator
免费生成ai无尽的。

热门文章
热工具

记事本++7.3.1
好用且免费的代码编辑器

SublimeText3汉化版
中文版,非常好用

禅工作室 13.0.1
功能强大的PHP集成开发环境

Dreamweaver CS6
视觉化网页开发工具

SublimeText3 Mac版
神级代码编辑软件(SublimeText3)
热门话题


 如何在Ubuntu 24.04上安装Angular
Mar 23, 2024 pm 12:20 PM
如何在Ubuntu 24.04上安装Angular
Mar 23, 2024 pm 12:20 PM
Angular.js是一种可自由访问的JavaScript平台,用于创建动态应用程序。它允许您通过扩展HTML的语法作为模板语言,以快速、清晰地表示应用程序的各个方面。Angular.js提供了一系列工具,可帮助您编写、更新和测试代码。此外,它还提供了许多功能,如路由和表单管理。本指南将讨论在Ubuntu24上安装Angular的方法。首先,您需要安装Node.js。Node.js是一个基于ChromeV8引擎的JavaScript运行环境,可让您在服务器端运行JavaScript代码。要在Ub

 如何使用PHP和Angular进行前端开发
May 11, 2023 pm 04:04 PM
如何使用PHP和Angular进行前端开发
May 11, 2023 pm 04:04 PM
随着互联网的飞速发展,前端开发技术也在不断改进和迭代。PHP和Angular是两种广泛应用于前端开发的技术。PHP是一种服务器端脚本语言,可以处理表单、生成动态页面和管理访问权限等任务。而Angular是一种JavaScript的框架,可以用于开发单页面应用和构建组件化的Web应用程序。本篇文章将介绍如何使用PHP和Angular进行前端开发,以及如何将它们
 Vue3中的lazy函数详解:懒加载组件提高应用性能
Jun 19, 2023 am 08:39 AM
Vue3中的lazy函数详解:懒加载组件提高应用性能
Jun 19, 2023 am 08:39 AM
Vue3是一款流行的JavaScript框架,它具有易学易用、高效稳定的特点,尤其擅长构建单页应用程序(SPA)。Vue3中的lazy函数,作为懒加载组件的利器之一,可以很大程度上提高应用程序的性能。本文将详解Vue3中的lazy函数的使用方法与原理,以及它在实际开发中的应用场景和优点。什么是懒加载?在传统的前后端分离的开发中,前端开发人员往往需要处理大量的
 Vue如何实现组件的懒加载和预加载?
Jun 27, 2023 pm 03:24 PM
Vue如何实现组件的懒加载和预加载?
Jun 27, 2023 pm 03:24 PM
随着Web应用程序的日益复杂,前端开发人员需要在保证页面加载速度的前提下更好地提供功能和用户体验。这就涉及到Vue组件的懒加载和预加载,它们是优化Vue应用程序性能的重要手段。本文将深入介绍Vue组件的懒加载和预加载的实现方法。一、什么是懒加载懒加载就是当用户需要访问某个组件时才会把该组件的代码加载进来,而不是一开始就把所有组件的代码都加载进来,这样可以减少
 Angular组件及其显示属性:了解非block默认值
Mar 15, 2024 pm 04:51 PM
Angular组件及其显示属性:了解非block默认值
Mar 15, 2024 pm 04:51 PM
Angular框架中组件的默认显示行为不是块级元素。这种设计选择促进了组件样式的封装,并鼓励开发人员有意识地定义每个组件的显示方式。通过显式设置CSS属性 display,Angular组件的显示可以完全控制,从而实现所需的布局和响应能力。
 Vue懒加载图片失败问题解决方案
Jun 29, 2023 pm 10:42 PM
Vue懒加载图片失败问题解决方案
Jun 29, 2023 pm 10:42 PM
Vue开发中如何解决图片懒加载失败的问题懒加载(LazyLoad)是现代Web开发中常用的优化技术之一,特别在加载大量图片和资源时,可以有效减轻页面的负担,提升用户体验。然而,在使用Vue框架进行开发时,有时候我们可能会遇到图片懒加载失败的问题。本文将介绍一些常见的问题和解决方案,以便开发者能够更好地应对这个问题。图片资源路径错误首先,我们需要确保图片资源
 一文详解Angular父子组件间传数据的方法
Jan 04, 2023 pm 09:06 PM
一文详解Angular父子组件间传数据的方法
Jan 04, 2023 pm 09:06 PM
本篇文章带大家了解一下Angular父子组件(Component)之间传递数据的方法,介绍一下Angular中父组件向子组件传数据、子组件向父组件传数据的方法,希望对大家有所帮助!
