

Angular学习之聊聊notification(自定义服务)

本篇文章带大家继续angular的学习,简单了解一下angular中的自定义服务 notification,希望对大家有所帮助!

在之前的文章中,我们有提到:
service 不仅可以用来处理 API 请求,还有其他的用处
比如,我们这篇文章要讲到的 notification 的实现。【相关教程推荐:《angular教程》】
效果图如下:
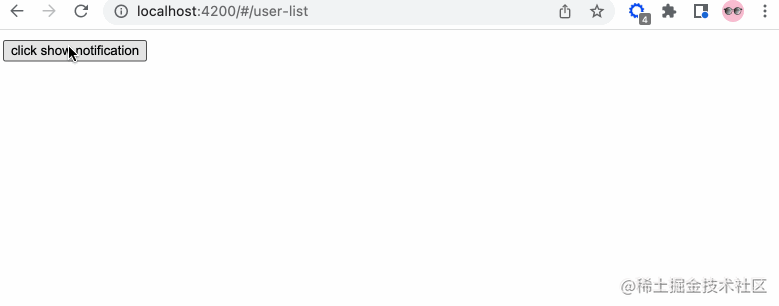
UI 这个可以后期调整
So,我们一步步来分解。
添加服务
我们在 app/services 中添加 notification.service.ts 服务文件(请使用命令行生成),添加相关的内容:
// notification.service.ts
import { Injectable } from '@angular/core';
import { Observable, Subject } from 'rxjs';
// 通知状态的枚举
export enum NotificationStatus {
Process = "progress",
Success = "success",
Failure = "failure",
Ended = "ended"
}
@Injectable({
providedIn: 'root'
})
export class NotificationService {
private notify: Subject<NotificationStatus> = new Subject();
public messageObj: any = {
primary: '',
secondary: ''
}
// 转换成可观察体
public getNotification(): Observable<NotificationStatus> {
return this.notify.asObservable();
}
// 进行中通知
public showProcessNotification() {
this.notify.next(NotificationStatus.Process)
}
// 成功通知
public showSuccessNotification() {
this.notify.next(NotificationStatus.Success)
}
// 结束通知
public showEndedNotification() {
this.notify.next(NotificationStatus.Ended)
}
// 更改信息
public changePrimarySecondary(primary?: string, secondary?: string) {
this.messageObj.primary = primary;
this.messageObj.secondary = secondary
}
constructor() { }
}是不是很容易理解...
我们将 notify 变成可观察物体,之后发布各种状态的信息。
创建组件
我们在 app/components 这个存放公共组件的地方新建 notification 组件。所以你会得到下面的结构:
notification
├── notification.component.html                     // 页面骨架
├── notification.component.scss                     // 页面独有样式
├── notification.component.spec.ts                  // 测试文件
└── notification.component.ts                       // javascript 文件
我们定义 notification 的骨架:
<!-- notification.component.html -->

<!-- 支持手动关闭通知 -->
<button (click)="closeNotification()">关闭</button>
<h1>提醒的内容: {{ message }}</h1>
<!-- 自定义重点通知信息 -->
<p>{{ primaryMessage }}</p>
<!-- 自定义次要通知信息 -->
<p>{{ secondaryMessage }}</p>接着,我们简单修饰下骨架,添加下面的样式:
// notification.component.scss

:host {
  position: fixed;
  top: -100%;
  right: 20px;
  background-color: #999;
  border: 1px solid #333;
  border-radius: 10px;
  width: 400px;
  height: 180px;
  padding: 10px;
  // 注意这里的 active 的内容,在出现通知的时候才有
  &.active {
    top: 10px;
  }
  &.success {}
  &.progress {}
  &.failure {}
  &.ended {}
}success, progress, failure, ended 这四个类名对应 notification service 定义的枚举,可以按照自己的喜好添加相关的样式。
最后,我们添加行为 javascript 代码。
// notification.component.ts

import { Component, OnInit, HostBinding, OnDestroy } from '@angular/core';
// 新的知识点 rxjs
import { Subscription } from 'rxjs';
import {debounceTime} from 'rxjs/operators';
// 引入相关的服务
import { NotificationStatus, NotificationService } from 'src/app/services/notification.service';

@Component({
  selector: 'app-notification',
  templateUrl: './notification.component.html',
  styleUrls: ['./notification.component.scss']
})
export class NotificationComponent implements OnInit, OnDestroy {

  // 防抖时间,只读
  private readonly NOTIFICATION_DEBOUNCE_TIME_MS = 200;

  protected notificationSubscription!: Subscription;
  private timer: any = null;
  public message: string = ''

  // notification service 枚举信息的映射
  private reflectObj: any = {
    progress: "进行中",
    success: "成功",
    failure: "失败",
    ended: "结束"
  }

  @HostBinding('class') notificationCssClass = '';

  public primaryMessage!: string;
  public secondaryMessage!: string;

  constructor(
    private notificationService: NotificationService
  ) { }

  ngOnInit(): void {
    this.init()
  }

  public init() {
    // 添加相关的订阅信息
    this.notificationSubscription = this.notificationService.getNotification()
      .pipe(
        debounceTime(this.NOTIFICATION_DEBOUNCE_TIME_MS)
      )
      .subscribe((notificationStatus: NotificationStatus) => {
        if(notificationStatus) {
          this.resetTimeout();
          // 添加相关的样式
          this.notificationCssClass = `active ${ notificationStatus }`
          this.message = this.reflectObj[notificationStatus]
          // 获取自定义首要信息
          this.primaryMessage = this.notificationService.messageObj.primary;
          // 获取自定义次要信息
          this.secondaryMessage = this.notificationService.messageObj.secondary;
          if(notificationStatus === NotificationStatus.Process) {
            this.resetTimeout()
            this.timer = setTimeout(() => {
              this.resetView()
            }, 1000)
          } else {
            this.resetTimeout();
            this.timer = setTimeout(() => {
              this.notificationCssClass = ''
              this.resetView()
            }, 2000)
          }
        }
      })
  }

  private resetView(): void {
    this.message = ''
  }

  // 关闭定时器
  private resetTimeout(): void {
    if(this.timer) {
      clearTimeout(this.timer)
    }
  }

  // 关闭通知
  public closeNotification() {
    this.notificationCssClass = ''
    this.resetTimeout()
  }

  // 组件销毁
  ngOnDestroy(): void {
    this.resetTimeout();
    // 取消所有的订阅消息
    this.notificationSubscription.unsubscribe()
  }

}在这里,我们引入了 rxjs 这个知识点,RxJS 是使用 Observables 的响应式编程的库,它使编写异步或基于回调的代码更容易。这是一个很棒的库,接下来的很多文章你会接触到它更多的内容。
这里我们使用了 debounce 防抖函数,函数防抖,就是指触发事件后,在 n 秒后只能执行一次,如果在 n 秒内又触发了事件,则会重新计算函数的执行时间。简单来说:当一个动作连续触发,只执行最后一次。
ps:
throttle节流函数:限制一个函数在一定时间内只能执行一次。
在面试的时候,面试官很喜欢问...
调用
因为这个一个全局的服务,我们在 app.component.html 中调用此组件:
// app.component.html

<router-outlet></router-outlet>
<app-notification></app-notification>
为了方便演示,我们在 user-list.component.html 中添加按钮,方便触发演示:
// user-list.component.html

<button (click)="showNotification()">click show notification</button>
触发相关的代码:
// user-list.component.ts

import { NotificationService } from 'src/app/services/notification.service';

// ...
constructor(
  private notificationService: NotificationService
) { }

// 展示通知
showNotification(): void {
  this.notificationService.changePrimarySecondary('主要信息 1');
  this.notificationService.showProcessNotification();
  setTimeout(() => {
    this.notificationService.changePrimarySecondary('主要信息 2', '次要信息 2');
    this.notificationService.showSuccessNotification();
  }, 1000)
}至此,大功告成,我们成功模拟了 notification 的功能。相关的服务组件我们可以按照实际的需求进行修改,满足业务需求自定义。如果我们是开发内部使用的系统的话,建议使用成熟的 UI 库,它们已经帮我们封装好各种组件和服务,大量节省我们的开发时间。
【完】✅
更多编程相关知识,请访问:编程教学!!
以上是Angular学习之聊聊notification(自定义服务)的详细内容。更多信息请关注PHP中文网其他相关文章!

热AI工具

Undresser.AI Undress
人工智能驱动的应用程序,用于创建逼真的裸体照片

AI Clothes Remover
用于从照片中去除衣服的在线人工智能工具。

Undress AI Tool
免费脱衣服图片

Clothoff.io
AI脱衣机

Video Face Swap
使用我们完全免费的人工智能换脸工具轻松在任何视频中换脸!

热门文章
热工具

记事本++7.3.1
好用且免费的代码编辑器

SublimeText3汉化版
中文版,非常好用

禅工作室 13.0.1
功能强大的PHP集成开发环境

Dreamweaver CS6
视觉化网页开发工具

SublimeText3 Mac版
神级代码编辑软件(SublimeText3)
热门话题


 WebSocket与JavaScript:实现实时监控系统的关键技术
Dec 17, 2023 pm 05:30 PM
WebSocket与JavaScript:实现实时监控系统的关键技术
Dec 17, 2023 pm 05:30 PM
WebSocket与JavaScript:实现实时监控系统的关键技术引言:随着互联网技术的快速发展,实时监控系统在各个领域中得到了广泛的应用。而实现实时监控的关键技术之一就是WebSocket与JavaScript的结合使用。本文将介绍WebSocket与JavaScript在实时监控系统中的应用,并给出代码示例,详细解释其实现原理。一、WebSocket技
 PHP与Vue:完美搭档的前端开发利器
Mar 16, 2024 pm 12:09 PM
PHP与Vue:完美搭档的前端开发利器
Mar 16, 2024 pm 12:09 PM
PHP与Vue:完美搭档的前端开发利器在当今互联网高速发展的时代,前端开发变得愈发重要。随着用户对网站和应用的体验要求越来越高,前端开发人员需要使用更加高效和灵活的工具来创建响应式和交互式的界面。PHP和Vue.js作为前端开发领域的两个重要技术,搭配起来可以称得上是完美的利器。本文将探讨PHP和Vue的结合,以及详细的代码示例,帮助读者更好地理解和应用这两
 JavaScript和WebSocket:打造高效的实时天气预报系统
Dec 17, 2023 pm 05:13 PM
JavaScript和WebSocket:打造高效的实时天气预报系统
Dec 17, 2023 pm 05:13 PM
JavaScript和WebSocket:打造高效的实时天气预报系统引言:如今,天气预报的准确性对于日常生活以及决策制定具有重要意义。随着技术的发展,我们可以通过实时获取天气数据来提供更准确可靠的天气预报。在本文中,我们将学习如何使用JavaScript和WebSocket技术,来构建一个高效的实时天气预报系统。本文将通过具体的代码示例来展示实现的过程。We
 简易JavaScript教程:获取HTTP状态码的方法
Jan 05, 2024 pm 06:08 PM
简易JavaScript教程:获取HTTP状态码的方法
Jan 05, 2024 pm 06:08 PM
JavaScript教程:如何获取HTTP状态码,需要具体代码示例前言:在Web开发中,经常会涉及到与服务器进行数据交互的场景。在与服务器进行通信时,我们经常需要获取返回的HTTP状态码来判断操作是否成功,根据不同的状态码来进行相应的处理。本篇文章将教你如何使用JavaScript获取HTTP状态码,并提供一些实用的代码示例。使用XMLHttpRequest
 前端面试官常问的问题
Mar 19, 2024 pm 02:24 PM
前端面试官常问的问题
Mar 19, 2024 pm 02:24 PM
在前端开发面试中,常见问题涵盖广泛,包括HTML/CSS基础、JavaScript基础、框架和库、项目经验、算法和数据结构、性能优化、跨域请求、前端工程化、设计模式以及新技术和趋势。面试官的问题旨在评估候选人的技术技能、项目经验以及对行业趋势的理解。因此,应试者应充分准备这些方面,以展现自己的能力和专业知识。
 Django是前端还是后端?一探究竟!
Jan 19, 2024 am 08:37 AM
Django是前端还是后端?一探究竟!
Jan 19, 2024 am 08:37 AM
Django是一个Python编写的web应用框架,它强调快速开发和干净方法。尽管Django是一个web框架,但是要回答Django是前端还是后端这个问题,需要深入理解前后端的概念。前端是指用户直接和交互的界面,后端是指服务器端的程序,他们通过HTTP协议进行数据的交互。在前端和后端分离的情况下,前后端程序可以独立开发,分别实现业务逻辑和交互效果,数据的交
 Go语言前端技术探秘:前端开发新视野
Mar 28, 2024 pm 01:06 PM
Go语言前端技术探秘:前端开发新视野
Mar 28, 2024 pm 01:06 PM
Go语言作为一种快速、高效的编程语言,在后端开发领域广受欢迎。然而,很少有人将Go语言与前端开发联系起来。事实上,使用Go语言进行前端开发不仅可以提高效率,还能为开发者带来全新的视野。本文将探讨使用Go语言进行前端开发的可能性,并提供具体的代码示例,帮助读者更好地了解这一领域。在传统的前端开发中,通常会使用JavaScript、HTML和CSS来构建用户界面
 Django:前端和后端开发都能搞定的神奇框架!
Jan 19, 2024 am 08:52 AM
Django:前端和后端开发都能搞定的神奇框架!
Jan 19, 2024 am 08:52 AM
Django:前端和后端开发都能搞定的神奇框架!Django是一个高效、可扩展的Web应用程序框架。它能够支持多种Web开发模式,包括MVC和MTV,可以轻松地开发出高质量的Web应用程序。Django不仅支持后端开发,还能够快速构建出前端的界面,通过模板语言,实现灵活的视图展示。Django把前端开发和后端开发融合成了一种无缝的整合,让开发人员不必专门学习
