react怎么实现图片选择
react实现图片选择的方法:1、使用import引入“react-native-image-picker”插件;2、使用“
{this.setState({uploadImgs: urls})}}src={uploadImgs}/>”调用实现图片选择上传即可。 ={6}onchange={urls>

本教程操作环境:Windows10系统、react18.0.0版、Dell G3电脑。
react怎么实现图片选择?
React Native七牛上传+本地图片选择
参考:
react-native-image-crop-picker图片选择并裁减 //这个看需求使用
https://github.com/ivpusic/react-native-image-crop-picker
react-native-image-picker图片选择
https://github.com/react-native-image-picker/react-native-image-picker
react-native-qiniu
https://github.com/buhe/react-native-qiniu
我只要一个多图片上传功能,所以就写简单一点
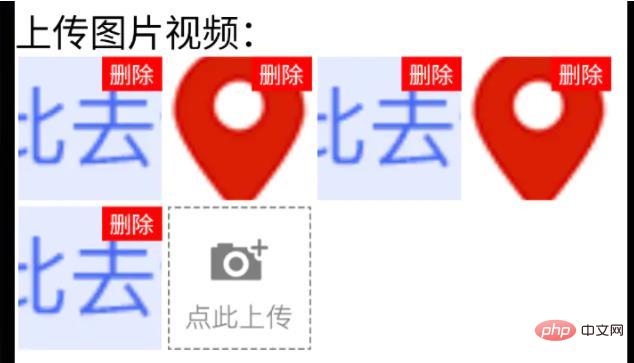
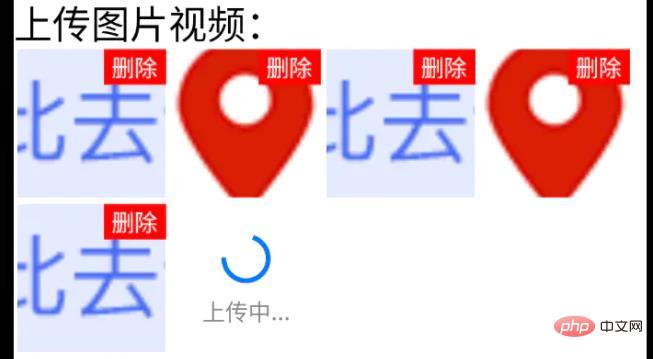
效果

已上传状态

上传中状态
步骤
1、手机图片、视频选择功能
用react-native-image-picker插件
yarn add react-native-image-picker;ios需要pod install;
import {launchCamera, launchImageLibrary, ImageLibraryOptions, PhotoQuality} from 'react-native-image-picker';
/**
* 从相册选择图片;
* sourceType: 'camera' 打开相机拍摄图片
**/
export async function chooseImage(options: {
count?: number,
quality?: PhotoQuality
sourceType?: 'camera', //默认'album'
} = {}) {
return new Promise<any>(async(resolve, reject) => {
const Opts: ImageLibraryOptions = {
mediaType: 'photo',
quality: options.quality || 1,
selectionLimit: options.count || 1
};
const result = options.sourceType == 'camera'?
await launchCamera(Opts) :
await launchImageLibrary(Opts);
resolve(result)
})
}
/**
* 从相册选择视频;
* sourceType: 'camera' 打开相机拍摄视频
**/
export async function chooseVideo(options: {
count?: number,
quality?: 'low' | 'high'
sourceType?: 'camera', //默认'album'
} = {}) {
return new Promise<any>(async(resolve, reject) => {
const Opts: ImageLibraryOptions = {
mediaType: 'video',
videoQuality: options.quality,
selectionLimit: options.count || 1
};
const result = options.sourceType == 'camera'?
await launchCamera(Opts) :
await launchImageLibrary(Opts);
resolve(result)
})
}2、七牛上传文件功能
class qiniuUpload {
private UP_HOST = 'http://upload.qiniu.com';
// private RS_HOST = 'http://rs.qbox.me';
// private RSF_HOST = 'http://rsf.qbox.me';
// private API_HOST = 'http://api.qiniu.com';
public upload = async(uri:string, key:string, token:string) => {
return new Promise<any>((resolve, reject) => {
let formData = new FormData();
formData.append('file', {uri: uri, type: 'application/octet-stream', name: key});
formData.append('key', key);
formData.append('token', token);
let options:any = {
body: formData,
method: 'post',
};
fetch(this.UP_HOST, options).then((response) => {
resolve(response)
}).catch(error => {
console.error(error)
resolve(null)
});
})
}
//...后面再加别的功能
}
const qiniu = new qiniuUpload();
export default qiniu;
import qiniu from '@/modules/qiniu/index'
...
/**
* 上传视频图片
*/
uploadFile: async (filePath: string) => {
const res = await createBaseClient('GET', '/v1/file')(); //这是接口请求方法,用来拿后端的七牛token、key
if( !res ) {
return res;
}
const { key, token } = res;
const fileSegments = filePath.split('.');
const fileKey = key + '.' + fileSegments[fileSegments.length - 1];
try {
const result = await qiniu.upload(filePath, fileKey, token)
if(result && result.ok) {
return {
url: ASSET_HOST + '/' + fileKey, //ASSET_HOST是资源服务器域名前缀
};
}else {
return null
}
} catch (error) {
return null;
}
},
...3、多图上传组件封装
(这里Base、Image、ActionSheet都是封装过的,需看情况调整)
import React from 'react'
import {
ViewStyle,
StyleProp,
ImageURISource,
ActivityIndicator
} from 'react-native'
import Base from '@/components/Base';
import { Image, View, Text } from '@/components'; //Image封装过的,所以有些属性不一样
import ActionSheet from "@/components/Feedback/ActionSheet"; //自己封装
import styles from './styleCss'; //样式就不放上来了
interface Props {
type?: 'video'
src?: string[]
count?: number
btnPath?: ImageURISource
style?: StyleProp<ViewStyle>
itemStyle?: StyleProp<ViewStyle>
itemWidth?: number
itemHeight?: number //默认正方形
onChange?: (e) => void
}
interface State {
imageUploading: boolean
images: string[]
}
/**
* 多图上传组件
* * type?: 'video'
* * src?: string[] //图片数据,可用于初始数据
* * count?: number //数量
* * btnPath?: ImageURISource //占位图
* * itemStyle?: item样式,width, height单独设
* * itemWidth?: number
* * itemHeight?: number //默认正方形
* * onChange?: (e:string[]) => void
**/
export default class Uploader extends Base<Props, State> {
public state: State = {
imageUploading: false,
images: []
};
public didMount() {
this.initSrc(this.props.src)
}
public componentWillReceiveProps(nextProps){
if(nextProps.hasOwnProperty('src') && !!nextProps.src){
this.initSrc(nextProps.src)
}
}
/**
*初始化以及改动图片
**/
private initSrc = (srcProp:any) => {
if(!this.isEqual(srcProp, this.state.images)) {
this.setState({
images: srcProp
})
}
}
public render() {
const { style, btnPath, count, itemStyle, itemWidth, itemHeight, type } = this.props;
const { imageUploading, images } = this.state;
let countNumber = count? count: 1
return (
<React.Fragment>
<View style={[styles.uploaderBox, style]}>
{images.length > 0 && images.map((res, ind) => (
<View style={[styles.item, itemStyle]} key={res}>
<View style={styles.imgItem}>
<Image
source={{uri: res}}
width={this.itemW}
height={this.itemH}
onPress={() => {
this.singleEditInd = ind;
this.handleShowActionSheet()
}}
/>
<Text style={styles.del} onPress={this.handleDelete.bind(null, ind)}>删除</Text>
</View>
</View>
))}
{images.length < countNumber &&
<View style={[styles.item, itemStyle]}>
{imageUploading? (
<View style={[{
width: this.itemW,
height: this.itemH,
}, styles.loading]}>
<ActivityIndicator size={this.itemW*0.4}></Loading>
<Text style={{
fontSize: 14,
color: '#888',
marginTop: 5
}}>
上传中...
</Text>
</View>
): (
<View style={styles.btn}>
<Image
source={btnPath || this.assets.uploadIcon}
width={this.itemW}
height={this.itemH}
onPress={() => {
this.singleEditInd = undefined;
this.handleShowActionSheet()
}}
/>
</View>
)}
</View>
}
</View>
<ActionSheet
name="uploaderActionSheet"
options={[{
name: type == 'video'? '拍摄': '拍照',
onClick: () => {
if(type == 'video') {
this.handleChooseVideo('camera')
}else if(this.singleEditInd !== undefined) {
this.handleChooseSingle('camera')
}else {
this.handleChooseImage('camera')
}
}
}, {
name: '相册',
onClick: () => {
if(type == 'video') {
this.handleChooseVideo()
}else if(this.singleEditInd !== undefined) {
this.handleChooseSingle()
}else {
this.handleChooseImage()
}
}
}]}
></ActionSheet>
</React.Fragment>
);
}
private get itemW() {
return this.props.itemWidth || 92
}
private get itemH() {
return this.props.itemHeight || this.itemW;
}
private isEqual = (firstValue, secondValue) => {
/** 判断两个值(数组)是否相等 **/
if (Array.isArray(firstValue)) {
if (!Array.isArray(secondValue)) {
return false;
}
if(firstValue.length != secondValue.length) {
return false;
}
return firstValue.every((item, index) => {
return item === secondValue[index];
});
}
return firstValue === secondValue;
}
private handleShowActionSheet = () => {
this.feedback.showFeedback('uploaderActionSheet'); //这是显示ActionSheet选择弹窗。。。
}
private handleChooseImage = async (sourceType?: 'camera') => {
const { imageUploading, images } = this.state;
const { count } = this.props
if (imageUploading) {
return;
}
let countNumber = count? count: 1
const { assets } = await this.interface.chooseImage({ //上面封装的选择图片方法
count: countNumber,
sourceType: sourceType || undefined,
});
if(!assets) {
return;
}
this.setState({
imageUploading: true,
});
let request:any = []
assets.map(res => {
let req = this.apiClient.uploadFile(res.uri) //上面封装的七牛上传方法
request.push(req)
})
Promise.all(request).then(res => {
let imgs:any = []
res.map((e:any) => {
if(e && e.url){
imgs.push(e.url)
}
})
imgs = [...images, ...imgs];
this.setState({
images: imgs.splice(0,countNumber),
imageUploading: false,
},
this.handleChange
);
})
}
private singleEditInd?: number; //修改单个时的索引值
private handleChooseSingle = async(sourceType?: 'camera') => {
let { imageUploading, images } = this.state;
if (imageUploading) {
return;
}
const { assets } = await this.interface.chooseImage({ //上面封装的选择图片方法
count: 1,
sourceType: sourceType || undefined,
});
if(!assets) {
return;
}
this.setState({
imageUploading: true,
});
const res = await this.apiClient.uploadFile(assets[0].uri) //上面封装的七牛上传方法
if(res && res.url && this.singleEditInd){
images[this.singleEditInd] = res.url
}
this.setState({
images: [...images],
imageUploading: false,
},
this.handleChange
);
}
private handleChooseVideo = async(sourceType?: 'camera') => {
const { onChange } = this.props
let { imageUploading } = this.state;
if (imageUploading) {
return;
}
const { assets } = await this.interface.chooseVideo({
sourceType: sourceType
});
if(!assets) {
return;
}
this.setState({
imageUploading: true,
});
const res = await this.apiClient.uploadFile(assets[0].uri) //上面封装的七牛上传方法
if(res && res.url){
//视频就不在组件中展示了,父组件处理
if(onChange) {
onChange(res.url)
}
}
this.setState({
imageUploading: false,
});
}
private handleDelete = (ind:number) => {
let { images } = this.state
images.splice(ind,1)
this.setState({
images: [...images]
},
this.handleChange
)
}
private handleChange = () => {
const { onChange } = this.props
const { images } = this.state
if(onChange) {
onChange(images)
}
}
}4、最后调用
import Uploader from "@/components/Uploader";
...
          <Uploader
            count={6}
            onChange={urls => {
              this.setState({
                uploadImgs: urls
              })
            }}
            src={uploadImgs}
          />
...推荐学习:《react视频教程》
以上是react怎么实现图片选择的详细内容。更多信息请关注PHP中文网其他相关文章!

热AI工具

Undresser.AI Undress
人工智能驱动的应用程序,用于创建逼真的裸体照片

AI Clothes Remover
用于从照片中去除衣服的在线人工智能工具。

Undress AI Tool
免费脱衣服图片

Clothoff.io
AI脱衣机

AI Hentai Generator
免费生成ai无尽的。

热门文章

热工具

记事本++7.3.1
好用且免费的代码编辑器

SublimeText3汉化版
中文版,非常好用

禅工作室 13.0.1
功能强大的PHP集成开发环境

Dreamweaver CS6
视觉化网页开发工具

SublimeText3 Mac版
神级代码编辑软件(SublimeText3)

热门话题
 如何利用React和WebSocket构建实时聊天应用
Sep 26, 2023 pm 07:46 PM
如何利用React和WebSocket构建实时聊天应用引言:随着互联网的快速发展,实时通讯越来越受到人们的关注。实时聊天应用已经成为现代社交和工作生活中不可或缺的一部分。本文将介绍如何利用React和WebSocket构建一个简单的实时聊天应用,并提供具体的代码示例。一、技术准备在开始构建实时聊天应用之前,我们需要准备以下技术和工具:React:一个用于构建
 React前后端分离指南:如何实现前后端的解耦和独立部署
Sep 28, 2023 am 10:48 AM
React前后端分离指南:如何实现前后端的解耦和独立部署,需要具体代码示例在当今的Web开发环境中,前后端分离已经成为一种趋势。通过将前端和后端代码分开,可以使得开发工作更加灵活、高效,并且方便进行团队协作。本文将介绍如何使用React实现前后端分离,从而实现解耦和独立部署的目标。首先,我们需要理解什么是前后端分离。传统的Web开发模式中,前端和后端是耦合在
 如何利用React和Flask构建简单易用的网络应用
Sep 27, 2023 am 11:09 AM
如何利用React和Flask构建简单易用的网络应用引言:随着互联网的发展,网络应用的需求也越来越多样化和复杂化。为了满足用户对于易用性和性能的要求,使用现代化的技术栈来构建网络应用变得越来越重要。React和Flask是两种在前端和后端开发中非常受欢迎的框架,它们可以很好的结合在一起,用来构建简单易用的网络应用。本文将详细介绍如何利用React和Flask
 如何利用React和RabbitMQ构建可靠的消息传递应用
Sep 28, 2023 pm 08:24 PM
如何利用React和RabbitMQ构建可靠的消息传递应用引言:现代化的应用程序需要支持可靠的消息传递,以实现实时更新和数据同步等功能。React是一种流行的JavaScript库,用于构建用户界面,而RabbitMQ是一种可靠的消息传递中间件。本文将介绍如何结合React和RabbitMQ构建可靠的消息传递应用,并提供具体的代码示例。RabbitMQ概述:
 React响应式设计指南:如何实现自适应的前端布局效果
Sep 26, 2023 am 11:34 AM
React响应式设计指南:如何实现自适应的前端布局效果随着移动设备的普及和用户对多屏幕体验的需求增加,响应式设计成为了现代前端开发的重要考量之一。而React作为目前最流行的前端框架之一,提供了丰富的工具和组件,能够帮助开发人员实现自适应的布局效果。本文将分享一些关于使用React实现响应式设计的指南和技巧,并提供具体的代码示例供参考。使用React的Fle
 React代码调试指南:如何快速定位和解决前端bug
Sep 26, 2023 pm 02:25 PM
React代码调试指南:如何快速定位和解决前端bug引言:在开发React应用程序时,经常会遇到各种各样的bug,这些bug可能使应用程序崩溃或导致不正确的行为。因此,掌握调试技巧是每个React开发者必备的能力。本文将介绍一些定位和解决前端bug的实用技巧,并提供具体的代码示例,帮助读者快速定位和解决React应用程序中的bug。一、调试工具的选择:在Re
 React Router使用指南:如何实现前端路由控制
Sep 29, 2023 pm 05:45 PM
ReactRouter使用指南:如何实现前端路由控制随着单页应用的流行,前端路由成为了一个不可忽视的重要部分。ReactRouter作为React生态系统中最受欢迎的路由库,提供了丰富的功能和易用的API,使得前端路由的实现变得非常简单和灵活。本文将介绍ReactRouter的使用方法,并提供一些具体的代码示例。安装ReactRouter首先,我们需
 如何利用React和Google BigQuery构建快速的数据分析应用
Sep 26, 2023 pm 06:12 PM
如何利用React和GoogleBigQuery构建快速的数据分析应用引言:在当今信息爆炸的时代,数据分析已经成为了各个行业中不可或缺的环节。而其中,构建快速、高效的数据分析应用则成为了许多企业和个人追求的目标。本文将介绍如何利用React和GoogleBigQuery结合起来构建快速的数据分析应用,并提供详细的代码示例。一、概述React是一个用于构建


