

基于Vue3和elementplus如何实现登录功能

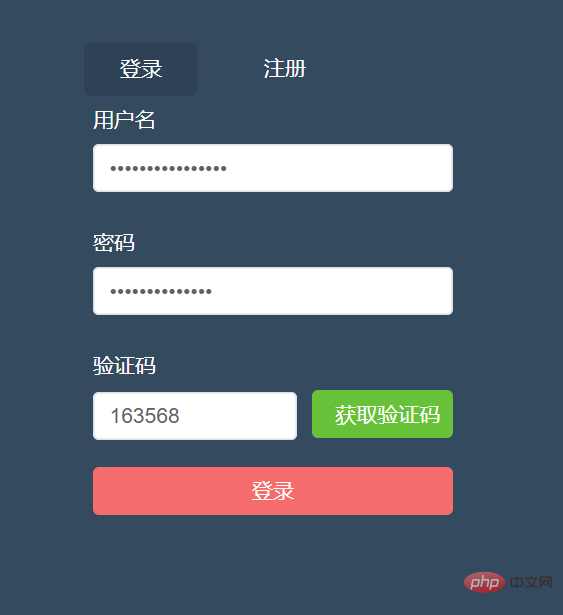
登录页面:
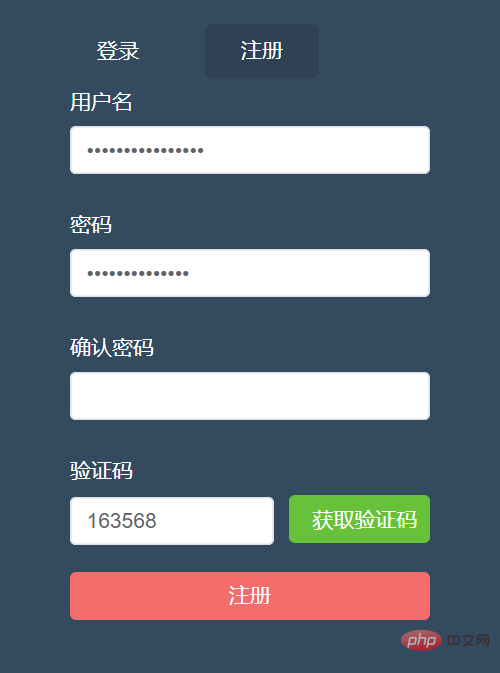
注册页面:
(1)引入element-plus组件库
引入组件库的方式有好多种,在这里我就在main.js全局引入了.
npm i element-plus -S
main.js中代码:
import { createApp } from "vue";
//element-plus
import ElementPlus from "element-plus";
import "element-plus/dist/index.css";
import App from "./App.vue";
import router from "./router";
import axios from "axios";
import store from "./store";
//创建实例
const app = createApp(App);
//全局应用配置
app.config.globalProperties.$axios = axios;

app.use(ElementPlus).use(store).use(router).mount("#app");引入之后自己可以用几个按钮测试一下是否引入成功.
(2)登录及注册页面
html部分
views/account/Login.vue
<template>
<div id="login">
<div>
<div class="form-wrap">
<ul class="menu-tab">
<li
:class="{ current: current_menu === item.type }"
v-for="item in data.tab_menu"
:key="item.type"
@click="toggleMenu(item.type)"
>
{{ item.label }}
</li>
</ul>
<el-form
:model="data.form"
ref="account_form"
:rules="data.form_rules"
label-width="80px"
>
<el-form-item prop="username">
<label class="form-label">用户名</label>
<el-input type="password" v-model="data.form.username" />
</el-form-item>
<el-form-item prop="password">
<label class="form-label">密码</label>
<el-input type="password" v-model="data.form.password" />
</el-form-item>
<el-form-item v-show="current_menu === 'register'" prop="passwords ">
<label class="form-label">确认密码</label>
<el-input type="password" v-model="data.form.passwords" />
</el-form-item>
<el-form-item prop="code">
<label class="form-label">验证码</label>
<el-row :gutter="10">
<el-col :span="14">
<el-input v-model="data.form.code"></el-input>
</el-col>
<el-col :span="10">
<el-button
type="success"
class="el-button-block"
@click="handleGetCode"
>获取验证码</el-button
></el-col
>
</el-row>
</el-form-item>
<el-form-item>
<el-button
type="danger"
class="el-button-block"
:disabled="data.submit_button_disabled"
:loading="data.submit_button_loading"
@click="submitForm"
>{{ current_menu === "login" ? "登录" : "注册" }}</el-button
>
</el-form-item>
</el-form>
</div>
</div>
</div>
</template>js部分
<script>
import { reactive, ref, getCurrentInstance, onBeforeUnmount } from "vue";
import {
  validate_email,
  validate_password,
  validate_code,
} from "@/utils/validate";
import { GetCode } from "@/api/common";
import { Register, Login } from "@/api/account";
import sha1 from "js-sha1"; //密码加密
// ErrorHttp
export default {
  setup() {
    const instance = getCurrentInstance();
    const { proxy } = getCurrentInstance();
    console.log("instance", instance);
    // console.log("proxy", proxy);
    // 用户名校验
    const validate_name_rules = (rule, value, callback) => {
      let regEmail = validate_email(value);
      if (value === "") {
        callback(new Error("请输入邮箱"));
      } else if (!regEmail) {
        callback(new Error("邮箱格式不正确"));
      } else {
        callback();
      }
    };

    //获取验证码
    const handleGetCode = () => {
      const username = data.form.username;
      const password = data.form.password;
      const passwords = data.form.passwords;
      //校验用户名
      if (!validate_email(username)) {
        proxy.$message({
          message: "用户名不能为空 或 格式不正确",
          type: "error",
        });
        return false;
      }

      //校验密码
      if (!validate_password(password)) {
        proxy.$message({
          message: "密码不能为空 或 格式不正确",
          type: "error",
        });
        return false;
      }

      //判断为注册时,校验两次密码
      if (data.current_menu === "redister" ** (password !== passwords)) {
        proxy.$message({
          message: "两次密码不一致",
          type: "error",
        });
        return false;
      }
      //获取验证码接口
      const requestData = {
        username: data.form.username,
        module: "register",
      };

      data.code_button_loading = true;
      data.code_button_text = "发送中";
      GetCode(requestData)
        .then((res) => {
          // console.log("123", res.data);验证码
          // const data=res.resCode

          const data = res;
          if (data.resCode === 1024) {
            proxy.$message.error(data.message);
            return false;
          }
          // 成功 Elementui 提示
          proxy.$message({
            message: data.message,
            type: "success",
          });
          //执行倒计时
          countdown();
        })
        .catch((err) => {
          console.log(err);
          data.code_button_loading = false;
          data.code_button_text = "发送验证码";
        });

      // ErrorHttp(requestData)
      //   .then((res) => {
      //     console.log(res.data);
      //     // const data=res.resCode
      //     const data = res.data;
      //     if (data.resCode === 1024) {
      //       proxy.$message.error(data.message);
      //       return false;
      //     }
      //     // 成功 Elementui 提示
      //     proxy.$message({
      //       message: data.message,
      //       type: "success",
      //     });
      //     //执行倒计时
      //     countdown();
      //   })
      //   .catch((err) => {
      //     console.log(err);
      //     data.code_button_loading = false;
      //     data.code_button_text = "发送验证码";
      //   });
    };

    /** 倒计时 */
    const countdown = (time) => {
      if (time && typeof time !== "number") {
        return false;
      }
      let second = time || 60; // 默认时间
      data.code_button_loading = false; // 取消加载
      data.code_button_disabled = true; // 禁用按钮
      data.code_button_text = `倒计进${second}秒`; // 按钮文本
      // 判断是否存在定时器,存在则先清除
      if (data.code_button_timer) {
        clearInterval(data.code_button_timer);
      }
      // 开启定时器
      data.code_button_timer = setInterval(() => {
        second--;
        data.code_button_text = `倒计进${second}秒`; // 按钮文本
        if (second <= 0) {
          data.code_button_text = `重新获取`; // 按钮文本
          data.code_button_disabled = false; // 启用按钮
          clearInterval(data.code_button_timer); // 清除倒计时
        }
      }, 1000);
    };

    // 组件销毁之前 - 生命周期
    onBeforeUnmount(() => {
      clearInterval(data.code_button_timer); // 清除倒计时
    });

    // 校验确认密码
    const validate_password_rules = (rule, value, callback) => {
      let regPassword = validate_password(value);
      if (value === "") {
        callback(new Error("请输入密码"));
      } else if (!regPassword) {
        callback(new Error("请输入>=6并且<=20位的密码,包含数字、字母"));
      } else {
        callback();
      }
    };

    // 校验确认密码
    const validate_passwords_rules = (rule, value, callback) => {
      // 如果是登录,不需要校验确认密码,默认通过
      if (data.current_menu === "login") {
        callback();
      }
      let regPassword = validate_password(value);
      // 获取“密码”
      const passwordValue = data.form.password;
      if (value === "") {
        callback(new Error("请输入密码"));
      } else if (!regPassword) {
        callback(new Error("请输入>=6并且<=20位的密码,包含数字、字母"));
      } else if (passwordValue && passwordValue !== value) {
        callback(new Error("两次密码不一致"));
      } else {
        callback();
      }
    };

    const validate_code_rules = (rule, value, callback) => {
      let regCode = validate_code(value);
      // 激活提交按钮
      data.submit_button_disabled = false;
      if (value === "") {
        callback(new Error("请输入验证码"));
      } else if (!regCode) {
        callback(new Error("请输入6位的验证码"));
      } else {
        callback();
      }
    };

    // 提交表单
    const submitForm = () => {
      // let res = proxy.$refs.account_form;
      proxy.$refs.account_form.validate((valid) => {
        if (valid) {
          console.log("提交表单", current_menu.value);
          current_menu.value === "login" ? login() : register();
          // register();
        } else {
          alert("error submit!");
          return false;
        }
      });
      // console.log(" 提交表单", res);
    };
    /** 登录 */
    const login = () => {
      const requestData = {
        username: data.form.username,
        password: sha1(data.form.password),
        code: data.form.code,
      };
      data.submit_button_loading = true;
      Login(requestData)
        .then((response) => {
          console.log("login", response);
          data.submit_button_loading = false;
          proxy.$message({
            message: response.message,
            type: "success",
          });

          reset();
        })
        .catch((error) => {
          console.log("登录失败", error);
          data.submit_button_loading = false;
        });
    };
    //注册
    const register = () => {
      const requestData = {
        username: data.form.username,
        password: sha1(data.form.password),
        code: data.form.code,
      };
      data.submit_button_loading = true;
      Register(requestData)
        .then((res) => {
          proxy.$message({
            message: res.message,
            type: "success",
          });
        })
        .catch((error) => {
          console.log("注册错误", error);
          data.submit_button_loading = false;
        });
    };

    /** 重置 */
    const reset = () => {
      // 重置表单
      proxy.$refs.form.resetFields();
      // 切回登录模式
      data.current_menu = "login";
      // 清除定时器
      data.code_button_timer && clearInterval(data.code_button_timer);
      // 获取验证码重置文本
      data.code_button_text = "获取验证码";
      // 获取验证码激活
      data.code_button_disabled = false;
      // 禁用提交按钮
      data.submit_button_disabled = true;
      // 取消提交按钮加载
      data.submit_button_loading = false;
    };

    const data = reactive({
      form_rules: {
        username: [{ validator: validate_name_rules, trigger: "change" }],
        password: [{ validator: validate_password_rules, trigger: "change" }],
        passwords: [{ validator: validate_passwords_rules, trigger: "change" }],
        code: [{ validator: validate_code_rules, trigger: "change" }],
      },
      form: {
        username: "", // 用户名
        password: "", // 密码
        passwords: "", // 确认密码
        code: "", // 验证码
      },
      tab_menu: [
        { type: "login", label: "登录" },
        { type: "register", label: "注册" },
      ],
      /**
       * 获取验证码按钮交互
       */
      code_button_disabled: false,
      code_button_loading: false,
      code_button_text: "获取验证码",
      code_button_timer: null,
      // 提交按钮
      submit_button_disabled: true,
    });

    const toggleMenu = (type) => {
      current_menu.value = type;
    };
    let current_menu = ref(data.tab_menu[0].type);
    // const dataItem = toRefs(data);
    return {
      // ...dataItem,
      data,
      current_menu,
      toggleMenu,
      handleGetCode,
      submitForm,
      register,
      reset,
      login,
    };
  },
};
</script>css部分(使用了scss)
<style lang="scss" scoped>
#login {
  height: 100vh;
  background-color: #344a5f;
}
.form-wrap {
  width: 320px;
  padding-top: 100px;
  margin: auto;
}
.menu-tab {
  text-align: center;
  li {
    display: inline-block;
    padding: 10px 24px;
    margin: 0 10px;
    color: #fff;
    font-size: 14px;
    border-radius: 5px;
    cursor: pointer;
    &.current {
      background-color: rgba(0, 0, 0, 0.1);
    }
  }
}
.form-label {
  display: block;
  color: #fff;
  font-size: 14px;
}
</style>(3)封装一些公共方法及样式
新建styles文件夹,然后新建几个样式文件:
normalize.scss
/*! normalize.css v8.0.1 | MIT License | github.com/necolas/normalize.css */

/* Document
   ========================================================================== */

/**
 * 1. Correct the line height in all browsers.
 * 2. Prevent adjustments of font size after orientation changes in iOS.
 */
 /* div的默认样式不存在padding和margin为0的情况*/
 html, body, span, applet, object, iframe,
 h2, h3, h4, h5, h6, h7, p, blockquote, pre,
 a, abbr, acronym, address, big, cite, code,
 del, dfn, em, img, ins, kbd, q, s, samp,
 small, strike, strong, sub, sup, tt, var,
 b, u, i, center,
 dl, dt, dd, ol, ul,
 fieldset, form, legend,
 table, caption, tbody, tfoot, thead, tr, th, td,
 article, aside, canvas, details, embed,
 figure, figcaption, footer, header, hgroup,
 menu, nav, output, ruby, section, summary,
 time, mark, audio, video {
   margin: 0;
   padding: 0;
   font-size: 100%;
   font: inherit;
   vertical-align: baseline;
 }
 /* HTML5 display-role reset for older browsers */
 article, aside, details, figcaption, figure,
 footer, header, hgroup, menu, nav, section {
   display: block;
 }
 html {
    line-height: 1.15; /* 1 */
    -webkit-text-size-adjust: 100%; /* 2 */
  }

  /* Sections
     ========================================================================== */

  /**
   * Remove the margin in all browsers.
   */

  body {
    margin: 0;
    font-family: 'Microsoft YaHei';
    font-size: 14px;
  }

  /**
   * Render the `main` element consistently in IE.
   */

  main {
    display: block;
  }

  /**
   * Correct the font size and margin on `h2` elements within `section` and
   * `article` contexts in Chrome, Firefox, and Safari.
   */


  /* Grouping content
     ========================================================================== */

  /**
   * 1. Add the correct box sizing in Firefox.
   * 2. Show the overflow in Edge and IE.
   */

  hr {
    box-sizing: content-box; /* 1 */
    height: 0; /* 1 */
    overflow: visible; /* 2 */
  }

  /**
   * 1. Correct the inheritance and scaling of font size in all browsers.
   * 2. Correct the odd `em` font sizing in all browsers.
   */

  pre {
    font-family: monospace, monospace; /* 1 */
    font-size: 1em; /* 2 */
  }

  /* Text-level semantics
     ========================================================================== */

  /**
   * Remove the gray background on active links in IE 10.
   */

  a {
    background-color: transparent;
    text-decoration: none;
  }


  /**
   * 1. Remove the bottom border in Chrome 57-
   * 2. Add the correct text decoration in Chrome, Edge, IE, Opera, and Safari.
   */

  abbr[title] {
    border-bottom: none; /* 1 */
    text-decoration: underline; /* 2 */
    text-decoration: underline dotted; /* 2 */
  }

  /**
   * Add the correct font weight in Chrome, Edge, and Safari.
   */

  b,
  strong {
    font-weight: bolder;
  }

  /**
   * 1. Correct the inheritance and scaling of font size in all browsers.
   * 2. Correct the odd `em` font sizing in all browsers.
   */

  code,
  kbd,
  samp {
    font-family: monospace, monospace; /* 1 */
    font-size: 1em; /* 2 */
  }

  /**
   * Add the correct font size in all browsers.
   */

  small {
    font-size: 80%;
  }

  /**
   * Prevent `sub` and `sup` elements from affecting the line height in
   * all browsers.
   */

  sub,
  sup {
    font-size: 75%;
    line-height: 0;
    position: relative;
    vertical-align: baseline;
  }

  sub {
    bottom: -0.25em;
  }

  sup {
    top: -0.5em;
  }

  /* Embedded content
     ========================================================================== */

  /**
   * Remove the border on images inside links in IE 10.
   */

  img {
    display: block;
    border-style: none;
  }

  /* Forms
     ========================================================================== */

  /**
   * 1. Change the font styles in all browsers.
   * 2. Remove the margin in Firefox and Safari.
   */

  button,
  input,
  optgroup,
  select,
  textarea {
    font-family: inherit; /* 1 */
    font-size: 100%; /* 1 */
    margin: 0; /* 2 */
  }

  /**
   * Show the overflow in IE.
   * 1. Show the overflow in Edge.
   */

  button,
  input { /* 1 */
    overflow: visible;
  }

  /**
   * Remove the inheritance of text transform in Edge, Firefox, and IE.
   * 1. Remove the inheritance of text transform in Firefox.
   */

  button,
  select { /* 1 */
    text-transform: none;
  }

  /**
   * Correct the inability to style clickable types in iOS and Safari.
   */

  button,
  [type="button"],
  [type="reset"],
  [type="submit"] {
    -webkit-appearance: button;
  }

  /**
   * Remove the inner border and padding in Firefox.
   */

  button::-moz-focus-inner,
  [type="button"]::-moz-focus-inner,
  [type="reset"]::-moz-focus-inner,
  [type="submit"]::-moz-focus-inner {
    border-style: none;
    padding: 0;
  }

  /**
   * Restore the focus styles unset by the previous rule.
   */

  button:-moz-focusring,
  [type="button"]:-moz-focusring,
  [type="reset"]:-moz-focusring,
  [type="submit"]:-moz-focusring {
    outline: 1px dotted ButtonText;
  }

  /**
   * Correct the padding in Firefox.
   */

  fieldset {
    padding: 0.35em 0.75em 0.625em;
  }

  /**
   * 1. Correct the text wrapping in Edge and IE.
   * 2. Correct the color inheritance from `fieldset` elements in IE.
   * 3. Remove the padding so developers are not caught out when they zero out
   *    `fieldset` elements in all browsers.
   */

  legend {
    box-sizing: border-box; /* 1 */
    color: inherit; /* 2 */
    display: table; /* 1 */
    max-width: 100%; /* 1 */
    padding: 0; /* 3 */
    white-space: normal; /* 1 */
  }

  /**
   * Add the correct vertical alignment in Chrome, Firefox, and Opera.
   */

  progress {
    vertical-align: baseline;
  }

  /**
   * Remove the default vertical scrollbar in IE 10+.
   */

  textarea {
    overflow: auto;
  }

  /**
   * 1. Add the correct box sizing in IE 10.
   * 2. Remove the padding in IE 10.
   */

  [type="checkbox"],
  [type="radio"] {
    box-sizing: border-box; /* 1 */
    padding: 0; /* 2 */
  }

  /**
   * Correct the cursor style of increment and decrement buttons in Chrome.
   */

  [type="number"]::-webkit-inner-spin-button,
  [type="number"]::-webkit-outer-spin-button {
    height: auto;
  }

  /**
   * 1. Correct the odd appearance in Chrome and Safari.
   * 2. Correct the outline style in Safari.
   */

  [type="search"] {
    -webkit-appearance: textfield; /* 1 */
    outline-offset: -2px; /* 2 */
  }

  /**
   * Remove the inner padding in Chrome and Safari on macOS.
   */

  [type="search"]::-webkit-search-decoration {
    -webkit-appearance: none;
  }

  /**
   * 1. Correct the inability to style clickable types in iOS and Safari.
   * 2. Change font properties to `inherit` in Safari.
   */

  ::-webkit-file-upload-button {
    -webkit-appearance: button; /* 1 */
    font: inherit; /* 2 */
  }

  /* Interactive
     ========================================================================== */

  /*
   * Add the correct display in Edge, IE 10+, and Firefox.
   */

  details {
    display: block;
  }

  /*
   * Add the correct display in all browsers.
   */

  summary {
    display: list-item;
  }

  /* Misc
     ========================================================================== */

  /**
   * Add the correct display in IE 10+.
   */

  template {
    display: none;
  }

  /**
   * Add the correct display in IE 10.
   */

  [hidden] {
    display: none;
  }

ul, li { list-style: none; }elementui.scss(当时测试时用的)
.el-button-block{
    display: block;
    width: 100%;
}新建main.scss(引入上方两个样式文件)
@import "./normalize.scss";
@import './elementui.scss'
vue.config.js配置一下样式文件
  css: {
    // 是否使用css分离插件 ExtractTextPlugin
    extract: true,
    // 开启 CSS source maps?
    sourceMap: false,
    // css预设器配置项
    loaderOptions: {
      scss: {
        additionalData: `@import "./src/styles/main.scss";`,
      },
    },
    // requireModuleExtension: true,
},登录中封装的校验方法
新建utils文件夹,
a.validate.js
// 校验邮箱
export function validate_email(value) {
  let regEmail = /^([a-zA-Z]|[0-9])(\w|\-)+@[a-zA-Z0-9]+\.([a-zA-Z]{2,4})$/;
  return regEmail.test(value);
}

// 校验密码
export function validate_password(value) {
  let regPassword = /^(?!\D+$)(?![^a-zA-Z]+$)\S{6,20}$/;
  return regPassword.test(value);
}

// 校验验证码
export function validate_code(value) {
  let regCode = /^[a-z0-9]{6}$/;
  return regCode.test(value);
}封装请求方法
npm i axios -S
记得先在main.js中引入axios
import axios from "axios";
utils中新建request.js
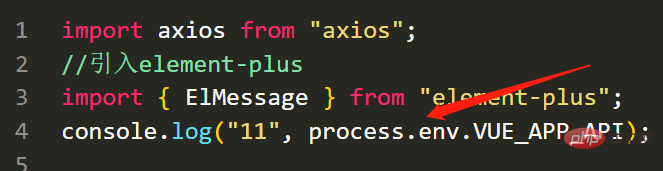
import axios from "axios";
//引入element-plus
import { ElMessage } from "element-plus";
console.log("11", process.env.VUE_APP_API); //undefined??

//创建实例
const service = axios.create({
  baseURL: "/devApi", //请求地址
  timeout: 5000, //超时
});

//添加请求拦截器
service.interceptors.request.use(
  function (config) {
    //在发送请求之前做些什么
    return config;
  },
  function (error) {
    console.log(error.request);
    const errorData = JSON.parse(error.request.response);
    if (errorData.message) {
      //判断是否具有message属性
      ElMessage({
        message: errorData.message,
        type: "error",
      });
    }
    //对请求错误做些什么
    return Promise.reject(errorData);
  }
);

//添加响  应拦截器
service.interceptors.response.use(
  function (response) {
    //对响应数据做些什么
    console.log("响应数据", response);
    const data = response.data;
    if (data.resCode === 0) {
      return Promise.resolve(data);
    } else {
      ElMessage({
        message: data.message,
        type: "error",
      });
      return Promise.reject(data);
    }
  },
  function (error) {
    //对响应错误做些什么
    const errorData = JSON.parse(error.request.response);
    if (errorData.message) {
      //判断是否具有message属性
      ElMessage({
        message: errorData.message,
        type: "error",
      });
    }

    return Promise.reject(errorData);
  }
);

//暴露service
export default service;(4)配置环境变量
和项目根路径同级,新建几个文件:
.env.development
VUE_APP_API = '/devApi'
可以自定义,但是必须是VUE_APP_XXX的格式
.env.production
VUE_APP_API = '/production'
.env.test
VUE_APP_API = '/test'
配置完后记得在axios文件中打印一下,看下能输出自己配置的环境变量吗.
(5)配置代理(跨域)
基本大同小异,代理地址改成自己的就可以了.
  devServer: {
    open: false, //编译完成是否自动打开网页
    host: "0.0.0.0", //指定使用地址,默认是localhost,0.0.0.0代表可以被外界访问
    port: 8080,
    proxy: {
      "/devApi": {
        target: "http://v3.web-jshtml.cn/api", //(必选)API服务器的地址
        changeOrigin: true, //(必选) 是否允许跨域
        ws: false, //(可选) 是否启用websockets
        secure: false, //(可选) 是否启用https接口
        pathRewrite: {
          "^/devApi": "", //匹配开头为/devApi的字符串,并替换成空字符串
        },
      },
    },
},以上是基于Vue3和elementplus如何实现登录功能的详细内容。更多信息请关注PHP中文网其他相关文章!

热AI工具

Undresser.AI Undress
人工智能驱动的应用程序,用于创建逼真的裸体照片

AI Clothes Remover
用于从照片中去除衣服的在线人工智能工具。

Undress AI Tool
免费脱衣服图片

Clothoff.io
AI脱衣机

Video Face Swap
使用我们完全免费的人工智能换脸工具轻松在任何视频中换脸!

热门文章
热工具

记事本++7.3.1
好用且免费的代码编辑器

SublimeText3汉化版
中文版,非常好用

禅工作室 13.0.1
功能强大的PHP集成开发环境

Dreamweaver CS6
视觉化网页开发工具

SublimeText3 Mac版
神级代码编辑软件(SublimeText3)


 vue3项目中怎么使用tinymce
May 19, 2023 pm 08:40 PM
vue3项目中怎么使用tinymce
May 19, 2023 pm 08:40 PM
tinymce是一个功能齐全的富文本编辑器插件,但在vue中引入tinymce并不像别的Vue富文本插件一样那么顺利,tinymce本身并不适配Vue,还需要引入@tinymce/tinymce-vue,并且它是国外的富文本插件,没有通过中文版本,需要在其官网下载翻译包(可能需要翻墙)。1、安装相关依赖npminstalltinymce-Snpminstall@tinymce/tinymce-vue-S2、下载中文包3.引入皮肤和汉化包在项目public文件夹下新建tinymce文件夹,将下载的
 Vue3如何实现刷新页面局部内容
May 26, 2023 pm 05:31 PM
Vue3如何实现刷新页面局部内容
May 26, 2023 pm 05:31 PM
想要实现页面的局部刷新,我们只需要实现局部组件(dom)的重新渲染。在Vue中,想要实现这一效果最简便的方式方法就是使用v-if指令。在Vue2中我们除了使用v-if指令让局部dom的重新渲染,也可以新建一个空白组件,需要刷新局部页面时跳转至这个空白组件页面,然后在空白组件内的beforeRouteEnter守卫中又跳转回原来的页面。如下图所示,如何在Vue3.X中实现点击刷新按钮实现红框范围内的dom重新加载,并展示对应的加载状态。由于Vue3.X中scriptsetup语法中组件内守卫只有o
 vue3+vite:src使用require动态导入图片报错怎么解决
May 21, 2023 pm 03:16 PM
vue3+vite:src使用require动态导入图片报错怎么解决
May 21, 2023 pm 03:16 PM
vue3+vite:src使用require动态导入图片报错和解决方法vue3+vite动态的导入多张图片vue3如果使用的是typescript开发,就会出现require引入图片报错,requireisnotdefined不能像使用vue2这样imgUrl:require(’…/assets/test.png’)导入,是因为typescript不支持require所以用import导入,下面介绍如何解决:使用awaitimport
 Vue3怎么解析markdown并实现代码高亮显示
May 20, 2023 pm 04:16 PM
Vue3怎么解析markdown并实现代码高亮显示
May 20, 2023 pm 04:16 PM
Vue实现博客前端,需要实现markdown的解析,如果有代码则需要实现代码的高亮。Vue的markdown解析库有很多,如markdown-it、vue-markdown-loader、marked、vue-markdown等。这些库都大同小异。这里选用的是marked,代码高亮的库选用的是highlight.js。具体实现步骤如下:一、安装依赖库在vue项目下打开命令窗口,并输入以下命令npminstallmarked-save//marked用于将markdown转换成htmlnpmins
 怎么使用vue3+ts+axios+pinia实现无感刷新
May 25, 2023 pm 03:37 PM
怎么使用vue3+ts+axios+pinia实现无感刷新
May 25, 2023 pm 03:37 PM
vue3+ts+axios+pinia实现无感刷新1.先在项目中下载aiXos和pinianpmipinia--savenpminstallaxios--save2.封装axios请求-----下载js-cookienpmiJS-cookie-s//引入aixosimporttype{AxiosRequestConfig,AxiosResponse}from"axios";importaxiosfrom'axios';import{ElMess
 Vue3复用组件怎么使用
May 20, 2023 pm 07:25 PM
Vue3复用组件怎么使用
May 20, 2023 pm 07:25 PM
前言无论是vue还是react,当遇到多处重复代码的时候,我们都会想着如何复用这些代码,而不是一个文件里充斥着一堆冗余代码。实际上,vue和react都可以通过抽组件的方式来达到复用,但如果遇到一些很小的代码片段,你又不想抽到另外一个文件的情况下,相比而言,react可以在相同文件里面声明对应的小组件,或者通过renderfunction来实现,如:constDemo:FC=({msg})=>{returndemomsgis{msg}}constApp:FC=()=>{return(
 Vue3中怎么实现选取头像并裁剪
May 29, 2023 am 10:22 AM
Vue3中怎么实现选取头像并裁剪
May 29, 2023 am 10:22 AM
最终效果安装VueCropper组件yarnaddvue-cropper@next上面的安装值针对Vue3的,如果时Vue2或者想使用其他的方式引用,请访问它的npm官方地址:官方教程。在组件中引用使用时也很简单,只需要引入对应的组件和它的样式文件,我这里没有在全局引用,只在我的组件文件中引入import{userInfoByRequest}from'../js/api'import{VueCropper}from'vue-cropper&
 vue3项目打包发布到服务器后访问页面显示空白怎么解决
May 17, 2023 am 08:19 AM
vue3项目打包发布到服务器后访问页面显示空白怎么解决
May 17, 2023 am 08:19 AM
vue3项目打包发布到服务器后访问页面显示空白1、处理vue.config.js文件中的publicPath处理如下:const{defineConfig}=require('@vue/cli-service')module.exports=defineConfig({publicPath:process.env.NODE_ENV==='production'?'./':'/&
