

怎么搭建vue+springboot项目

开发使用的软件
idea: 编写后端springboot代码
hbuilderx或VSCode编写vue代码
navicat或者dbeaver 编写创建数据库表
vue项目搭建
环境配置
在搭建之前,首先你需要安装nodeJs,具体如何安装就不多赘述,百度即可。
cmd命令
win+R键唤出弹框输入cmd,进入控制台界面。
然后,
命令行
cd/d 路径地址
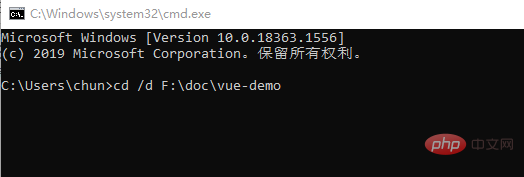
切换到想创建项目的路径
再使用
vue init webpack 项目名称
命令创建项目
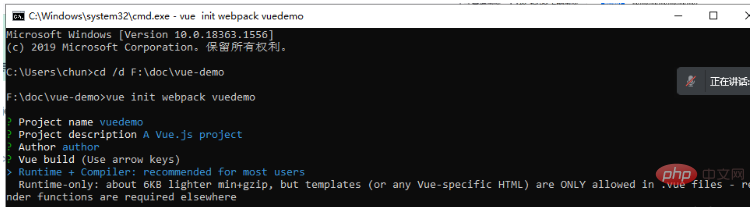
Project name:项目名称
Project description:项目描述
author:作者
Runtime + Complier: 运行时和编译器:默认第一个
install router :是否安装路由,选择安装就后面我安装步骤就不用执行
Use ESLint to lint your code? (Y/n):问你是否使用eslint限制语法,新手建议否
Set up unit tests (Y/n):单元测试,新手选否
Setup e2e tests with Nightwatch? (Y/n):使用Nightwatch设置端到端测试?,选否
Should we run `npm install` for you after the project has been created?:用什么方式运行项目:选npm
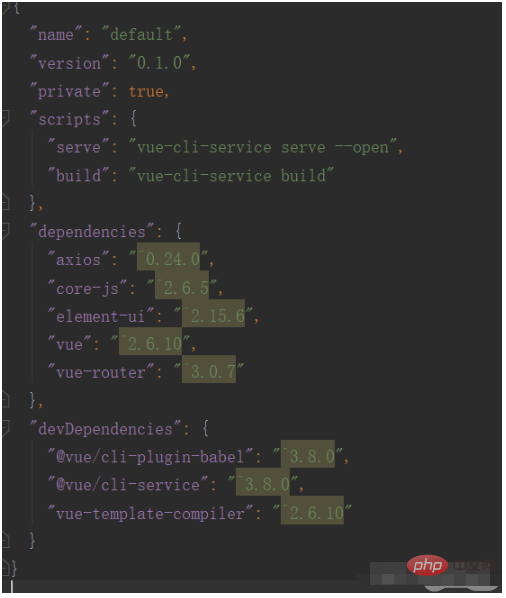
然后就创建好了,找到创建项目的路径,cmd命令行,看package.json是dev还是serve
此时的package.json文件内容
{
  "name": "项目名称",
  "version": "0.1.0", // b=版本
  "private": true,
  // 运行脚本:serve为启动项目脚本,build为打包项目脚本
  "scripts": {
    "serve": "vue-cli-service serve --open",
    "build": "vue-cli-service build"
  },
  // 安装的vue依赖文件
  "dependencies": {
    "vue": "^2.6.11",
    // vue-router一般作传参和页面跳转使用
    "vue-router": "^3.5.1"
  },
  "devDependencies": {
    "@vue/cli-service": "~4.5.12",
    "vue-template-compiler": "^2.6.11"
  },
  "browserslist": [
    "> 1%",
    "last 2 versions",
    "not dead"
  ]
}运行 npm run dev 或 npm run serve
vue ui 创建项目
这里给大家推荐第二种方式创建
使用cmd命令行
vue ui
会打开一个ui界面,跟着ui提示操作就行
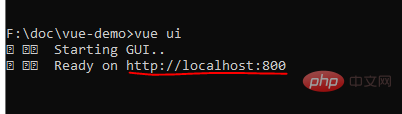
打开cmd提示的网页地址:我的是http://localhost:800
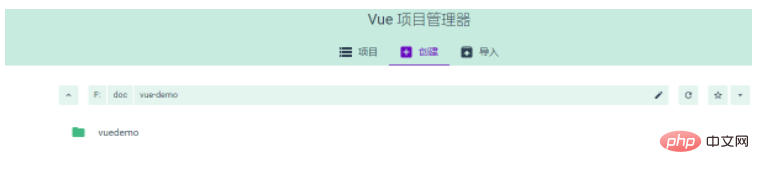
然后一步步操作:
ps:如果提示不是内部命令信息提示,就需要安装vue组件
命令行输入: npm install vue更具体的百度搜索操作即可
vue项目制作方向梳理
在正式开始运行之前先梳理一下创建vue项目需要什么
在按照我刚刚的方式创建完vue项目后,(如有勾选安装router的情况)
便已经可以通过npm run serve直接运行项目了,(只是有前端部分);
初始它会有一个HelloWorld.vue的组件界面。一运行便能够看到该页面的内容。
但是单单有这些是不够的。
要制作一个功能齐全的vue项目,最少需要安装这几项:
vue-router :页面跳转和传参
一个UI框架组件:根据你需要制作电脑端还是手机端项目去搜索vue ui框架。
一般都能够搜索到比较常用的vue ui框架。这些ui框架都会有文档,文档内部有如何安装
的npm install 命令。
本次的ui框架为elementUi
axios: 目前常用的与后端数据交互的组件,因为我们是vue+springboot项目,为前后端
分离的项目,需要用它来连接前后端
那么,通过梳理我们便清楚了如何往下去制作。
此外,为了快速的构建好vue项目,你最起码你需要掌握以下关于vue的
知识:
vue常用指令:
内容渲染指令 ————》
{{ 属性值 }} 别名:插值表达式
属性值为自定义的属性
该指令将数据渲染到页面
例子:
name: "张三" // 自定义属性
<div>{{ name }}</div>
------------------------------------------------------
属性渲染指令
v-bind:元素="属性值" 简写方式==> :元素="属性"
------------------------------------------------------
事件渲染指令
v-on:事件名 只需要知道v-on:click="方法名" 点击事件 简写:@click="方法名"
------------------------------------------------------
双向绑定指令
v-model="属性值"
例如:给input绑定一个v-model的属性值,修改input的值,该绑定的属性值内容会跟
着改变
------------------------------------------------------
条件渲染指令
v-if
v-else-if
v-else
该指令分条件渲染页面,只有满足条件的标签才会被渲染到页面
完整写法例子:
name: "张三" // 自定义属性
// 页面写法
<div v-if="name=='张三'">
我的名字是张三</div> // 当满足条件时该文本会显示在页面
<div v-else>我的名字不是张三</div> // 不满足条件显示本文本内容
------------------------------------------------------
列表渲染指令
v-for=(item ,index) in list
该指令为渲染集合数组的指令,通过该指令可以把多条数据分批次渲染到界面
item为数组集合元素的内容,index为下标
例:
list: [
{
name: "xxx",
age: xx,
},
{
name: "zzz",
age: zz,
},
]
当下标为0时,item值为list下的
{
name: "xxx",
age:xx,
}
需要获取name属性值,则在页面中写成{{ item.name }}
完整写法例子:
<div v-for(item,index) in list>
<span>{{ item.name }}</span>
</div>除了掌握基础指令外,还需要最起码掌握以下函数:
data() {
return {
// 在return这里定义自定义的属性
}
},
// 在methods定义方法
methods: {
方法A() {
}
},
// 在created内调用方法,实现一加载页面就获取数据,用于增删改查中的查,来
查询数据
created() {
}还需要了解: 在main.js这个入口文件引用npm install 后的组件 // 导入安装的组件 import 自定义组件名 from "组件路径(一般在搜索安装的组件文档会有说明)" Vue.use(自定义组件名) // 引用组件(一般安装的组件文档会有说明) 例: import Router from "./vue-router" Vue.use(Router)
掌握了以上知识的前提,是你已经有学习过html5相关的知识后,然后就可以着手制作vue项目了
通过软件vscode打开项目
vscode,找到项目路径(我用的是idea,无所谓用什么软件,直接用cmd也能运行)
然后新建终端,输入运行的命令:
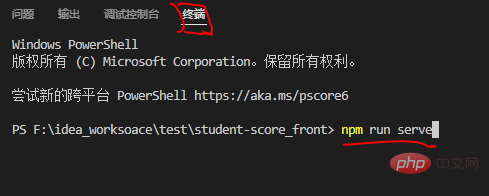
运行
npm run dev
或
npm run serve
vue 配置
以下vue代码皆以vue2.x为准!
vue-router
vue-router是vue.js的官方路由管理器,一般用它作页面跳转和跳转时传参。
如何配置
以我的学生管理系统的结构为例:
首先需要在vue项目的界面引入vue-router,
使用编程软件的终端或者cmd 切换到自己项目的路径下,使用以下代码安装:
npm install vue-router
axios
axios的作用用于于后端异步通信,简单的说就是你想把前端数据传给后端就需要它进行数据交互
同样,使用编程软件的终端或者cmd 切换到自己项目的路径下,使用以下代码安装:
npm install axios
ui框架
ui框架,顾名思义就是用于编写界面用的,像淘宝网站,京东等等。
其实选择哪个都ok,看自己喜好,一般比较用的多的是elementui,layui,museui,和mintui等等。
有基于移动端的也有基于电脑端。
以我的学生成绩管理系统为例,用的是elementui
同样,使用编程软件的终端或者cmd 切换到自己项目的路径下,使用以下代码安装:
npm i element-ui -S
到这里基础的vue项目所需要的都安装好了,打开package.json能看到刚刚安装的
引入
安装完了,你还需要引入
在mian.js里进行引入刚刚安装的,以及使用elementui
// 导入包
import Vue from 'vue'
import App from './App.vue'
import router from './router'
import ElementUI from 'element-ui'
import axios from 'axios'

Vue.config.productionTip = false
// elementui
Vue.use(ElementUI)
Vue.prototype.$axios = axios

new Vue({
  el: '#app',
  // 路由
  router,
  render: h => h(App),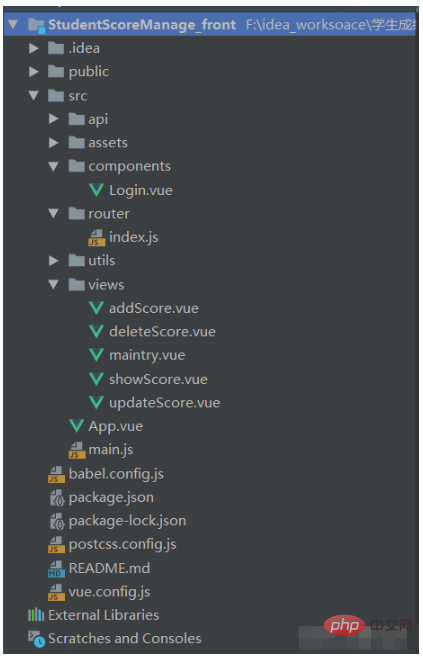
}).$mount('#app')结构
首先看看我的学生成绩管理系统的完整结构
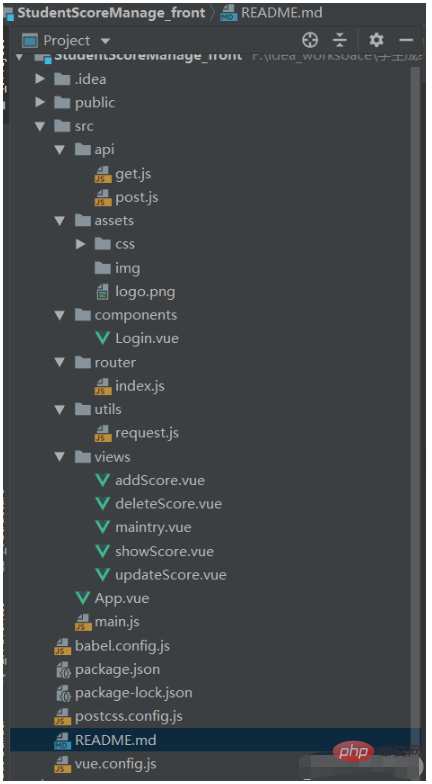
api: 用于与后端数据交互
assets: 用于存放静态资源,如图片,样式设置
components: 组件,一般我用它作为项目的主入口,即项目一启动就打开它的界面
router: 配置路由,管理页面跳转
utils: 主要工具配置,这里主要是写axios的配置,用于引入api里的get.js和post.js,作为数据交互
views: 你的项目里需要几个页面就使用几个页面进行增添视图组件
router配置
在以上截图中,我有:
Login.vue
addScore.vue
deleteScore.vue
updateScore.vue
showScore.vue
maintry.vue
这几个视图组件
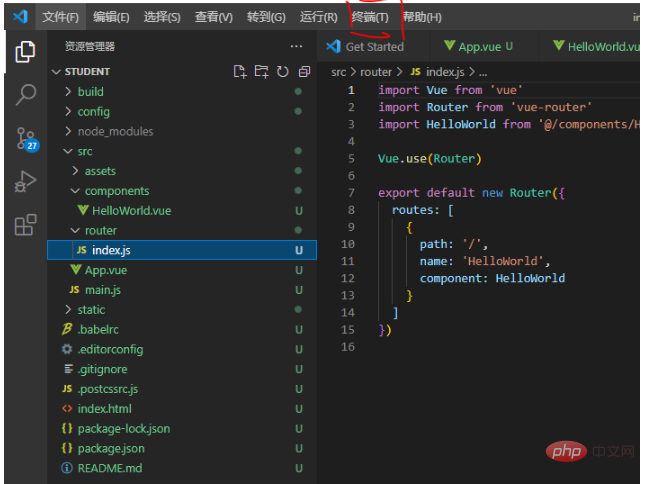
则,router的index.js代码如下
import Vue from 'vue'
import Router from 'vue-router'
import Login from '@/components/Login'
import maintry from '@/views/maintry'
import addScore from '@/views/addScore'
import deleteScore from '@/views/deleteScore'
import showScore from '@/views/showScore'
import updateScore from '@/views/updateScore'

// 挂载vue-router
// 将组件添加到router
Vue.use(Router)
export default new Router({
    routes: [
        {
            path: '/',
            redirect: '/login'
        },
        {
            path: '/login',
            name: 'Login',
            component: Login
        },
        {
            path: '/maintry',
            name: 'maintry',
            component: maintry
        },
        {
            path: '/addScore',
            name: 'addScore',
            component: addScore
        },
        {
            path: '/deleteScore',
            name: 'deleteScore',
            component: deleteScore
        },
        {
            path: '/showScore',
            name: 'showScore',
            component: showScore
        },
        {
            path: '/updateScore',
            name: 'updateScore',
            component: updateScore
        }
    ]
})ps: 需要注意的是,配置好了路由,你还需要在App.vue里进行声明,需要在App.vue 加入<router-view/>代码
App.vue代码:
<template>
<div id="app">
<router-view/>
</div>
</template>
<script>
export default {
name: 'app'
}
</script>
<style>
#app {
font-family: 'Avenir', Helvetica, Arial, sans-serif;
-webkit-font-smoothing: antialiased;
-moz-osx-font-smoothing: grayscale;
text-align: center;
color: #2c3e50;
margin-top: 60px;
height: 100%;
}
</style>request.js
这个文件是axios的配置文件
代码如下:
import axios from 'axios'

// 创建axios实例
// eslint-disable-next-line no-unused-vars
const service = axios.create({
    // baseURL: '/', // api的base_Url
    // 后端的请求路径
    baseURL: 'http://localhost:8081/student', // api的base_Url
    timeout: 50000 // 请求超时时间
})

// 请求拦截器
axios.interceptors.request.use(
    function (config) {
        // 在发送请求之前做些什么
        return config
    },
    function (error) {
        // 对请求错误做些什么
        return Promise.reject(error)
    }
)

// 响应拦截器
axios.interceptors.response.use(
    function (config) {
        // 对响应数据做点什么
        return config
    },
    function (error) {
        // 对响应错误做点什么
        return Promise.reject(error)
    }
)

export default serviceget和post请求
写完request.js后,就需要根据自己的需求在get.js和post.js编写对应的和后端交互的代码
以其中一个进行举例:
get.js:
// 导入axios配置
import service from '../utils/request'

// 登录
export function loginTosystem(username, password) {
    return service.get('/login/loginTosystem', {
        headers: { 'Content-Type': 'application/json' },
        params: {
            username: username,
            password: password
        }
    })
}如我想实现登录功能,则需要先引入刚刚的request.js文件,把前端输入框输入的两个参数,账号username和密码password传到后端,去获取后端路径下的/login/loginTosystem里编写的controller方法
post.js
// 导入axios配置
import service from '../utils/request'

// 注册账号
export function registerAccount (obj) {
    return service.post('/register/registerAccount', JSON.stringify(obj), {
        headers: { 'Content-Type': 'application/json' }
    })
}post一般处理参数比较多的情况
如我实现注册功能,用一个对象参数去接收,把它传入后端的/register/registerAccount的controller方法
// 这里给大家举一个例子:
// 登录和注册界面以及功能
<template>
<div v-show="loginShowControll">
<!-- 登录界面-->
<div v-show="loginShow" id="login_login">
<el-container>
<el-header>学生成绩管理系统登录入口</el-header>
<el-main>
<!-- 输入框-->
<span id="login_usernameInfo">用户名:</span>
<el-input v-model="username" placeholder="请输入用户名" id="login_input_username"></el-input>
<span id="login_passwordInfo">密码:</span>
<el-input v-model="password" placeholder="请输入密码" id="login_input_password"></el-input>
<!-- 按钮-->
<button type="submit" id="login_submit" @click="loginButton">登录</button>
<button type="submit" id="login_registerButton" @click="registerButton">注册</button>
</el-main>
<el-footer>登录界面</el-footer>
</el-container>
</div>
<!-- 注册界面-->
<div v-show="registerShow" id="login_register">
<el-container>
<el-header>学生成绩管理系统注册入口<span id="register_return" @click="registerReturn" @mouseover="mouseOver" @mouseleave="mouseLeave" :>返回</span></el-header>
<el-main>
<!-- 输入框-->
<span id="register_nameInfo">姓名:</span>
<el-input v-model="name" placeholder="请输入姓名" id="register_input_name"></el-input>
<span id="register_usernameInfo">用户名:</span>
<el-input v-model="registerUsername" placeholder="请输入用户名" id="register_input_username"></el-input>
<span id="register_passwordInfo">密码:</span>
<el-input v-model="registerPassword" placeholder="请输入用户名" id="register_input_password"></el-input>
<!-- 按钮-->
<button type="submit" id="register_submit" @click="submitButton">提交</button>
<button type="submit" id="register_registerButton" @click="resetButton">重置</button>
</el-main>
<el-footer>注册界面</el-footer>
</el-container>
</div>
</div>
</template>
<script>
import { loginTosystem } from "../api/get";
import { registerAccount } from "../api/post"
export default {
name: 'Login',
data () {
return {
loginShowControll: true, // 登录、注册界面显示控制
loginShow: true, // 登录界面显示控制
registerShow: false, // 注册界面显示控制
username: '', // 用户名
password: '', // 密码
name: '', // 姓名
bgc: '', // 鼠标悬停变色
registerUsername: '', // 注册账号
registerPassword: '' // 注册密码
}
},
methods: {
// 跳转注册界面
registerButton () {
this.loginShow = false
this.registerShow = true
},
// 登录学生成绩管理系统
loginButton () {
if (this.username.trim() == '') {
alert('请输入用户名')
return
}
if (this.password.trim() == '') {
alert('请输入密码')
return
}
loginTosystem(this.username, this.password).then(res => {
if (res.data.data == null) {
alert('账号或密码错误!')
} else {
alert('登录成功')
this.$router.push({
path: '/maintry',
// 将username传到maintry组件,用于获取登陆人员的姓名
query: {username: this.username}
})
}
})
},
// 注册按钮
submitButton () {
if (this.name = '') {
alert('请输入姓名')
return
}
if (this.username = '') {
alert('请输入用户名')
return
}
if (this.password = '') {
alert('请输入密码')
return
}
const obj = {
username: this.registerUsername,
password: this.registerPassword,
name: this.name
}
this.registerAccount(obj)
this.name = ''
this.registerUsername = ''
this.registerPassword = ''
},
// 注册信息
async registerAccount(obj) {
await registerAccount(obj).then(res => {
alert(res.data.data)
})
},
// 重置文本
resetButton () {
this.name = ''
this.registerUsername = ''
this.registerPassword = ''
},
// 返回登录界面
registerReturn () {
this.loginShow = true
this.registerShow = false
},
// 鼠标悬停变色
mouseOver () {
this.bgc = 'background-color: #cccccc;color: red'
},
mouseLeave () {
this.bgc = ''
}
},
watch: {
// 监听登录和注册地方只能使用数字和英文
username(newValue, oldValue) {
this.username = newValue.replace(/[^A-Za-z0-9]/g, '')
},
password(newValue, oldValue) {
this.password = newValue.replace(/[^A-Za-z0-9]/g, '')
},
registerUsername (newValue, oldValue) {
this.registerUsername = newValue.replace(/[^A-Za-z0-9]/g, '')
},
registerPassword(newValue, oldValue) {
this.registerPassword = newValue.replace(/[^A-Za-z0-9]/g, '')
},
// 只能输入汉字
name(newValue,oldValue) {
this.name = newValue.replace(/[^\4E00-\u9FA5]/g, '')
}
}
}
</script>
<style scoped>
@import "../assets/css/login.css";
</style>增删改查的思路按照该方法去制作即可
vue.config.js
这个是vue的配置文件,是代理的一种,可以理解解决跨域
module.exports = {
  publicPath: '/',
  lintOnSave: false,
  devServer: {
    disableHostCheck: true,
    open: true,
    port: 8080,
    proxy: {
      '/': {
        // 连接到后端的路径
        target: 'http://localhost:8081/student',
        changeOrigin: true,
        secure: false,
        pathRewrite: {
          '^/': '/'
        }
      }
    }
  }
}这里有一个要注意的是,前面的module.exports一定要注意有没有“s”如果没有s,配置是不会生效的
vue完成
以上vue的配置基本就完成了,接下来就可以去编写你需要的页面和功能了
springboot
和前端不同,springboot一般使用的是依赖进行配置所需要的内容,以及使用注解去声明
创建springboot项目
我使用的idea去创建springboot项目。
直接创建maven项目在后面新增文件夹作为不同的功能
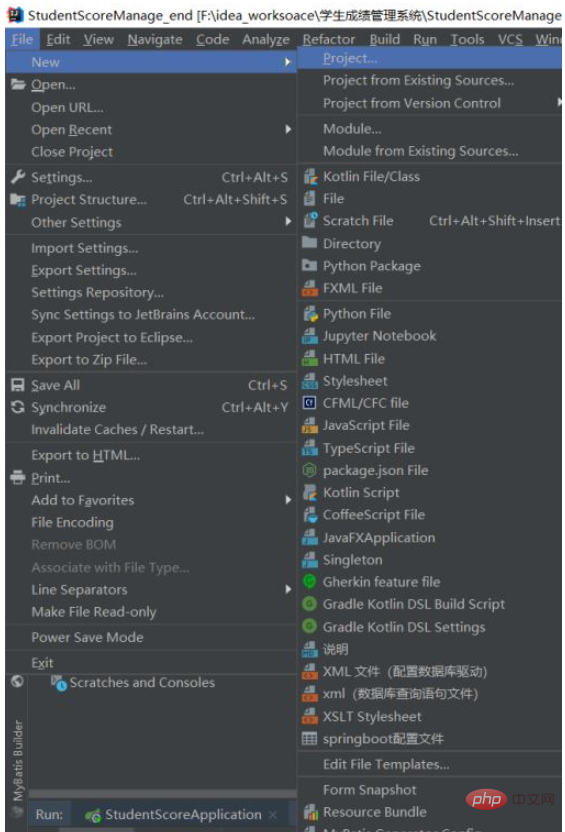
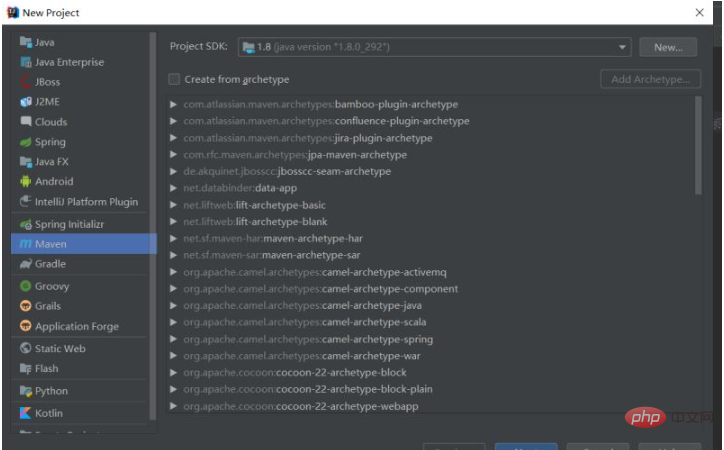
直接下一步,填写完项目名称创建即可
依赖
本依赖为pom.xml文件的内容
<?xml version="1.0" encoding="UTF-8"?>
<project xmlns="http://maven.apache.org/POM/4.0.0"
         xmlns:xsi="http://www.w3.org/2001/XMLSchema-instance"
         xsi:schemaLocation="http://maven.apache.org/POM/4.0.0 http://maven.apache.org/xsd/maven-4.0.0.xsd">
    <modelVersion>4.0.0</modelVersion>

    <groupId>com.hxc</groupId>
    <artifactId>com.StudentScoreManage</artifactId>
    <version>1.0-SNAPSHOT</version>
    <parent>
        <groupId>org.springframework.boot</groupId>
        <artifactId>spring-boot-starter-parent</artifactId>
        <version>2.4.5</version>
    </parent>
    <dependencies>
<!--        springboot-->
        <dependency>
            <groupId>org.springframework.boot</groupId>
            <artifactId>spring-boot-starter-web</artifactId>
        </dependency>
        <dependency>
            <groupId>org.springframework.boot</groupId>
            <artifactId>spring-boot-starter</artifactId>
        </dependency>
        <dependency>
            <groupId>org.springframework.boot</groupId>
            <artifactId>spring-boot-starter-test</artifactId>
            <scope>test</scope>
        </dependency>
<!--        mysql-->
        <dependency>
            <groupId>mysql</groupId>
            <artifactId>mysql-connector-java</artifactId>
            <version>8.0.26</version>
        </dependency>
<!--        fastjson-->
        <dependency>
            <groupId>com.alibaba</groupId>
            <artifactId>fastjson</artifactId>
            <version>1.2.76</version>
        </dependency>
<!--        mybatis-->
        <dependency>
            <groupId>com.baomidou</groupId>
            <artifactId>mybatis-plus-boot-starter</artifactId>
            <version>3.4.3</version>
        </dependency>
<!--        lombok-->
        <dependency>
            <groupId>org.projectlombok</groupId>
            <artifactId>lombok</artifactId>
            <version>1.18.12</version>
        </dependency>
<!--        redis-->
        <dependency>
            <groupId>redis.clients</groupId>
            <artifactId>jedis</artifactId>
            <version>3.6.0</version>
        </dependency>
    </dependencies>
    <!--    编码格式-->
    <properties>
        <project.build.sourceEncoding>UTF-8</project.build.sourceEncoding>
        <project.reporting.outputEncoding>UTF-8</project.reporting.outputEncoding>
    </properties>
    <!--    打包配置-->
    <build>
        <plugins>
            <plugin>
                <groupId>org.springframework.boot</groupId>
                <artifactId>spring-boot-maven-plugin</artifactId>
            </plugin>
        </plugins>
    </build>
</project>以上按需引入,引入了springboot依赖,mysql驱动,mybatis等等,具体功能请百度
项目结构
以我的学生成绩管理系统为例:
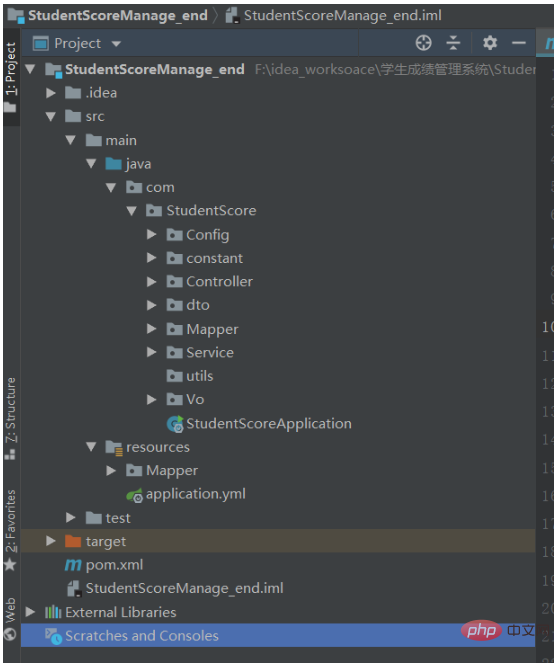
config: 配置跨域和redis配置
constant: 配置与前端交互返回的数据提示和内容
controller: 控制层,接收前端的数据
service: service层,处理接收到的数据,主要作功能代码
dto: 实体类
mapper: 从service到mapper,主要实现数据库的增删改查方法的实现
Vo: 主要用于构建不同数据的综合的实体类,以及配置与前端交互的数据
utils: 工具类,但是本项目并没有用到
resource/mapper: 数据库的增删改查语句
application.yml: 配置数据库驱动和redis配置、服务器端口等等
pom.xml: 依赖
StudentScoreApplication.java: 启动类
ps: constant和Vo可简化不编写,如不编写数据交互提示,把controller和service
层的返回数据修改为别的数据类型即可,如String
启动类配置
想启动项目,必须要有一个入口文件,
代码如下:
package com.StudentScore;
import org.mybatis.spring.annotation.MapperScan;
import org.springframework.boot.SpringApplication;
import org.springframework.boot.autoconfigure.SpringBootApplication;
//声明springboot
@SpringBootApplication
//定义mapper区
@MapperScan("com.StudentScore.Mapper")
public class StudentScoreApplication {
    public static void main(String[] args) {
        SpringApplication.run(StudentScoreApplication.class,args);
    }
}配置 跨域
只有配置跨域,才能接收到前端的数据请求
原本教程需要配置redis,现在简化,修改为不需要redis,更新时间2022-04-11
package com.StudentScore.Config;

import org.springframework.context.annotation.Configuration;
import org.springframework.web.servlet.config.annotation.CorsRegistry;
import org.springframework.web.servlet.config.annotation.WebMvcConfigurer;

/**
 * @author hxc
 * @dateTime: 2021-12-2
 * @description: 跨域配置
 * */
@Configuration
public class CorsConfig implements WebMvcConfigurer {
    @Override
    public void addCorsMappings(CorsRegistry registry) {
        //设置允许跨域
        registry.addMapping("/**")
                .allowedOrigins("*")
                // 设置允许跨域请求的域名
                .allowedOriginPatterns("*")
                //设置允许的方法
                .allowedMethods("*")
                .maxAge(3600);
    }
}数据库配置、服务端口
application.yml 文件主要是配置数据库和服务器的
server:
  port: 8081
  servlet:
# 项目的路径,配置如下之后,它的路径为http:locahost:8081/student
    context-path: /student
#    数据库
spring:
  datasource:
    username: root
    url: jdbc:mysql://localhost:3306/mydb
    password: root
driver-class-name: com.mysql.cj.jdbc.Driver在这里要注意的是,context-path,配置了项目的路径
于是本项目路径为:
http:locahost:8081/student
之所以提这个,因为怕你们和后面要讲的contoller的路径搞乱
数据交互
ps:如需要简化,此处可不配置
主要有两个文件,一个是ResutEnum,一个是ResutVo
用于与前端数据交互
代码如下
package com.StudentScore.constant;

import lombok.Getter;

@Getter
public enum ResutEnum {
    OK(2000,"成功"),
    Error(5000,"失败");
    ResutEnum(Integer code,String message){
        this.code = code;
        this.message = message;
    }
    Integer code;
    String message;
}package com.StudentScore.Vo;
import com.StudentScore.constant.ResutEnum;
import lombok.Getter;
/**
* @author hxc
* @dateTime: 2021-12-4
* @description: 数据交互响应-提示
* */
@Getter
public class ResultVo<T> {
private T data;
private Integer code;
private String message;
public ResultVo(ResutEnum resutEnum) {
this.code = resutEnum.getCode();
this.message = resutEnum.getMessage();
data = null;
}
public ResultVo(ResutEnum resutEnum,T data) {
this.code = resutEnum.getCode();
this.message = resutEnum.getMessage();
this.data = data;
}
public ResultVo(Integer code,String message,T data){
this.code = code;
this.message = message;
this.data = data;
}
}springboot运行顺序
以上,springboot的基础配置就已经ok了。
但是,在继续往下写代码,我们得明白,springboot是怎么执行代码的。
其实,我们哪怕只创建一个文件夹,只创建两三个java文件也能编写完一个springboot项目,但是,这样的代码是特别乱的,也不利于维护;因此我们才分层,一个文件夹一个层次,每个层次处理一种类型的功能
首先,我们知道,第一步肯定是从前端接收数据,那么接收到的数据第一步是哪里?
答案就是controller,别的层也可以,但是约定俗成,规定了它作为和前端交互
同理,controller接收到后,传到了service,service编写功能的实现,service再请求到mapper,mappe里编写数据库增删改查的实现
mapper再请求到resource下的mapper.xml,数据库的增删改查语句去查找数据库的数据。
当查到数据库数据后,返回到mapper,再到service,然后回到controller,最后再返回前端。
controller层
然后我们再看controller代码,以下所有的都以登录和注册功能作为例子,因为其他功能都和这两个差不多
登录是查询
注册是插入
登录controller:
package com.StudentScore.Controller;

import com.StudentScore.Service.LoginService;
import com.StudentScore.Vo.ResultVo;
import com.StudentScore.constant.ResutEnum;
import org.springframework.web.bind.annotation.GetMapping;
import org.springframework.web.bind.annotation.RequestMapping;
import org.springframework.web.bind.annotation.RequestParam;
import org.springframework.web.bind.annotation.RestController;

import javax.annotation.Resource;

/**
 * @author hxc
 * @dateTime: 2021-12-2
 * @description: 登录Controller
 * */
@RestController
@RequestMapping("/login/**")
public class LoginController {
    @Resource
    private LoginService loginService;

    // 登录到系统
    @GetMapping("/loginTosystem")
    public ResultVo loginTosystem(@RequestParam("username")String username, @RequestParam("password")String password) {
        return new ResultVo(ResutEnum.OK,loginService.loginTosystem(username,password));
    }
    @GetMapping("/findName")
    public ResultVo findName(@RequestParam("username")String username) {
        return new ResultVo(ResutEnum.OK,loginService.findName(username));
    }
}ps: 如简化不编写数据交互,把ResultVo修改为别的类型,如String
这里需要特别说明,其他和它一样
我们看到,它@RequestMapping("/login/**")
代表会请求到login路径
@GetMapping("/loginTosystem")
在login路径下写这个请求,代表它的路径为
/login/loginTosystem
细心的人会发现,前端的get和post也有写相同的路径
再结合配置的路径,到请求到这里的时候,最终路径为
http:localhost:8081/student/login/loginTosystem
其他同理
注册controller:
package com.StudentScore.Controller;

import com.StudentScore.Service.RegisterService;
import com.StudentScore.Vo.ResultVo;
import com.StudentScore.constant.ResutEnum;
import com.StudentScore.dto.Account;
import org.springframework.web.bind.annotation.*;

import javax.annotation.Resource;

/**
 * @author hxc
 * @dateTime: 2021-12-2
 * @description: 注册Controller
 * */
@RestController
@RequestMapping("/register/**")
public class RegisterController {
    @Resource
    private RegisterService registerService;

    // 注册
    @PostMapping("/registerAccount")
    public ResultVo registerAccount(@RequestBody Account account) {
        return new ResultVo(ResutEnum.OK,registerService.registerAccount(account));
    }
}ps: 如简化不编写数据交互,把ResultVo修改为别的类型,如String
dto层:实体
在请求到下面的service的时候,我们应该要有一个实体去映射,
即和数据库字段相同,账号表
package com.StudentScore.dto;

import lombok.Data;

/**
 * @author hxc
 * @dateTime: 2021-12-2
 * @description: 账号登录注册实体
 * */
@Data
public class Account {
    private String id;
    // 姓名
    private String name;
    // 账号
    private String username;
    // 密码
    private String password;
}ps: 要注意的是,字段名称需要一样,否则会映射失败,到时候拿到的数据是空的
service层
登录service
package com.StudentScore.Service;

import com.StudentScore.Mapper.LoginMapper;
import org.springframework.stereotype.Service;

import javax.annotation.Resource;

/**
 * @author hxc
 * @dateTime: 2021-12-2
 * @description: 登录service
 * */
@Service
public class LoginService {
@Resource
    private LoginMapper loginMapper;
    // 登录
    public String loginTosystem(String username,String password){
        String message = "";
        // 判断登录的角色是否为空
        if(loginMapper.loginTosystem(username,password)== null) {
            message = "登录失败";
        }else {
            loginMapper.loginTosystem(username,password);
            message = "登录成功";
        }
       return message;
    }

    // 获取登录人员的姓名
    public String findName(String username) {
        return loginMapper.findName(username);
    }
}注册service
package com.StudentScore.Service;

import com.StudentScore.Mapper.RegisterMapper;
import com.StudentScore.dto.Account;
import org.springframework.stereotype.Service;

import javax.annotation.Resource;

/**
 * @author hxc
 * @dateTime:2021-12-2
 * @description: 注册service
 * */
@Service
public class RegisterService {
    @Resource
    private RegisterMapper registerMapper;

    // 注册
    public String registerAccount(Account account) {
        registerMapper.registerAccount(account);
        return "注册成功";
    }
}mapper层
登录mapper
package com.StudentScore.Mapper;

import org.apache.ibatis.annotations.Param;

/**
 * @author hxc
 * @dateTime: 2021-12-2
 * @description: 登录mapper
 * */
public interface LoginMapper {
    // 登录
    String loginTosystem(@Param("username")String username, @Param("password")String password);
    // 获取登录的人的姓名
    String findName(@Param("username")String username);
}注册mapper
package com.StudentScore.Mapper;

import com.StudentScore.dto.Account;
import org.apache.ibatis.annotations.Param;

/**
 * @author hxc
 * @dateTime: 2021-12-2
 * @description: 注册mapper
 * */
public interface RegisterMapper {
    // 注册
    void registerAccount(@Param("account")Account account);
}数据库查询语句
登录:
<?xml version="1.0" encoding="UTF-8" ?>
<!DOCTYPE mapper
        PUBLIC "-//mybatis.org//DTD Mapper 3.0//EN"
        "http://mybatis.org/dtd/mybatis-3-mapper.dtd">
        <!-- 映射的mapper层-->
<mapper namespace="com.StudentScore.Mapper.LoginMapper">

    <select id="loginTosystem" resultType="java.lang.String">
        select username,password from scorelogin where username=#{username} and password=#{password}
    </select>
    <select id="findName" resultType="java.lang.String">
        select name from scorelogin where username=#{username}
    </select>
</mapper>注册:
<?xml version="1.0" encoding="UTF-8" ?>
<!DOCTYPE mapper
        PUBLIC "-//mybatis.org//DTD Mapper 3.0//EN"
        "http://mybatis.org/dtd/mybatis-3-mapper.dtd">
<mapper namespace="com.StudentScore.Mapper.RegisterMapper">
<!--useGeneratedKeys="true" keyProperty="id"代表使用自增,自增的对象是id -->
    <insert id="registerAccount" parameterType="com.StudentScore.dto.Account" useGeneratedKeys="true" keyProperty="id">
        insert into scorelogin (name,username,password) values (#{account.name},#{account.username},#{account.password})
    </insert>
</mapper>以上是怎么搭建vue+springboot项目的详细内容。更多信息请关注PHP中文网其他相关文章!

热AI工具

Undresser.AI Undress
人工智能驱动的应用程序,用于创建逼真的裸体照片

AI Clothes Remover
用于从照片中去除衣服的在线人工智能工具。

Undress AI Tool
免费脱衣服图片

Clothoff.io
AI脱衣机

Video Face Swap
使用我们完全免费的人工智能换脸工具轻松在任何视频中换脸!

热门文章
热工具

记事本++7.3.1
好用且免费的代码编辑器

SublimeText3汉化版
中文版,非常好用

禅工作室 13.0.1
功能强大的PHP集成开发环境

Dreamweaver CS6
视觉化网页开发工具

SublimeText3 Mac版
神级代码编辑软件(SublimeText3)
热门话题


 vue中怎么用bootstrap
Apr 07, 2025 pm 11:33 PM
vue中怎么用bootstrap
Apr 07, 2025 pm 11:33 PM
在 Vue.js 中使用 Bootstrap 分为五个步骤:安装 Bootstrap。在 main.js 中导入 Bootstrap。直接在模板中使用 Bootstrap 组件。可选:自定义样式。可选:使用插件。
 vue怎么给按钮添加函数
Apr 08, 2025 am 08:51 AM
vue怎么给按钮添加函数
Apr 08, 2025 am 08:51 AM
可以通过以下步骤为 Vue 按钮添加函数:将 HTML 模板中的按钮绑定到一个方法。在 Vue 实例中定义该方法并编写函数逻辑。
 vue中的watch怎么用
Apr 07, 2025 pm 11:36 PM
vue中的watch怎么用
Apr 07, 2025 pm 11:36 PM
Vue.js 中的 watch 选项允许开发者监听特定数据的变化。当数据发生变化时,watch 会触发一个回调函数,用于执行更新视图或其他任务。其配置选项包括 immediate,用于指定是否立即执行回调,以及 deep,用于指定是否递归监听对象或数组的更改。
 vue.js怎么引用js文件
Apr 07, 2025 pm 11:27 PM
vue.js怎么引用js文件
Apr 07, 2025 pm 11:27 PM
在 Vue.js 中引用 JS 文件的方法有三种:直接使用 <script> 标签指定路径;利用 mounted() 生命周期钩子动态导入;通过 Vuex 状态管理库进行导入。
 vue多页面开发是啥意思
Apr 07, 2025 pm 11:57 PM
vue多页面开发是啥意思
Apr 07, 2025 pm 11:57 PM
Vue 多页面开发是一种使用 Vue.js 框架构建应用程序的方法,其中应用程序被划分为独立的页面:代码维护性:将应用程序拆分为多个页面可以使代码更易于管理和维护。模块化:每个页面都可以作为独立的模块,便于重用和替换。路由简单:页面之间的导航可以通过简单的路由配置来管理。SEO 优化:每个页面都有自己的 URL,这有助于搜索引擎优化。
 vue返回上一页的方法
Apr 07, 2025 pm 11:30 PM
vue返回上一页的方法
Apr 07, 2025 pm 11:30 PM
Vue.js 返回上一页有四种方法:$router.go(-1)$router.back()使用 <router-link to="/"> 组件window.history.back(),方法选择取决于场景。
 vue遍历怎么用
Apr 07, 2025 pm 11:48 PM
vue遍历怎么用
Apr 07, 2025 pm 11:48 PM
Vue.js 遍历数组和对象有三种常见方法:v-for 指令用于遍历每个元素并渲染模板;v-bind 指令可与 v-for 一起使用,为每个元素动态设置属性值;.map 方法可将数组元素转换为新数组。
 vue怎么a标签跳转
Apr 08, 2025 am 09:24 AM
vue怎么a标签跳转
Apr 08, 2025 am 09:24 AM
实现 Vue 中 a 标签跳转的方法包括:HTML 模板中使用 a 标签指定 href 属性。使用 Vue 路由的 router-link 组件。使用 JavaScript 的 this.$router.push() 方法。可通过 query 参数传递参数,并在 router 选项中配置路由以进行动态跳转。
