MyBatis 是一款优秀的持久层框架,它支持自定义 SQL、存储过程以及高级映射。MyBatis 免除了几乎所有的 JDBC 代码以及设置参数和获取结果集的工作。MyBatis 可以通过简单的 XML 或注解来配置和映射原始类型、接口和 Java POJO(Plain Old Java Objects,普通老式 Java 对象)为数据库中的记录。
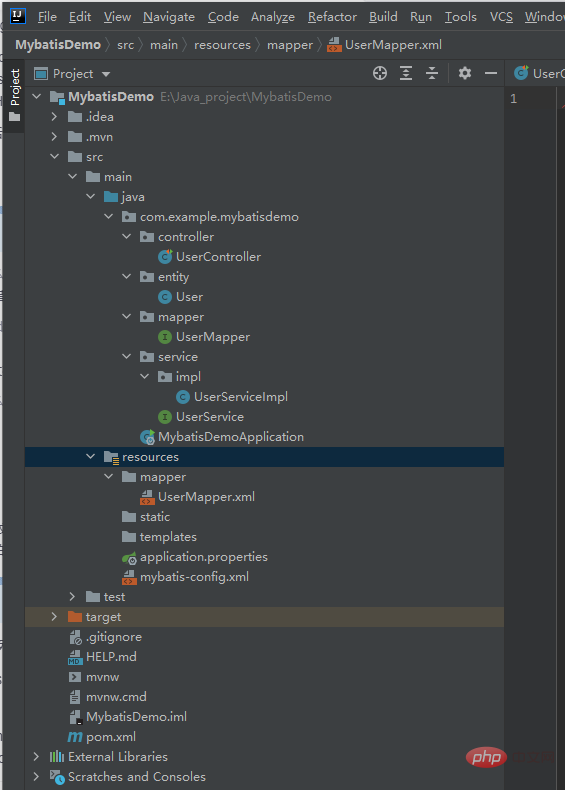
1、MyBatis工程总体目录结构
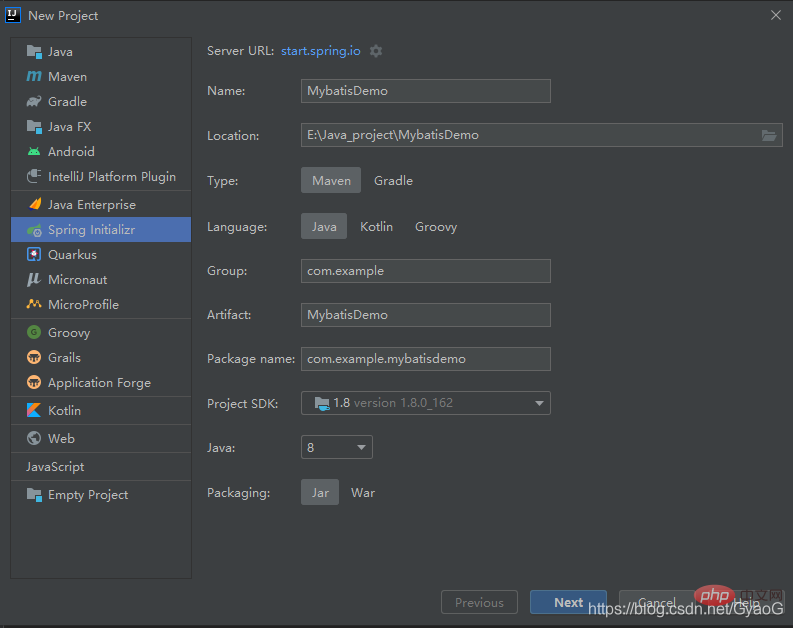
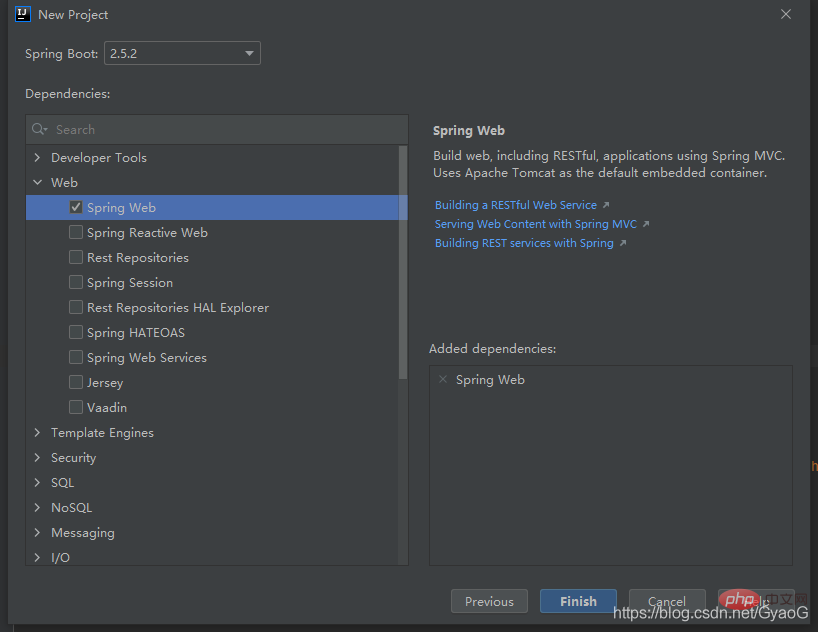
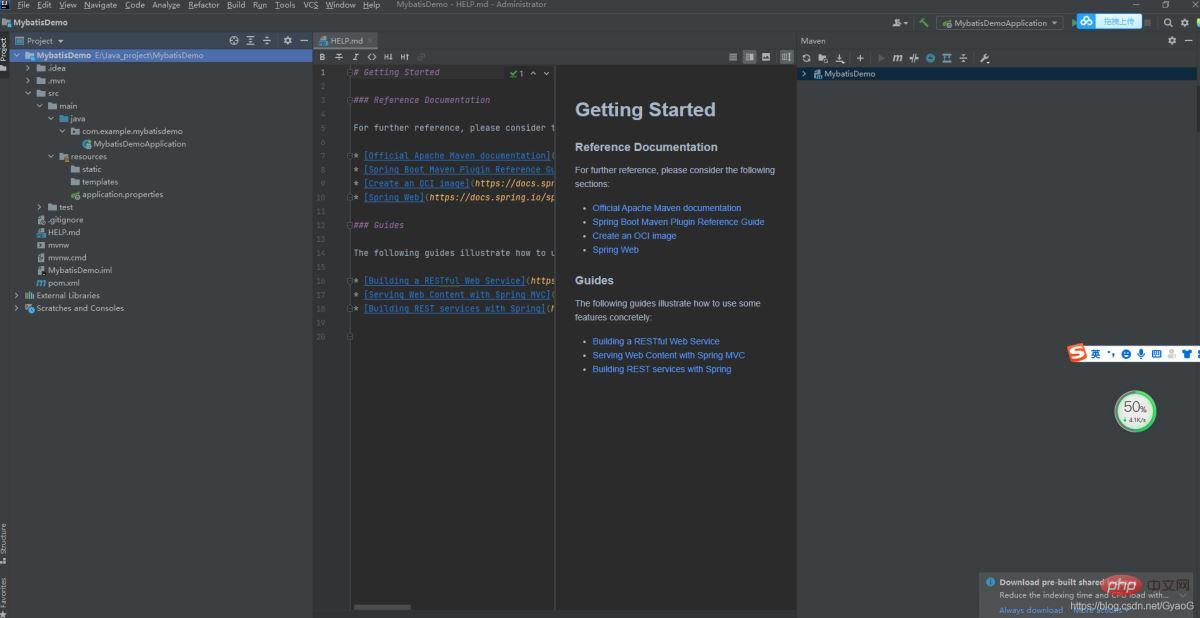
2、创建简单的SpringBoot工程
3、添加MyBatis依赖
  <!--MyBatis-->
        <dependency>
            <groupId>mysql</groupId>
            <artifactId>mysql-connector-java</artifactId>
            <version>5.1.32</version>
        </dependency>
        <dependency>
            <groupId>org.mybatis</groupId>
            <artifactId>mybatis</artifactId>
            <version>3.4.6</version>
        </dependency>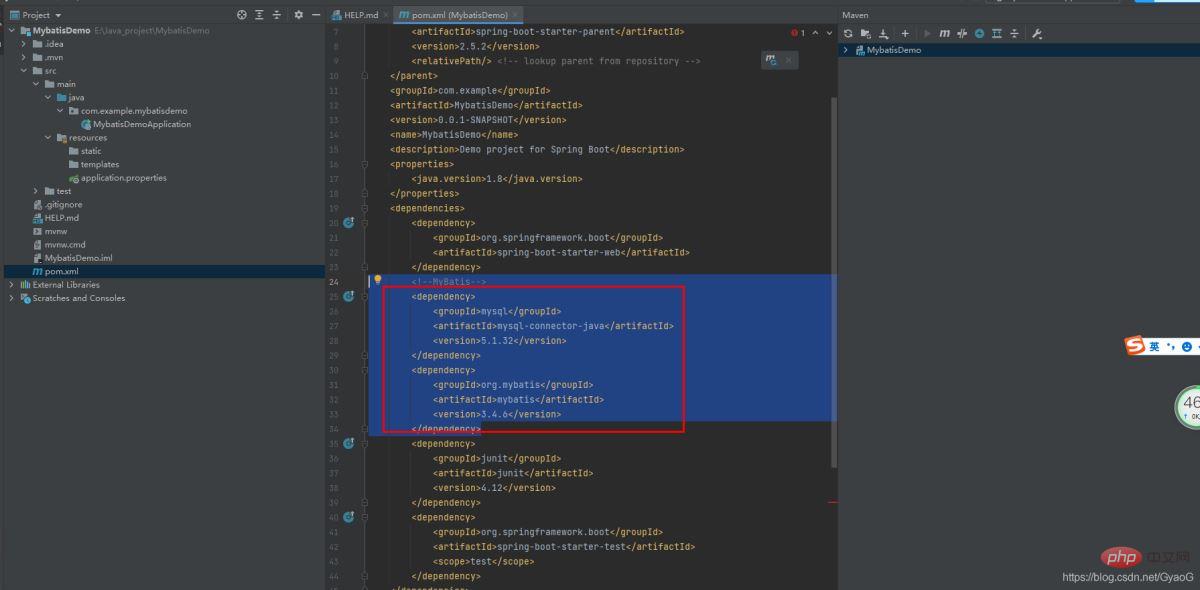
4、在数据库创建USER表

CREATE TABLE `user` (
  `id` int(11) NOT NULL AUTO_INCREMENT,
  `username` varchar(20) NOT NULL  DEFAULT "" COMMENT "用户名",
  `password` varchar(50) NOT NULL DEFAULT "" COMMENT "密码",
  PRIMARY KEY (`id`) USING BTREE
) ENGINE=InnoDB DEFAULT CHARSET=utf8mb4 ROW_FORMAT=DYNAMIC;
5、在application.properties配置数据库连接信息
#数据库相关配置
spring.datasource.driver-class-name=com.mysql.jdbc.Driver
spring.datasource.url=jdbc:mysql://127.0.0.1:3306/test?useSSL=false&characterEncoding=utf8&allowMultiQueries=true&serverTimezone=Asia/Shanghai&useAffectedRows=true
spring.datasource.username=root
spring.datasource.password=QQ796413

#mybaits配置
#mapper加载路径
mybatis.mapper-locations= classpath:mapper/*.xml
#实体包位置
mybatis.type-aliases-package= com.example.mybatisdemo.entity
#myatbis配置文件
mybatis.config-location= classpath:mybatis-config.xml
6、创建USER表对应的实体类
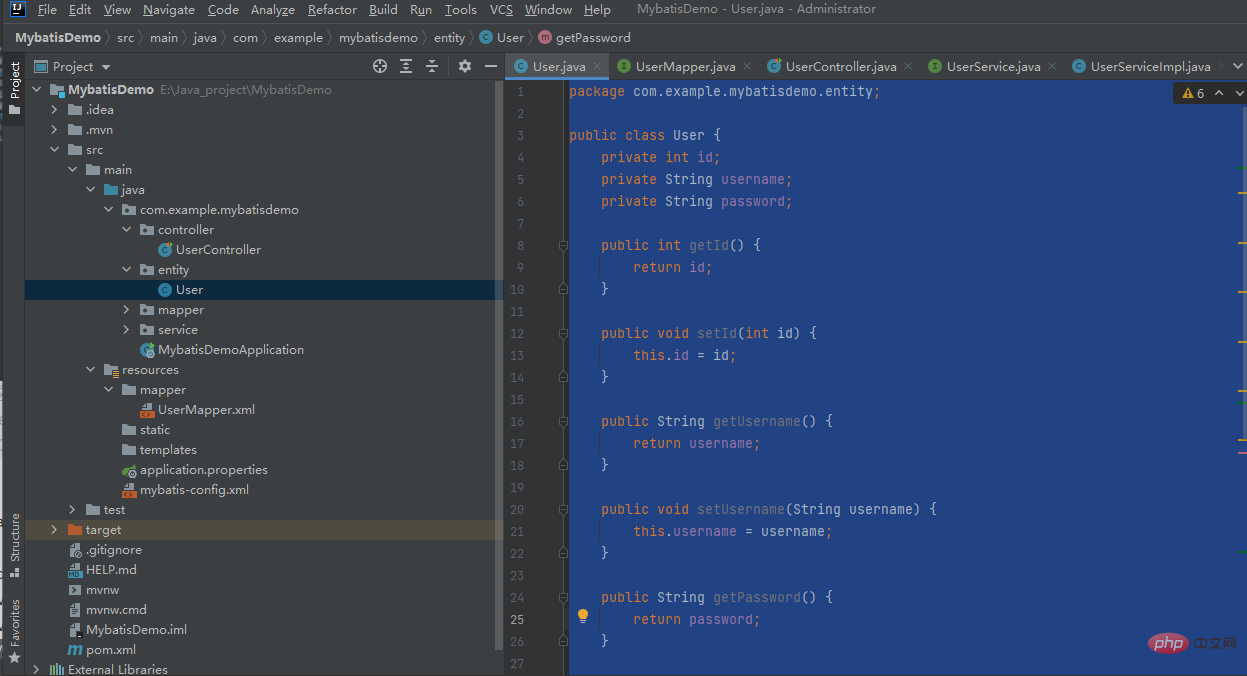
package com.example.mybatisdemo.entity;

public class User {
    private int id;
    private String username;
    private String password;

    public int getId() {
        return id;
    }

    public void setId(int id) {
        this.id = id;
    }

    public String getUsername() {
        return username;
    }

    public void setUsername(String username) {
        this.username = username;
    }

    public String getPassword() {
        return password;
    }

    public void setPassword(String password) {
        this.password = password;
    }

    @Override
    public String toString() {
        return "User{" +
                "id=" + id +
                ", username="" + username + """ +
                ", password="" + password + """ +
                "}";
}7、在mapper/UserMapper创建UserMapper.java

package com.example.mybatisdemo.mapper;

import com.example.mybatisdemo.entity.User;
import org.apache.ibatis.annotations.Mapper;

@Mapper
public interface UserMapper{

     User findUserById(Integer id);
}8、在service/UserService新建UserService.java

package com.example.mybatisdemo.service;

import com.example.mybatisdemo.entity.User;

public interface UserService {
    User findUserById(Integer id);
}9、在service/impl/UserServiceImpl 创建UserServiceImpl.java

package com.example.mybatisdemo.service.impl;

import com.example.mybatisdemo.entity.User;
import com.example.mybatisdemo.mapper.UserMapper;
import com.example.mybatisdemo.service.UserService;
import org.springframework.beans.factory.annotation.Autowired;
import org.springframework.stereotype.Service;

@Service
public class UserServiceImpl implements UserService {
        @Autowired
        private UserMapper userMapper;

        @Override
        public User findUserById(Integer id) {
            return userMapper.findUserById(id);
        }
}10、在resources下新建mybatis-conf.xml

<?xml version="1.0" encoding="UTF-8" ?>
<!DOCTYPE configuration
        PUBLIC "-//mybatis.org//DTD Config 3.0//EN"
        "http://mybatis.org/dtd/mybatis-3-config.dtd">

<configuration>
    <settings>
        <!--开启日志-->
        <setting name="logImpl" value="STDOUT_LOGGING"/>
        <!--开启驼峰命名法-->
        <setting name="mapUnderscoreToCamelCase" value="true"/>
        <!--开启全局延迟加载-->
        <setting name="lazyLoadingEnabled" value="true"/>
        <!-- 集合为空时强制返回空集合实例而不是null -->
        <setting name="returnInstanceForEmptyRow" value="true"/>
        <!-- 结果集中value为空时保留key -->
        <setting name="callSettersOnNulls" value="true"/>
    </settings>
</configuration>11、在resources下mapper文件下创建UserMapper.xml

<?xml version="1.0" encoding="UTF-8"?>
<!DOCTYPE mapper PUBLIC "-//mybatis.org//DTD Mapper 3.0//EN" "http://mybatis.org/dtd/mybatis-3-mapper.dtd">
<!--注意:1.这里的namespace要是你usermapper的位置-->
<mapper namespace="com.example.mybatisdemo.mapper.UserMapper">
    <!--注意这里的返回类型-->
    <resultMap id="BaseResultMap" type="com.example.mybatisdemo.entity.User">
        <result column="id" property="id"/>
        <result column="username" property="username"/>
        <result column="password" property="password"/>
    </resultMap>

    <!--2.id和你的方法名一样,resultMap为上面的id名一致-->
    <select id="findUserById" resultMap="BaseResultMap">
        select
             id,
             username,
             password
        from
             user
        where
             id= #{id,jdbcType=INTEGER}
    </select>
</mapper>12、创建UserController.java

package com.example.mybatisdemo.controller;

import com.example.mybatisdemo.entity.User;
import com.example.mybatisdemo.service.UserService;
import org.springframework.beans.factory.annotation.Autowired;
import org.springframework.web.bind.annotation.GetMapping;
import org.springframework.web.bind.annotation.RequestParam;
import org.springframework.web.bind.annotation.RestController;

@RestController
public class UserController {

    @Autowired
    UserService userService;

    @GetMapping("/findUserById")
    public User findUserById(@RequestParam Integer id){
       return userService.findUserById(1);
    }
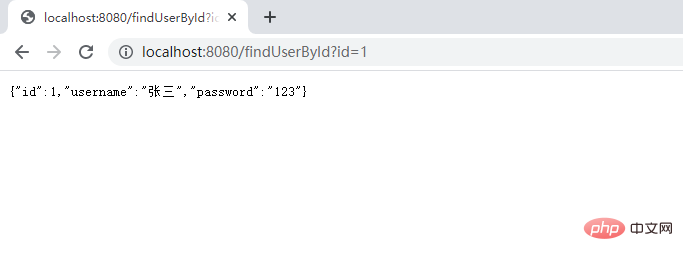
}13、测试
以上是SpringBoot MyBatis怎么快速入门的详细内容。更多信息请关注PHP中文网其他相关文章!


