

SpringBoot启动流程SpringApplication源码分析

SpringBoot启动流程源码分析一、入口参数研究和创建对象
准备阶段分析
以下先看下SpringApplication的run()方法
package org.springframework.boot;
public ConfigurableApplicationContext run(String... args) {
   //1.计时器
   StopWatch stopWatch = new StopWatch();
   stopWatch.start();
   ConfigurableApplicationContext context = null;
   Collection<SpringBootExceptionReporter> exceptionReporters = new ArrayList<>();
   //2.headless配置
   configureHeadlessProperty();
   //3、获取监听
   SpringApplicationRunListeners listeners = getRunListeners(args);
   listeners.starting();
   try {
   //应用程序启动的参数
      ApplicationArguments applicationArguments = new DefaultApplicationArguments(args);
      //4、准备环境
      ConfigurableEnvironment environment = prepareEnvironment(listeners, applicationArguments);
      //环境创建成功后,配置bean信息,决定是否跳过 BeanInfo 类的扫描,如果设置为 true,则跳过
      configureIgnoreBeanInfo(environment);
      //打印banner信息
      Banner printedBanner = printBanner(environment);
      context = createApplicationContext();
      exceptionReporters = getSpringFactoriesInstances(SpringBootExceptionReporter.class,
            new Class[] { ConfigurableApplicationContext.class }, context);
      prepareContext(context, environment, listeners, applicationArguments, printedBanner);
      refreshContext(context);
      afterRefresh(context, applicationArguments);
      //停止计时
      stopWatch.stop();
      //控制是否打印日志的,这里为true,即打印日志
      if (this.logStartupInfo) {
         new StartupInfoLogger(this.mainApplicationClass).logStarted(getApplicationLog(), stopWatch);
      }
      listeners.started(context);
      callRunners(context, applicationArguments);
   }
   catch (Throwable ex) {
      handleRunFailure(context, ex, exceptionReporters, listeners);
      throw new IllegalStateException(ex);
   }
   try {
      listeners.running(context);
   }
   catch (Throwable ex) {
      handleRunFailure(context, ex, exceptionReporters, null);
      throw new IllegalStateException(ex);
   }
   return context;
}我将会根据执行过程逐行进行分析
1、StopWatch计时器
此类实则为计时器,如下对具体使用进行分析
StopWatch stopWatch = new StopWatch();
//开始计时
stopWatch.start();
//停止计时
stopWatch.stop();
对于具体打印的上面写的为
//将当前类传入StartupInfoLogger创建了一个对象
//然后调用logStarted打印日志
new StartupInfoLogger(this.mainApplicationClass).logStarted(getApplicationLog(), stopWatch);
//创建一个Log类
protected Log getApplicationLog() {
   if (this.mainApplicationClass == null) {
      return logger;
   }
   return LogFactory.getLog(this.mainApplicationClass);
}
//调用log类的log.info()方法来打印日志
public void logStarted(Log log, StopWatch stopWatch) {
    if (log.isInfoEnabled()) {
            log.info(getStartedMessage(stopWatch));
    }
}
//打印详细的日志
private StringBuilder getStartedMessage(StopWatch stopWatch) {
   StringBuilder message = new StringBuilder();
   message.append("Started ");
   message.append(getApplicationName());
   message.append(" in ");
   message.append(stopWatch.getTotalTimeSeconds());
   try {
      double uptime = ManagementFactory.getRuntimeMXBean().getUptime() / 1000.0;
      message.append(" seconds (JVM running for " + uptime + ")");
   }
   catch (Throwable ex) {
      // No JVM time available
   }
   return message;
}这里可以看到stopWatch.getTotalTimeSeconds()方法就是来获取实际的计时时间的。再者,通过这几行代码,我们也可以考虑下平常在写代码的时候,有几种日志打印方式?SpringBoot是怎么集成日志框架的?
2、configureHeadlessProperty()
private static final String SYSTEM_PROPERTY_JAVA_AWT_HEADLESS = "java.awt.headless";
private void configureHeadlessProperty() {
   System.setProperty(SYSTEM_PROPERTY_JAVA_AWT_HEADLESS,
         System.getProperty(SYSTEM_PROPERTY_JAVA_AWT_HEADLESS, Boolean.toString(this.headless)));
}这一部分代码这样理解吧,首先java.awt包提供了用于创建用户界面和绘制图形图像的所有分类,那么 属性SYSTEM_PROPERTY_JAVA_AWT_HEADLESS就一定会和用户界面相关了。 这里将SYSTEM_PROPERTY_JAVA_AWT_HEADLESS设置为true,其实就是表示在缺少显示屏、键盘或者鼠标中的系统配置,如果将其设置为true,那么headless工具包就会被使用。
3、getRunListeners(args) 获取监听
总体上可以分这三步
获取一个默认的加载器
根据类型获取spring.factories中符合的类名
创建类实例,返回
如下将跟下代码
//获取所有监听
SpringApplicationRunListeners listeners = getRunListeners(args);
//启动监听
listeners.starting();
跳转进入getRunListeners方法
private SpringApplicationRunListeners getRunListeners(String[] args) {
   Class<?>[] types = new Class<?>[] { SpringApplication.class, String[].class };
   return new SpringApplicationRunListeners(logger,
         getSpringFactoriesInstances(SpringApplicationRunListener.class, types, this, args));
}
private <T> Collection<T> getSpringFactoriesInstances(Class<T> type, Class<?>[] parameterTypes, Object... args) {
  //3.1获取类加载器
   ClassLoader classLoader = getClassLoader();
   // Use names and ensure unique to protect against duplicates
   //3.2 根据类型获取spring.factories中符合的类名
   Set<String> names = new LinkedHashSet<>(SpringFactoriesLoader.loadFactoryNames(type, classLoader));
   //3.3 创建类实例
   List<T> instances = createSpringFactoriesInstances(type, parameterTypes, classLoader, args, names);
   //对实例进行排序
   AnnotationAwareOrderComparator.sort(instances);
   return instances;
}SpringApplicationRunListeners类解读
先看下SpringApplicationRunListeners类
/**
 * A collection of {@link SpringApplicationRunListener}.
 *
 * @author Phillip Webb
 */
class SpringApplicationRunListeners {
   private final Log log;
   private final List<SpringApplicationRunListener> listeners;
   SpringApplicationRunListeners(Log log, Collection<? extends SpringApplicationRunListener> listeners) {
      this.log = log;
      this.listeners = new ArrayList<>(listeners);
}SpringApplicationRunListeners类内部关联了SpringApplicationRunListener的集合,说白了就是用List集合存储了SpringApplicationRunListeners类,那么,我们就需要了解一下这个类是干嘛的
老规矩,先把源码抬上来
/**
 *//可以理解为Spring Boot应用的运行时监听器
 * Listener for the {@link SpringApplication} {@code run} method.
 *//SpringApplicationRunListener的构造器参数必须依次为SpringApplication和String[]类型
 * {@link SpringApplicationRunListener}s are loaded via the {@link SpringFactoriesLoader}
 * and should declare a public constructor that accepts a {@link SpringApplication}
 * instance and a {@code String[]} of arguments.
 *//每次运行的时候将会创建一个 SpringApplicationRunListener
  A new
 * {@link SpringApplicationRunListener} instance will be created for each run.
 *
 */
public interface SpringApplicationRunListener {
   /**
    * Called immediately when the run method has first started. Can be used for very
    * early initialization.
    */
    //Spring应用刚启动
   void starting();
   /**
    * Called once the environment has been prepared, but before the
    * {@link ApplicationContext} has been created.
    * @param environment the environment
    */
    //ConfigurableEnvironment准备妥当,允许将其调整
   void environmentPrepared(ConfigurableEnvironment environment);
   /**
    * Called once the {@link ApplicationContext} has been created and prepared, but
    * before sources have been loaded.
    * @param context the application context
    */
    //ConfigurableApplicationContext准备妥当,允许将其调整
   void contextPrepared(ConfigurableApplicationContext context);
   /**
    * Called once the application context has been loaded but before it has been
    * refreshed.
    * @param context the application context
    */
    //ConfigurableApplicationContext已装载,但是任未启动
   void contextLoaded(ConfigurableApplicationContext context);
   /**
    * The context has been refreshed and the application has started but
    * {@link CommandLineRunner CommandLineRunners} and {@link ApplicationRunner
    * ApplicationRunners} have not been called.
    * @param context the application context.
    * @since 2.0.0
    */
    //ConfigurableApplicationContext已启动,此时Spring Bean已初始化完成
   void started(ConfigurableApplicationContext context);
   /**
    * Called immediately before the run method finishes, when the application context has
    * been refreshed and all {@link CommandLineRunner CommandLineRunners} and
    * {@link ApplicationRunner ApplicationRunners} have been called.
    * @param context the application context.
    * @since 2.0.0
    */
    //Spring应用正在运行
   void running(ConfigurableApplicationContext context);
   /**
    * Called when a failure occurs when running the application.
    * @param context the application context or {@code null} if a failure occurred before
    * the context was created
    * @param exception the failure
    * @since 2.0.0
    */
    //Spring应用运行失败
   void failed(ConfigurableApplicationContext context, Throwable exception);
}单纯的看源码,是一个简单的接口,这时候我们可以看下作者给的注释。理解部分就直接加到上面源码中了。
再看下他的实现类EventPublishingRunListener
public class EventPublishingRunListener implements SpringApplicationRunListener, Ordered {
   private final SpringApplication application;
   private final String[] args;
   private final SimpleApplicationEventMulticaster initialMulticaster;
   public EventPublishingRunListener(SpringApplication application, String[] args) {
      this.application = application;
      this.args = args;
      this.initialMulticaster = new SimpleApplicationEventMulticaster();
      for (ApplicationListener<?> listener : application.getListeners()) {
         this.initialMulticaster.addApplicationListener(listener);
      }
}这里我们看到两点:
构造器参数和他实现的接口(上面刚分析了)注释中规定的一致
将SpringApplication中的ApplicationListener实例列表全部添加到了SimpleApplicationEventMulticaster对象中
SimpleApplicationEventMulticaster是Spring框架的一个监听类,用于发布Spring应用事件。因此EventPublishingRunListener实际充当了Spring Boot事件发布者的角色。
这里我再跟进源码的时候发现,针对SpringBoot的事件/监听机制内容还是挺多的,我们在充分理解的时候需要先了解Spring的事件/监听机制,后面将两个结合后单独进行对比分析。
3.1获取类加载器getClassLoader()
ClassLoader classLoader = getClassLoader();
public ClassLoader getClassLoader() {
  if (this.resourceLoader != null) {
     return this.resourceLoader.getClassLoader();
  }
  return ClassUtils.getDefaultClassLoader();
}这里的类加载器获取首先是获取resourceLoader的类加载器,获取不到则获取默认的类加载器。 resourceLoader是资源加载器类,有具体的实现类。
3.2 根据类型获取spring.factories中符合的类名
SpringFactoriesLoader.loadFactoryNames(type, classLoader)
public static List<String> loadFactoryNames(Class<?> factoryClass, @Nullable ClassLoader classLoader) {
//获取类型名称:org.springframework.context.ApplicationContextInitializer
   String factoryClassName = factoryClass.getName();
   return (List)loadSpringFactories(classLoader).getOrDefault(factoryClassName, Collections.emptyList());
}我们继续对loadSpringFactories追下去
private static Map<String, List<String>> loadSpringFactories(@Nullable ClassLoader classLoader) {
    //从缓存里面获取
    MultiValueMap<String, String> result = (MultiValueMap)cache.get(classLoader);
    if (result != null) {
        return result;
    } else {
        try {
        //执行classLoader.getResources("META-INF/spring.factories"),表示通过加载器获取META-INF/spring.factories下的资源
            Enumeration<URL> urls = classLoader != null ? classLoader.getResources("META-INF/spring.factories") : ClassLoader.getSystemResources("META-INF/spring.factories");
            LinkedMultiValueMap result = new LinkedMultiValueMap();
            while(urls.hasMoreElements()) {
               //文件地址
                URL url = (URL)urls.nextElement();
                //从指定位置加载UrlResource
                UrlResource resource = new UrlResource(url);
                //加载里面的属性,属性见下图
                Properties properties = PropertiesLoaderUtils.loadProperties(resource);
                Iterator var6 = properties.entrySet().iterator();
                while(var6.hasNext()) {
                    Entry<?, ?> entry = (Entry)var6.next();
                    //获取key值
                    String factoryClassName = ((String)entry.getKey()).trim();
                    //获取value值
                    String[] var9 = StringUtils.commaDelimitedListToStringArray((String)entry.getValue());
                    int var10 = var9.length;
//这里是将查询出来的key作为result的key,value转换成字符数组存放到result的value中
                    for(int var11 = 0; var11 < var10; ++var11) {
                        String factoryName = var9[var11];
                        result.add(factoryClassName, factoryName.trim());
                    }
                }
            }
            //将结果集存入缓存中
            cache.put(classLoader, result);
            return result;
        } catch (IOException var13) {
            throw new IllegalArgumentException("Unable to load factories from location [META-INF/spring.factories]", var13);
        }
    }
}
default V getOrDefault(Object key, V defaultValue) {
    V v;
    return (((v = get(key)) != null) || containsKey(key))
        ? v
        : defaultValue;
}这个的意思是如果没有,则获取一个空的list
3.3创建实例createSpringFactoriesInstances()
这一步其实就是将上一步从META-INF/spring.factories加载进来的资源进行实例化。
private <T> List<T> createSpringFactoriesInstances()(Class<T> type, Class<?>[] parameterTypes,
      ClassLoader classLoader, Object[] args, Set<String> names) {
   List<T> instances = new ArrayList<>(names.size());
   for (String name : names) {
      try {
      //根据类加载器获取指定类
         Class<?> instanceClass = ClassUtils.forName(name, classLoader);
         Assert.isAssignable(type, instanceClass);
         //根据参数获取构造器
         Constructor<?> constructor = instanceClass.getDeclaredConstructor(parameterTypes);
         //根据传入的构造器对象以及构造器所需的参数创建一个实例
         T instance = (T) BeanUtils.instantiateClass(constructor, args);
         //添加实例到集合中
         instances.add(instance);
      }
      catch (Throwable ex) {
         throw new IllegalArgumentException("Cannot instantiate " + type + " : " + name, ex);
      }
   }
   return instances;
}4、环境准备prepareEnvironment
prepareEnvironment(listeners, applicationArguments)
private ConfigurableEnvironment prepareEnvironment(SpringApplicationRunListeners listeners,
      ApplicationArguments applicationArguments) {
   // Create and configure the environment
   //4.1 创建一个环境
   ConfigurableEnvironment environment = getOrCreateEnvironment();
   //4.2 配置环境
   configureEnvironment(environment, applicationArguments.getSourceArgs());
   //4.3 ConfigurationPropertySourcesPropertySource对象存入到第一位
   ConfigurationPropertySources.attach(environment);
   //listeners环境准备(就是广播ApplicationEnvironmentPreparedEvent事件)
   listeners.environmentPrepared(environment);
   // 将环境绑定到SpringApplication
   bindToSpringApplication(environment);
     // 如果是非web环境,将环境转换成StandardEnvironment
   if (!this.isCustomEnvironment) {
      environment = new EnvironmentConverter(getClassLoader()).convertEnvironmentIfNecessary(environment,
            deduceEnvironmentClass());
   }
    // 配置PropertySources对它自己的递归依赖
   ConfigurationPropertySources.attach(environment);
   return environment;
}4.1创建一个环境getOrCreateEnvironment
private ConfigurableEnvironment getOrCreateEnvironment() {
//有的话,直接返回
  if (this.environment != null) {
     return this.environment;
  }
  //这里我们在上面见到过,通过WebApplicationType.deduceFromClasspath()方法获取的
  switch (this.webApplicationType) {
  case SERVLET:
     return new StandardServletEnvironment();
  case REACTIVE:
     return new StandardReactiveWebEnvironment();
  default:
     return new StandardEnvironment();
  }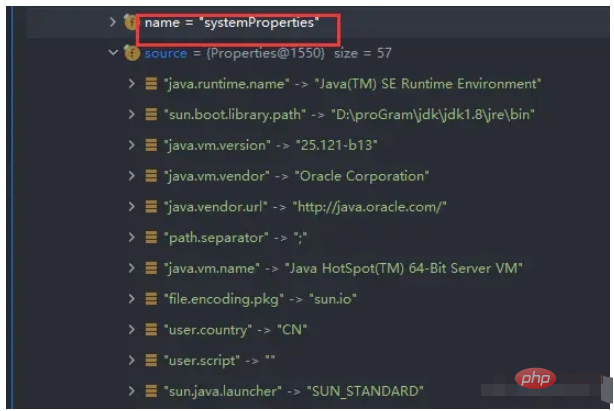
}这里创建了一个StandardServletEnvironment实例的环境 systemProperties用来封装了JDK相关的信息 如下图
systemEnvironment用来封转环境相关的信息
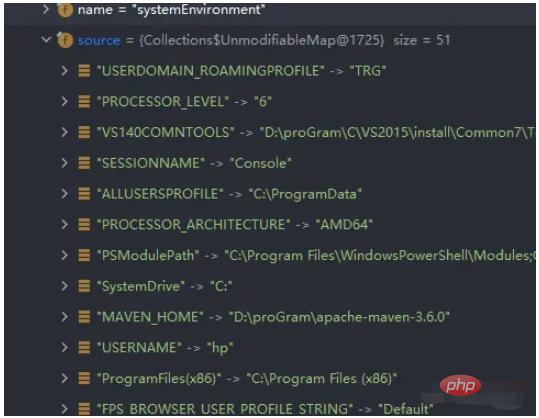
封装的还是挺详细的哈。
4.2 配置环境
protected void configureEnvironment(ConfigurableEnvironment environment, String[] args) {
   if (this.addConversionService) {
      ConversionService conversionService = ApplicationConversionService.getSharedInstance();
      environment.setConversionService((ConfigurableConversionService) conversionService);
   }
   configurePropertySources(environment, args);
   configureProfiles(environment, args);
}setConversionService(ConfigurableConversionService conversionService)方法继承于ConfigurablePropertyResolver接口, 该接口是PropertyResolver类型都将实现的配置接口。提供用于访问和自定义将属性值从一种类型转换为另一种类型时使用的ConversionService的工具。PropertyResolver是用于针对任何底层源解析属性的接口。
configurePropertySources(environment, args);当前方法主要是将启动命令中的参数和run 方法中的参数封装为PropertySource。
protected void configurePropertySources(ConfigurableEnvironment environment, String[] args) {
//获取所有的属性源,就是获取4.1的ConfigurableEnvironment上获取到的属性
  MutablePropertySources sources = environment.getPropertySources();
  if (this.defaultProperties != null && !this.defaultProperties.isEmpty()) {
     sources.addLast(new MapPropertySource("defaultProperties", this.defaultProperties));
  }
  //是否添加命令启动参数,addCommandLineProperties为true,表示需要添加,但是前提是你得配置了参数
  if (this.addCommandLineProperties && args.length > 0) {
     String name = CommandLinePropertySource.COMMAND_LINE_PROPERTY_SOURCE_NAME;
     if (sources.contains(name)) {
        PropertySource<?> source = sources.get(name);
        CompositePropertySource composite = new CompositePropertySource(name);
        composite.addPropertySource(
              new SimpleCommandLinePropertySource("springApplicationCommandLineArgs", args));
        composite.addPropertySource(source);
        sources.replace(name, composite);
     }
     else {
        sources.addFirst(new SimpleCommandLinePropertySource(args));
     }
  }
}configureProfiles(environment, args);环境配置
protected void configureProfiles(ConfigurableEnvironment environment, String[] args) {
//获取激活的环境
  environment.getActiveProfiles(); // ensure they are initialized
  // But these ones should go first (last wins in a property key clash)
  Set<String> profiles = new LinkedHashSet<>(this.additionalProfiles);
  profiles.addAll(Arrays.asList(environment.getActiveProfiles()));
  //设置当前的环境
  environment.setActiveProfiles(StringUtils.toStringArray(profiles));
}4.3 ConfigurationPropertySourcesPropertySource对象存入
public static void attach(Environment environment) {
   Assert.isInstanceOf(ConfigurableEnvironment.class, environment);
   //获取所有的属性源,就是获取4.1的ConfigurableEnvironment上获取到的属性
   MutablePropertySources sources = ((ConfigurableEnvironment) environment).getPropertySources();
   //判断是否有 属性 configurationProperties
   PropertySource<?> attached = sources.get(ATTACHED_PROPERTY_SOURCE_NAME);
   if (attached != null && attached.getSource() != sources) {
      sources.remove(ATTACHED_PROPERTY_SOURCE_NAME);
      attached = null;
   }
   if (attached == null) {
   // 将sources封装成ConfigurationPropertySourcesPropertySource对象,并把这个对象放到sources的第一位置
      sources.addFirst(new ConfigurationPropertySourcesPropertySource(ATTACHED_PROPERTY_SOURCE_NAME,
            new SpringConfigurationPropertySources(sources)));
   }
}以上是SpringBoot启动流程SpringApplication源码分析的详细内容。更多信息请关注PHP中文网其他相关文章!

热AI工具

Undresser.AI Undress
人工智能驱动的应用程序,用于创建逼真的裸体照片

AI Clothes Remover
用于从照片中去除衣服的在线人工智能工具。

Undress AI Tool
免费脱衣服图片

Clothoff.io
AI脱衣机

Video Face Swap
使用我们完全免费的人工智能换脸工具轻松在任何视频中换脸!

热门文章
热工具

记事本++7.3.1
好用且免费的代码编辑器

SublimeText3汉化版
中文版,非常好用

禅工作室 13.0.1
功能强大的PHP集成开发环境

Dreamweaver CS6
视觉化网页开发工具

SublimeText3 Mac版
神级代码编辑软件(SublimeText3)


 Springboot怎么集成Jasypt实现配置文件加密
Jun 01, 2023 am 08:55 AM
Springboot怎么集成Jasypt实现配置文件加密
Jun 01, 2023 am 08:55 AM
Jasypt介绍Jasypt是一个java库,它允许开发员以最少的努力为他/她的项目添加基本的加密功能,并且不需要对加密工作原理有深入的了解用于单向和双向加密的高安全性、基于标准的加密技术。加密密码,文本,数字,二进制文件...适合集成到基于Spring的应用程序中,开放API,用于任何JCE提供程序...添加如下依赖:com.github.ulisesbocchiojasypt-spring-boot-starter2.1.1Jasypt好处保护我们的系统安全,即使代码泄露,也可以保证数据源的
 SpringBoot怎么集成Redisson实现延迟队列
May 30, 2023 pm 02:40 PM
SpringBoot怎么集成Redisson实现延迟队列
May 30, 2023 pm 02:40 PM
使用场景1、下单成功,30分钟未支付。支付超时,自动取消订单2、订单签收,签收后7天未进行评价。订单超时未评价,系统默认好评3、下单成功,商家5分钟未接单,订单取消4、配送超时,推送短信提醒……对于延时比较长的场景、实时性不高的场景,我们可以采用任务调度的方式定时轮询处理。如:xxl-job今天我们采
 怎么在SpringBoot中使用Redis实现分布式锁
Jun 03, 2023 am 08:16 AM
怎么在SpringBoot中使用Redis实现分布式锁
Jun 03, 2023 am 08:16 AM
一、Redis实现分布式锁原理为什么需要分布式锁在聊分布式锁之前,有必要先解释一下,为什么需要分布式锁。与分布式锁相对就的是单机锁,我们在写多线程程序时,避免同时操作一个共享变量产生数据问题,通常会使用一把锁来互斥以保证共享变量的正确性,其使用范围是在同一个进程中。如果换做是多个进程,需要同时操作一个共享资源,如何互斥呢?现在的业务应用通常是微服务架构,这也意味着一个应用会部署多个进程,多个进程如果需要修改MySQL中的同一行记录,为了避免操作乱序导致脏数据,此时就需要引入分布式锁了。想要实现分
 springboot读取文件打成jar包后访问不到怎么解决
Jun 03, 2023 pm 04:38 PM
springboot读取文件打成jar包后访问不到怎么解决
Jun 03, 2023 pm 04:38 PM
springboot读取文件,打成jar包后访问不到最新开发出现一种情况,springboot打成jar包后读取不到文件,原因是打包之后,文件的虚拟路径是无效的,只能通过流去读取。文件在resources下publicvoidtest(){Listnames=newArrayList();InputStreamReaderread=null;try{ClassPathResourceresource=newClassPathResource("name.txt");Input
 Springboot+Mybatis-plus不使用SQL语句进行多表添加怎么实现
Jun 02, 2023 am 11:07 AM
Springboot+Mybatis-plus不使用SQL语句进行多表添加怎么实现
Jun 02, 2023 am 11:07 AM
在Springboot+Mybatis-plus不使用SQL语句进行多表添加操作我所遇到的问题准备工作在测试环境下模拟思维分解一下:创建出一个带有参数的BrandDTO对象模拟对后台传递参数我所遇到的问题我们都知道,在我们使用Mybatis-plus中进行多表操作是极其困难的,如果你不使用Mybatis-plus-join这一类的工具,你只能去配置对应的Mapper.xml文件,配置又臭又长的ResultMap,然后再去写对应的sql语句,这种方法虽然看上去很麻烦,但具有很高的灵活性,可以让我们
 SpringBoot与SpringMVC的比较及差别分析
Dec 29, 2023 am 11:02 AM
SpringBoot与SpringMVC的比较及差别分析
Dec 29, 2023 am 11:02 AM
SpringBoot和SpringMVC都是Java开发中常用的框架,但它们之间有一些明显的差异。本文将探究这两个框架的特点和用途,并对它们的差异进行比较。首先,我们来了解一下SpringBoot。SpringBoot是由Pivotal团队开发的,它旨在简化基于Spring框架的应用程序的创建和部署。它提供了一种快速、轻量级的方式来构建独立的、可执行
 SpringBoot怎么自定义Redis实现缓存序列化
Jun 03, 2023 am 11:32 AM
SpringBoot怎么自定义Redis实现缓存序列化
Jun 03, 2023 am 11:32 AM
1、自定义RedisTemplate1.1、RedisAPI默认序列化机制基于API的Redis缓存实现是使用RedisTemplate模板进行数据缓存操作的,这里打开RedisTemplate类,查看该类的源码信息publicclassRedisTemplateextendsRedisAccessorimplementsRedisOperations,BeanClassLoaderAware{//声明了key、value的各种序列化方式,初始值为空@NullableprivateRedisSe
 SpringBoot+Dubbo+Nacos 开发实战教程
Aug 15, 2023 pm 04:49 PM
SpringBoot+Dubbo+Nacos 开发实战教程
Aug 15, 2023 pm 04:49 PM
本文来写个详细的例子来说下dubbo+nacos+Spring Boot开发实战。本文不会讲述太多的理论的知识,会写一个最简单的例子来说明dubbo如何与nacos整合,快速搭建开发环境。
